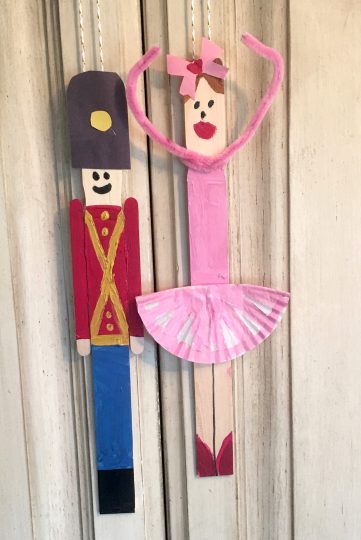
Have you taken your kids to see The Nutcracker yet? Whether you are reading the book, watching it on TV or seeing a live production, you can keep the magic going with this easy Nutcracker craft that’ll give your Christmas tree (or your wall) a perfect toy soldier-ballerina pair. Scroll down for the directions on how to make both figures.

What you’ll need (for the pair):
Paint (blue, yellow, red, white, black) and paint brushes
Construction paper (black, yellow, pink)
Paint stirring sticks (available at your local hardware or paint store)
Popsicle sticks
Cupcake liners
String
Pipe cleaners
Hot glue gun
For the toy soldier:
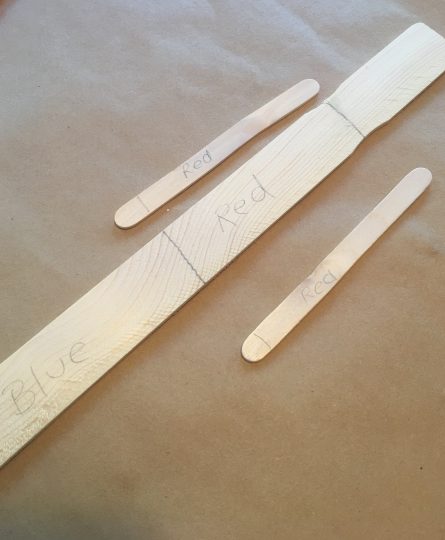
Step 1: Sketch out the basics (if your kids need it)
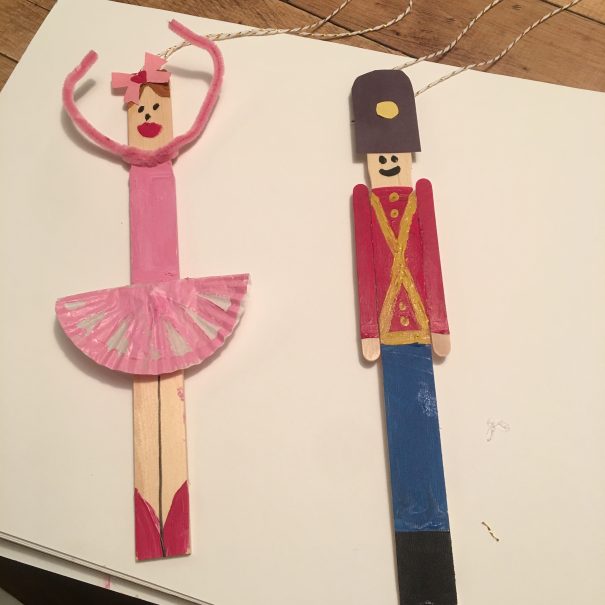
Using pencil, sketch out the necessary color blocks on the sticks so that your kids know where to paint (this is especially important for younger kids if you want your nutcracker to look anything like the above picture).

Step 2: Let them paint!
Put dabs of paint onto a paper plate and let your little artists paint away. Make sure they leave the face blank for now (and be careful they don’t paint the entire popsicle stick red — these little guys need hands, after all).
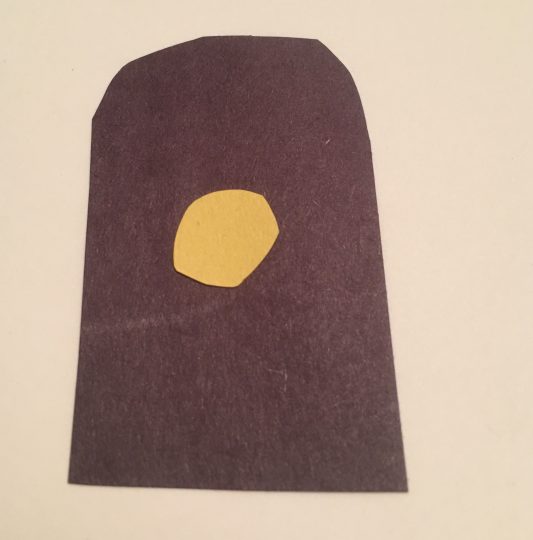
Step 3: Make a hat
While the paint is drying, cut out and glue together a simple soldier’s hat as shown (or choose a different design by looking online at different nutcrackers). Then, glue the hat onto the toy soldier’s head, leaving some space to draw/paint the face. Once the glue is dry, give your child a paint brush (with a narrow point) and let him paint the eyes, nose, and mouth onto the soldier’s face. Note: Younger kids might do better with a marker for this part.
Step 4: Glue on the arms
Glue the popsicle stick arms onto the body of your soldier, being sure to match the bottom of the sleeves with the bottom of the “shirt.” Let the glue dry completely before handling the soldier.
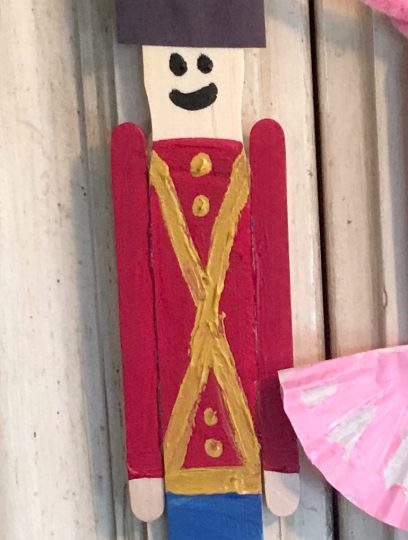
Step 5: Add the details
Finish the paint job by making a yellow “X” on the body, with matching yellow buttons up as shown. Note: These smaller details may be tough for little fingers, so don’t be afraid to get in there and help your kids out.
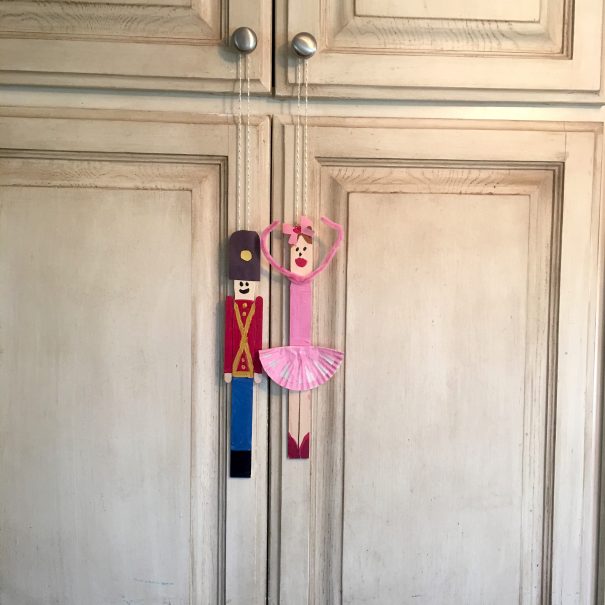
If you want your soldier to hang… Dip a loop of string into a big glob of hot glue on the back of your soldier’s head. Wait for it to dry completely before lifting it up.
Want more? Follow the below simple steps to make a matching wooden partner for your toy soldier.
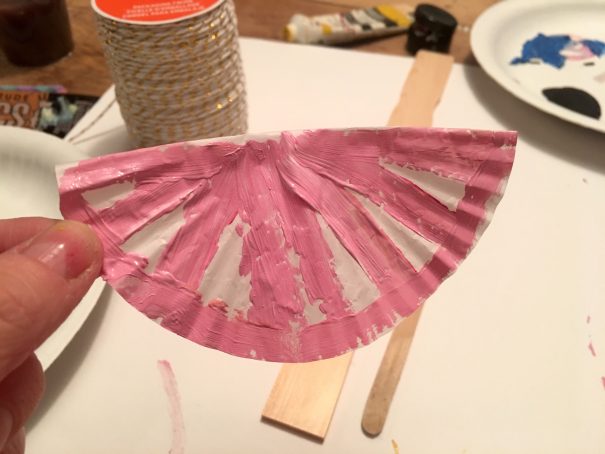
Step 1: Paint the costume
Take the cupcake liner and let your child paint and decorate it however they like (glitter! Polka-dots! Stripes!) This will become your ballerina’s tutu. Then, set aside and let it dry.
Cut a bow out of pink construction paper (your kids can decorate, add glitter, or draw a heart in the middle of this, if they want).
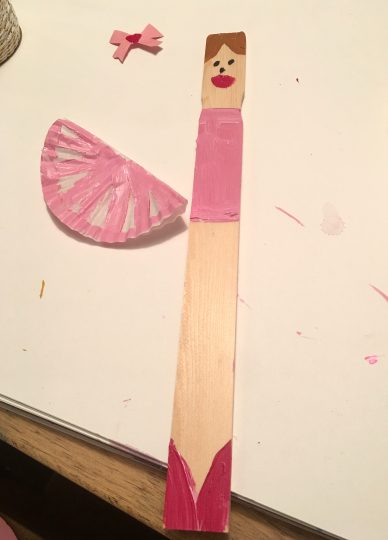
Step 2: Draw the features
Paint the body and head of the ballerina as shown. When the paint is dry, glue on the tutu and bow.
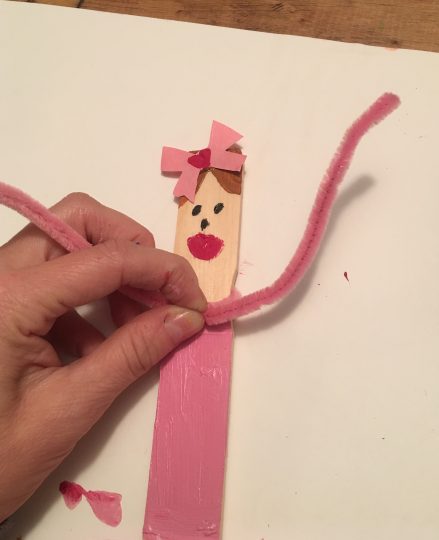
Step 3: Add the arms
Twist a pink pipe cleaner around your ballerina to make arms. You can pose these however you want; we decided the classic ballerina arc (“fifth position”) would look cute.
Step 4: Add the string to back
Follow the same steps you did with the soldier to glue the string onto the ballerina’s back. Let it dry before hanging.
Step 5: Nutcracker, meet Ballerina.
That’s it — you’ve got yourself a couple! Now, hang them up and go play some Tchaikovsky.
*This post was inspired by the crafty mamas at Fireflies and Mudpies and Glued to My Crafts.
Did you try this craft? Let us know how it turned out by writing a note in the comment section below!
— Story and photos by Melissa Heckscher
Need some fresh ideas?
Related reads


