Spring is winding down and summer is on its way. There’s no time like the present to get out and about and see great art. Did you know you can enjoy family-friendly art without spending a single cent all while enjoying fresh air? Portland is known for its next-level street art so we put together a list of murals and walls throughout the city that has some of the most inspiring art to be found. Read on for where to go on your Portland street art tour.
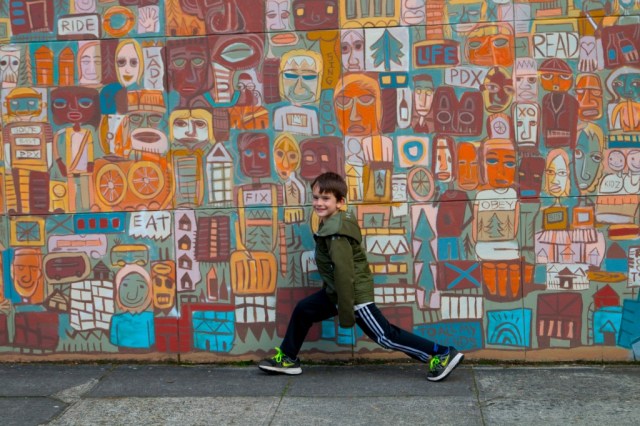
photo: by Annette Benedetti
People’s History of Hawthorne
Located on the corner of SE Hawthorne and SE 49th on the Eagles Lodge, this beautiful mural represents the best of the area and is a dedication to the neighborhood and community. It includes representations of historical figures and mythical figures that are said to have shaped SE Portland. Look closely and you will catch a glimpse of the individuals you see roaming the neighborhood. Artist, Chris Haberman painted this piece in 2012/2013 and your littles will love standing among the neighborhood folk while you capture an image of them hanging out in this vibrant depiction of their beloved hometown.
4904 SE HawthornBlvd.
Artist: Chris Haberman
Online: portlandwild.com
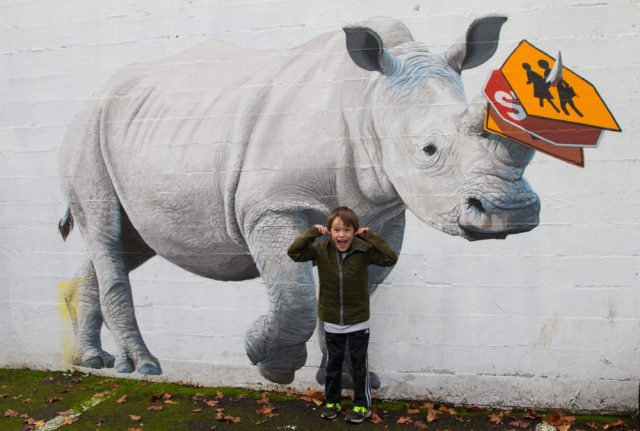
Rhinoceros Mural Wall
Located on SE Morrison street just east of SE 12 outside of There Be Monsters, this life-like mural is a community favorite. It was painted in August of 2015 by artists Josh Keys for the annual Forest For The Trees mural event. Your little animal lovers will love leaning on this friendly looking beast and the resulting photos will be unforgettable.
1308 SE Morrison St.
Artist: Josh Keys
Online: turningart.com
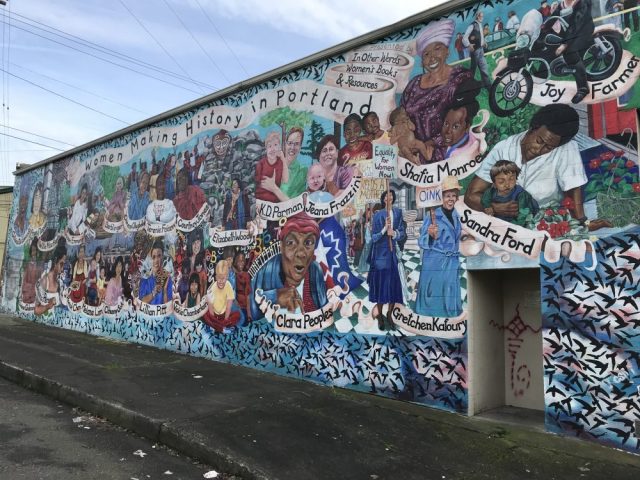
photo: Carrie Uffindell
Women Making History in Portland
Painted in 2007 for the now defunct In Other Words Feminist Community Center, this 18-foot by 60-foot acrylic painting by Robin Corbo honors amazing women who’ve influenced – or are currently influencing – the city. Think community activists, native artists, educational advocates and more.
2335 N. Clark Ave, a block off N. Interstate
Artist: Robin Corbo
Online: eliotneighborhood.org/2018/10/02/women-making-history-mural
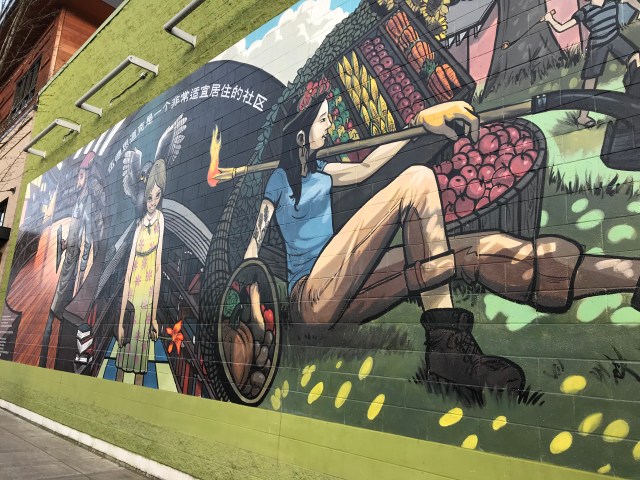
photo: Carrie Uffindell
Woodstock Mural
Commerce, education and the outdoors dominate this mural, which was relocated to the western wall of New Seasons in 2015. Look closely and you’ll also see various mythological symbols scattered throughout, including a winged hat, an olive branch necklace and a lotus staff. Behind the young student is the Woodstock motto translated into Mandarin, in honor of the elementary school’s immersion program.
4500 S.E. Woodstock Blvd
Artists: Designed by Mark Lawrence and painted by Heidi Schultz. Reproduction by Dan Cohan and Christo Wunderlich.
Online: en.wikipedia.org/wiki/Woodstock_Mural
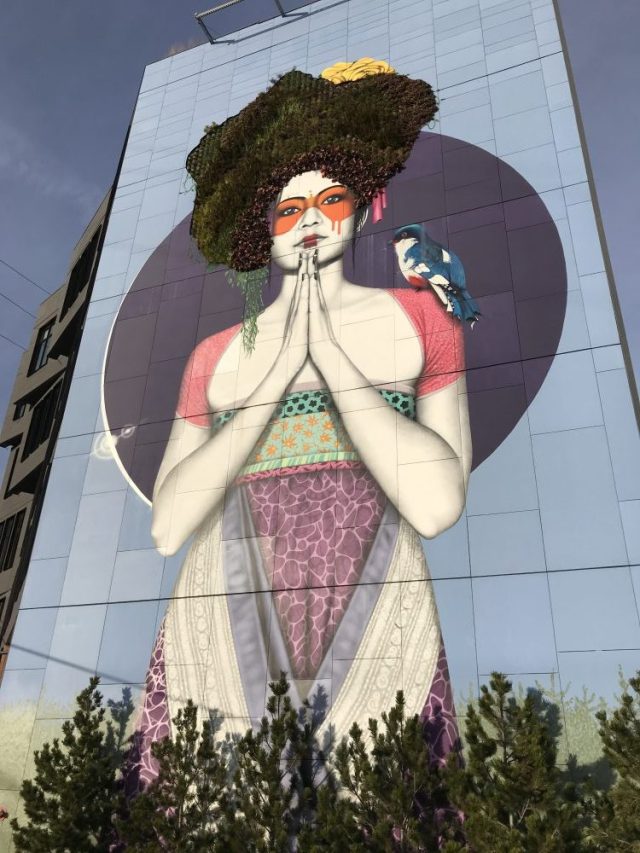
photo: Carrie Uffindell
Attitude of Gratitude
You’ll be hard pressed to find a more dynamic mural than the one SolTerra’s headquarters: a 70-foot tall woman, hands clasped in gratitude, with over one thousand living plants for her hair. Check back to see it flourish and change each season.
959 S.E. Division St.
Artist: Fin DAC
Online: solterra.com/blog-attitude-9-22-17-2
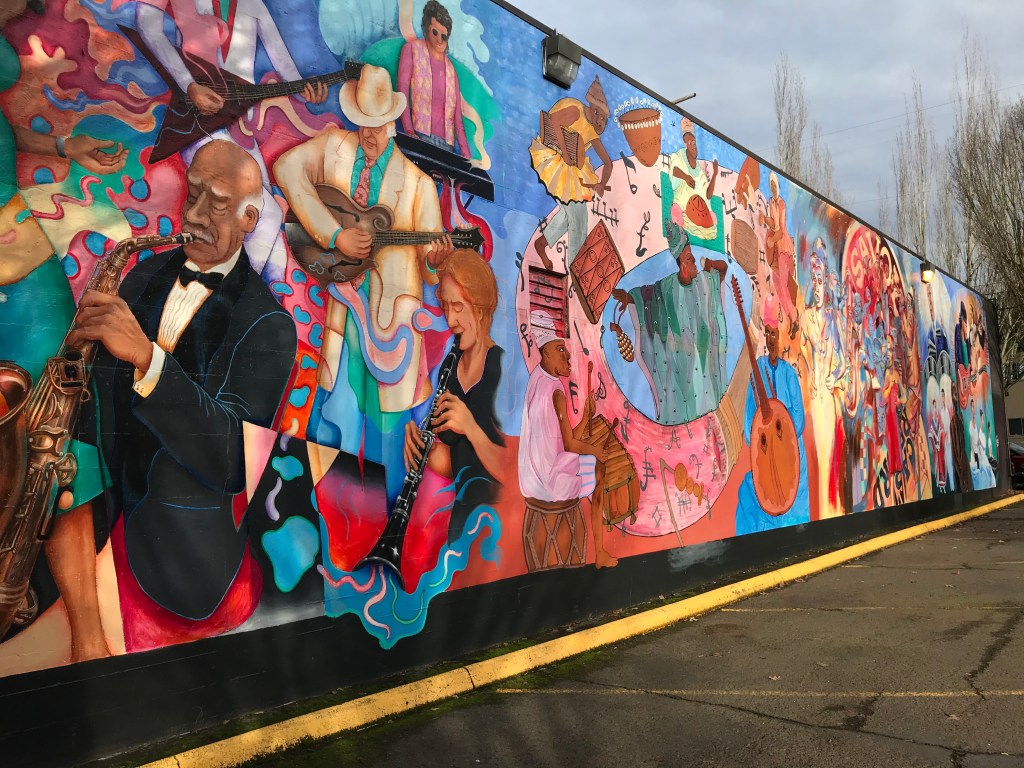
The Musician’s Union Building Mural
This 100-foot composition at the Portland Musician’s Union Local 99 celebrates our city’s thriving music scene and heritage in vivid color. Jazz, classical, bluegrass, rock ‘n’ roll, hip hop, reggae and rhythm & blues — all showcase the power of music. Find it on the building’s south wall, facing the parking lot.
325 N.E. 20th Ave.
Artists: Isaka Shamsud-Din, Joe Cotter, Baba Wagué Diakité, Hector Hernandez
Online: portlandwild.com/art/86
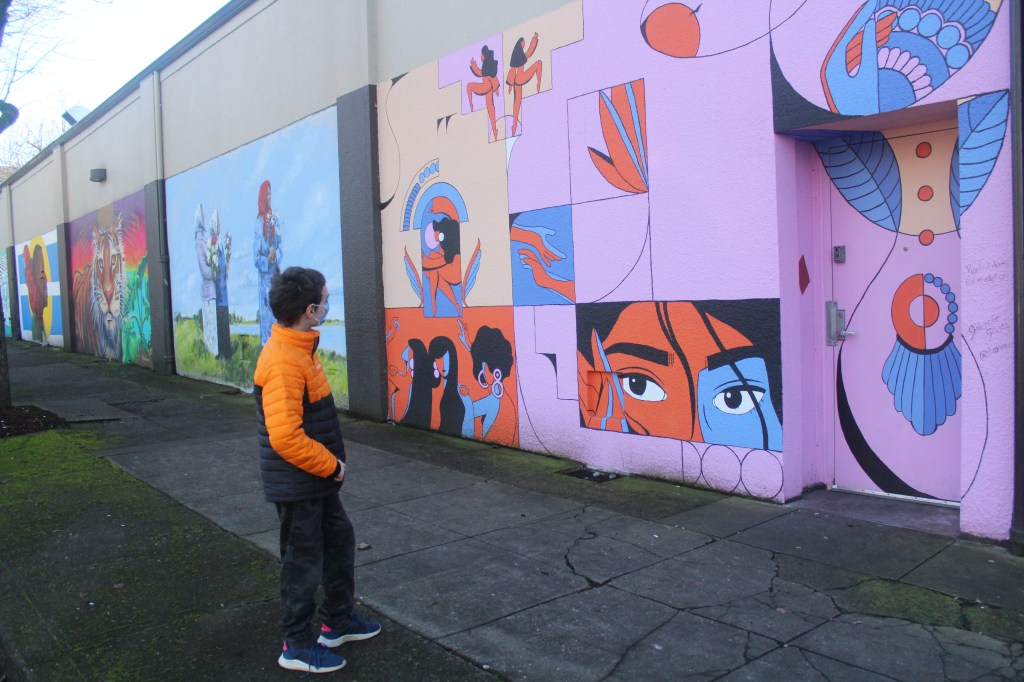
Ladies Up Project
Morrison Place’s retail center is home to seven murals and counting. This ongoing, multi-artist project (also in collaboration with PSAA) only features works by local female-identifying artists and artists of color. Images range from a bold tiger to messages of unity. Look for the murals along S.E. Alder St.
1401 S.E. Morrison St.
Artists: Tatyana Ostepenko, Salomée Soung, Amaranta Colindres, Isis Fisher, Kyra Watkins, Sunny Beard, Angela Saenz and Laura Medina
Online: pdxstreetart.org/articles-all/ladiesup
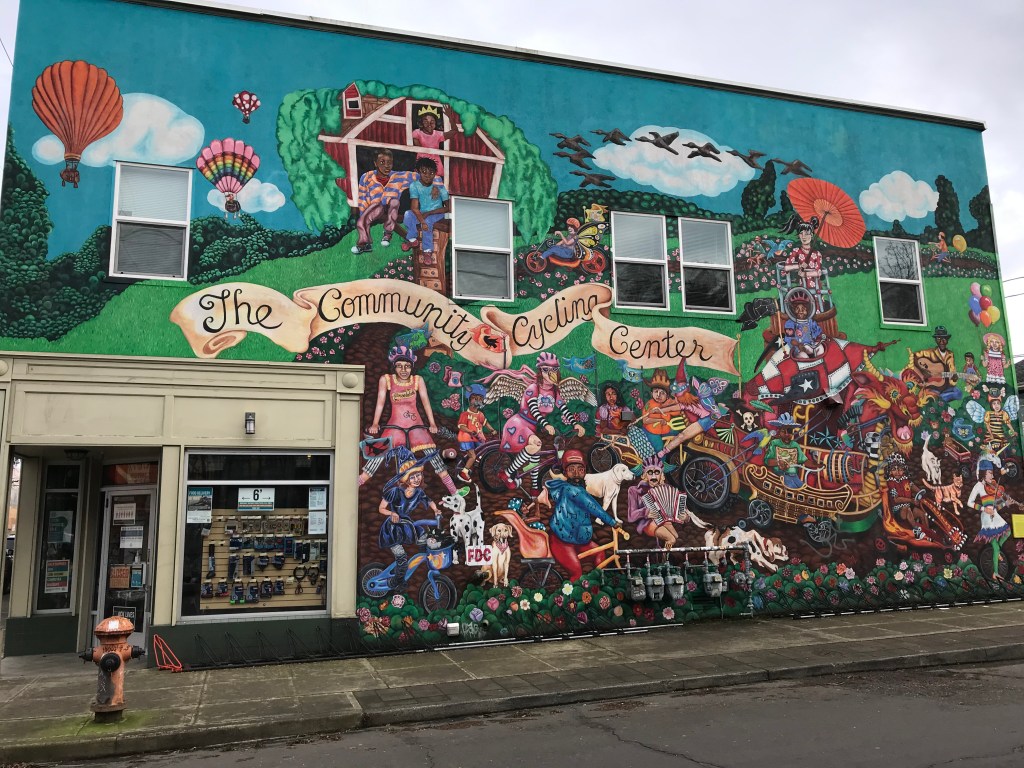
Community Cycling Center Mural
There’s no better – or more iconic – mural in the city that celebrates Portland’s bike culture. Covering the western wall of the cycling center’s retail shop, the vibrant piece portrays a whimsical parade of unicycles/bicycles/tricycles, costumed kids, hot air balloons, happy pets and more.
1700 N.E. Alberta St.
Artist: Robin Corbo
Online: communitycyclingcenter.org
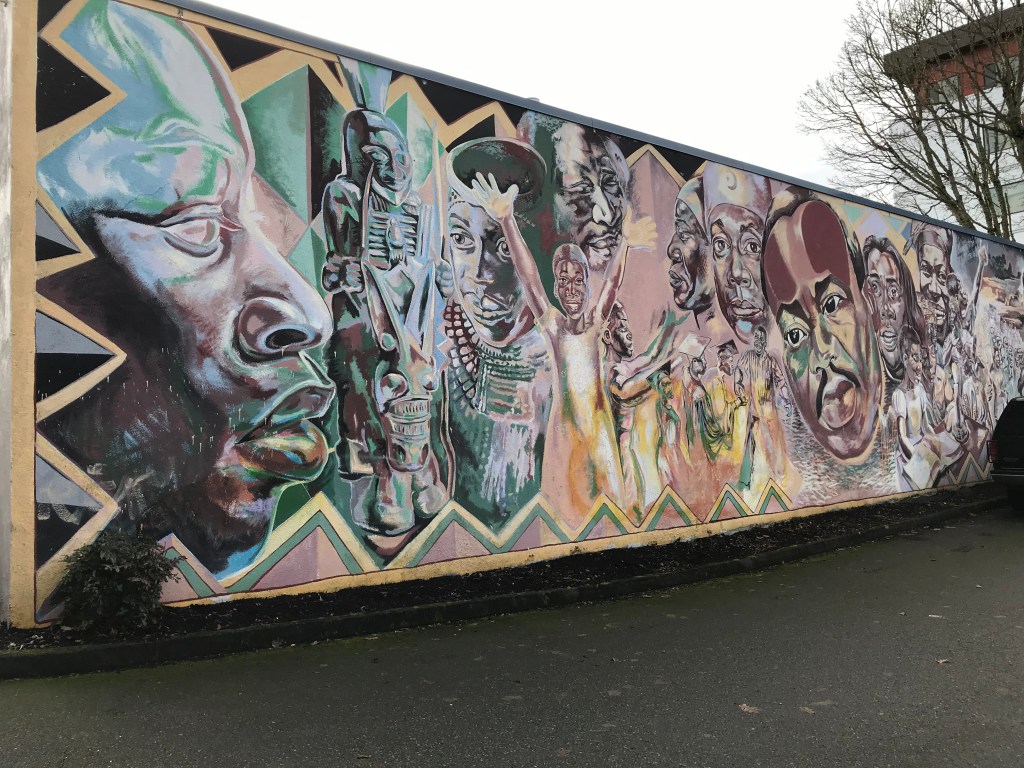
photo: Carrie Uffindell
Now is the Time, Now is the Place
One of Portland’s oldest murals, its message of Black pride and empowerment is as important today as when it was painted in 1989. On the north wall of the Portland Covenant Church, Martin Luther King Jr. is surrounded by other notable faces, including Nelson and Winnie Mandela, South African playwright Selaelo Maredi and Muslim leader Elijah Muhammad.
4046 N.E. Martin Luther King, Jr. Blvd.
Artists: Isaka Shamsud-Din, Paul Odighizuwa, Charlotte Lewis and Kathy Pennington
Online: portlandwild.com/art/view/75
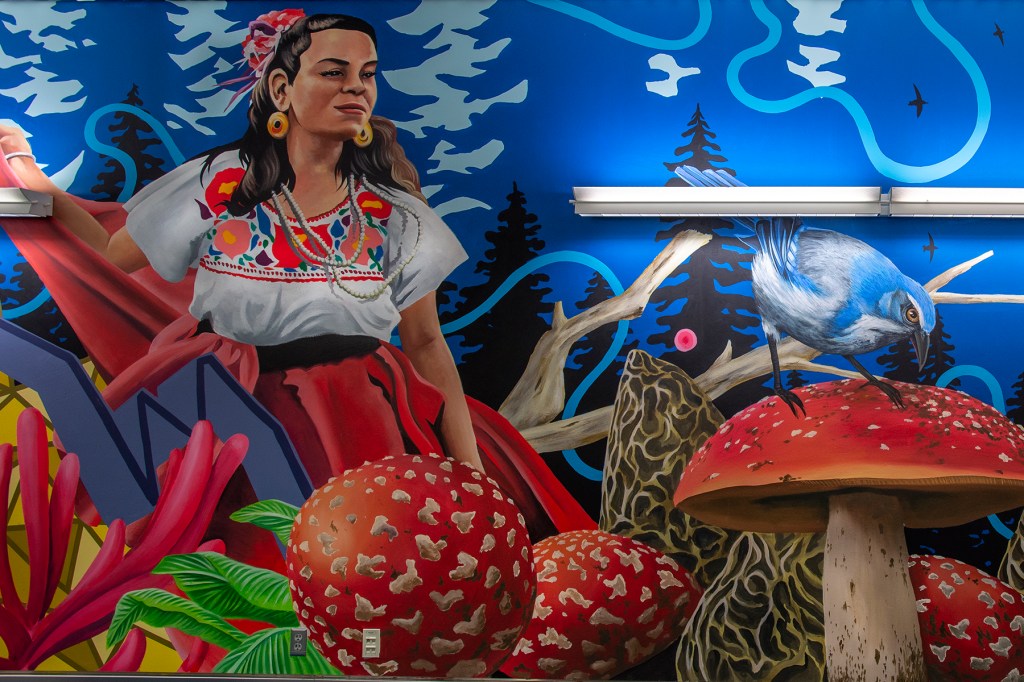
photo: courtesy of Portland Street Art Alliance
A Place Called Home
When airport travel is safe again, you won’t want to miss this sweeping 150-foot mural, located in Portland International Airport’s north pedestrian tunnel. All of what makes the Pacific Northwest great is on display here, from native peoples and natural wonders to farmers markets and local musicians.
7000 NE Airport Way
Artists: Alex Chiu and Jeremy Nichols
Online: pdxstreetart.org/articles-all/2019/10/2/the-pdx-airport-mural-project
—Annette Benedetti
Related Stories
Downtown Public Art Kids Will Love
Portland Restaurants: Best Places To Eat Outside