Looking for science experiments for kids? Thanks to common household ingredients, some ingenuity, and our guide, these at-home science experiments for kids make any day exciting. To help you prepare, we’ve rated each experiment from one to five sponges so you know the messiness factor ahead of time. If you’re looking for seasonal projects, check out these water-themed science experiments. Or how about a few science projects for kids that are perfect for the backyard?

TIP: Did you know there are a ton of awesome science kits and subscription boxes that will further develop your child’s love of science? KiwiCrate is one of our favorite ed-tech companies, as they offer seriously fun & enriching science & art projects, for kids 0 months up to 13+.

Classic Science Experiments for Kids

Potato Battery Science Experiment
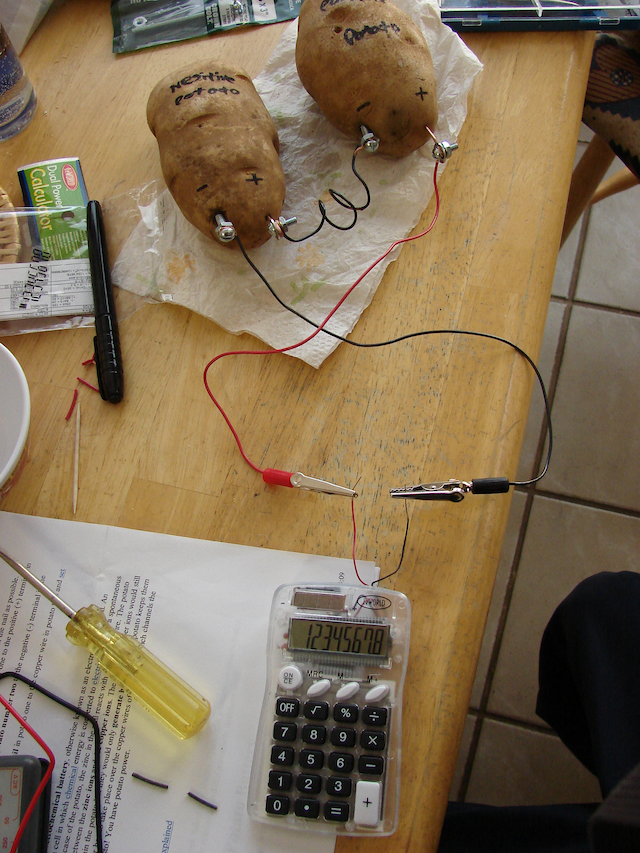
a potato battery is a science experiment for kids
Wikimedia Commons

A lesson in: Chemical to electrical energy

When these nails and copper wires collide, heat is generated (psst ... heat is a result of expended energy, so you can explain to your little runner why he feels warmer after a race around the house). But with some potato magic, the properties of the nail and copper stay separated, allowing the heat to become the electric energy needed to power up your devices. Build your own potato battery with this tutorial from Wiki How .

Messiness factor: One sponge

Make a Baking Soda & Vinegar "Steam" Powered Boat
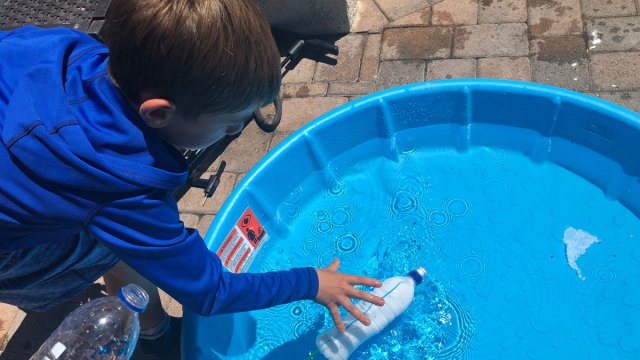
making a baking soda boat is a fun science experiment for kids
Melissa Heckscher

A lesson in: Chemical reactions

Sure, anyone can do the old baking soda and vinegar volcano, but what about creating a boat that is propelled by this classic chemical reaction? Keep your little Einsteins busy this afternoon with this cool science project for kids that doesn't require a lot of prep. 

Messiness factor: Three sponges

Make Water Float
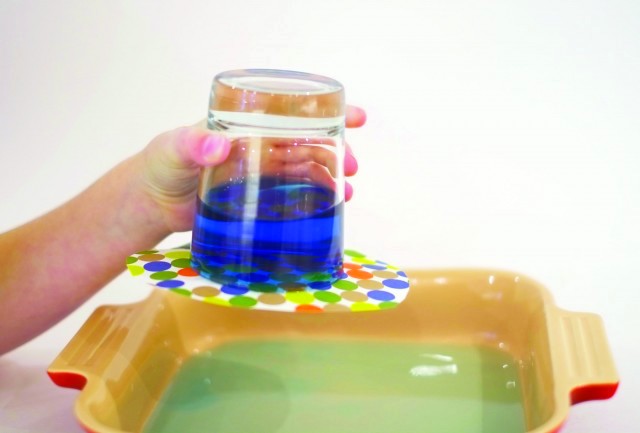
making water float is a fun science experiment for kids
Mike Adamick

A lesson in: Air pressure

Can you make water float? We bet you can. No, you don’t need to be a wizard or a witch. You don’t need to cast a spell. There’s nothing magic about it at all, in fact. You can make water float using science. The “trick” to this experiment is air pressure. Get everything you need and the how-to, right here, thanks to Mike Adamick and his book, Dad's Book of Awesome Science Experiments.

Messiness factor: Two sponges

Photo by Mike Adamick. Copyright © 2014 F+W Media, Inc. Used by permission of the publisher. All rights reserved.

Germ Testing Science Project for Kids

A germ-testing science project for kids
Melissa Heckscher

A lesson in: Germs

This germ-growing science project for kids will help them understand how even the cleanest-looking surfaces (and hands) can be filled with germs, is one of the easiest science experiments for kids we've found. Get the fun and yucky instructions at Kids Activity Blog.

Messiness factor: One sponge

Make an Edible Water Bottle

A lesson in: Chemistry and specifically, spherification.

This futuristic science experiment will leave your kids wanting to know more about chemistry. Quench her thirst for knowledge when you create an edible membrane around teaspoons of water to make these handy water “bottles.” The tutorial is in video form over at Inhabitat. Trust us, it’s as cool as it looks!

Messiness factor: One sponge.

Make Crystal Egg Geodes

A lesson in: Molecular bonding and chemistry.

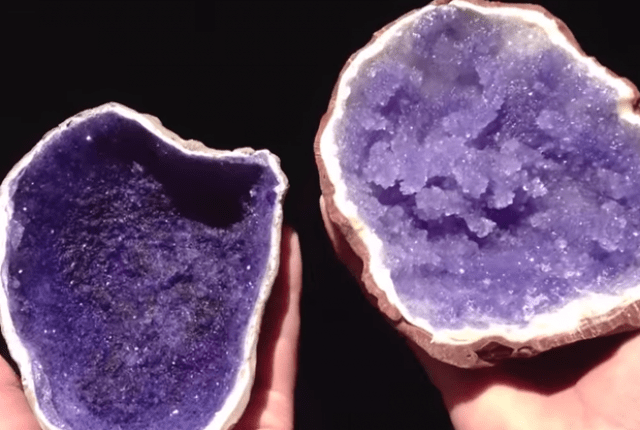
This grow-your-own experiment lets you grow crystals inside an eggshell. Be sure to get alum powder that contains potassium, or else you won’t get any crystal growth. Adding drops of food dye to the growing solution yields some super cool crystals. A perfectly formed geode takes about 12-15 hours to grow, making this a great weekend project. Get the tutorial for this science experiment for kids at Art and Soul.

Messiness factor: Four sponges.

Check the Iron in Breakfast Cereal

A lesson in: Magnetism.

You’ve probably seen the label that says “fortified with iron” on your cereal box, but how much iron is actually in your cereal? Is there enough to cause a magnetic reaction? This super easy experiment doesn’t require too many fancy ingredients (cereal + magnet) which means you and the kiddos can try it right away. The results may surprise you! Get the how-to at Rookie Parenting and get started!

Messiness Factor: Two sponges.

Learn About Shooting Stars

stargazing is an easy science experiment you can do at home
Kate Loweth

A lesson in: Astronomy

With this fun video from They Might Be Giants, kids can learn that shooting stars are not stars, they're meteorites. Then, take it out back for a fun backyard stargazing session. We love this science experiment you can do at home! 

Messiness Factor: One sponge

Related: 14 Backyard Science Experiments for Kids

Marshmallow Tower

marshmallows are good supplies for science experiments for kids
Fly D Art Photographer via Unsplash

A lesson in: Engineering

Using only marshmallows and dry spaghetti noodles, kids can experiment with structure, stability, and weight distribution. Get the instructions from Kesler Science by clicking here. 

Messiness factor: 1 sponge

Paper Airplane Science

flying a paper airplane is a good science experiment for kids
Melissa Heckscher

A lesson in: Aerodynamics

By making various paper airplanes, your scientists can test the drag of each plane, which will have an effect on how far they fly. Get more info on this science project for kids here.

Messiness factor: 1 sponge

Walk on Eggs

walking on eggs is a fun science experiment for kids
Shelley Massey

A lesson in: Weight distribution

How can you walk on eggs without breaking them? Steve Spengler shows us how and teaches an awesome lesson on how an egg’s unique shape gives it tremendous strength, despite its seeming fragility. Check out this easy science experiment for kids to get started.

Messiness factor: 1-3 sponges, depending on the state of the eggs in the end!

Milk Magic
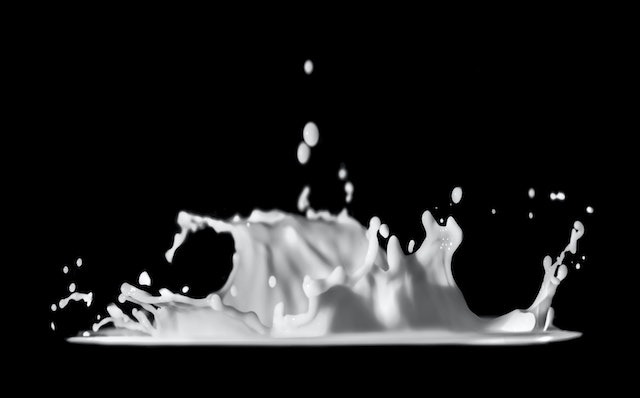
using milk to explain molecules in a science experiment for kids
Daniel Sinoca via Unsplash

A Lesson in: Molecules

Fill a shallow dish with milk, drop food coloring, and make sure the drops don't touch. Then, dip a cotton swab in dish soap and place it in the middle of the dish. The colors will begin to swirl and seem as though they are moving on their own! Explain to your kids that the soap reduces surface tension and makes the fat molecules in the milk move. Click here for more science experiments that use food coloring.

Messiness Factor: 2 sponges

Professor Egghead's Lesson about Light

Professor Egghead has great science experiments for kids

A Lesson in: Light

Learn all about the sun and what it gives humans (think energy and warmth!) You'll also do an experiment to learn about different kinds of light, even ultraviolet rays. Get the video from Professor Egghead here. 

Messiness factor: 1 sponge 

Cup Amplifier

Storey Publishing

A lesson in: Sound

Slide a mobile phone into this low-tech amplifier and the result will be music to your ears. The audio is deeper, richer, and louder, thanks to the science of sound waves and the natural amplification created by the cone-shaped cups. If the two cups look a bit like the attentive ears of a cat or fox, that’s no coincidence. Animal ears use the same science, but in reverse: they help creatures hear by gathering sound waves and directing them into the ear. For engineers, that’s a design worth copying.

Customize your amplifier to fit any size phone!

Tabs cut all around the hold make it easy to glue the cardboard tube in place.

Cut a slot with a flap to support your phone.

What’s Going On
The Cup Amplifier focuses and projects sound waves, in the same way that a cheerleader’s megaphone (or even just your cupped hands) amplifies your voice. Once sound waves are created, they want to spread out in all directions. The amplifier directs them from your phone’s speakers into the cardboard cups, where, instead of scattering, they are gathered and channeled in one direction—out the openings.

Messiness factor: One sponge

Excerpted from Cardboard Box Engineering © 2020 by Jonathan Adolph. Used with permission from Storey Publishing.

Skittles Science

using skittles in a science experiment for kids
iStock

A Lesson in: Stratification

A great way to get rid of extra candy, this easy science experiment for kids uses Skittles and whatever liquids you want to use. The idea is, the candy is made of ingredients that dissolve, so kids get a chance to guess which liquid will make the Skittles dissolve the fastest. Get more info over at Little Bins for Little Hands

Messiness factor: Two sponges

Find Out How Many Water Drops Fit on a Coin

an easy science experiment to do at home is to see how much water can fit on a coin.
Sarbasri Bhaumik via Unsplash

A Lesson in: Chemistry

An easy science experiment to do at home is one that helps kids find out what affects the surface tension of water! You'll need basic materials like a penny and a water dropper, and be sure to make a hypothesis before you start. You might be surprised! Get the tutorial from Rookie Parenting

Messiness factor: One sponge

Pulley Experiment
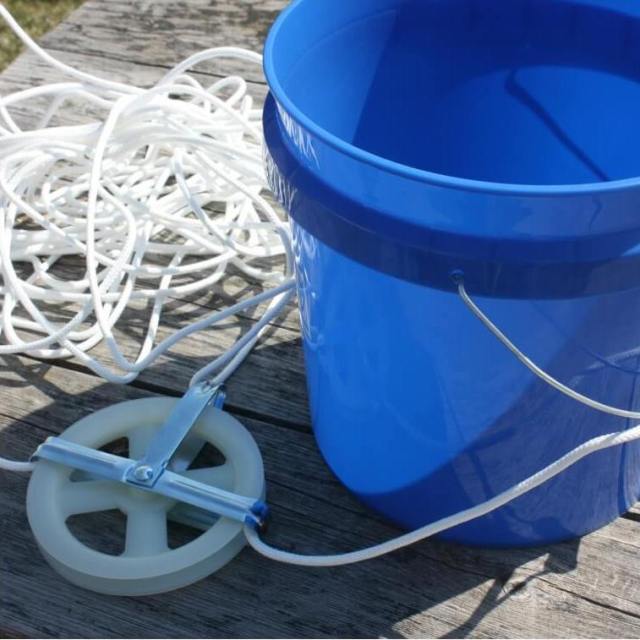
a rope pulley is an easy science experiment
Little Bins for Little Hands

A Lesson in: Physics

This simple experiment requires a trip to the hardware store, but putting it all together is a cinch. Once you've completed the system, have your kids pick up different-sized rocks and make a note about how difficult it is. Then, try with the pulley. Is it easier or is it harder? To find out how to make your pulley, and for other questions to ask your kids, head over to Little Bins for Little Hands

Messiness Factor: One sponge

Make a Volcano Explode

two boys doing a volcano explosion, an easy science experiment for kids
iStock

A Lesson in: Chemical reactions

There's a reason why this science experiment is so popular. When the solid baking soda (sodium bicarbonate—a base) mixes with the liquid vinegar (acetic acid—a weak acid), it creates a gas—carbon dioxide! Besides the chemical reaction, kids enjoy making the actual volcano, whether it's out of clay, mud, or foam sheets. Get a great step-by-step tutorial from The Dad’s Book of Awesome Science Experiments by clicking here

Messiness Factor: Four sponges

Bake Hygroscopic Cookies
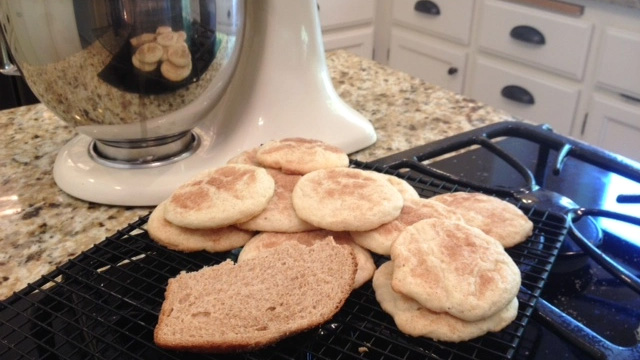
Hygroscopic Cookies are an easy science experiments to do at home
Allison Sutcliffe

A Lesson in: Hygroscopy. 

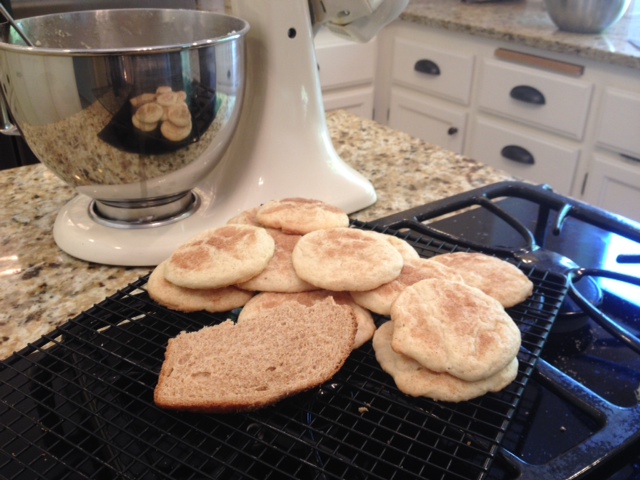
This simple science experiment is best when you check in on it the next morning. Bake up a batch of cookies, then place them in an airtight container with a piece of fresh bread. Watch as the cookies stay straight-from-the-oven soft thanks to the moisture of the bread (The sugar in the cookies is hygroscopic, which means it absorbs water molecules out of the bread). The best part? Getting to eat the cookies!

Messiness Factor: Two sponges.

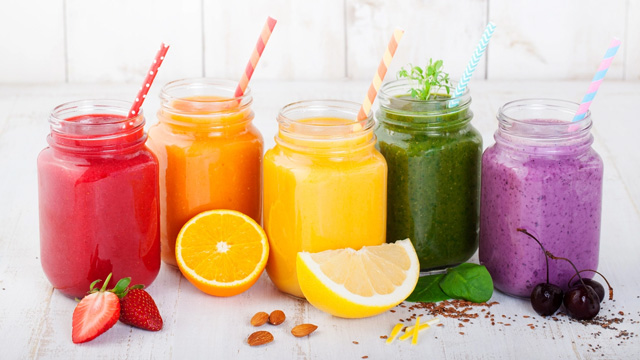
The Juice-Tasting Challenge
different juices
iStock

A lesson in: Taste buds and olfactory senses.

Tummy’s rumbling–it’s time to eat! Did you know that you “eat” with your nose and eyes as well as your mouth? It’s true. Put your family’s sense of smell and sight to the test with this juice-guessing game.

You’ll Need:
Masking tape
4 glasses
Pen and paper
4 flavors of juice
4 food colorings

How to:
1. Stack a piece of tape on the bottom of each glass and number them one to four, making sure your partner can’t see the numbers. Pour one type of juice into each glass.

2. Send your partner out of the room. Drip a different food coloring into each juice and stir so your partner can’t recognize the juice by its color alone. Record the number, juice type, and color in each glass on a piece of paper.

3. Call your partner back. Tell her to hold her nose, sip from each glass, and guess the juice If she’s like most people, she’ll be kind of confused–her eyes and tongue give her two conflicting flavor messages.

4. Ask her to unplug her nose, close her eyes, and sniff the juice before drinking it. Her guesses should be on target now. All hail the mighty schnoz!

Reprinted from Exploralab: 150+ Ways to Investigate the Amazing Science All Around You

Messiness factor: One sponge. 

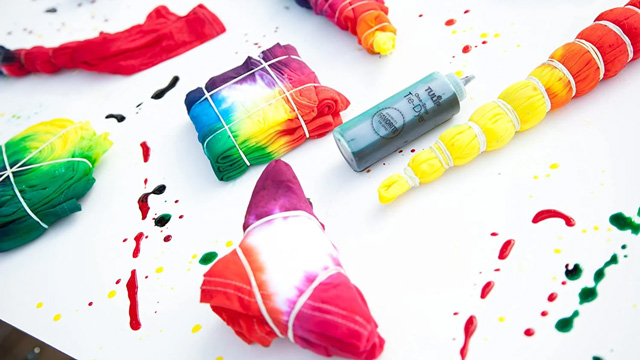
Experiment with Tie Dye
usee a Tie dye kit to do a science project with kids
Amazon

A lesson in: Chemistry.

Dyes are fiber reactive, so there's a chemical reaction between the dye and the fabric. You can do this experiment with everything from paper to t-shirts. We've got a great list of tie-dye projects here

Messiness Factor: Five sponges.

Make a Sundial

A lesson in: Astronomy

Unravel the mysteries of time. Or at least figure out the basics by setting up a sundial outside. Take time each hour to check the sun’s positioning and make note of it so your sidekick can see the bigger picture.

Messiness Factor: One sponge

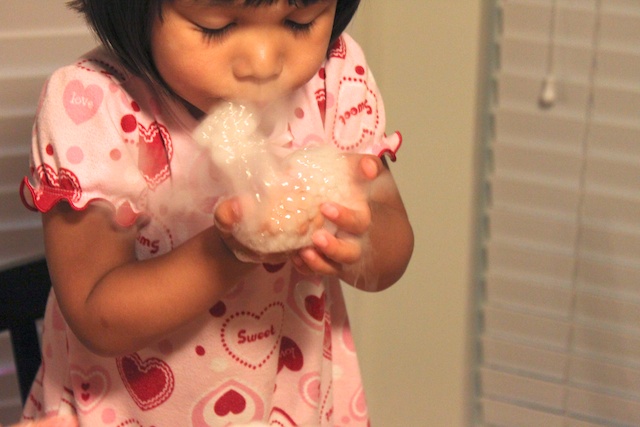
Dry Ice Bubbles
dry ice bubbles are an at-home science project for kids
Simply Modern Mom

A lesson in: Gas.

Dry ice is already cool enough on its own, but it takes science to turn them into bubbles. When you add water, it changes the temperature of the dry ice, causing the ice to go from solid to gas. That’s where the fog and bubbles come from! Head to Simply Modern Mom to get the full tutorial. But be careful: Dry ice can cause serious skin burns, so make sure your kids are well-supervised and know not to touch the ice.

Messiness factor: Three sponges.

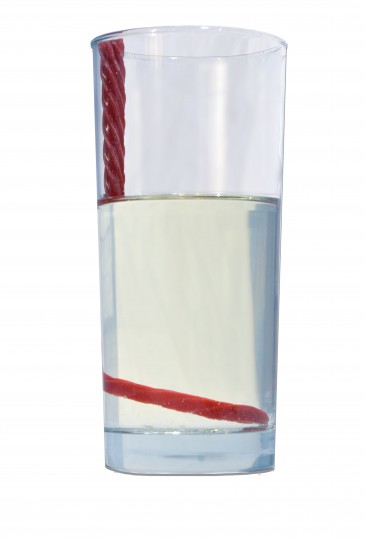
Invisible Licorice
From Candy Experiments 2 by Loralee Leavitt/Andrews McMeel Publishing, LLC.

A lesson in: Light and perspective.

Did the candy melt or disappear? Your sweetums might think it’s magic, but it’s really all about how oil redirects light, causing half the candy to disappear! Click here for the instructions on how to recreate this mind-warping experiment.

Messiness factor: One sponge.

Egg in a Bottle
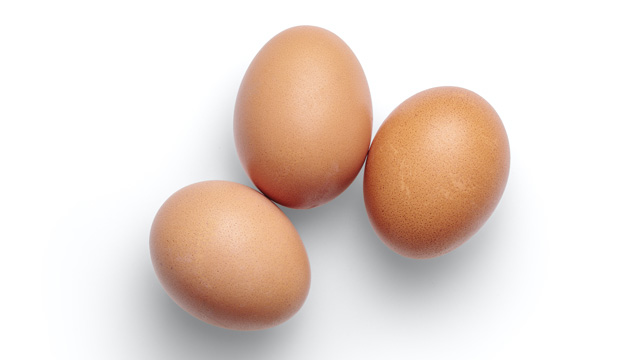
egg in a bottle is a fun science experiment you can do at home
Mockup Grahics via Unsplash

A lesson in: Air pressure

Your whistler has the basics of air pressure down just by using their mouth to blow. And now you can amaze them with this science experiment for kids. There is a little fire play involved (dropping a lit paper into the bottle), but that’s what causes the unbalanced air pressure, which pushes the egg into the bottle. Want to test it out? Head over to Steve Spangler Science for the tutorial.

Messiness factor: One sponge

Invisible Ink
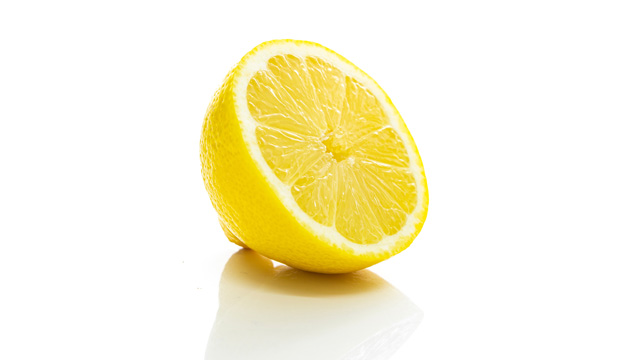
invisible ink using lemon is a fun science experiment for kids
Moritz Nie via Unsplash

A lesson in: Oxidation.

If your snacker has noticed how their apples have turned brown after being left out for too long, then they’ve seen oxidization in action (loss of electrons and nutrients when in contact with oxygen). Fortunately, lemon juice only oxidizes when in contact with heat. This method works with baking soda and milk too. Click here to find out how to write secret messages with your little spy.

Messiness factor: One sponge.

Kid-Safe Lava Lamps
iStock

A lesson in: Density and intermolecular polarity.

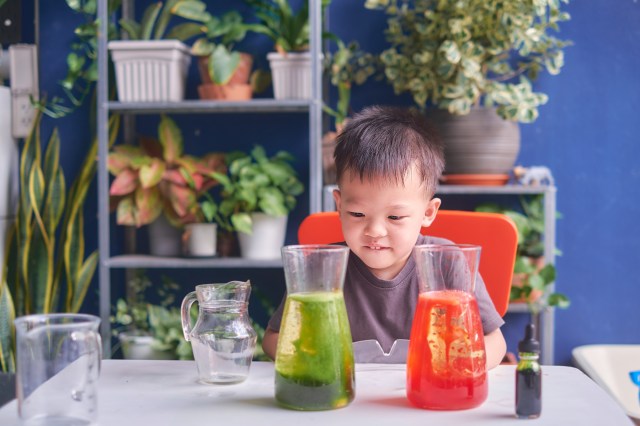
These sound like big words for our little ones, but there’s an easier way to break it down. Water and oil won’t mix because they’re not the same “weight” or substance (just like clay and LEGOs won’t become one). Now add a drop of food coloring (which is heavier than oil) and a fizzy tablet and watch the air bubbles take coloring with them to the top. Head on over to S. L. Smith’s blog to see how it’s done.

Messiness factor: Two sponges.

Rock Candy
Wikimedia Images via Pixabay

A Lesson in: Crystallization.

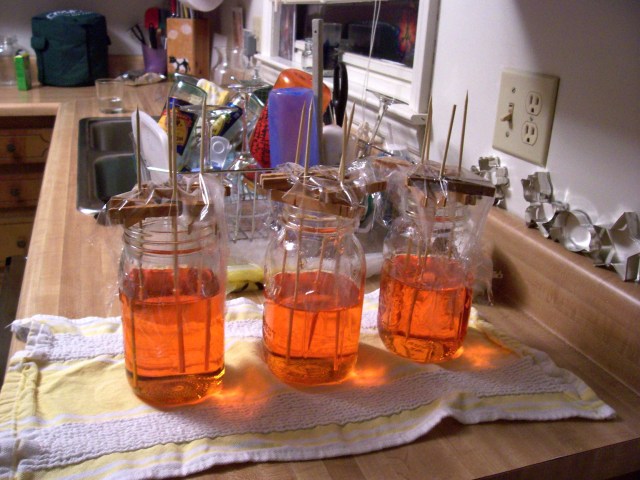
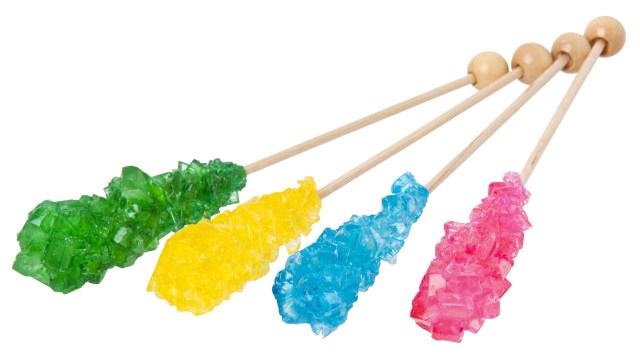
Be careful: The water only has the power to make the sugar crystals “invisible” when it’s piping hot. After the water cools down and evaporates, the sugar turns back into a solid. And with a little help of your sugar-soaked string, the crystals will find a home to grow upon and become rock candy. Learn how to make your smart sweets with these instructions from the Exploratorium. 

Messiness factor: Two sponges.

S'more Solar Oven

Kelly Sikkema via Unsplash

A lesson in: Solar power.

Harness the power of the sun to make your favorite campfire treat! With just a few common household items you can create an eco-friendly oven just for melting marshmallows and chocolate, plus you can teach kids about the power of the sun. Click here to learn how.

Messiness Factor: Two sponges.

Homemade Slime
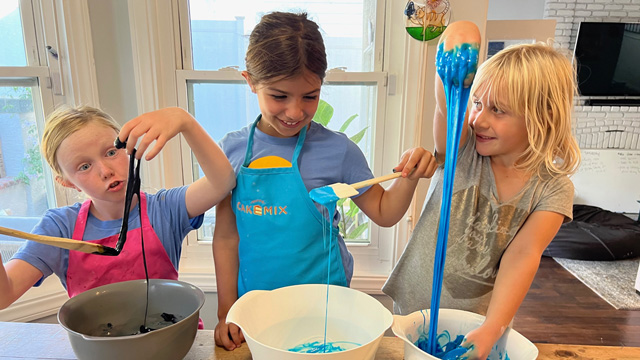
girls making slime, which is a fun science experiment for kids
Melissa Heckscher

A lesson in: Polymers.

Is it a liquid or solid? The answer is both! This DIY slime—made from glue, borax, and water—is also known as a polymer (molecules that can stick close together to be a solid or spread apart and take liquid form). And it’s all thanks to borax, which acts as a binder to prevent the glue from going completely liquid. Check out Explorable’s recipe for mixing the ingredients. Prolong the life of your goo by keeping it in an airtight container in the fridge. And, if you need help with cleanup, check out our guide for how to get slime out of clothes, couches, and hair

Messiness factor: Three sponges.

Make Fizzy Lemonade
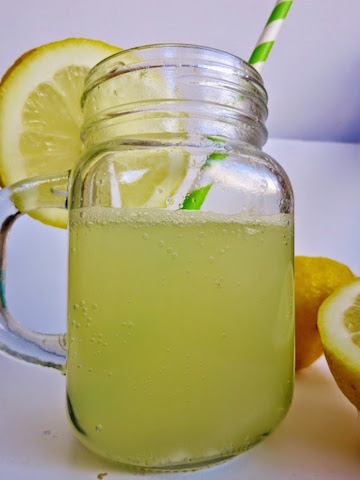
Learn with Play at Home

A lesson in: Chemistry.

Plain old fresh-squeezed lemonade is so last year. Boost the fun quotient and learn a simple science concept simultaneously when you recreate this edible Fizzy Lemonade drink from Learn With Play at Home. It’s super easy to mix and little sippers report it’s pretty tickly too. A great alternative to the baking soda-vinegar volcano, it shows kids what happens when an acid and base are mixed together. 

Messiness factor: One sponge. 

Whirlpool in a Bottle
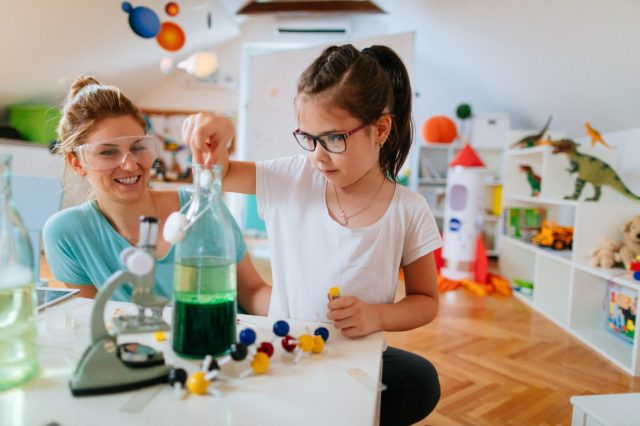
iStock

A lesson in: physics, weather science. 

This easy little experiment doesn't take much: just two empty and clear 2-liter bottles, a metal washer, water and duct tape. Food coloring is optional. Fill one bottle with about two-thirds water. Place the washer on the bottle and line up the empty bottle on top of the water-filled one. Wrap the duct tape around the middle securing the two bottles together. Then, turn the bottles upside down. Does the water go straight down or do you see a mini whirlpool (Swirl the top or bottom a bit for a better effect.)? The spinning water is called a vortex, and all tornadoes, hurricanes and typhoons are examples of air vortexes. Since you’re using water, this is an example of a whirlpool. As the water spins faster, it pushes to the outside of the bottle creating a hole in the middle. The air from the bottom of the bottle comes up the middle and the water from the top flows back down through the hole.

Messiness factor: Two sponges.

Salt Crystal Feathers
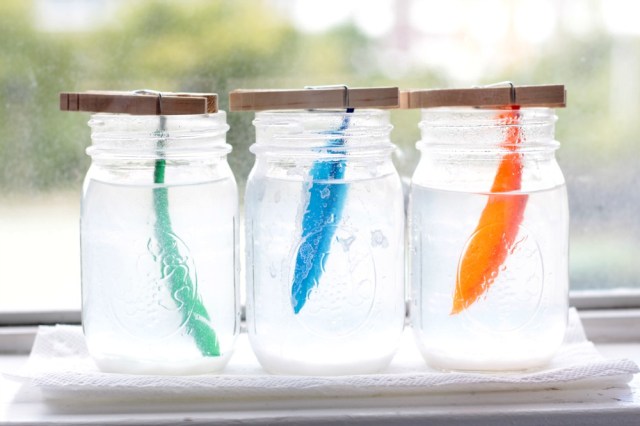
Schooling a Monkey

A lesson in: Evaporation

You’ve probably tried a salt crystal growing kit at some point in your life (5th grade Science Fair perhaps?) but Schooling a Monkey takes the idea to a new level with these Salt Crystal Feathers. This awe-inspiring project is deceptively simple and inexpensive to achieve, and requires just a wee bit of patience to see the results—kids will love checking in on the progress. 

Messiness factor: One sponge


Soda Blasting Experiment

soda bottles used in science experiments
Amanda Shepard via Unsplash

A lesson in: Chemistry, pressure, and release of pressure

This experiment is one you'll definitely want to do outside. Step it up with this Mentos + soda experiment: head to Steve Spangler for all the need-to-know details on this engaging experiment. 

Messiness factor: Three (very epic) sponges

Melting Rates

outdoor science projects for kids
Shelly Massey

A lesson in: Solar science and absorption

Different colors have different heat-absorbing capacities. Black has the greatest heat-absorbing capacity, which results in ice melting quicker than white, which reflects the most light. Learn how to observe and report on which colors affect ice’s melting rates here on Curiodyssey. Get more sidewalk science ideas here.

Messiness factor: One sponge

Make Elephant Toothpaste
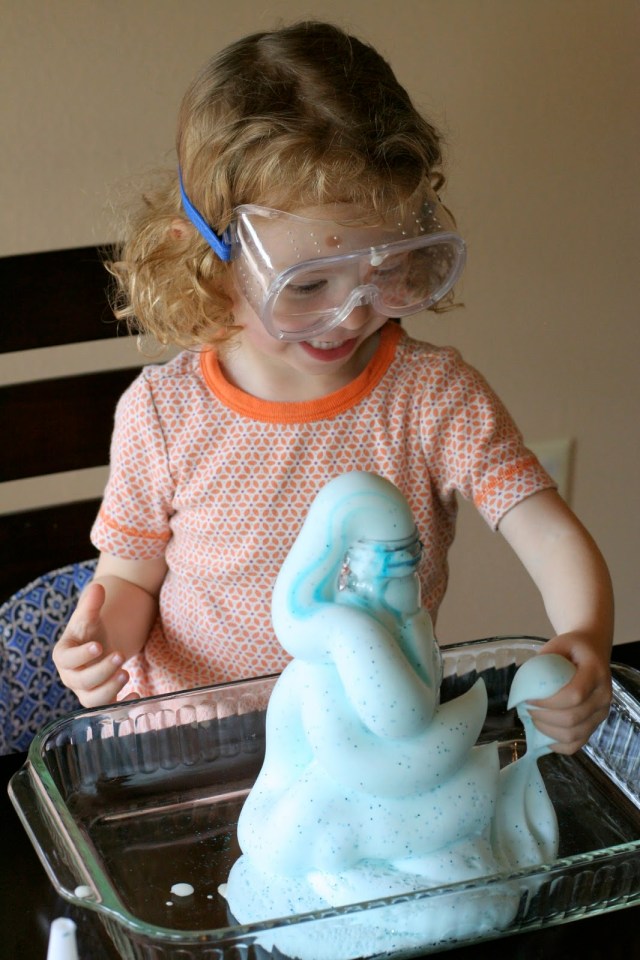
Fun at Home With Kids

A lesson in: Chemistry and the exothermic process <<<impress your kids! 

If you’ve ever wondered how elephants keep their tusks clean, we’ve got the answer. They use elephant toothpaste! Find out how to mix your own and figure out the science behind this dynamic exothermic (heat-releasing) reaction from Fun at Home With Kids. Our favorite part? That you get to throw in some sensory playtime after the action’s over.

Messiness factor: Three sponges. Maybe four. 

Bending Water with a Comb
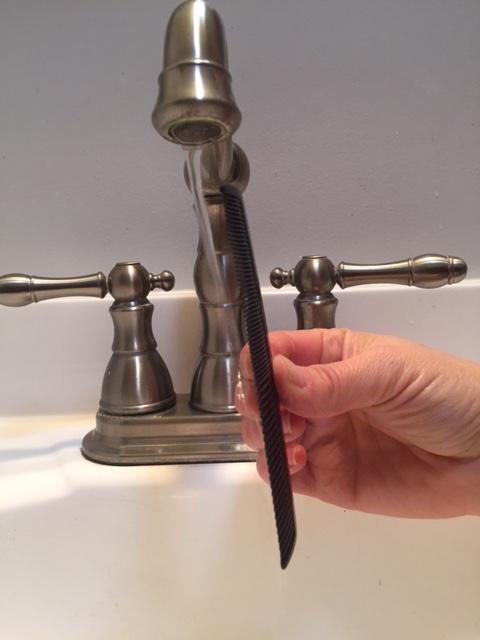
static electricity experiments for kids
Amber Guetebier

A lesson in: Electrical currents and static electricity

This static electricity science experiment couldn't be any easier. In fact, other than a balloon or going down the slide, it might be the easiest way to teach kids about electrical currents. And, you can impress them with your wizarding skills once before you reveal the science behind it. Click here to get the step-by-step. 

Messiness factor: One sponge

Regrow Leftovers
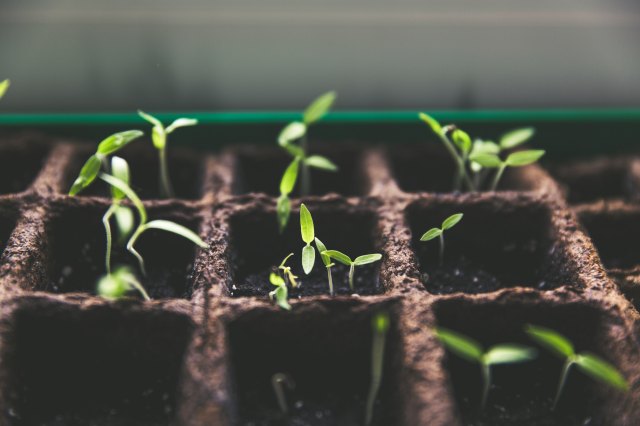
Marcus Spiske via Unsplash

A lesson in: Photosynthesis and plant science.

Insert a little plant science into the mix by re-growing food from scraps. Think onions, potatoes, and lettuce for this one (psst… green onions are a super easy, fast option). Get the low down on all that recycled goodness at Mrs. Happy Homemaker. Since plants need water and sunlight to grow, exposing scrap roots to that winning combo helps them recharge.

Messiness factor: Two sponges.

Turning Pennies Green

Buggy and Buddy

A lesson in: Chemical reactions.

It happens to the Statue of Liberty and it happens to the change in your pocket! Create your own home lab with just a few household ingredients (this experiment will literally cost you just pennies). It’s also a chemical reaction with very non-toxic ingredients, so it’s safe and fascinating even for young kids. Click over to Buggy and Buddy to get the simple how-to.

Messiness factor: One sponge.

Film Canister Rocket

The Science Kiddo

A lesson in: Rocket science.

Like the popular baking soda and vinegar experiments, this film canister rocket literally takes it to the next level by using that creation of gas and energy to jet off into the sky. If your explorer has seen videos of mountain tops getting blown off during a volcanic eruption, this science project is pretty much any space lover’s version. Get the building instructions over at The Science Kiddo.

Messiness factor: Three sponges.

Disappearing Egg Shell
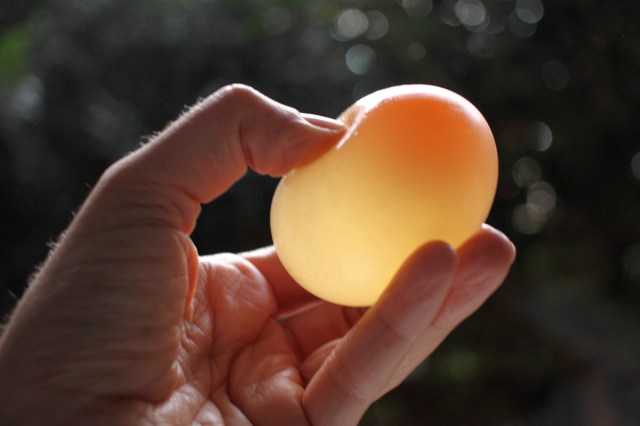
Go Science Kids

A lesson in: Chemistry.

Can you and the kiddos solve the mysterious case of the disappearing eggshell? Following the simple how-to at Go Science Kids, you’ll learn the step-by-step and talking points about the process along the way. Warning! Although it’s totally non-toxic, toddler-aged kids will be tempted to squeeze the egg at the end so make sure it’s a supervised experiment. Visit Go Science Kids to get cracking!

Messiness factor: One sponge.

Fishing for Ice
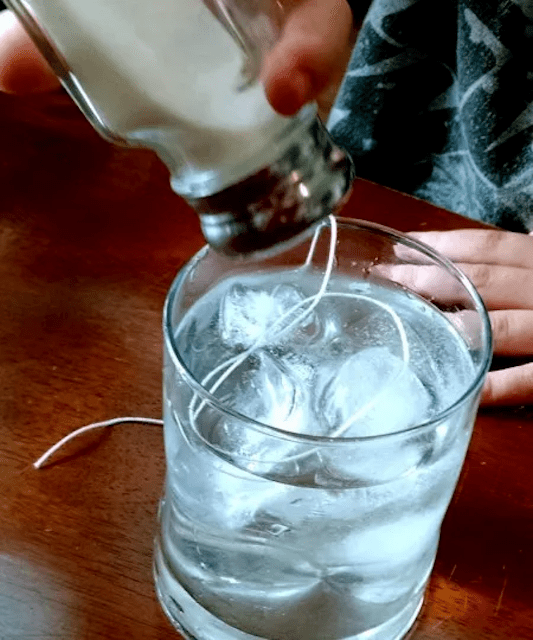
ice salt is a fun science experiment for kids
The Science Kiddo

A lesson in: Freezing/temperature.

Children living in snow-covered cities might witness their neighbors salting the driveway. Well, while that is definitely not for fun, this experiment is. Salt lowers the freezing point of ice so it melts, but it won’t be able to freeze unless it’s cold enough. See how The Science Kiddo made a clever game with this knowledge.

Messiness factor: Two sponges.

Cloud Jars
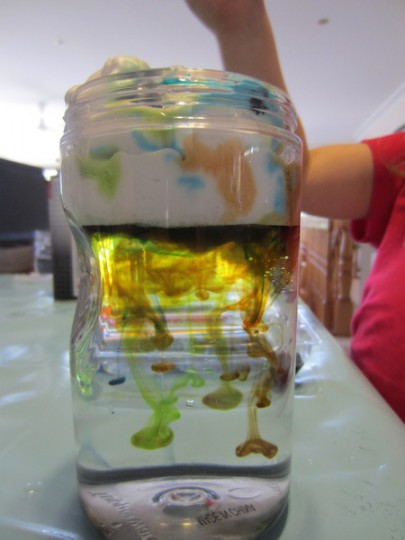
Learn With Play at Home

A lesson in: How clouds hold water.

Let your imagineers pretend shaving cream is a cloud that holds colorful raindrops. As they squeeze more and more food coloring, their “cloud” will soon release the excess below—just like how real clouds get too heavy and let the rain loose on a gloomy day. Learn how to re-create this weather experiment here.

Messiness factor: One sponge.

Dyed Plants

Mike Adamick for Dad’s Book of Awesome Science Experiments

A lesson in: Capillary action.

Find out how plants “drink” water with some food coloring. Use carnations, roses, or stalks of celery submerged in the colored water and watch the liquid slowly seep through the plant’s “veins” and towards the leaves. Keep an eye out -- you could have a very colorful bouquet just after the first day. Get the rundown by Dad’s Book of Awesome Science Experiments over here.

Messiness factor: One sponge.

Dancing Oobleck
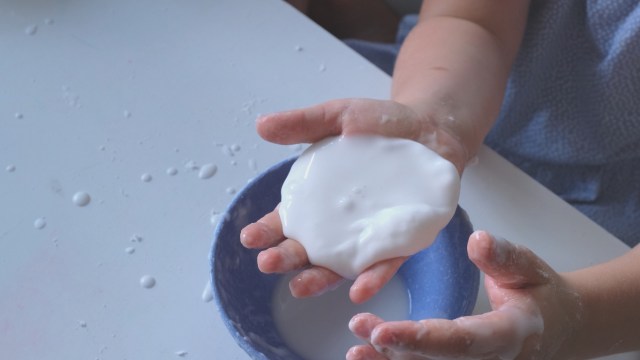
iStock

A lesson in: Sound waves.

The word “oobleck” comes from a Dr. Seuss story where a young boy must rescue his kingdom from a sticky substance. But the neat part of this experiment is how oobleck reacts to vibrations. Put the oobleck over a subwoofer (on top of a cookie sheet!) and watch it dance to different frequencies. Your dancer will see how sound isn’t just about volume! Check out more of this awesome experiment from Tammy of Housing a Forest.

Messiness factor: Five sponges.

Homemade Lightning

Unsplash

A lesson in: Static electricity. (Or weather science.)

Lightning is essentially electrons moving uber fast between the sky and the earth—and with a few simple materials, you can use homemade static electricity (the reason behind your hair sticking up when you rub a balloon or go through a tunnel slide super fast) for DIY lightning. Figure out how to recreate a family-friendly version of this spark by visiting the activity blog Learn Play Imagine.

Messiness factor: One sponge.

Make a Bug Vacuum

Excerpted from Mason Jar Science (c) by Jonathan Adolph, photography (c) by Carl Tremblay, used with permission from Storey Publishing.

A Lesson in: Entomology

Scientists capture bugs for study using a mouth-powered vacuum, called an aspirator or a pooter. Kids can make their own version from a mason jar, then use it to gather ants (or other small insects) and observe them in action.

What you'll need:
Pint-size mason jar with a two-piece lid
Milk or juice carton
Hole punch
2 bendy straws
Tape
Gauze pad

How to: 
1. Open the milk carton along the seams and flatten it out. Use the inner lid of the mason jar as a template to trace a circle on the carton. Cut out the circle and punch two holes in the center about an inch apart.

2. Carefully slide the short ends of the bendy straws into the holes. Tape a piece of gauze pad around the end of one straw to prevent any bugs from getting sucked up.

3 Set the lid on the jar and fasten it in place with the ring.

4. To use your pooter, place the tip of the straw without the gauze near a bug. Put your mouth on the straw with the gauze, and gently suck in. The bug should travel up the straw and land unharmed at the bottom of the jar.

Take It Further
Capture some ants in your bug vacuum, then use a magnifying glass to observe these remarkable insects up close. Open the jar and feed them a few drops of sugary water or corn syrup, or try giving them some birdseed. Ants live in colonies headed by a queen ant, and they can’t last long on their own. When you are done observing them, release your ants where you found them. (Note: Some ants bite, so be careful handling them.)

Tell Me More
Ants were the Earth’s first farmers. For millions of years, certain species have been creating underground gardens where they grow their favorite fungus for food. They tend to their crops, bringing them water and even weeding out other fungi they don’t want.

Excerpted from Mason Jar Science © by Jonathan Adolph, used with permission from Storey Publishing. Available online, $12.69.

Messiness Factor: One sponge. 

A Smell Challenge

Babble Dabble Do

A Lesson in: Olfactory senses.

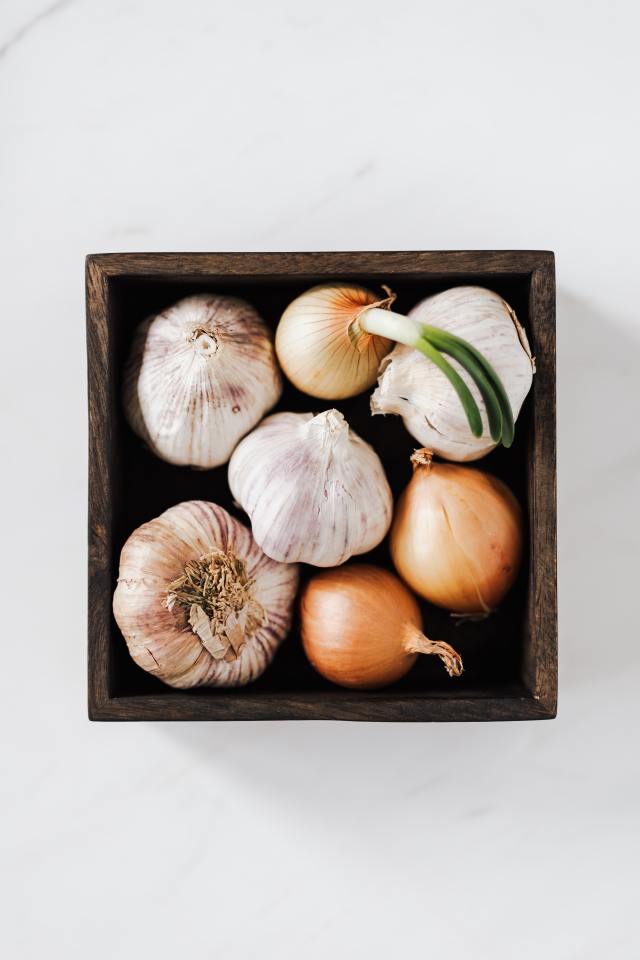
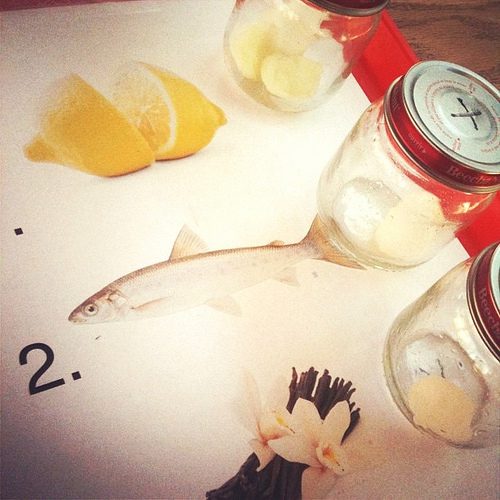
Teach kids the importance of smell with this activity that asks them to use only their noses to identify objects. Can they sniff out the fish oil over the garlic cloves? The lemon juice over the orange oil? Homeschooling blogger Ana has the instructions at Babble Dabble Do.

Messiness Factor: Two sponges.

Is This Soluble?

Dominka Roseclay via Pexels

A Lesson in: Mixtures 

Teaching children chemistry can become a fun, at-home activity as a weekend afternoon project or as part of their remote learning curriculum. One of the best experiments you can do is the mixing activity. With this exercise, children will learn the difference between soluble and insoluble substances. Do not worry! You can do it with ingredients you already have in your kitchen!

Ingredients

  • Water
  • Oil (cooking oil, vegetable oil, olive oil, etc.)
  • Food Coloring
  • Table Salt
  • Sand
  • Transparent containers with a lid or transparent cups with a spoon to mix

Experiment

Before you begin the activity, ask the children what each ingredient is—whether it is a solid, liquid, or gas—and what they think will happen when you begin mixing them. This guarantees a hands-on experiment that will allow the children to feel they are in control.

  1. Mix the water and the sand. Children will notice there is a separation between both ingredients and that layers have formed, so it is an insoluble reaction.
  2. Mix the water and the food coloring. Children will see them combine—the water turning into that color—and know it is a soluble reaction.
  3. Mix the water and the table salt. The salt will disappear in the water, making it another soluble reaction.
  4. Mix the water and the oil. This time, a clear layer will be formed, showing another insoluble reaction.

After these mixing activities, you can further this experiment by letting the children find other ingredients to mix with water and have them determine if that substance is soluble or insoluble. The main goal is to show them different reactions and layers.

For a clear example of this experiment, check out this video.

Messiness factor: 2 sponges 

Experiment courtesy of Dr. Stephanie Ryan. See more fun about science over at letslearnaboutscience.com
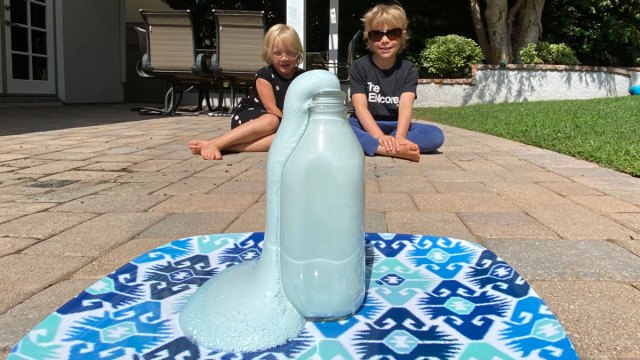
Here’s a hint: a pizza cutter can be used for more than just pizza

When it comes to feeding a crew of hungry kids, we’ve never met a shortcut we didn’t like. This is why, it being the season of busy weeknights and early bedtimes, we want to give you as many cooking hacks (scooped from resourceful parents everywhere) as possible. From meal-prep advice to the easiest way to get an egg that peels with ease, here are 36 clever food and cooking shortcuts that’ll save you tons of time. 

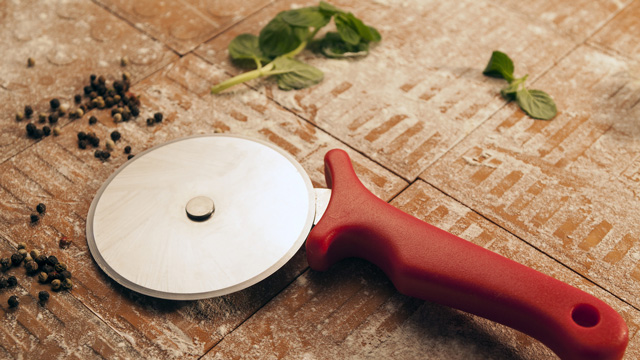
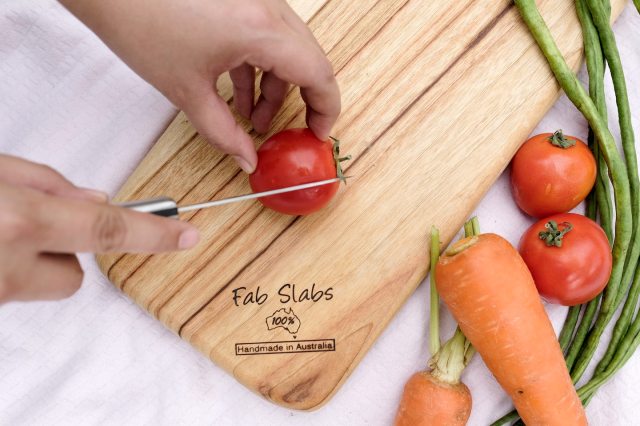
Pizza Cutter for Herbs

using a pizza cutter on herbs is a clever cooking hack
iStock

Having fresh herbs in the house is nice for creating marinades, dressings, and more, but finely chopping those herbs can be difficult. The good news is, there’s a way to make the process easy. Place the herbs on a cutting board, and roll a pizza cutter through them. Don't worry about cutting in a perfect line, just roll through the bunch as many times as you want.  

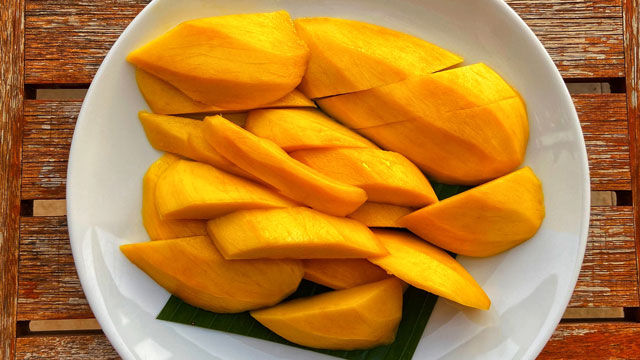
Peeling a Mango

cooking hacks: how to peel a mango
Fedor via Unsplash

The skin of a mango is pretty thick, and the peeling process usually involves careful knife skills. We found another way to get that pesky skin off with ease. All you need to do is slice the mango in half and grab a tall glass. Using the rim of the glass, get between the skin and the fruit at the bottom of the slice. Push down, and the skin will slide right off. Voila! You've got a perfectly peeled mango.

Steam Eggs Instead of Boiling Them

Morgane Perraud via Unsplash

Boiled eggs can be a challenge to peel, but if you steam them over boiled water for 10-15 minutes, the shell will come off in no time.  

Add an Ice Cube to Sautéing Onions to Avoid Burning

Cooking hack: add an ice cube to sauteing onions so they don't burn
Simona Sergi via Unsplash

If your onions are on the verge of burning, throw an ice cube into the pan. It'll evaporate quickly and give the veggies a hint of moisture to avoid being overcooked. 

Store Partially Chopped Veggies in The Freezer

a good cooking hack is storing partially chopped vegetables in the freezer
Ashish Ansurkar via Unsplash

Have you ever just chopped half a stalk of celery or bulb of cauliflower, and had to put it back in the fridge where it immediately starts to wilt? If you want to keep your partially chopped veggies fresh, we recommend putting them right in the freezer. This locks in the freshness, and they’ll be ready to jump into the frying pan after a little defrosting time.

Shred Chicken in Your Food Processor

Shutterstock

From tacos to salads, casseroles, and beyond, shredded chicken is a staple for family meals. But shredding it all by hand or with a pair of forks can take forever! Amazingly, there’s a quick fix for that—just toss boiled or baked chicken breasts in your mixer, and you’ll have expertly shredded chicken in seconds.

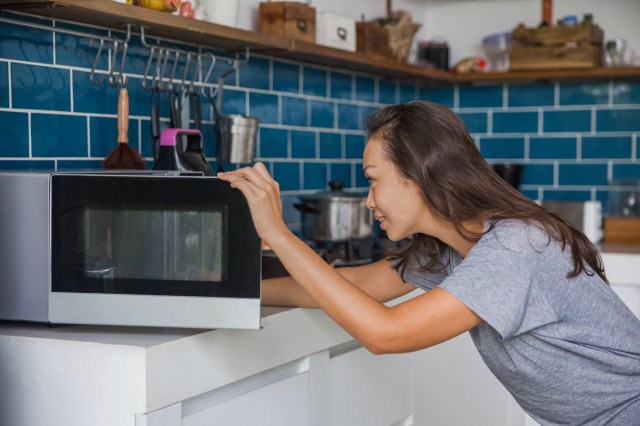
Put Water in Your Microwave to Preserve the Moisture

iStock

Whether it’s leftovers or meal-prepped treats, your microwave is a powerful tool. But you’re always at risk of drying out your food when you use it. We’ve got a simple way to avoid that. Toss a glass of water into the microwave with your food to give it a little extra moisture.

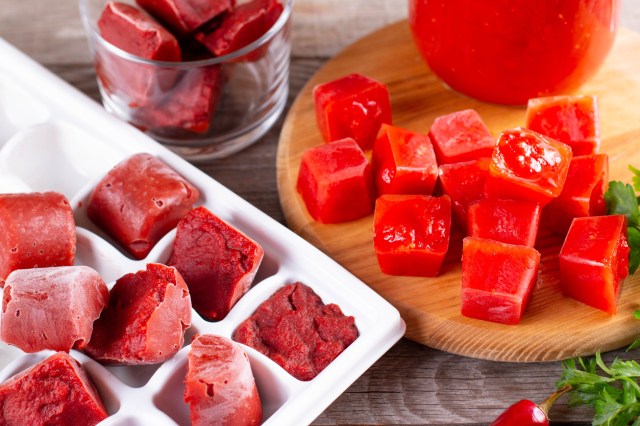
Freeze Sauce in Ice Cube Trays

iStock

We’re all about making cooking easier. With this meal-prep hack, you’ll be able to create perfectly portioned sauces days or weeks in advance and use them whenever you want. Just mix up your favorite sauces, put the liquid in your ice trays and freeze. Keep the portions frozen until you're ready to use them.

Boil Potatoes for an Easy Peel

Jaye Haych via Unsplash

From fries to mashed potatoes and chips, everybody LOVES potatoes. But, for a lot of recipes, peeling the potatoes is a must, and using a potato peeler or knife can be time-consuming and difficult. We have an easy fix! Boil the potatoes, let them cool, and the skin will peel off in seconds.

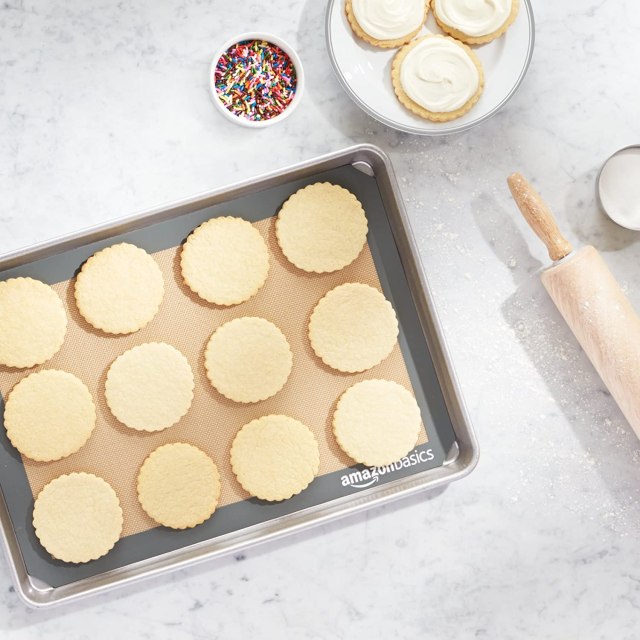
Try Silicone Baking Sheets

using a silicone baking sheet is a good cooking hack
Amazon

Do you hate cleaning cookie sheets? We know that cleaning them can be difficult because the grease and grime are baked in deep. Using a silicone baking sheet, which makes removing all of your tasty morsels as easy as pie, will change your life. We like this one

Related: 15 Genius Kitchen Organization Hacks

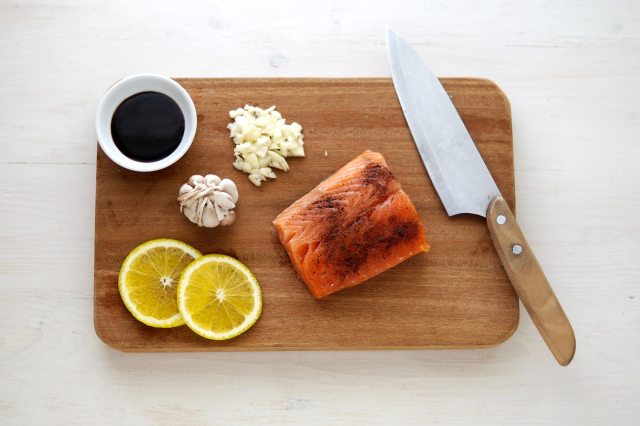
Use Lemon Slices as a Base for Grilled Fish

Agto Nugroho via Unsplash

Your filet of salmon will stay intact much easier if you line it with slices of lemon. Plus, the juices will seep up, making a flavorful dinner. See one of our favorite recipes here

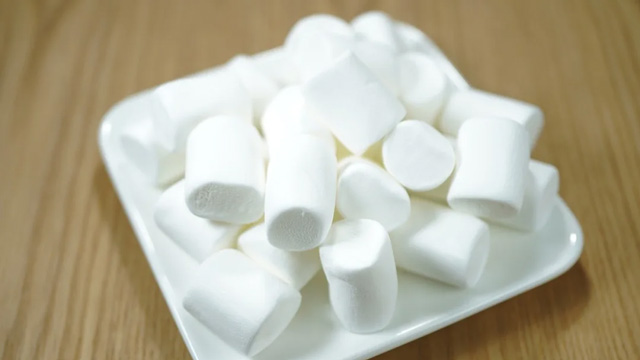
Put Marshmallows in Your Brown Sugar

storing marshmallows with brown sugar to keep it soft is a cool cooking hack
Shutterstock

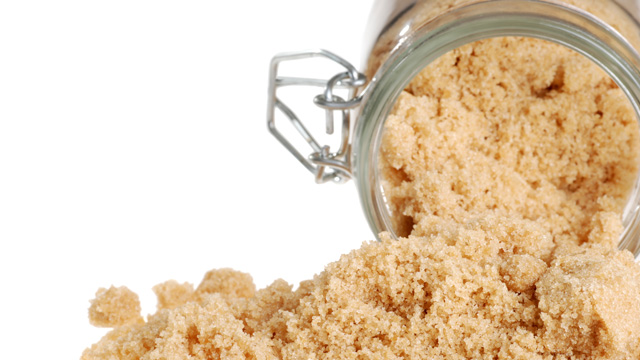
Brown sugar is a baking necessity for cookies, cupcakes, and pies, but unlike white sugar, it can dry out very quickly, which means you’ll be stuck breaking up hard blobs of sugar when you want to use it. But, there’s an easy fix for this. All you need to do is throw a few marshmallows into the airtight container with your brown sugar to conserve the moisture and make it easy to scoop.

Separating Strawberry Tops

Call Me Fred via Unsplash

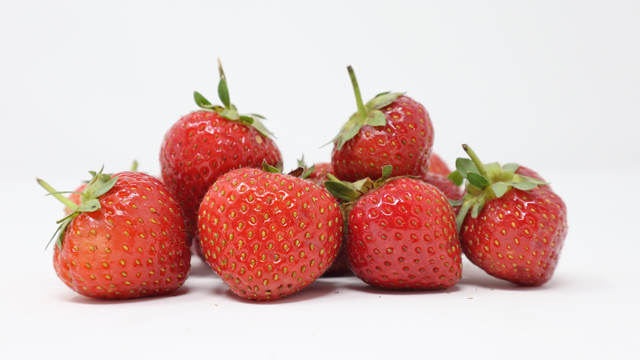
Strawberries are healthy and delicious. But chopping the green tuffs off the top of every piece of fruit takes so long! Use this fun trick to get them off without a knife: Take a straw and push it from the bottom of the fruit to the top in one swift motion—it'll pop those little green leaves right off.

Flatten Ground Meat

ground beef, which can be flattened to freeze, a genius cooking hack
iStock

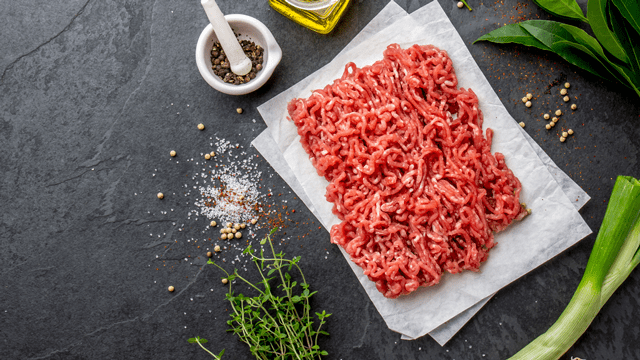
No matter how hard you try, it seems like there’s never enough freezer space. We have a fun way to help you create extra room. Take your ground beef out of its package, put it in a Ziploc bag, flatten it, and put it back in the freezer; you'll be surprised by the extra open space. You can also write the expiration dates on the bags to make sure your meat is always fresh.

Cut Corn Over Your Bundt Cake Tin

Mohd Hafiz Yahya via Unsplash

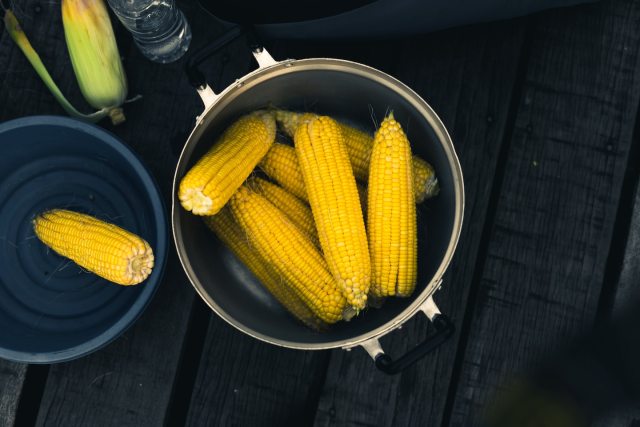
Let’s face it, chopping fresh corn is a pain, mostly because the kernels get all over the counter. But there’s a way to make sure it never happens again. Grab your bundt cake tin, flip it upside down, stand the corn up in the middle, and slice the kernels off; they’ll fall perfectly into that round tin, so cleaning up is a breeze!

Stabilize Your Cutting Board

Samantha Fields via Unsplash

Slicing and dicing are a big part of cooking, which means you’re always reaching for the cutting board. But it’s important to make sure that it isn’t slipping and sliding all over the place, so make it stable by putting a damp dishtowel underneath it. It'll keep it in place and make clean-up even easier. 

Cupcake Liner Catches Popsicle Drips

Allison Sutcliffe

Popsicles are a childhood fave, but they can turn into a bit of a sticky mess. Prevent all of that dripping by slipping cupcake liners onto the bottom of your kids' popsicles. Slide the liner up so that it cups the bottom of the popsicle to make sure it catches all of those little drips.

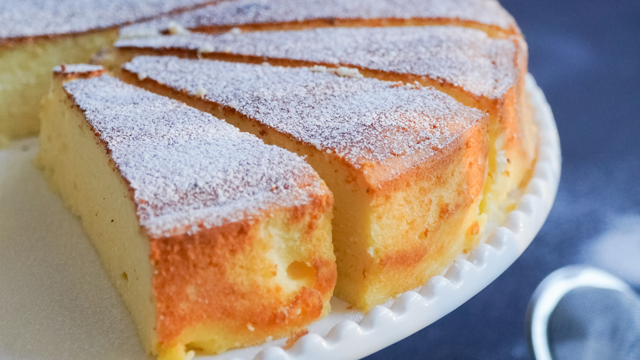
Cut Cheesecake with Dental Floss

using floss to cut cheesecake is a smart cooking hack
Karolina Kołodziejczak via Unsplash

Cheesecake is a dessert that kids and parents love, but cutting it equally can be difficult. Well, we've got an easy way to slice it perfectly every time. Try using dental floss. Just make sure the dental floss is unscented, so you don’t get a minty surprise with your dessert.  

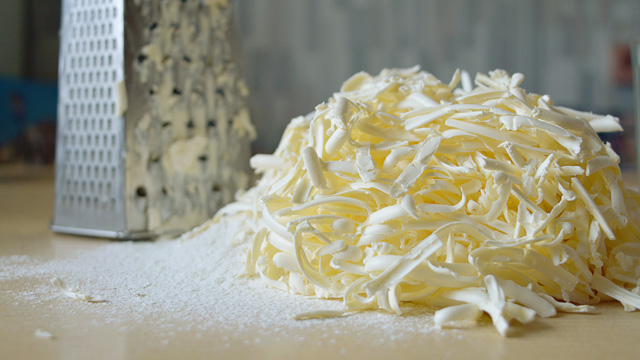
Grate Your Butter

using a cheese grater on butter is a cooking hack
Shutterstock

Softened butter is a staple for all bakers out there, but putting solid butter in the microwave isn’t always the best way to get that soft consistency you're looking for. Try grating it with a cheese grader instead.

Use White Bread on Your Birthday Cake

iStock

Birthday cake is yummy, but when the party’s over, you're left with half a cake that'll be stale by tomorrow. What if there was a way to preserve this delectable sugar overload? Try putting slices of white bread on the interior sections of the cake where you cut into it—the bread locks in moisture.

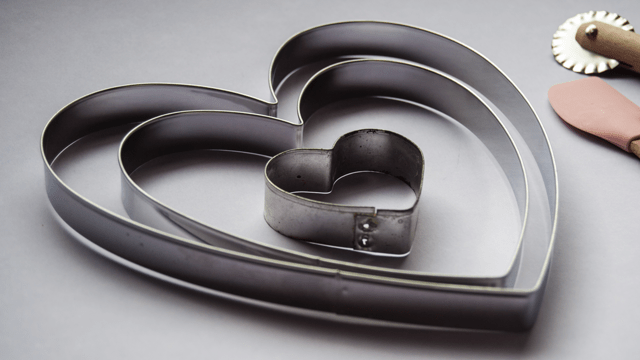
Use Cookie Molds for Fun Food

Maja II via Unsplash

No matter what time of year it is, you can always use cookie cutters. And they can be used for much more than just cookies. You can also use them to create pancakes or eggs with designs like flowers, cartoon characters, and more. 

Related: 30 Storage Hacks Every Parent Needs

Make Oatmeal in Your Rice Cooker

Alex Motoc via Unsplash

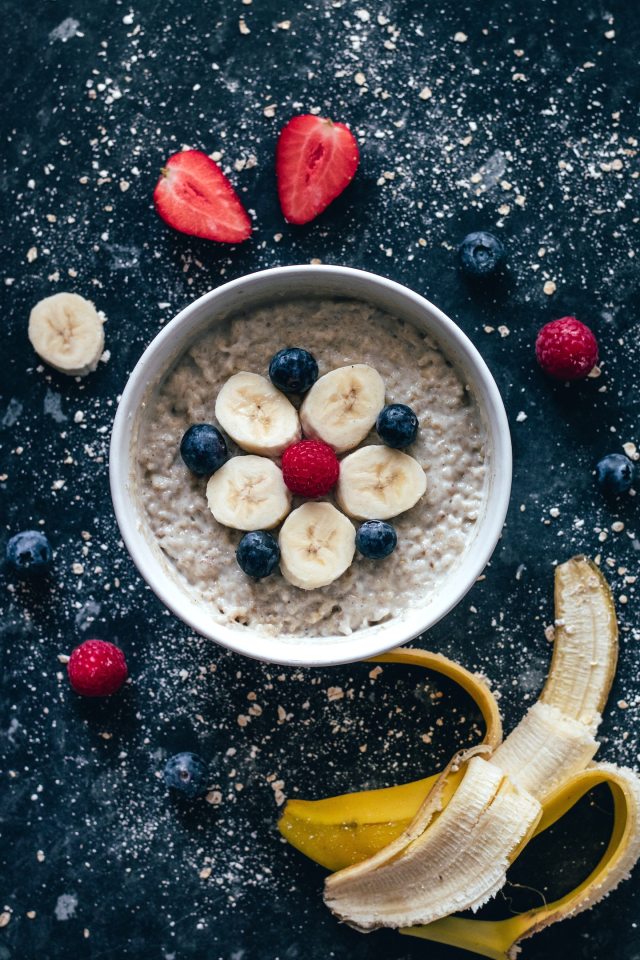
Oatmeal is a warm alternative to cold cereal, but it does take a little more time to make in the morning. Try using your rice cooker to make the oatmeal instead. This way, you don’t need to worry about watching, stirring or remembering to turn off the stove. Just put everything inside, and within minutes you’ve got scrumptious oatmeal.

Use an Apple Corer to Make French Fries

Lisa Carpenter

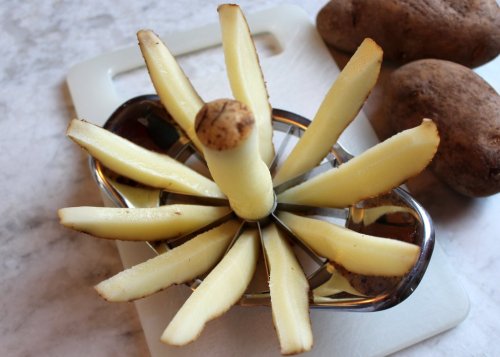
An apple corer/slicer can instantly transform a plain potato into everyone's favorite side. That's right, you can make homemade fries in a snap with a utensil you may already have in your kitchen drawer. Grandma's Brief has all the delicious details.


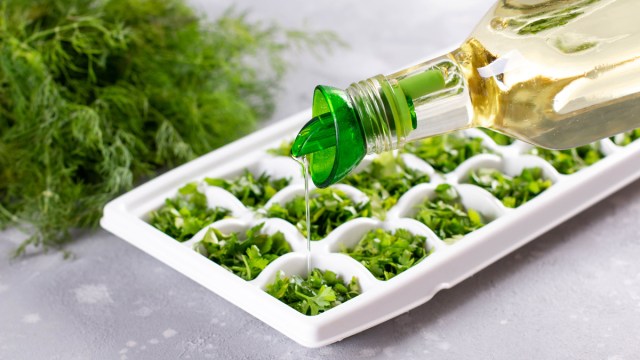
Freeze Herbs in Ice Trays

freezing herbs in an ice tray is a good cooking hack to use
Shutterstock

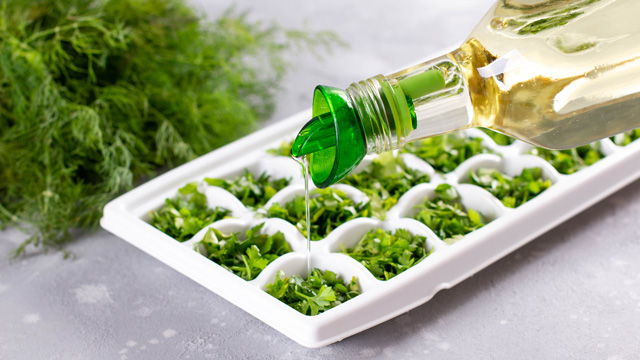
Want fresh basil, thyme, and rosemary all year long? No problem. This cooking hack is worthy of Martha Stewart, sans the effort. Just put fresh herbs in ice trays, add oil, and freeze. Freezing the herbs in oil also prevents them from turning brown or getting that dreaded freezer burn. 


A Thrifty Mom

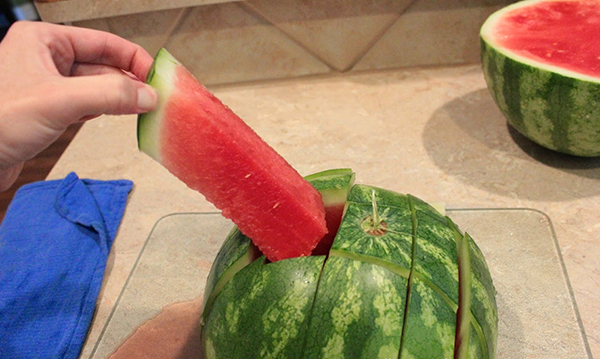
Wedges are so 2022. No, not the ones you wear on your feet; those are still fabulous. We're talking about watermelon wedges. Instead of slicing the melon into wide wedges that inevitably get juice all over everyone's face and chin, cut the fruit in half, then slice it in a grid. You'll get evenly sized slices that each have just enough rind on the bottom for little hands to grab.


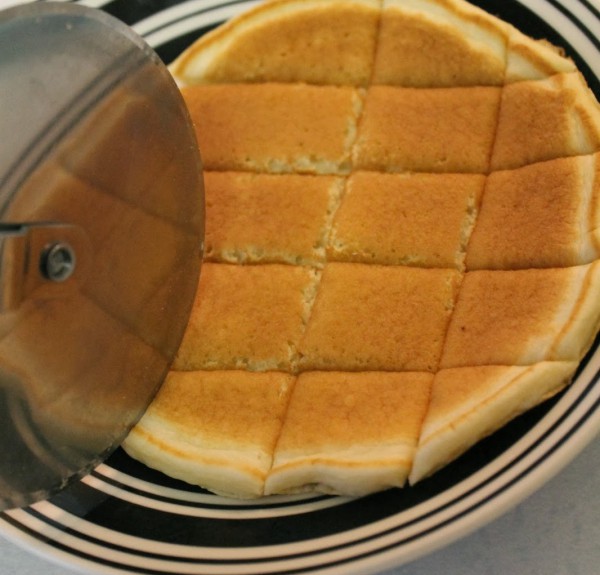
Cut Pancakes with a Pizza Cutter

Cook and Craft Me Crazy

The trusted pizza slicer really is a mom's best friend. From sandwiches to pancakes, you can use this snazzy slicer to save time and messes. 


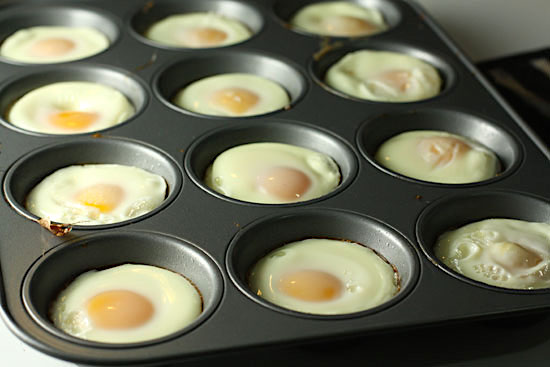
Cook Eggs in the Oven

Nick Evans

It is a literal Egg McMuffin. Nick of Macheesmo shows us how to make a breakfast sandwich even more amazing by simply baking the eggs in a muffin tin. Best part? You can add other ingredients to the eggs (think spinach, ham, cheese) and then freeze the whole thing for busy on-the-go mornings. Find the original recipe here and the updated version here.


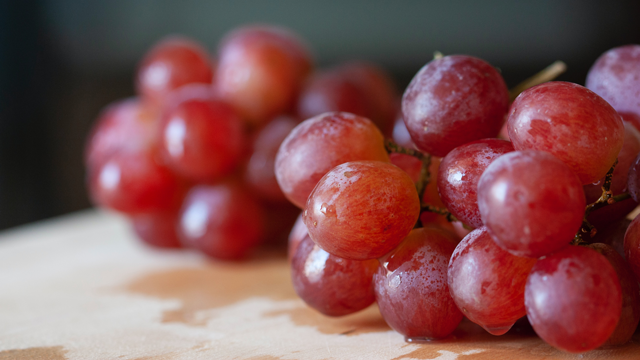
Frozen Grapes Taste Great

grapes, can be frozen for a snack, which is a great cooking hack
J Yeo via Unsplash

Pop grapes into the freezer for a sweet and crunchy treat that tastes like candy. A refreshing snack any time of the year, this is also a great way to make sure you always have fruit on hand.


Use Magnets to Keep Water Cups Handy

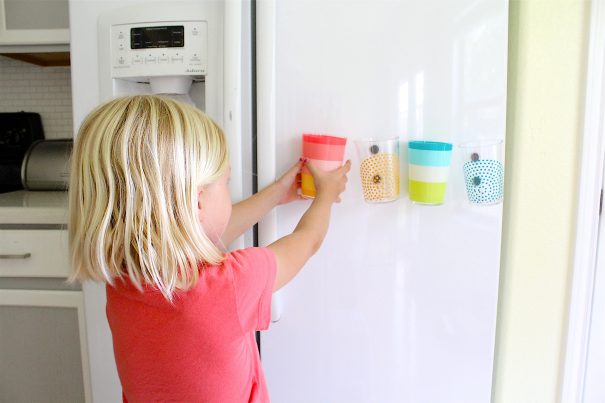
Dana Williard via Made Every Day

Talk about having a “why didn’t I think of that” moment. If your kids are anything like ours, then you probably go through a few water cups every day. Cut down on needless dishes with this awesome cup hack from Dana over at Made Everyday.


Related: 23 Life-Saving House Cleaning Hacks

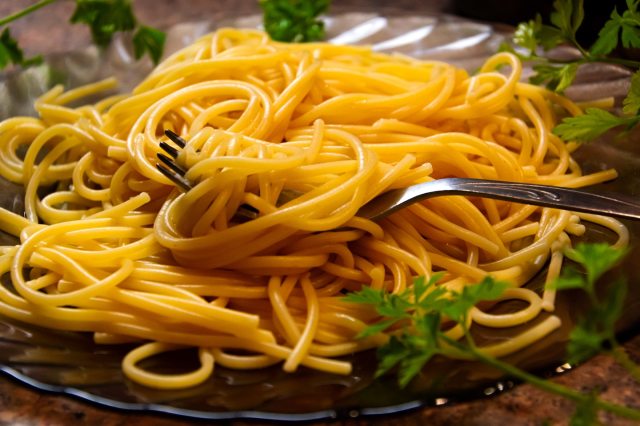
Cut Up Noodles

Christine Sandu via Unsplash

Use your noodle: Cut up spaghetti, linguine, and ramen with scissors. Smaller bites and shorter bits will ease frustration at the dinner table and make after-dinner clean-up easier.  


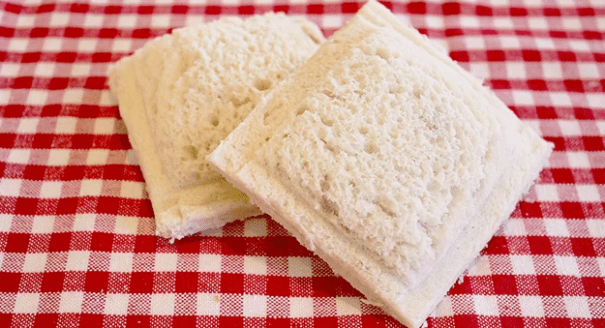
DIY Uncrustables

Jill Nystol via One Good Thing

You like the idea of making PB&J (or some "other butter" and jelly) ahead of time but don't really know how to make a good freezer version. Good news! One Good Thing by Jillee explains the how-to and shows you how to seal that sandwich—no fancy gear needed.


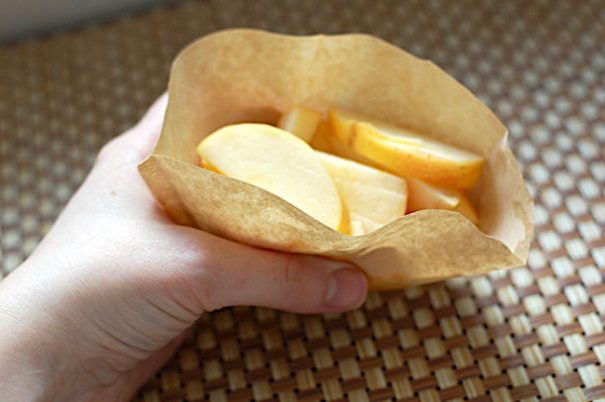
Coffee Filters as Snack Containers

Kimberly Harris via The Nourishing Gourmet

A brilliantly simple idea from The Nourishing Gourmet, swap out plastic baggies or even bulky reusables in favor of a biodegradable coffee filter. Psst! If you’ve gone Keurig, we’re betting you’ve got a box of these collecting dust somewhere in your kitchen.


Ice Cube Trays as Snack Holders

Jennifer Bishop

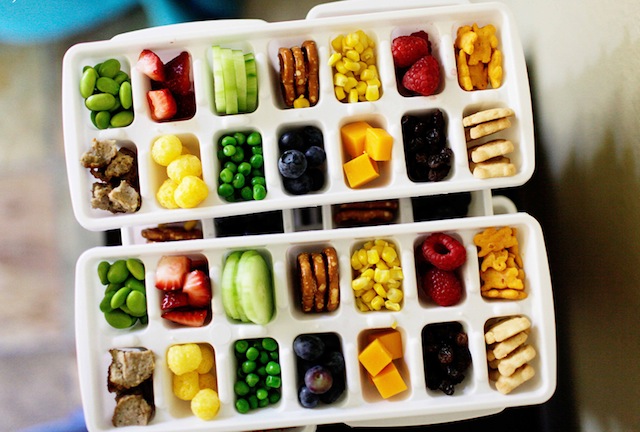
Having a stash of snacks is a must for every parent. But, having a bunch of different canisters, bags, and boxes on hand is difficult for travel and storage. Well, we’ve got the perfect hack for you! Try using silicone ice cube trays as snack trays for at home or on car trips.

Use Binder Clips in the Fridge and Freezer

If you need an easy way to keep all of your favorite munchies fresh in the fridge, may we suggest binder clips? Yes, you read that right. Grab some binder clips, and clip all of your bags of food directly onto the rungs of each shelf. This saves space and keeps everything nice and fresh. This works for bags in the freezer as well. 

These indoor projects for kids range from science experiments to creative activities that the whole family will love

Are you on the hunt for boredom busters? Invite imagination and keep the creativity flowing with these exciting activities that’ll keep them busy for more than a few minutes. If you’re looking for other ideas to fill your free time, check out these easy indoor games for kids, artsy how-to’s, super-science experiments, and other pint-sized projects for kids.

Grow Stalactites

projects for kids
Allison Sutcliffe

It takes a few days to complete this grow-at-home science experiment from Science Kids at Home. With a few simple household materials, your budding scientists can track the growth of their own stalactites when you set up this easy project. Check back often to see how things are growing. 

Hold an Art Exhibit

projects for kids
Andrew Valdivia on Unsplash

Make art a daily part of your creative kid’s playtime routine. Challenge them to draw, paint, or collage a new project each day based on different themes or a favorite artist’s style. When the collection is ready, hang it gallery-style on the walls, and invite the rest of the family to tour the artsy exhibit.

Start a Story Time

projects for kids
Michał Parzuchowski on Unsplash

Set a weekly theme, and choose one book per day. Hold a daily story time for the kiddos, reading the playful picks interactively. After each day’s book session, ask your child questions about the story, draw pics of the characters or turn the narratives into pretend plays.

Have a Boardgame Play-Off

projects for kids
National Cancer Institute on Unsplash

Indoor games for kids take on a whole new meaning when you set up brackets, create teams, and hold an all-out gaming tournament. Choose a few of your fam’s favorite games and get playing! Hold the tournament over a few days, crowning a winner at the end of the week.

Journal the Days with Photos

projects for kids
Kelly Sikkema on Unsplash

Snap a pic each day to document everything your family does. Your budding photographer can take pics of their art activities, indoor game play, and everything else the family does. Print the pictures, paste them onto card stock paper, and bind the book with colorful yarn or ribbons.

Craft Your Own Paper—and Use It

Loretta Rosa on Unsplash

Bring your summer camp days home when you make paper by hand. Rachelle at Tinkerlab walks you through the process of this two-day-long project. It definitely takes planning (and a couple of special supplies), but the finished product is perfect for writing very special letters or drawing an extra special picture for mom or dad. 

DIY a Boardgame

projects for kids
Mam Scouts

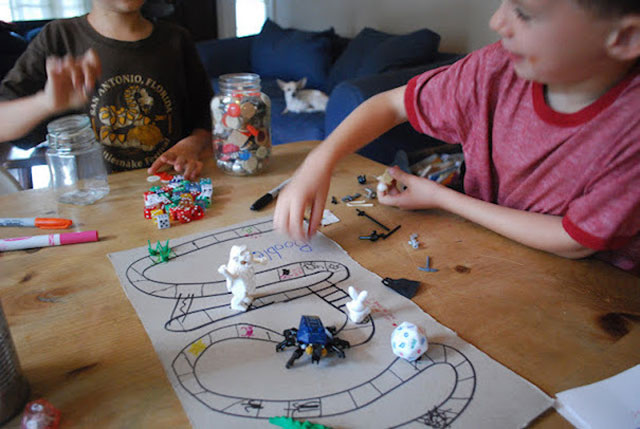
Forget about a ready-made game. Your child’s creativity will kick into high gear when they make their own board game. Amy at Mama Scouts has the scoop on how you can encourage this multi-day activity for big kids. Play on!

Write a Family Newsletter

projects for kids
Santi Vedrí on Unsplash

Extra, extra! A lot of crazy things happen to your family each week: from funny things the kids say to good grades and weekend outings. During the week, have your kid take pictures, record events, and land big interviews so she can publish your family’s breaking news stories at the end of the week.

Artsy Rock Fun

Mariah Hewines on Unsplash

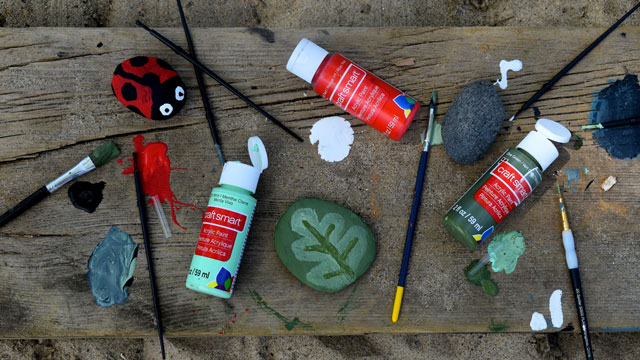
If you haven’t caught on to rock painting yet, this is a perfect time. Kids start by painting colorful rocks of their own design. Then you hide them for others to find (after sealing them properly). Then, set out on a hunt to find painted rocks others have left behind. Get the full scoop here.

Code Away

projects for kids
iStock

Promote a little active screen time with your future programmers and ask them to complete 20 minutes of coding each day. Everything you need to know is mapped out online! The best part? A sweet certificate your tiny techie can earn when she’s learned it all. Gold stars all around!

Build a Village

Kenny Eliason on Unsplash

Don’t stop at just one LEGO creation. Go big with a village your child can build over two, three, or more days. Start with a theme, like a mountain ski park or downtown waterfront high rises, and encourage your master builder to expand from there. Start construction any day of the week and keep it going until the last brick is laid.

Plan a Play

projects for kids
TK on Unsplash

Whether they’re leaning toward a classic like The Day the Crayons Quit, or want to go with a meatier choice, like something from the Captain Underpants oeuvre or a Judy Moody selection, challenge your kids to turn their best story ever into a play. Write out dialogue, plan simple scenes, put together set pieces, and choose costumes that make the story come to life. Set a practice schedule for a daily review and choose a debut date. When the play is ready for an audience, gather your child’s favorite stuffed animal friends for a day of drama.

Have a Three-Day Bake-Off

projects for kids
Shortgirl Shortbread on Unsplash

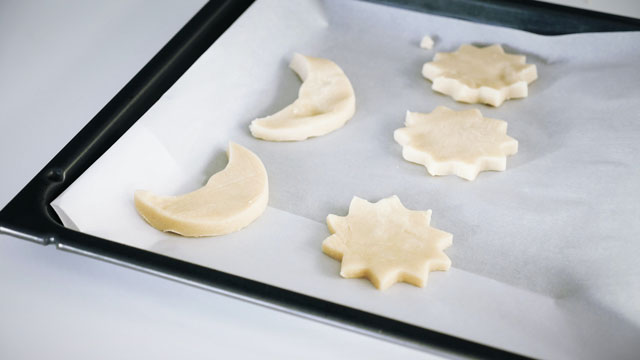
Turns out the trick to kid-friendly cookies is to spread the project out over three days: Spend the first day making the dough. Roll, cut, and bake your silly shapes on day two. Then, pop the cookies into an airtight container (add a piece of bread to keep them soft) so they’re ready to ice and decorate on day three.

Create with Cardboard

iStock

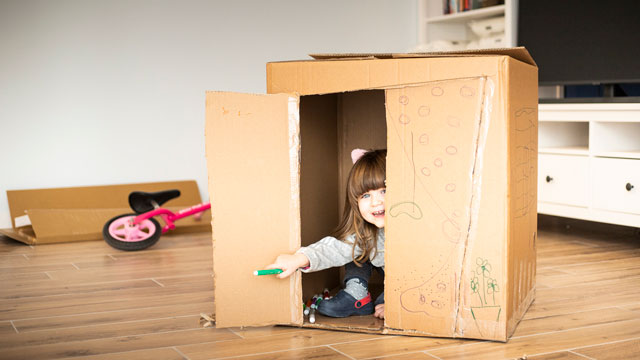
Score a mountain of materials from the recycle pile! Gather all the cardboard you can and help your crafty kids to build skyscrapers, campers, and rocket ships to take them to the moon. Use these ideas to inspire your little builders.

Grow Your Own Crystals

projects for kids
Tinker Lab

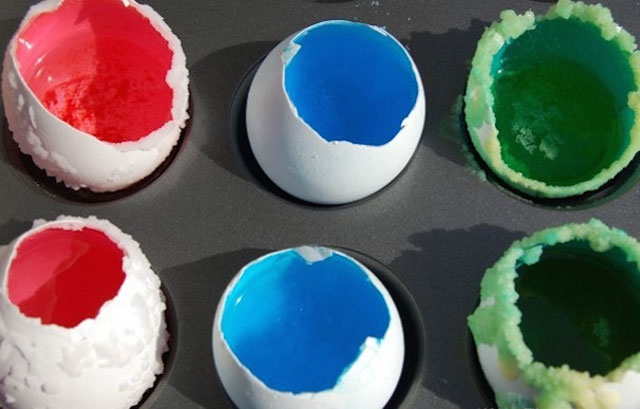
With Borax, salt, and a half-dozen eggs, your curious kids can grow their own crystals over the course of a few days (five works best.). Rachelle at Tinkerlab has all you need to know to set up this experiment.

Make a Mural

Brittani Burns on Unsplash

Murals aren’t exclusive to the outdoor setting. Get creative and craft one on a piece of butcher paper or a plain sheet of gift wrap. Choose a theme, pick materials, and experiment with different processes such as collage, drawing, or painting. Hang it on the playroom wall, and add to it daily!

Run an Indoor 5K

Yanapi Senaud on Unsplash

Whether the kiddos run up and down the stairs, around the living room, or just jog in place, they can get in plenty of indoor exercises. Encourage the kids to “race” for 5-10 minutes each day until they've knocked out 3.1 miles. Follow their progress on your fitness tracker, make a run-time graph, and compare how many minutes/miles they run by the day, week, or month. On your mark, get set, and go!

Pull Out a Puzzle

Ross Sneddon on Unsplash

Somewhere a little out of the way set up a puzzle table for your kids. Then break out that 500-piecer you’ve been saving for a rainy day. Working on a giant jigsaw puzzle is a simple way to engage kids for the long haul because they’re in charge of just how much time they give to it each day.

Hint: Set out simpler puzzles at your table for tots and preschoolers. That way, they can work their way through this fun activity alongside everyone else.

Fun with Felt

projects for kids
Mini Monets and Mommies

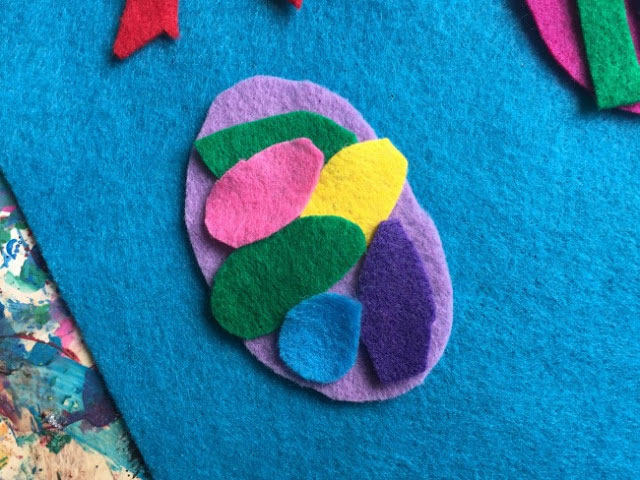
We love this make-and-play project.  All it takes is felt, scissors, and a few creative design ideas to make the felt pieces your kids can use on a giant blank board. Get great ideas and the know-how details at Fun at Home with Kids.

Looking for a way to spice up mealtime, but don’t want to spend hours in the kitchen? These Fast and Fabulous Smoked Sausage Fajitas are great for family dinner, and Eckrich® Smoked Sausage is precooked and ready to heat for your convenience.

Check out the recipe from Eckrich® below to learn how to make your next go-to meal.

Total Time Skill Level Servings
35 mins Intermediate 4

Ingredients

Eckrich® Smoked Sausage Rope, halved lengthwise, cut into 1/2 inch-thick slices 8 oz.
Medium green bell pepper, cut into thin strips 1 whole
Medium red bell pepper, cut into thin strips 1 whole
Medium onion, cut into thin slices, separated into rings 1 whole
Dried oregano leaves 1 Tsp.
Ground cumin 1/2 Tsp.
Hot pepper sauce 1/8 Tsp.
Flour tortillas 4
Shredded lettuce, optional As needed
Salsa, optional As needed
Sour cream, optional As needed

Instructions

  1. Combine sausage, bell peppers, onion, oregano, cumin and hot pepper sauce in medium skillet; cook over medium heat for 8 minutes, or until vegetables are crisp-tender and sausage is heated through.
  2. Heat tortillas according to package directions.
  3. Spoon sausage mixture evenly down centers of tortillas. Top with lettuce, salsa and sour cream, if desired. Roll up.

Tips to Stretch Your Dollar

Use the leftover mixture to add to a taco salad for lunch the next day. Be sure to store your the sausage and veggies in an airtight container for maximum freshness.

In need of more inspiration for your next family meal? Smithfield Foods’ large portfolio of products, including Smithfield® Bacon, Nathan’s Famous® Beef Franks and Eckrich® Smoked Sausage, can meet your household’s needs for breakfast, lunch, dinner and even snack time. 

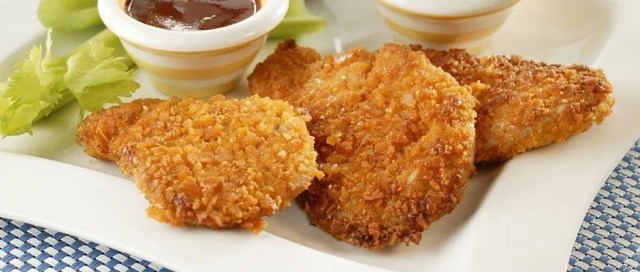
Tired of wasting the crushed-up crackers at the bottom of the box? Put them to good use with this tasty Bottom-of-the-Box Crushed Cracker Pork recipe.

Check out the recipe from Smithfield® below to make your next dinner a slam dunk.

Total Time Skill Level Servings
30 mins Beginner 4

Ingredients

Smithfield® Pork Tenderloin 1 lb.
Egg, beaten 1
Steak sauce 1 Tbsp.
Garlic powder 1 Tsp.
Cheese crackers, finely crushed 1 cup(s)
Vegetable oil, divided 2 Tbsp.

Instructions

  1. Combine egg, steak sauce and garlic powder in a shallow dish.
  2. Place crushed crackers in another shallow dish.
  3. Cut tenderloin crosswise into 1/2-inch-thick slices.
  4. Pound or flatten slices with the heal of your hand to 1/4-inch thickness.
  5. Dip each slice first into egg mixture, then cracker crumbs, turning to coat.
  6. Heat one tablespoon of oil in a large nonstick skillet over medium heat until hot.
  7. Add half of pork slices and cook 4 to 5 minutes per side or until browned.
  8. Repeat with remaining oil and pork slices (or use 2 skillets at one time).

Tips to Stretch Your Dollar

Slice up leftover pork tenderloins and add to a salad! Store refrigerated in an airtight container for maximum freshness, and reheat in the oven to reduce sogginess.

In need of more inspiration for your next family meal? Smithfield Foods’ large portfolio of products, including Smithfield® Bacon, Nathan’s Famous® Beef Franks and Eckrich® Smoked Sausage, can meet your household’s needs for breakfast, lunch, dinner and even snack time. 

Even if most kids love avocado, they often leave it untouched in the lunchbox because they didn’t like the first signs of browning. Just like with apples, bananas, and potatoes, avocados turn brown when it’s exposed to oxygen in the air. It’s still safe to eat, but the less browning there is, the better visually, especially if you want to get your child to eat it. Check out easy ways to incorporate avocados into your lunches and how to prevent them from browning below!

Healthy, Easy-to-Pack Lunchbox Ideas with Avocados That Your Kids Will Love
Besides being delicious, avocados are a rich source of vitamins and minerals. Welcome vitamin E, potassium, fibers, healthy fats, anti-inflammatory components. The cherry on the cake, they are popular among young kids, including toddlers, if we judge by the frequency we see them in the kid-approved lunch ideas on Teuko.com. Check out these popular and delicious ways to pack avocado in the kids’ lunch.

1. Half Avocado with or without the Pit
Just add a spoon in the lunchbox, and your avocado is ready to eat, even for little hands. Find lunch ideas with half avocados on Teuko.com.

2. Guacamole or Simply Smashed Avocado
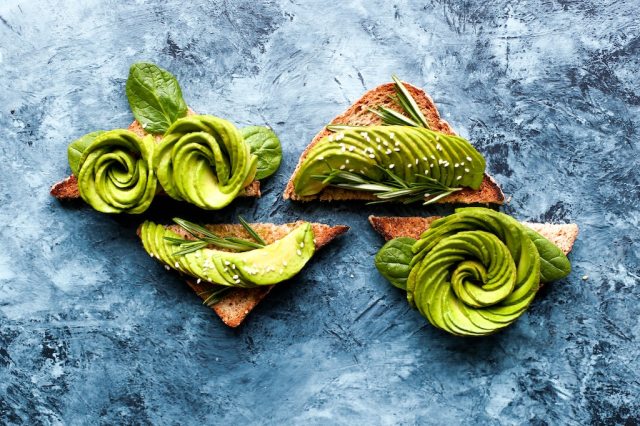
With guacamole in the lunchbox, you send party food for lunch. Use it as a dip with veggies or crackers, and you’ll have here one of the fastest lunch ideas to assemble. Avocado toasts are also a perfect alternative either for lunch, breakfast, or even snack time. Just spread it on the bread of your choice. Find lunch ideas with guacamole on Teuko.com.

3. Avocado Sandwich
Avocado is a great alternative to mayonnaise for every sandwich idea. Don’t have a favorite yet? Start with the simple but delicious avocado/cream cheese sandwich. you can also easily use it in a wrap and make beautiful pinwheels your kid won’t resist. Find lunch ideas with avocado sandwiches on Teuko.com.

4. Cut Avocado Diced or Sliced
Not sure if your child would eat avocado for lunch? Start with dice or slices on top of their favorite salad or main meal. Find lunch ideas with avocado dice or slices on Teuko.com.

5 Popular and Kid-Approved Tricks from Experienced Lunchbox Moms & Dads
How to stop the browning before it even starts? The goal is to protect the flesh of the avocado from oxygen exposure as much as possible.

1. Use Avocado Oil
Rub or spray avocado oil on the exposed flesh, then store the avocado in an airtight container in your refrigerator. You can also use coconut oil or squeeze lemon juice if the taste doesn’t bother your child.

2. Use Frozen Pre-cut Avocado
Many recommend the frozen products found at Costco or Whole Foods.

3. Try Wrapping It Up
Wrap tightly in plastic wrap, foil, or any disposable wrapping paper you have at home. You can find disposable or eco-friendly alternatives to regular plastic like the Beeswax Food Wrap Rolls or Compostable Cling Wrap to keep your food fresh naturally and reduce waste!

4. Use an Avocado Saver
Amazon has plenty of options. Here are 3 products that we liked: Evriholder Avo SaverAvocado Keeper by VantigeJoie Fresh Stretch Pod.

5. Use a Food Preserver
As an example, Ball Fruit-Fresh Product Protector prevents browning and protects the flavor of fresh-cut produce. Parents say that it works like a charm on avocados—it’s worth a try!

We love these tricks because they are easy and they don’t alter much the flavor nor the aspect of the avocado in the lunchbox, which always helps in getting a child to eat his lunch!

If you are not 100% confident in the preparation you made, you can always use one last trick when packing the lunchbox in the morning. Some parents admitted that using sesame seeds on top of the avocado was efficient enough to “mask” any first sign of browning in the lunchbox. In any case, always make sure the avocado stays in a tightly closed container to prevent air from getting in.

Do you pack lunch? If so, don’t miss out on the opportunity to showcase your lunchbox ideas on Teuko.com! Upload your photos today: you’ll build a useful record while inspiring other parents who pack school lunches like you.

RELATED STORIES:
How to Win the Battle Against Picky Eaters

How Simple Meal Planning Saved our Meals & My Sanity

Photo: Brenda Godinez on Unsplash

This post originally appeared on Teuko Blog.

Teuko is the first platform that empowers families to simplify lunch packing. Using Teuko, they can find and share kid-approved lunchbox ideas, recipes, and tips, all in one place. Teuko is transforming the lunch packing experience by boosting inspiration and motivation week after week. 

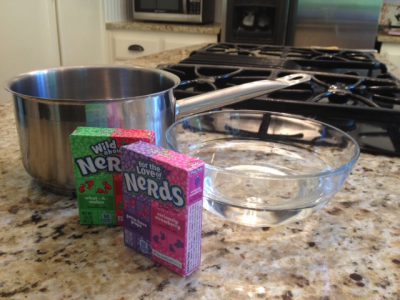
Did you know you can make ice cream in a resealable plastic bag without an ice cream maker, make your own candy geode, and bake hygroscopic cookies without any special equipment? Give curious minds at home a boost with these delicious science experiments for kids that’ll add a dash of excitement to your table and bring a whole new meaning to phrase “brain food.” Flip through the slideshow to see all the delicious science projects.

Save these tasty tests to Pinterest. Just click here!

Discover Density

Allison Sutcliffe

This colorful experiment found on CandyExperiments teaches your little scientist all about density using candy as the main ingredient. What’s not to love about this weighty rainbow!

Brain Boost Factor: The volume of sugar in each colored layer is the key to figuring out why the colors rise or sink.


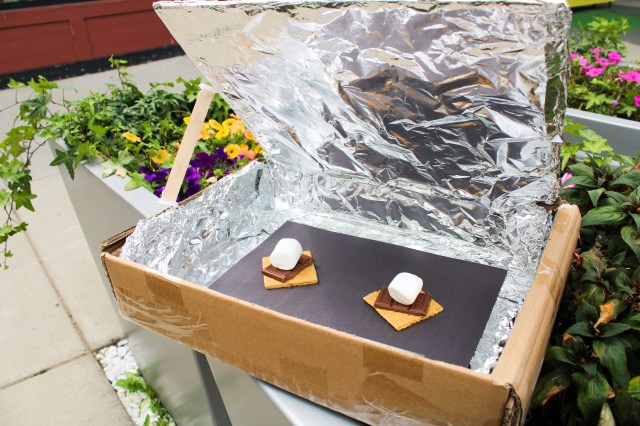
S'more Solar Oven

Tierra Encantada

This awesome project from Tierra Encantada can be recreated any time of the year, as long as the sun is shining. 
You will need: 

  • -Cardboard box
  • - Aluminum foil
  • - Plastic wrap
  • - Black construction paper
  • - Tape
  • - Scissors
  • - Something to prop your oven’s lid open (ruler, stick, marker, etc.)
  • - S’more goodies - graham crackers, chocolate, marshmallows (you can also reheat cooked food!)

Cover the inside of the box with aluminum foil (use tape to seal tightly). Place black construction paper inside the box to absorb light. Stack your s’more ingredients. Cover opening of box with plastic wrap to conceal heat. Adjust lid to find the best angle to reflect sunlight. Use a stick to keep the lid in place.

Get cooking! Don’t forget to check on your food every few minutes. Depending on the temperature outside and reflection of the sun, it should take about 30 minutes to cook.

Check out the video tutorial here.


Pumpkin Seed Science

fall science experiments with pumpkin seeds
Erica Loop

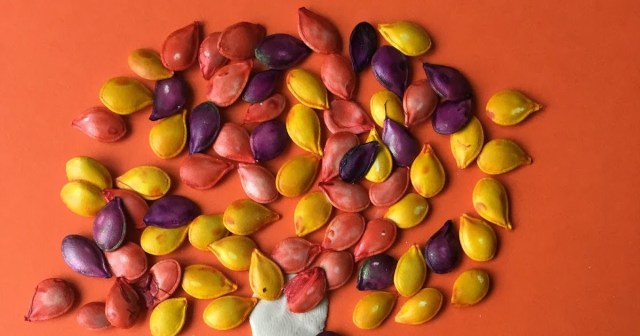
When it's pumpkin time again, do some sciencey fun while you carve your family's jack o'lantern by letting the kiddos explore the ooey gooey goop inside. This sensory activity is ideal for little scientists who are into making hands-on discoveries. Have them close their eyes and describe what the inside of the pumpkin feels like. When they're done, scoop out the seeds and let them dry. Your creative kid can add a few drips of red, orange or yellow food coloring into a bag, toss in the seeds and coat them. When they're dry, the seeds are perfect for making mini mosaics or other types if seasonal art. Not only is this sensory exploration an artsy adventure, but it's also a lesson in the plant life cycle. Discuss why pumpkins need seeds. Save a few seeds and plant them in indoor pots, creating a second fall science activity!

Insider tip: in the mood for Pumpkin recipes? We have pumpkin recipes for every taste bud. Just hop on over to our story for pumpkin recipes here. 

Candy Creations

fall science experiments
Lemon Lime Adventures

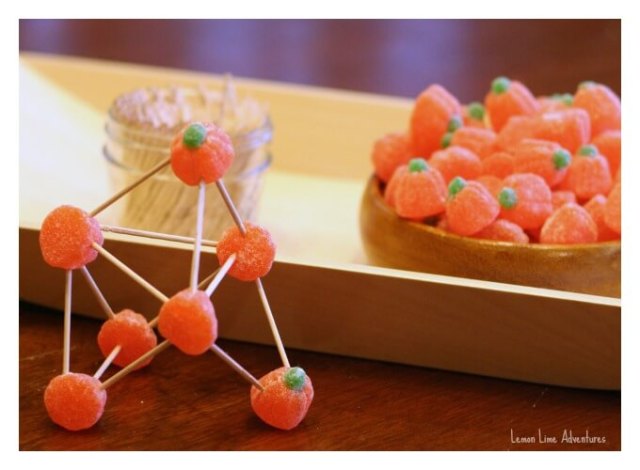
This STEM idea from Lemon Lime Adventures takes autumn engineering to the next level. Your little learner can explore the art of building, getting hands-on with concepts such as form vs. function, balance and weight distribution. 

Insider tip: for ways to use up leftover Halloween candy, check out our ideas here. 

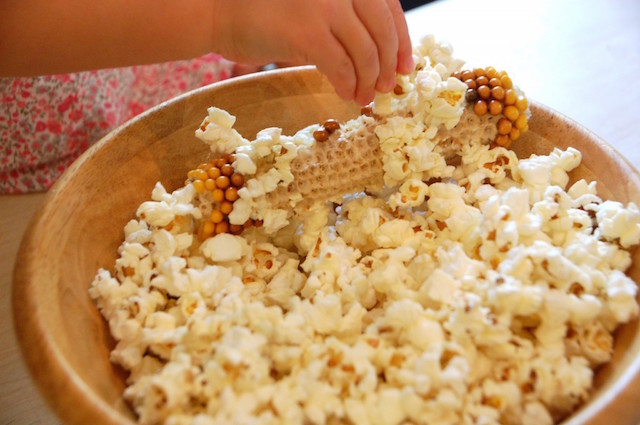
Pop Corn on the Cob

Tinkerlab

Break out your favorite family movie and grab the butter to go with homemade popcorn. Find out how to pop your own in this experiment outlined on Tinkerlab.

Brain Boost Factor: This is a simple heating up water experiment. The trick is that the water is inside the corn kernel. Who knew?


Rock Candy Geodes

a geode can be an edible science experiment if you do it right.
How to Cook That

Take the traditional rock candy string experiment to the next level by making these tasty geodes. It’s all about crystallization achieved through total saturation with this experiment. Find out how to make these realistic looking candy creations at How to Cook That. Rock on!

Brain Boost Factor: They'll learn all about how crystals form and this one gives curious cuties the chance to see them life-size without using a microscope.

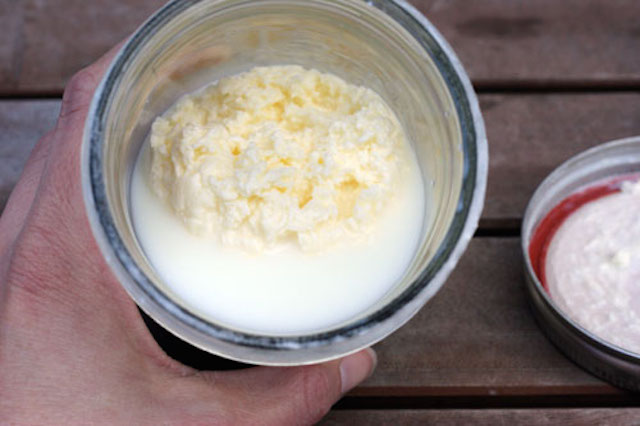
Churn Butter and Whip Cream

Make and Takes

Churn Butter and Whip Cream

When a trip to colonial Williamsburg isn’t on the menu, you and your little chef can make your own homestead-style whip cream or butter by simply shaking and shaking and shaking heavy cream. Make and Takes has everything you need to turn back the clock in your own kitchen.

Brain Boost Factor: Churning butter and whipping cream is all about agitating the fat molecules (those pesky buggers) and getting them to eventually clump together. The longer you shake ‘em up, the stickier they get.


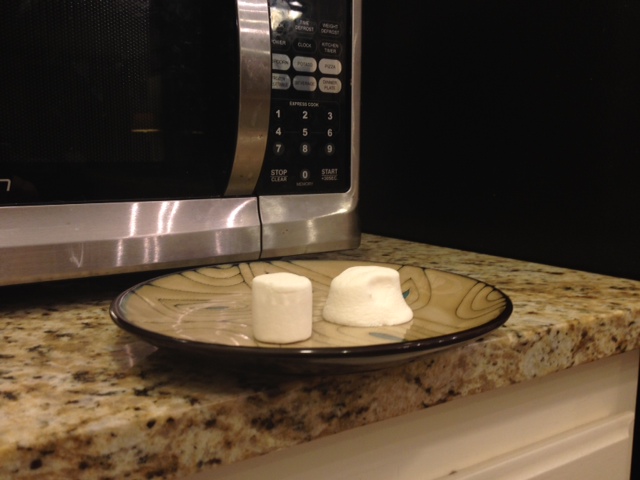
Microwave Marshmallows

Put marshmallows in the microwave and your little scientists will be amazed at the crazy antics that follow. They puff up. They shrink back down. And they still taste good. The Exploratorium spells out the necessary steps for this simple (tasty) experiment.

Brain Boost Factor: The thrilling combo of sugar, water and air do amazing things when heated up and cooled off quickly.


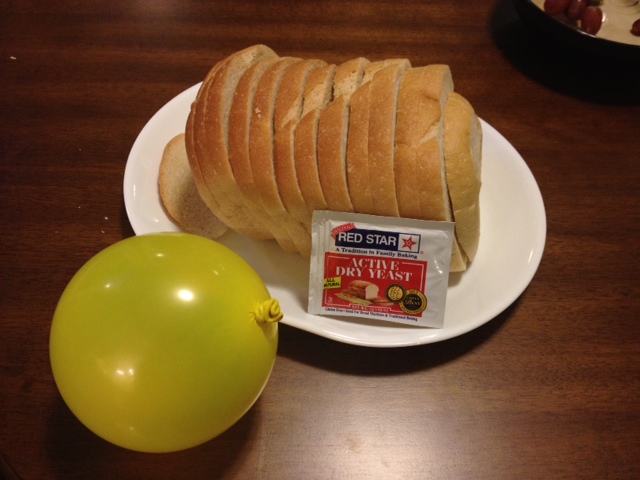
Bake Fresh Bread

Allison Sutcliffe

Break out your favorite bread recipe (and that bread machine that’s collecting dust in the cupboard) to cook up a loaf alongside this experiment, explained on Teach Beside Me. It’s an “inner working” visual that will certainly make an impact on your little cooker.

Brain Boost Factor: As yeast munches on the sugars in the bread, the gasses released perk it up, up, up!

Shake Up Ice Cream

no bake desserts
iStock

\You don’t need all 31 flavors to start in on this experiment with your kidlet. Get the step-by-step on shaking out single serve scoops in re-sealable plastic bags on Instructables. Be sure to have fresh fruit or other treats ready to mix in when the experiment is over. Yum!

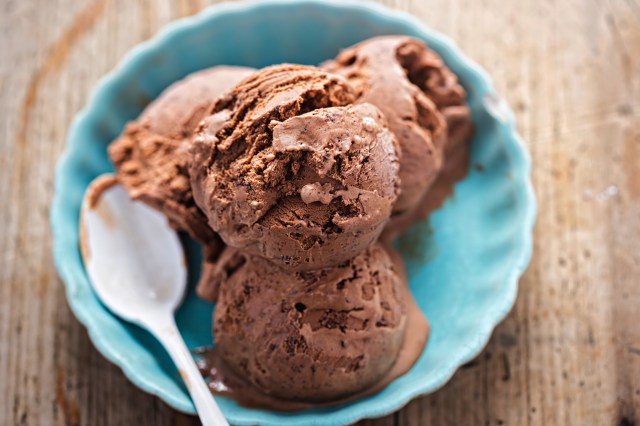
Brain Boost Factor: The salt does most of the work in this frosty experiment. It lowers the freezing point of the outside ice enough so that the milk mixture inside becomes cold and creamy. Delish!

Squeeze an Egg

Science Sparks

This egg-cellent experiment described on Science- Sparks will have everyone cringing when little hands put the big squeeze on a fragile egg. Try as you might, that baby won’t break. Until you crack it into a pan to make breakfast for dinner afterward.

Brain Boost Factor: The egg’s shape is clearly stronger than it looks.


Element Cookies

 Life at Cold Feathers Farm

Let your little chemists study the periodic table and make a tasty treat, all at once. Prep a batch of (extra big) sugar cookies, let the kids choose an element at the beginning of the periodic table, then set out frosting and M&Ms to re-create the atomic layout. Easy! Get the details over at Life at Cold Feathers Farm.

Brain Boost Factor: Giving your kids a visual (and tasty) version of nature’s building blocks is an easy intro to the physical sciences.


Test Grape Juice

Allison Sutcliffe

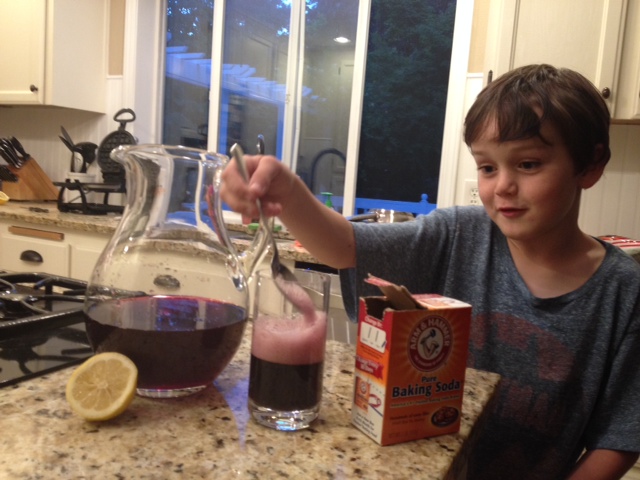
If you didn’t know grape juice was an indicator before, you will after walking your sidekick through this experiment found on education.com. Simply mix up some juice, add in a few extras and watch what happens. It’s a juicy revelation!

Brain Boost Factor: Recognizing acids and bases is the name of this color-changing game.

Regrow Leftovers

Karolina via Pexels

Insert a little plant science into the mix by re-growing food from scraps. Think onions, potatoes, and lettuces for this one (psst… green onions are a super easy, fast option). Get the low down on all that recycled goodness at Mrs. Happy Homemaker. Since plants need water and sunlight to grow, exposing scrap roots to that winning combo helps them recharge.

Make Fizzy Lemonade

Learn with Play at Home

Plain old fresh-squeezed lemonade is so last year. Boost the fun quotient and learn a simple science concept simultaneously when you recreate this edible Fizzy Lemonade drink from Learn With Play at Home. It’s super easy to mix and little sippers report it’s pretty tickly too. A great alternative to the baking soda-vinegar volcano, it shows kids what happens when an acid and base are mixed together. 


Gumdrop Structural Challenge

The Homeschool Scientist

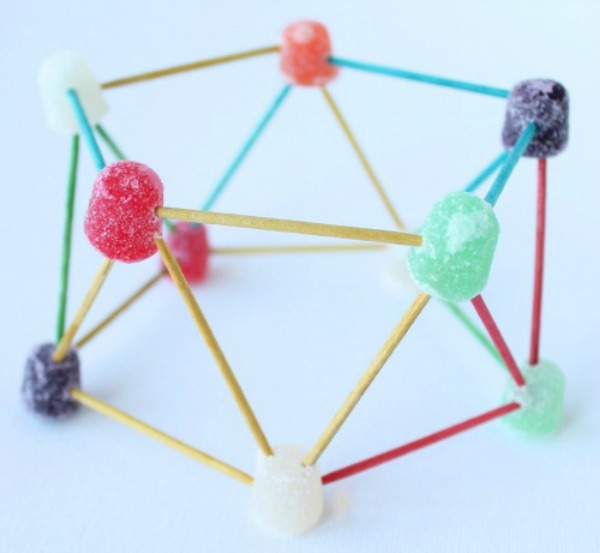
'Tis the season for gumdrops and this classic structural engineering challenge uses just two ingredients: toothpicks and candy. We’re particularly fond of this one from The Homeschool Scientist because it helps you explain what the concepts (engineering, load distribution, physics, shape comparison) are to your kiddos while they are building it. doing it. Visit The Homeschool Scientist to get going. And click here for five more gumdrop-themed challenges. 


Bake Hygroscopic Cookies

This simple science experiment is best when you check in on it the next morning. Bake up a batch of cookies, then place them in an airtight container with a piece of fresh bread. Watch as the cookies stay straight-from-the-oven soft thanks to the moisture of the bread (The sugar in the cookies is hygroscopic, which means it absorbs water molecules out of the bread). The best part? Getting to eat the cookies!


Dissolving Candy Hearts

Emily Ranquist via Pexels

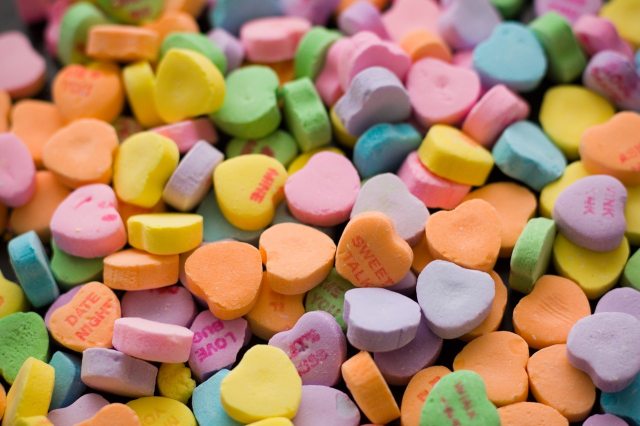
Explore the science of your child's fave Valentine's Day candy and use up those leftovers STAT. Toss them into warm water and wait (and watch, of course) to see what happens. Repeat the science experiment with cool water, veggie oil, milk or any other liquid and record what caused the candy to dissolve the fastest, which took the longest. 

A Smell Challenge

Babble Dabble Do

Teach kids the importance of smell with this activity that asks them to use only their noses to identify objects. Can they sniff out the fish oil over the garlic cloves? The lemon juice over the orange oil? Homeschooling blogger Ana has the instructions at Babble Dabble Do.


The Juice-Tasting Challenge

Susanne Jutzeler via Pexels

Tummy’s rumbling–it’s time to eat! Did you know that you “eat” with your nose and eyes as well as your mouth? It’s true. Put your family’s snifffers and peepers to the test with this juice-guessing game.

You’ll Need:
Masking tape
4 glasses
Pen and paper
4 flavors of juice
4 food colorings

How to:
1. Stack a piece of tape on the bottom of each glass and number them one to four, making sure your partner can’t see the numbers. Pour one type of juice into each glass.

2. Send your partner out of the room. Drip a different food coloring into each juice and stir so your partner can’t recognize the juice by its color alone. Record the number, juice type, and color in each glass on a piece of paper.

3. Call your partner back. Tell her to hold her nose, sip from each glass, and guess the juice If she’s like most people, she’ll be kind of confused–her eyes and tongue give her two conflicting flavor messages.

4. Ask her to unplug her nose, close her eyes, and sniff the juice before drinking it. Her guesses should be on target now. All hail the mighty schnoz!

Reprinted from Exploralab: 150+ Ways to Investigate the Amazing Science All Around You. Available online. $24.95.


Invisible Licorice

From Candy Experiments 2 by Loralee Leavitt/Andrews McMeel Publishing, LLC.

Did the candy melt or disappear? Your sweetums might think it’s magic, but it’s really all about how oil redirects light, causing half the candy to disappear! Click here for the instructions on how to recreate this mind-warping experiment.


Taste Test

Education.com
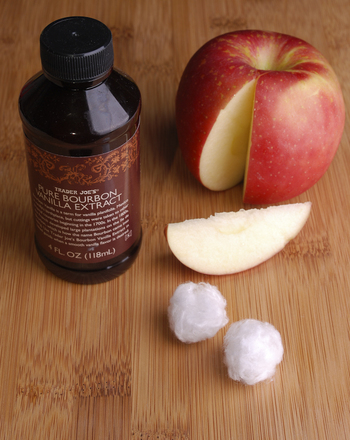
After figuring out this simple experiment your sidekick will want to play Houdini with all her friends. All it takes is an apple, vanilla extract, and a cotton ball to pull one over on her tastebuds. Abracadabra!


Rock Candy

Jessica B via Flickr

A Lesson in: Crystallization.

Be careful: The water only has the power to make the sugar crystals “invisible” when it’s piping hot. After the water cools down and evaporates, the sugar turns back into a solid. And with a little help of your sugar-soaked string, the crystals will find a home to grow upon and become rock candy. Learn how to make your smart sweets with these instructions from the Exploratorium. 
Messiness factor: Two sponges.

Magnetic Cereal

Rookie Parenting

A lesson in: Magnetism.

You’ve probably seen the label that says “fortified with iron” on your cereal box, but how much iron is actually in your cereal? Is there enough to cause a magnetic reaction? This super easy experiment doesn’t require too many fancy ingredients (cereal + magnet) which means you and the kiddos can try it right away. The results may surprise you! Get the how-to at Rookie Parenting and get started!

Messiness Factor: Two sponges.


People are stuck at home missing their favorite foods. Luckily some brands have been sharing their fan-favorite recipes. Now Ben & Jerry’s is stepping up to satisfy our sweet tooth. 

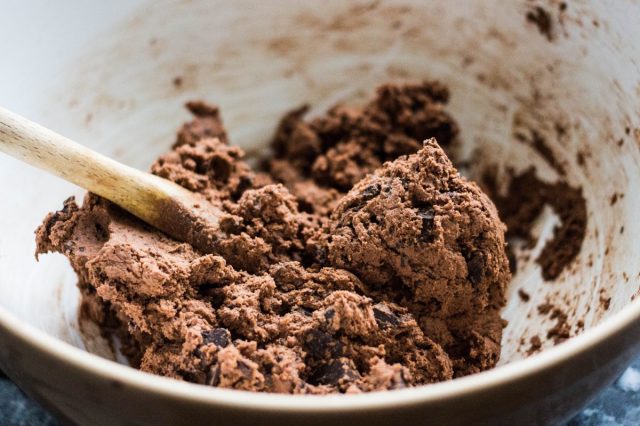
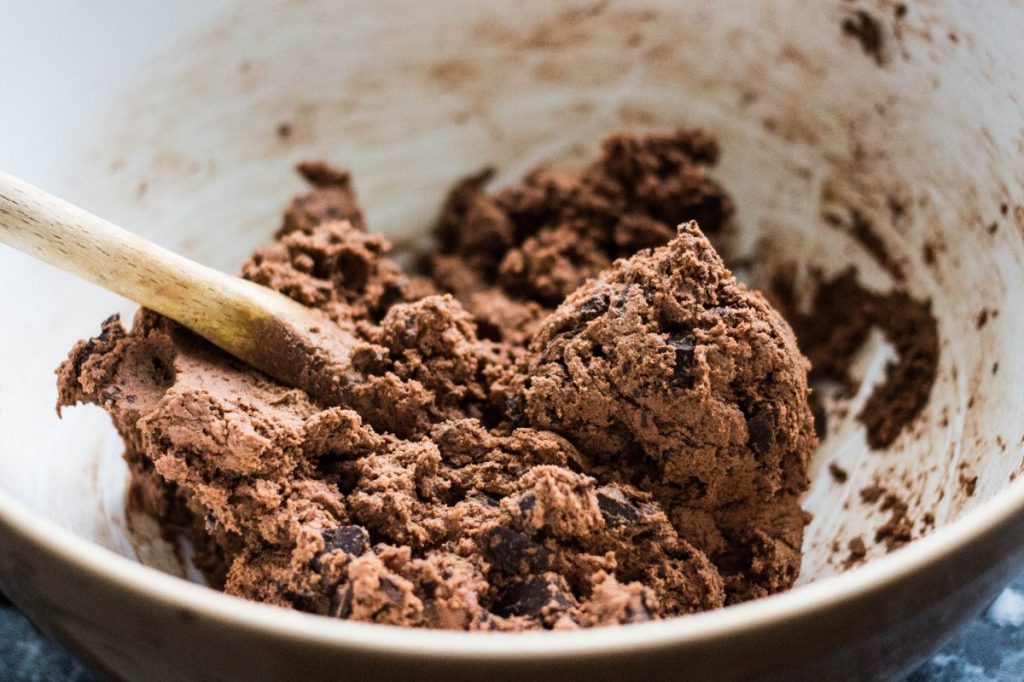
Ben & Jerry’s just shared their edible chocolate chip cookie dough recipe which is the same one used for the frozen balls found in their popular ice creams.

Cookie dough

INGREDIENTS

8 tbsp. unsalted butter (1 stick), room temperature
1 cup brown sugar, packed

2 tbsp. heavy cream

1 tsp. vanilla extract

½ tsp. kosher salt

1 cup flour

 ½ cup chocolate chips

Prep Time: 15 minutes

Total Time:  15 minutes 

Total Yield: About 2 cups


Step 1: Gather all your ingredients.

Step 2: First, heat treat the flour to ensure it is safe to eat. Do not skip this step, untreated flour can contain contaminants and is not safe to eat. Place the flour in a microwave safe bowl and microwave on high in 30-second intervals, stirring in between. Use an instant-read thermometer to ensure that the flour reaches 165°F throughout.

Step 3: In a stand mixer or using a hand mixer, beat together the butter and sugar until light and fluffy.

Step 4: Add the vanilla, cream, and salt. Mix to combine. Then add the heat treated flour and mix to incorporate.

Step 5: Fold in the chocolate chips.

Step 6: Serve and enjoy! 

Store your uneaten edible cookie dough in an airtight container in the refrigerator for up to one week, or in the freezer for up to six months.

—Jennifer Swartvagher

Featured photo: Charisse Kenion on Unsplash

RELATED STORIES

Disney Shares Recipe for Tasty Plant-Based Cookie Fries

Now You Can Make Disney’s Grilled Three-Cheese Sandwich at Home

Disney Releases an At-Home DIY Dole Whip Recipe

Ice cream…the ultimate in summer sweet treats. Nowadays, even little (or big!) fans who struggle with allergies or upset tummies can enjoy an ice cold dish. We’ve rounded up 15 delicious concoctions from around the web packing just as much flavor as traditional ice cream—all without a drop of dairy. Your only problem will be trying to put down the spoon.

Dole Whip

Even if you can’t swing a trip to Disneyland this summer, you can still pretend you’re hanging out with Mickey by making Real Food Real Deals’ rendition of the cult favorite theme park dessert. No ice cream maker needed—just a blender and a shallow, airtight container for freezing. Click here to grab the full recipe.

photo: Real Food Real Deals

Will you whip up one of these fabulous frozen treats this summer? Share with us in a Comment! 

—Susie Foresman

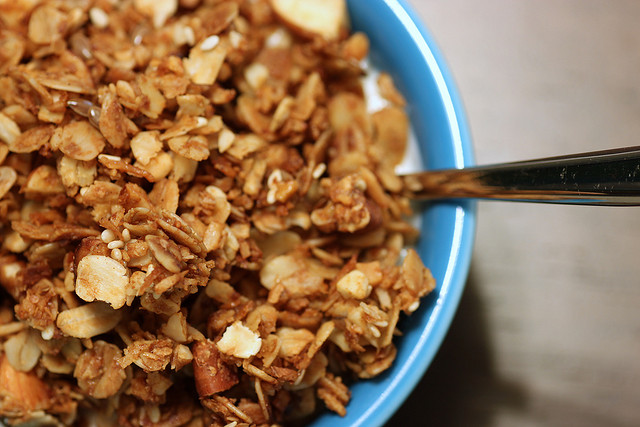
Did you know that granola is one of those foods that’s just as easy to make (if not easier) as buying it at the store? The next time you’re craving a healthy snack whip up a batch of this granola that takes less than five minutes to prep. Customize the ingredients to your taste with nuts, dried fruit and even chocolate chips. Serve with fresh fruit and yogurt or throw it in a ziplock bag for a mid-afternoon snack. You really can’t go wrong.

granola

Ingredients:
3 cups of old fashioned rolled oats
1/3 cup of vegetable oil
2/3 cup of honey
an assortment of dried fruit (we used apricots, cherries and cranberries)
an assortment of nuts (we used 1 cup of sliced almonds)

Method:
1. Whisk together honey and vegetable oil. Mix together rolled oats, nuts (if desired) and oil/honey mixture with a wooden spatula in a bowl until the oats are coated.

2. Spread oats mixture on a parchment paper lined baking sheet and bake between 25-30 minutes at 325 degrees. It’s very important to check and mix the oats every 10 minutes to ensure the mixture won’t burn. If your oven runs on the hot side, you may only need to cook the oats for 20-25 minutes.

3. After the mixture turns a nice, golden brown (about 25-30 minutes) remove the baking sheet from the oven and let cool for 5 minutes.

4. Chop up the dried fruit and any additional nuts and combine. Store in an airtight container.

Have you tried making granola at home? 

A special thanks to Food Network’s Ina Garten — Red Tricycle’s Managing Editor adapted this recipe and has made this granola multiple times recently. It’s delicious mixed with yogurt and fresh fruit. 

photo: notahipster via flickr