When they’re not having fun finding pots of gold or searching for leprechauns, your little learners will love trying out some St. Patrick’s Day science activities! From rainbows to shamrocks, there is so much to learn from the icons surrounding St. Patrick’s Day. If you want more, check out our roundup of fun and easy science experiments for kids.

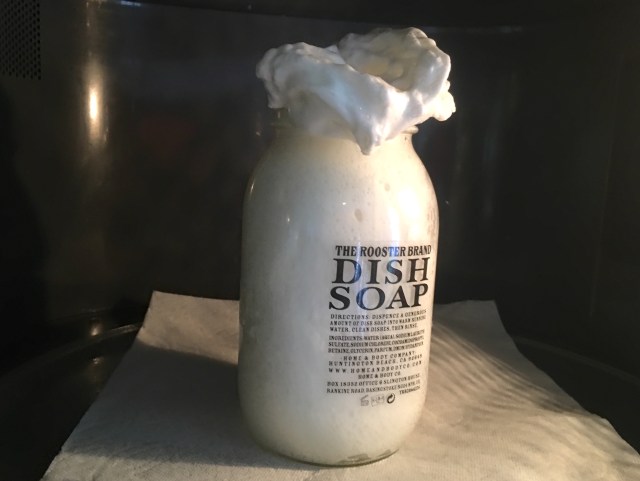
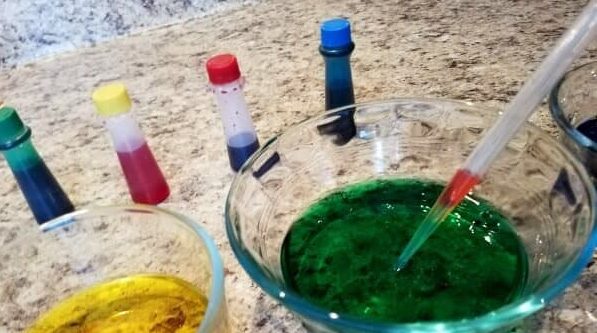
Make Leprechaun Slime

Learn about viscosity by making leprechaun slime complete with gold flakes!

Make a Leprechaun Trap

little boy who made a leprechaun trap
Amber Guetebier

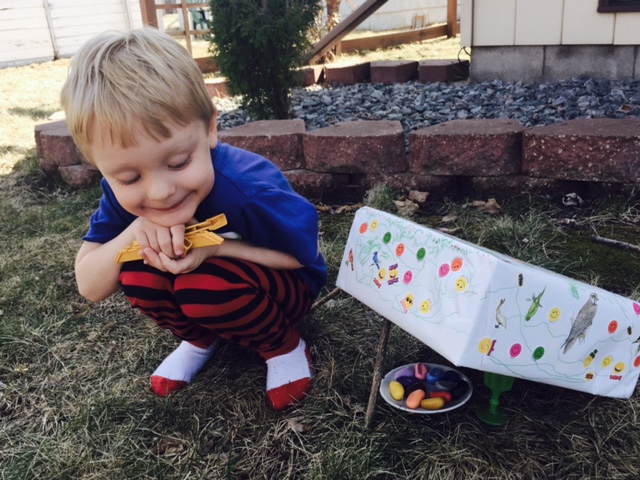
This is one of our favorite St. Patrick's day activities for preschoolers. Bust out your STEM hats and plan how you are going to catch your very own leprechaun. Start with a shoebox and see where the imagination takes you! 

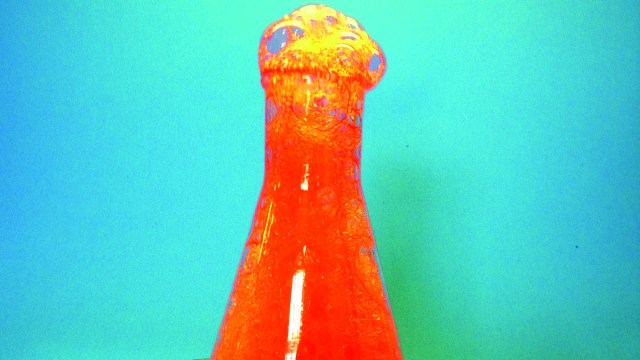
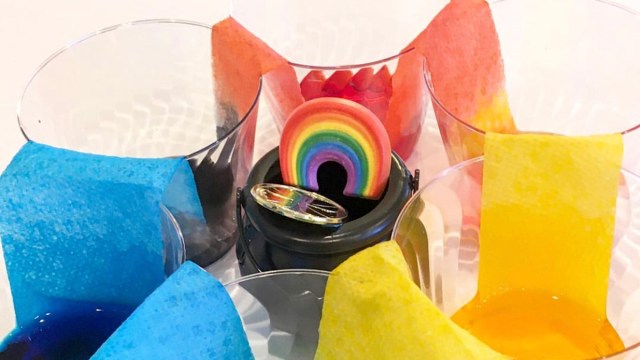
Create a Fizzing Rainbow

We love this colorful idea where you create your own fizzing rainbow. Be sure to put a paper towel underneath your creation. You can dry it in the sun and hang it in your window!

Related: Everything You Need to Trap a Leprechaun This St. Patrick’s Day

Crystal Shamrocks

Little Bins for Little Hands

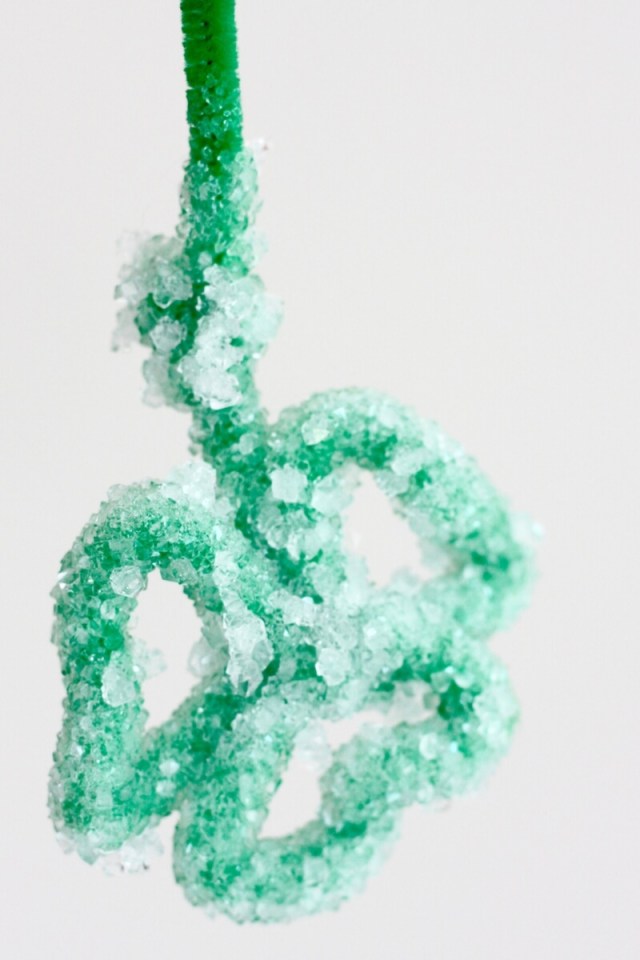
You can't celebrate St. Paddy's Day without a few shamrocks! This year, let science take the wheel and grow a few crystal shamrocks with a few easy steps from Little Bins for Little Hands. All you need is a few pipe cleaners and borax and you'll be on your way in no time.
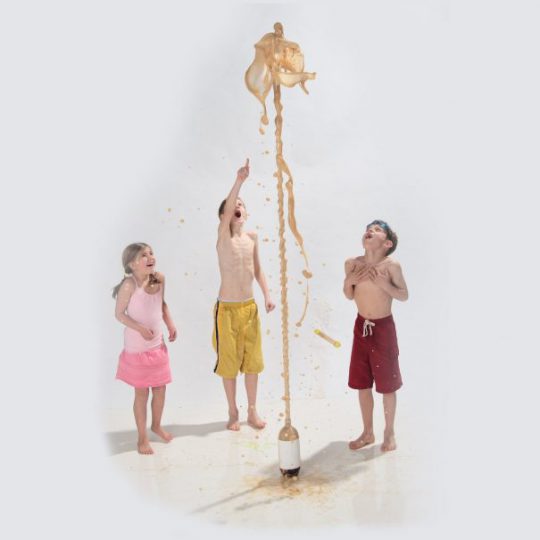
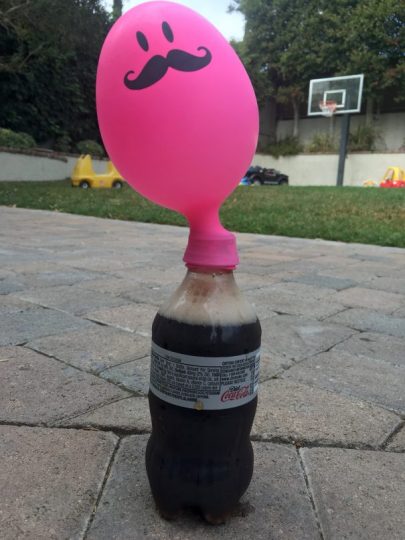
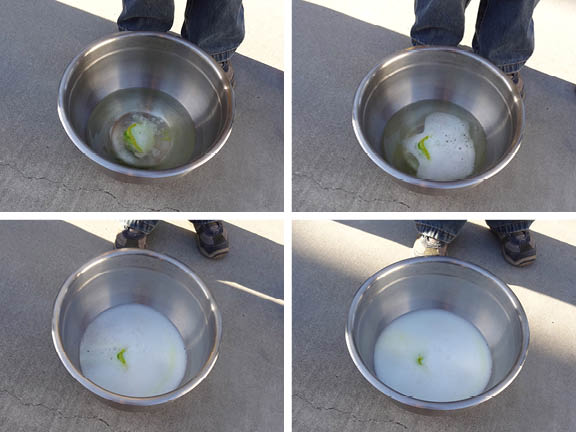
Leprechaun Sand

Live Well Play Together

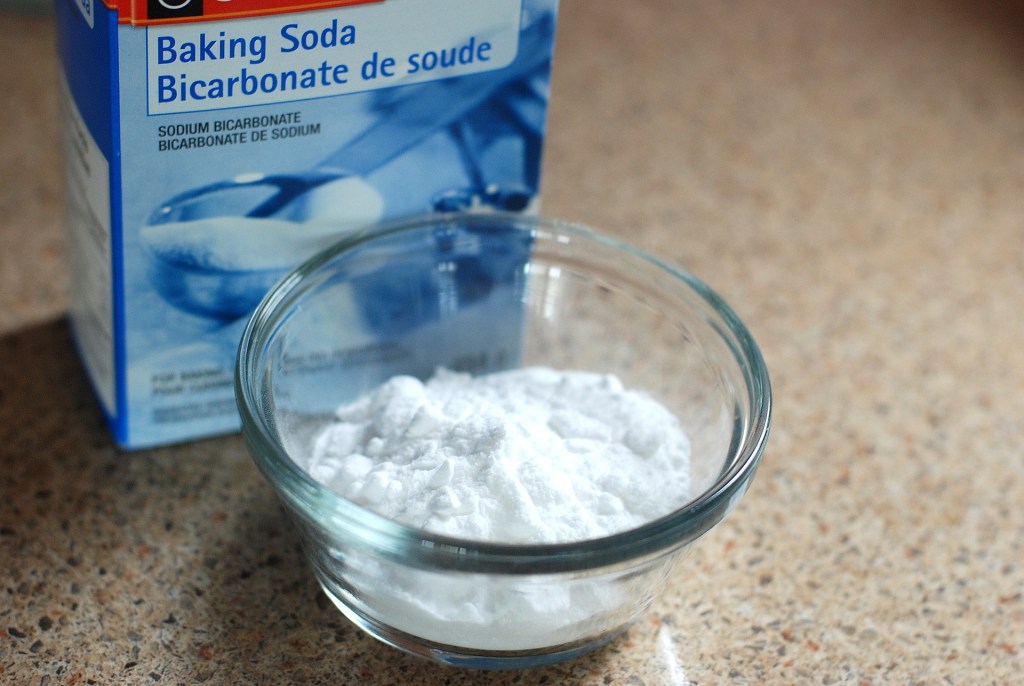
This messy but fun activity from Live Well Play Together lets kids see how baking soda and vinegar interact, in St. Patrick's Day style. With minimal supplies, this is a perfect afternoon activity that involves basic household supplies you probably have already.

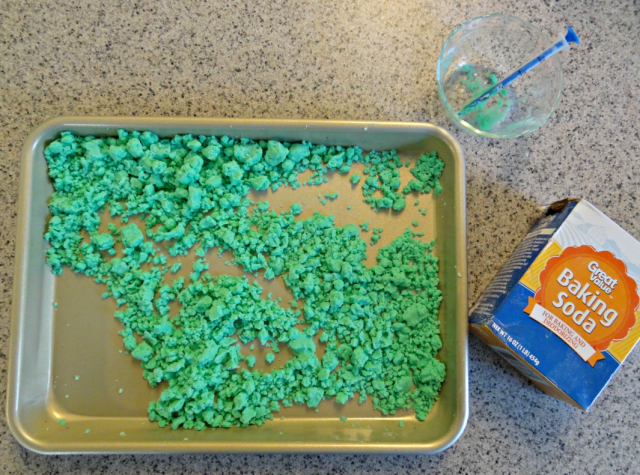
Magic Leprechaun Rocks

Gift of Curiosity

These homemade leprechaun rocks from Gift of Curiosity are a perfect blend of educational and fun! The "magic" rocks are made from green-dyed baking soda and water that conceal a gold coin. You'll have the ultimate scavenger hunt when the kiddos "wash" this at the end!

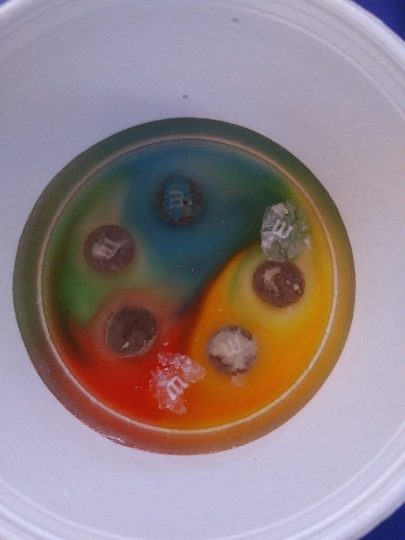
Rainbow Density Experiment

123 Homeschool 4 Me

Let rainbows do the talking with this educational experiment from 123 Homeschool 4 Me. Your littles will learn all about density and liquids with this simple activity that involves household supplies you probably already have!

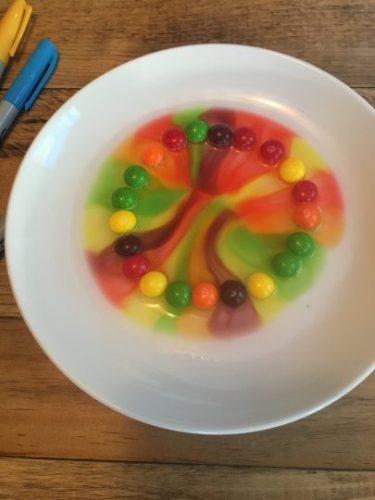
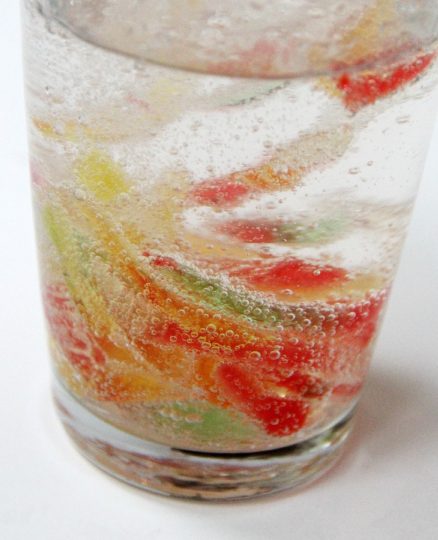
Skittles Rainbow Science Investigation

Taste the rainbow! This delicious St. Patrick’s Day activity for preschoolers from Fantastic Fun & Learning uses everyone’s favorite rainbow candy to explore the impact of water and how it can physically change an object. This is a great (and tasty) afternoon activity for young learners.

Walking Water

This festive-colored experiment is perfect for St. Patrick’s Day. Let your kiddos learn the science behind “capillary action” and how it plays into the real world. Get more details from Walking Cartwright here.

Related: 23 St. Patrick’s Day Jokes for Your Little Leprechaun

Homemade Spectroscope

Buggy & Buddy

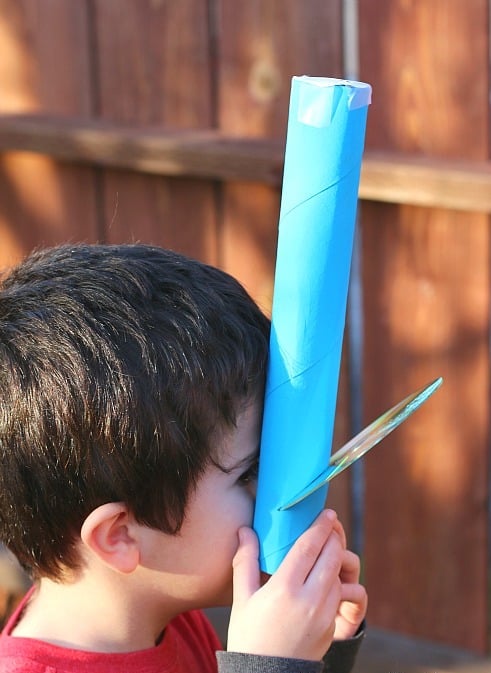
When you craft your own spectroscope, you'll get to see all sorts of rainbows! This easy idea from Buggy & Buddy uses household supplies that come together in a jiffy, but provide hours of fun and learning.

Rainbow Shamrock Salt Painting

Rhythms of Play

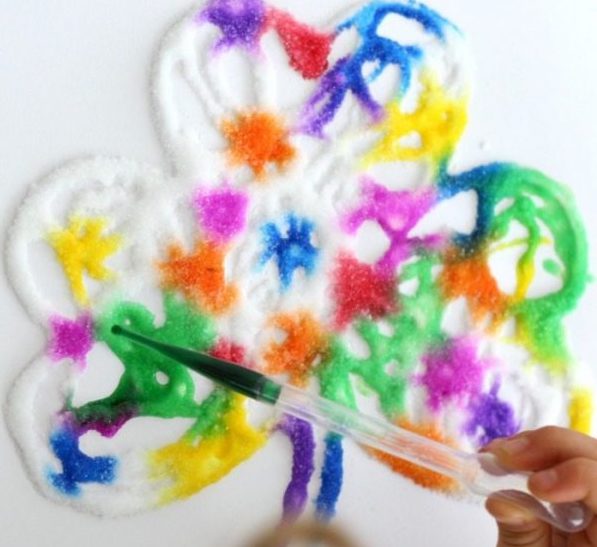
Learn all about the shapes of shamrocks and how colors travel down salt in this colorful project from Rhythms of Play. Kids will exercise their fine motor skills and artistic prowess in this fun St. Patrick's Day science activity. 


Got too much Halloween candy hanging around? Try these Halloween science experiments to use up that candy you don’t want to eat

Looking to unload some of your kids’ massive candy stash? Make like Bill Nye and use it up in Halloween science experiments. From melting marshmallows to growing Gummy Bears, make good use of your leftover Halloween sweets with these 10 yummy science experiments for kids. Bonus points for making a hypothesis and taking notes on each science project!

Candy Reactions

https://www.instagram.com/p/CHMAt2cFgBs/?hidecaption=true

Try putting certain candies like candy corn into test tubes and see the different reactions! Try it with vinegar, soda, or whatever you can come up with.

Skittles Rainbow 

Melissa Heckscher

You'll be doing more than just tasting the rainbow. Put some Skittles into water and marvel as the colored coating dissolves into an Instagram-worthy design. Head to Little Bins for Little Hands to get the science behind the sugar.

Exploding Peep Geysers

Halloween science Experiments
Melissa Heckscher

Poor Peeps; they're just so much fun to torture. This easy science experiment teaches your kids a little bit about how microwaves work—at the expense of a few marshmallow candies. Just put those Peeps into a bottle, stick ‘em in the microwave, and watch as they erupt. It's quick and sticky fun, but kids will love watching those sugary faces expand and explode. Get all the details at Housing a Forest.

Related: Simple Science Experiments with 5 Supplies or Less

Make a Mentos Geyser

Steve Spangler's Geyser Tubes on Amazon

Kids will happily hand over an entire pack of Mentos to watch a soda geyser explode skyward. Just drop a few Mentos into a bottle of soda and stand back! Charlene at My Frugal Adventures explains how it's done.

Gummy Bear Science

Halloween science experiments
Melissa Heckscher

Plunk a few Gummy Bears into different solutions and let them sit for a few days to see what happens. Kids will love checking in on their bears every day for a status update. Get more ideas on how to do it here.

Related: 6 Ways to Make Ice Cream without an Ice Cream Maker

Take the “m” Off the m&ms

Halloween science experiments
Holly Hopson

M&Ms may not melt in your hands, but it turns out they may not last so long when plopped into a cup of water. Kids will love watching the "m" peel off their m&ms; parents will love the patience this experiment requires of their little scientists. Little Bins for Little Hands has the scoop.

Dancing Gummy Worms

Bitz 'n Giggles

Observe as a simple chemical reaction makes a bunch of yummy Gummy Worms come alive. Younger kids will think you've actually put life into candy; older kiddos will be simply mesmerized. Sara at Bitz 'n Giggles takes you step by step through the process (Note: Make sure your baking soda is fresh; we tried this with long-opened baking soda and our worms hardly moved).

Jellybean Taste Test

Halloween science experiments
Christie at Childhood 101

Your child might say he likes blue jelly beans the best, but is it a taste thing? This experiment explores the relationship between sight and taste as kids are asked to identify the kind of bean they’re tasting without seeing it. Christie at Childhood 101 has more.

Related: Sink, Swim, & Float! 6 Sensational Science Experiments

Sink or Float - Hypothesis Tester

Halloween science experiments
Melissa Heckscher

This experiment lets kids make a hypothesis and test it. Which candies will sink, which will float— and why? Get more ideas here.

Balancing with M&Ms

Inspiration Laboratories

Give kids a simple physics lesson with this experiment that lets them balance various objects against a handful of m&ms. Another opportunity for kids to hypothesize— and a great excuse for them to eat enough m&ms to make the scale even. Get inspired from Mama Trisha at Inspiration Laboratories.

Related: This Simple Static Electricity Experiment will Impress Your Kids

Halloween science experiments
Melissa Heckscher

Candy + Balloons + Soda = ?? 
See what happens when you fill a balloon with Pop Rocks and dump it all into a bottle of soda. Then, try it again with Nerds candy. Your kids will be amazed at which one blows the bigger balloon. Get the simple steps over at Learn Play Imagine.

You’ll want to make this yummy snack all year

Pumpkin bread that’s moist, flavorful, and easy to make? Yep, it’s true! This easy pumpkin bread recipe is perfect for the festive holiday season, especially when your time is limited since there is very little prep time or dirty dishes involved. Try making the pumpkin bread in a regular loaf pan, or if you’re looking for a unique present, bake the bread in a coffee tin or in old soup cans. Then wrap it up with cellophane or tissue paper and you’ve got yourself a great (and delicious) gift.

Easy Pumpkin Bread Recipe Ingredients: 

1 (15 ounce) can of pumpkin puree
4 eggs
1 cup vegetable oil
2/3 cup water
3 cups white sugar
3 1/2 cups all-purpose flour
2 teaspoons baking soda
1 1/2 teaspoons salt
2 teaspoon ground cinnamon
2 teaspoon ground nutmeg
1 teaspoon ground cloves
1 teaspoon ground ginger

**this recipe will yield three 7″ x 3″ loaf pans. We suggest cutting the recipe in half if you don’t want that large of a portion. If you do cut the recipe in half, it will make one regular loaf.

Method:

1. Preheat oven to 350 degrees F (175 degrees C). Grease and flour three 7×3 inch loaf pans.

2. In a large bowl, mix together pumpkin puree, eggs, oil, water, and sugar until well blended. In a separate bowl, whisk together the flour, baking soda, salt, cinnamon, nutmeg, cloves, and ginger. Stir the dry ingredients into the pumpkin mixture until just blended. Pour into the prepared pans.

3. Bake for about 50 minutes in the preheated oven. Loaves are done when a toothpick inserted in the center comes out clean.

Recipe adapted from Allrecipes.com


Kick the Bisquick to the curb

Give the pre-made pancake mix a break with this fast and made-from-scratch buttermilk pancake recipe that even the most pancake-challenged parents can easily make. Get the little ones in on the fun by letting them help pour the ingredients into the bowl and sprinkle fresh blueberries into the batter. The whole family will be digging into these yummy cakes within 20 minutes. If you want to get fancy, check out our round-up of creative pancakes, and pass the maple syrup!

Buttermilk Pancake Recipe: Ingredients

1 ½ cup flour

1/3 cup sugar

2 teaspoons baking powder

½ teaspoon baking soda

½ teaspoon salt

1 ½ cup buttermilk

2 eggs

3 tablespoons canola oil

1 teaspoon vanilla

Instructions:

1. Get ready by taking out all of your ingredients and placing a griddle or large pan over medium-low heat.  You’ll need 2 large bowls, measuring cups, measuring spoons, a whisk, and a large spoon.

2. In bowl number one, pour and mix all your dry ingredients together (flour, baking powder, baking soda, salt).

3. In bowl number two, pour and mix all your wet ingredients together (buttermilk, eggs, canola oil, vanilla) and whisk.

4. Pour bowl number two (wet ingredients) into bowl number one (dry ingredients) and mix gently with a large spoon.

5. Butter the griddle or pan and spoon pancake batter onto the pan in little circles. You can even experiment with making shapes (mickey mouse is a popular choice).

6. Cook each side until golden (you’ll see bubbles begin to form when it’s time to flip). Top with butter and maple syrup and enjoy.

Related: 10 Make-Ahead Breakfast Recipes for Kids to Simplify Your Mornings

Here’s what all those bubbles and foam really mean

As schools start to let out for the summer, parents everywhere are starting to mentally prepare themselves for occupying their kids at home. Get started early with this fun demo video for the beaker volcano science project from The Dad’s Book of Awesome Science Experiments.

The science behind, “But, why?”

Don’t get caught off guard by your kids’ science questions! You and your family can learn about chemistry with this amazing beaker volcano science project! Best of all, this experiment can be tossed together with just vinegar, baking soda, red dye, a baker, toilet paper, and string. This is a science experiment that also expertly mimics what happens under the earth’s crust to create volcanic eruptions.

Volcano Time!

If you grew up watching endless Brady Bunch reruns you’re probably familiar with Peter Brady’s volcano—a mud-spewing, steep-sided science project that sent showers of muck and sludge all over Peter’s sister, Marsha, and her snooty friends. It was the coolest thing ever.

There’s a good chance that this one episode alone launched our love affair with kitchen-sink volcano projects—an experiment so simple that you and your lab partner can most likely do it right now with stuff you already have in the kitchen. All you really need is vinegar, baking soda, and a bottle to mix them in, but it is much cooler to use good ol’ fashioned backyard dirt to construct a volcano model around the bottle first and then conduct the experiment. Either way you do it, this is a science experiment with serious thrills. But it also expertly mimics what happens under the earth’s crust to create volcanic eruptions.

Here’s Why the Volcano Science Project Works

When the solid baking soda (sodium bicarbonate—a base) mixes with the liquid vinegar (acetic acid—a weak acid), a chemical reaction occurs and forms a gas (carbon dioxide). All those bubbles and foam? They’re evidence of gas, and as the gas expands, it looks for an escape route for all that built-up pressure. So the foam and bubbles rise until they flood out of your bottle’s opening. Pretty much the same exact thing is happening under the earth right now. The earth’s crust is made up of many sections of super thick shell—65-plus miles thick!—called tectonic plates that are always moving, very slowly, over the much, much hotter inner earth. Most of the world’s volcanoes are found where two or more of these tectonic plates meet one another. Sometimes those plates shift and sometimes they collide, forming escape routes in the earth’s crust for molten rocks and gas, called magma. Much like the carbon dioxide in your baking soda–vinegar experiment seeks the quickest escape route to relieve pressure, the gases in the underground magma do the same thing before erupting out of a volcano.

Not all eruptions are alike, however. Sometimes the gases in the magma are easily released from the earth’s crust and the result is a slow, oozing spread of superhot lava. But sometimes the gases stay trapped beneath cooled magma and rock building up pressure until they erupt in violent explosions that can send ash and boulders flying up to 20 miles high. In fact, airplane pilots keep track of volcano activity around the earth, just to be sure they don’t fly into clouds of dangerous ash.

Here’s What You Need for a Volcano Science Experiment

Baking soda
Vinegar
A bottle (a good vase with a wide bottom and slender top also works well, but use whatever you can find)
Red food dye String Toilet paper

Here’s What You Do

1. First add the vinegar to your bottle and dye it red with food coloring. Then, rip out a few sheets of toilet paper and make a pouch for the baking soda. Use your string to tie the pouch and then insert the pouch into your bottle, using the bottle cap to hold the other end of the string so that the pouch dangles above your “lava.” (See Fig. 1.)

2. If you’re feeling super science-y/crafty, let your lab partner shape a volcano model out of backyard mud and dirt around the bottle. Note: you don’t have to do this, but go big or go home, right?

3. When your volcano model is ready, lift the cap and watch the pouch drop into the lava. It will foam up slowly, mimicking the slow buildup of earth’s gases, until the vinegar fully soaks the tissue paper. Then, the fun really begins, as the foam begins to climb the bottle, looking for an escape route. Just stand back, and watch the foam erupt. It’s really that easy!

Want More?

There are many, many ways to perform this experiment, so don’t be afraid to get creative. Try mixing the vinegar and baking soda in a bottle, and then quickly place a balloon over the bottle opening. While this doesn’t create a lava explosion, the gases will inflate the balloon. Pretty cool, right? Or, put baking soda in a small snack-size zip bag and seal it tightly with a bit of air in the bag. Place the baking soda bag in a larger zip bag that is filled with vinegar and seal that bag tightly, with as little air as possible in the big bag. Now use your fist to smash the tiny baking soda bag and stand back. You just made a sandwich bag bomb, using the same chemical reactions as your volcano.

Related: 60+ Science Experiments for Kids to Try at Home

Mike Adamick is the author of The Dad's Book of Awesome Projects, The Dad's Book of Awesome Science Experiments, and The Dad's Book of Awesome Recipes, and a stay-at-home dad who writes for the Adventures in Learning science blog at PBS.org, the San Francisco Chronicle, KQED Radio, Disney's parenting website, Babble.com, and the Daddy Issues column on Jezebel.com.

Did you run out of food coloring? Are you unhappy with your crust? Do you not have the right tools? It’s no problem with these great baking hacks

It’s that most wonderful time of the year: holiday cookie time! This year, don’t dread it, own it with these Christmas baking hacks to salvage any quandary. From a baking powder substitution and what to do if you don’t have a rolling pin to what to use in place of eggs or butter, we’ve got the goods on making goodies.

iStock

1. Holiday baking often calls for some pepperminty goodness, but who keeps peppermint syrup on hand for once-a-year baking? (No, Schnapps doesn’t count). Use an abundant ingredient: peppermint candies. Just put them in a Ziploc bag and smash them to bits. A great stress reliever!

2. Use tongs to make an even crimping pattern along the edge of your pie crust.

3. No rolling pin? Try this rolling pin hack: Use a wine bottle as a rolling pin (no, it doesn’t have to be full!). 

4. Fill a wine bottle with ice (and cork well) to keep pie dough chill while rolling it out, great for when it's hot or humid. 

5. Sub a little of your water for vodka and your pie crust somehow comes out flakier. And now you have an almost-full bottle of vodka on hand. Just sayin'...

Related: Holiday Treats You Can Have Delivered

A pile of red, green, and white star and present shaped Christmas cookies
rawpixel via Unsplash

6. Add a marshmallow to the top of your cupcakes five minutes before you take them out of the oven for a gooey, perfect topping—no frosting required.

7. If you run out of food coloring, use Jello to tint decorative icing.

8. Looking for a natural way to dye when baking? Check out these simple recipes for making natural food coloring yourself. 

9. Fill an oral syringe with thin icing to get precise lines and letters when decorating. 

10. If you do have piping tips, fill two piping bags or Ziplocks with different colored frosting. Don't overfill the bags; now put both bags into one tip, and you'll squeeze out a swirl of color.  

Related: 38 Classic Holiday Cookies to Try This Year 

iStock

11. Put a pan of water in the bottom of the oven to give your bread a crisp, browned crust. You can also use a spray bottle with water; spritz the oven to create steam.

12. Substitute butter in your next boxed cake recipe for a super-rich and luscious cake. You can even just melt it to make sure it incorporates easily.

13. You can also sub avocado for butter if you want something dairy-free and heart-healthy. Use one avocado to one stick of butter ratio. And if you run out of butter (or avocado), you can use applesauce in its place.

14. When making pies, freeze your butter, and then grate it into your flour mixture, instead of trying to crumble it with your fork. This will help integrate it more evenly and keep the butter cool.

15. Soften your butter BEFORE you mix it into your cookie dough batter, and try using salted butter instead of sweet cream.

Measuring spoons with baking ingredients are lined up on a table
Welcome Industries

16. Use a set of visual measuring cups. Perfect for kids and parents who need to squint just to read the measurements, the shape tells the size! The innovative cups make cooking and baking fun and easy for everyone.

17. Soften butter in the microwave, but be careful. Use a low power level, like two, and put it in for no more than 10 seconds to avoid melted butter (vs. softened). If it's not soft enough, continue to microwave at five-second intervals until it is. 

18. Soften too-hard butter by putting it between two pieces of waxed paper and whacking it hard with a rolling pin. Once it’s been smacked a bit, roll it out (still between the waxed paper). The kids will love helping with this one.

19. Another method for softening too-cold butter without microwaving it to a puddle: set it on top of the stove while the oven is preheating. It will gradually soften: this works great if you are baking a cake and want to use the butter for a no-fail frosting.

20. Bring cold eggs to room temperature by placing them in a bowl of hot water for 5-10 minutes. 

Related: 34 Food & Meal Prep Hacks Every Parent Needs 

A father and daughter stand over eggs in the kitchen baking together
iStock

21. Use the other part of an eggshell to remove any errant bits of shell. Miraculously, this works and is way faster than struggling with a spoon or your fingers.

22. Baking for someone with an egg allergy? Use a flax egg. Simply measure one tablespoon of flaxseed meal (that’s flax seeds you put in the blender or you can buy already blended) to two tablespoons warm water for each “egg.” Mix it and let it sit for five minutes. The consistency will be similar to an egg. Or, opt for this egg alternative from Bob’s Red Mill.

23. If you want your chocolate chip cookies to have a more caramel flavor, sub out ½ cup of white sugar with additional brown sugar. If you want them with a more sugar-cookie-like taste, leave out all the brown sugar and use only white (most recipes call for some of each).

24. Use a muffin tin to make sure your cookies turn out uniform in size.

25. Easiest cookie ever? Hershey’s Kiss in pretzel circle, melt on parchment paper covered cookie sheet in oven until just soft. Boom. Next level: Use Rolos instead. 

Related: Feeling Left Out? These Are the Common Baking Substitutions & Swaps You Need 

A gooey chocolate cookie broken into pieces next to other chocolate chip cookies
Jennifer Pallian via Unsplash

26. Dust your cookie cutters with flour or powdered sugar before you use them to help keep them from sticking.

27. Want soft gooey cookies? Under-bake them slightly. If the recipe says 12 minutes at 375 degrees, pull them out at 10.

28. Sprinkle just a little bit of sea salt on your chocolate chip cookies before baking for that sophisticated professional flavor.

29. Use a wine glass to cut out perfectly even biscuits or sugar cookies.

A clear mixing bowl on a table with bright yellow ingredients being stirred into another ingredient
Taylor Kiser via Unsplash

30. If you’ve “sorta” burned your cookies, use a box grater to shave off the darkest parts.

31. Also, measure out your cookie dough with an ice cream scoop, then chill them on the pan for a bit before baking (you can even freeze them, which means you can do this all ahead of time, bake the cookies the morning of and you get a better cookie). If you can’t afford the time (or space), just chill the bowl of dough for 20 minutes in the freezer before you start to scoop.

32. Store your cookies (or what's left of them) in an air-tight container with an apple wedge to keep the cookies moist. 

A boy and his friend are in the kitchen stirring ingredients in a silver bowl during a baking themed birthday party
Annie Spratt via Unsplash

33. Use an ice cream scoop to assure level amounts of batter for cupcakes.

34. You can make gluten-free flour by blending up gluten-free oats until they are powdered. 

35. Moisten the heck out of your boxed cake mix with a ½ cup of applesauce, yogurt, or even—wait for it—mayonnaise. Try it! We swear it works.

36. Add ½ cup of oil and two eggs to any boxed cake mix and LEAVE OUT the water or other liquids... and voila! You’ve got cookie dough. (Mind. Blown.)

Related: Baking Kits for No-Fail Treats

Baking ingredients, bowls and spoons sit on a table waiting for you to use some baking hacks
Calum Lewis via Unsplash

37. Keep your brown sugar from going rock-hard by storing it in an air-tight container. Toss in a piece of bread to keep it moist. 

38. If it's too late and your brown sugar is already hard, microwave it for 30 seconds in a bowl covered with a wet paper towel or place it in the oven to soften for about 15 minutes. 

39. Does your recipe call for powdered sugar, but you are out? Use a spice grinder or food processor and pulverize white granulated sugar until it’s powder.

40. Slice your cheesecake with dental floss (but not the minty kind).

41. Hate dealing with metal sheet pans and cookie tins? Use a silicone baking mold instead. We love Silpat molds—there's no need to ever grease the molds or use liners, and your goodies bake to perfection (though depending on your oven, you may want to add a couple of minutes to the cooking time). 

42. Need a baking powder substitution? The following are equal to 1 tsp. of baking powder:

  • 1/4 teaspoon of baking soda + 1/2 teaspoon of cream of tartar.
  • 1/2 cup plain yogurt + 1 tsp. baking soda. Mix dry ingredients first before adding yogurt to dry ingredients (Reduce the amount of water or other liquids.).
  • 1/2 tsp. lemon juice + 1/4 tsp. baking soda.

Looking for more common baking substitutions? We've got you covered

Great! You’ve got the hacks. Now you need the recipes. Here are our favorite 51 insanely popular cookie recipes.

—Additional reporting by Taylor Clifton and Erin Lem

It’s no surprise you’ve been doing some serious daydreaming about who, exactly, is in there. Before you dive into full-on baby shower planning mode, have some fun trying these at-home baby prediction tests to find out how to tell the gender of your baby. Can a wacky at-home prediction test tell you if you are having a boy or a girl? Well, you’ll have to try these tests to find out. (Regardless of the outcome, these incredible gender-neutral nurseries should have you covered.)

Related: 10 Fun & Easy Baby Shower Games

A daughter touches her mother's pregnant belly as they discuss how to tell the gender of the baby
iStock

1.  Carrying high? That's supposed to mean you'll have a girl, while a low rider means boy.

2. If your skin has that pregnancy glow, chances are you're having a boy, according to one old wives' tale. If you're breaking out, get ready for a girl.

3. Look at your breasts in the mirror. If your right breast is larger than your left, you're having a girl. If your left breast looks larger, it's a boy.

4. Consult a Chinese gender chart, which uses your age and the month you conceived to determine how to tell the gender of your baby.

5. Energetic fetuses are thought to be boys, while chill babes in utero are predicted to be girls.

6. Pee in a cup (you should be a pro at this by now after all those doctor's visits), and then mix in 1 tablespoon of Drano drain cleaner. If the color turns green, you'll have a girl. Blue means it's a boy. (Be careful with this one. Drano can be toxic, so wear gloves and a mask or have someone else do this experiment for you.)

Related: Your Epic Baby Shower & Sprinkle Planning Guide

A mom to be in a green dress embraces her pregnant belly as she wonders how to tell the gender of her baby
Camylla Battani via Unsplash

7. At your next prenatal checkup, check out baby's head on the ultrasound. If it's square-shaped, then you're having a boy. If you see a rounder head, it's a girl.

8. Tie a ring on the end of a piece of string. Sit down and have someone hold the string over your belly. If the ring swings in a circle, you're having a girl. If it swings back and forth, it's a boy.

9. That dark line that runs from your pubic bone straight up the center of your belly (known as the linea nigra) is said to indicate baby's sex. If the line stops at your belly button, you're having a girl. If the line continues up to your ribs and chest, it's a boy.

10. The faster baby's heart rate is, the more likely you're having a girl. The slower the heart rate (below 140 beats per minute), the more likely you're having a boy.

11. If the skin on your hands is dry and chapped during pregnancy, you're more likely to be carrying a boy. Smooth skin means it'll be a girl.

12. If you're craving salty foods, then you're pregnant with a boy. Are you jonesin' for something sweet? Then it's a girl you're carrying.

iStock

13. Since you have to pee all the time anyway, pee in a cup one more time. Then drop in some baking soda. If it fizzes, then it's a boy; if it doesn't, it's a girl.

14. Here's another pee test: Boil a head of red cabbage in some water. Save the red cabbage water and mix it in a cup with your urine. If the water turns pink, it means a girl is on its way. If the water is purple, you're having a boy.

15. Next time you wake up in the morning (or from one of those much-needed pregnancy naps), check which side of your body you're sleeping on. Left side indicates boy, while right means girl.

16. This one is similar to the Chinese chart above. The Mayans take the mama's age at conception and add it to the year baby was conceived. If it's an odd number, the baby is a boy. Even means it's a girl.

17. If your morning sickness lasts beyond the first trimester, some people think you're carrying a girl. If your sickness subsides or you didn't have any to begin with (lucky you!), then it's a boy.

18. If your baby bump looks like a basketball, it could be you're having a boy. If your baby bump is more spread out across your waistline, then it's a girl.

While planning for your new arrival, there’s no better time to download the Tinybeans app. The secure platform allows you to share special moments with friends and family near and far and puts parents in total control of who sees and interacts with photos and videos of their littles.

Let’s be honest, when it comes to the morning makeup routine, well, it’s probably fallen to the wayside. But did you know there are a ton of natural beauty tips that can get your day at home off on the right foot by helping you look great and feel confident (even if you’re still wearing yoga pants)? Keep reading to discover our list of tried-and-true beauty hacks for busy moms everywhere!

Castor Oil

Kelly Sikkema via Unsplash

Beauty Hack: Use for thicker brows. Why? Castor oil contains an Omega 9 Fatty Acid and boasts anti-inflammatory properties to help hair grow uninhibited

Sugar

Pixabay

Beauty Hack: Use for softer lips, feet, and hands. Mix a DIY sugar scrub with olive oil, lemon juice, and sugar to soften rough heels, hands, and lips. 

Honey

Free-Photos via Pixabay

Beauty Hack: Use for anti-aging. Apply a honey mask to clean skin for its anti-bacterial and healing properties (honey can heal acne scars!) as well as anti-aging effects.

Sweat Sesh

Inspired Horizons Digital Marketing via Unsplash

Beauty Hack: For detoxing skin. A good sweat session (be it at your fitness class, chasing your kids, a visit to the sauna) is good for your skin as it helps flush toxins from the body.

Baking Soda

evitaochel via Pixabay

Beauty Hack: Use for whiter teeth. Apply baking soda to your toothbrush once a week to whiten teeth.

Petroleum Jelly

Amazon

Beauty Hack: Use for a natural highlighter. Apply to the high points of the face and eyelids as an all-natural highlighter for a quick, subtle glow.

Steam

kboyd via Pixabay

Beauty Hack: For detoxing skin. Run a washcloth under warm water and apply it to your face before your masks for optimal results. This opens the pores and allows the product to really absorb into the skin. You can also boil water on the stove and hold a towel over your head to create a makeshift steam room.

Business Card

Bru-nO via Pixabay

Beauty Hack: Use for clean, precise mascara. Hold a business card behind your lashes as you apply mascara. This lets you get to the root of your lashes without leaving smudges on your skin.

Peppermint Oil

Kelly Sikkema via Unsplash

Beauty Hack: Use for plump lips. Peppermint oil offers lips a natural plump, so add a drop or two onto your lipstick next time you apply.

Glycerin Soap

Kristina Balic via Unsplash

Beauty Hack: Use to keep brows in place. Dip your spoolie in a little glycerin soap and brush your brows upward for a full look and to keep them in place.

Scotch Tape

Crissy Jarvis via Unsplash

Beauty Hack: Use for eyeliner application. Use scotch tape as a guide for the perfect cat eyeliner.

Contact Solution

Rawpixel

Beauty Hack: Use to prolong mascara. If your mascara has gone clumpy, mix in a little contact solution to make the tube last longer.

Propped Pillows

Holly Stratton via Unsplash

Beauty Hack: If you want to de-puff your face, sleep with two pillows propped up instead of one to help fluid drain from the face.

Lipstick

kaboompics via Pixabay

Beauty Hack: Use as a cheek stain. If you don’t have time (or the makeup stash in your bag!), use a little lipstick as a stain on your cheeks for a fresh, healthy flush.

Frozen Spoons

Pixabay

Beauty Hack: Keep two spoons in the freezer and place them under your eyes to de-puff any under-eye bags or dark circles when needed.

Face Mist

courtesy NSMBL

Beauty Hack: Spritz it on throughout the day for an instant skin (and spirit) pick-me-up. You can make your own face mist by steeping a couple of bags of white tea with the zest from one lemon in boiling hot water. Let it sit at room temperature before transferring it to a spray bottle and letting it chill in the fridge. Spray your face whenever you’re feeling the baby blues. Make a new batch after a week.


Baby Oil

Amazon

Score a quick fix for your manicure by applying baby oil to your nails and cuticles every night. Nails will stay shiny and hydrated 24-7.

—Kaitlyn Kirby with Ayren Jackson-Cannady

Feature photo: Kevin Laminto via Unsplash


RELATED STORIES:

Beauty Gear That’ll Make You Look Refreshed (Even When You’re Exhausted)

This CVS “Beauty In Real Life” Campaign Is Awesome & So Important

8 DIY Beauty Tricks for New (& Tired) Moms


We’ve all been there: all set to bust out your favorite recipe or do some baking with the kids and you find yourself short on a key ingredient. Whether you’re looking for a baking soda substitution or you are in need of an egg substitution, or it’s just not practical (or safe) to go to the store, we’ve got a handy list for those just-in-case moments.

photo: cottonbro via Pexels

Baking powder: The following are equal to 1 tsp. baking powder. 

1/4 teaspoon of baking soda + 1/2 teaspoon of cream of tartar

1/2 cup plain yogurt + 1 tsp. baking soda. Mix dry ingredients together first before adding yogurt. dded to dry ingredients. (Reduce amount of water or other liquids).

1/2 tsp. lemon juice + 1/4 tsp. baking soda.

1/4 cup of molasses + 1/4 tsp. baking soda.

1/2 tsp. vinegar + 1/4 tsp. baking soda.

Baking soda:

Baking powder at a 3x ratio (i.e. 3 tsp. baking powder = roughly 1 tsp. baking soda).

Brown sugar:

1 cup white sugar + 1 tbsp. maple syrup or molasses

Maple syrup, agave nectar or molasses at the ratio of 2/3 cup liquid to 1 cup of brown sugar. Reduce your other liquids in the recipe by 1/4 cup each.

photo: evita ochel via Pixabay 

Butter: The following are the equivalent to 1 cup of butter:

1 avocado (mashed)

1/2 cup applesauce

1/2 cup pumpkin puree

3/4 cup vegetable oil

1/2 cup buttermilk

1 cup coconut oil

Buttermilk:

Add one tbsp. of white vinegar or lemon juice to 1 cup of milk.

Cake flour:

Add cornstarch to flour as follows: 1 cup of flour minus 2 tbsps. Sub in 2 tbsp. of cornstarch. Sift together well.

Cornstarch: 

As a thickener, you can add in flour in place of cornstarch at a 3 to 1 ratio (3 tbsp. flour = 1 tbsp. cornstarch).

In baking you can substitute arrowroot powder on an even basis, but it’s not a very common ingredient.

Cream of tartar:

1 tsp. white vinegar or lemon juice for every 1/2 tsp. of cream of tartar

photo: skitterphoto via Pixabay 

Egg: You won’t believe the things you can swap for an egg in recipes! The following are equal to one egg in a recipe:

1/4 cup of applesauce, avocado or pumpkin puree. (Go! Go! Squeeze to the rescue.)

1/2 of a medium-sized banana, mashed.

Baking soda + vinegar: 1 tsp. of baking soda to 1 tbsp. of vinegar

Chia or flax seeds, processes to a 1 tbsp. of powder. Mix with 3 times the water, use warm water and let it sit for several minutes.

1/4 cup of pureed tofu.

3 1/2 tablespoons of an gelatin blend made by using 2 tsps. of unflavored gelatin to 1 cup of boiling water.

Pectin: 1-2 tsps added directly to your mix.

3 tbsp. of nut butter.

1/4 mashed potatoes or 2 tbsp of (rehydrated) instant mashed potatoes.

1 tbsp. vegetable oil + 2 tbsp. water + 2 tsp. baking powder.

Aquafaba, aka bean water! This is the liquid leftover from canned beans. Use 3 tbsp. per egg. This is great to sub for whipped meringues or when a recipe calls for egg whites.

Flour:

It’s Pretty hard to sub out flour, but you can create your own flour from dried oats if you powder them. Other flours, such as almond flour or coconut flour, can be used on a 1 to 1 ratio but don’t expect the same results. Liquids bind differently with these flours, so if possible try for a half regular/half alternative flour recipe.

Half and half or heavy cream:

Add 2 tbsp. of cornstarch to regular milk.

Melt 1/4 cup butter into 3/4 cup regular or skim milk.

Lemon/lemon juice:

You can sub in vinegar, orange juice, lime juice or white wine in place of lemon juice.

Powdered sugar:

DIY your own powdered sugar by putting regular (castor) sugar into a food processor until it’s…well…powdered!

Sour cream:

Add 1/4 cup vinegar or lemon juice to yogurt.

Yeast: 

There isn’t really a great substitute for yeast, but in a pinch you can try using equal parts baking soda + vinegar (or another acid like lemon juice) to create a leavening effect.


photo: calum lewis via Unsplash 

Other Clever Substitutions 

Sub a little of your water for vodka and your pie crust somehow comes out flakier. And now you have an almost-full bottle of vodka on hand. Just sayin…

If you run out of food coloring, Use Jello to tint decorative icing.

—Amber Guetebier

featured image: Gustavo Fring via Pexels 


RELATED STORIES 

41 Life-Changing Baking Hacks You Need in Your Life 

The World’s Easiest No-Fail Frosting

Key Lime Pie You Can’t Ruin 

If you are tired of buying toxic chemicals to clean your home, you can easily DIY homemade cleaners using the recipes below.

Non-Toxic Cleaners for the Bathroom

1. DIY Hand Soap
With the current pandemic raising havoc worldwide, I always do everything humanly possible to keep my kids safe. This means preparing an effective and non-toxic hand soap for them to use every day when they come home from school or after using the toilet.

For non-toxic hand soap, you need to fill 25% of the soap dispenser with liquid or grated castile soap and then top it up with water. Mix it well and place it in the bathroom for everyone to use after visiting the toilet or getting home.

2. Disinfectant
Despite being where we clean our bodies, the bathroom floors are prone to bacteria infestations; therefore, Eco Peanut recommends that you disinfect them regularly. And being an environmentally conscious parent, you can prepare a simple yet effective disinfectant for your floor using simple ingredients like lime, lemon, lime peels and white vinegar. Mix 0.24 liters of white vinegar, lime peels, juice of one lime and juice of one lemon and 0.24 liters of water. Mix this well and spray it on the bathroom floor and then rinse it after a few minutes.

3. DIY Toilet Cleaner
For the toilet, I have two solutions (heavy-duty and mellow cleaners) that I prepare for specific types of cleaning. The mellow cleaner keeps the toilet clean daily, while the heavy-duty formula helps with stain removal.

4. Mellow Cleaner Recipe for Toilets
To prepare this mellow toilet cleaner, you need to mix 0.24 liters of white vinegar, half a cup of baking soda, and one and a half teaspoons of tea tree essential oil, lavender, grapefruit or orange essential oils. Mix it well before cleaning your toilet. This DIY toilet cleaner will leave your toilet clean and smelling nice.

5. Heavy-Duty Cleaner Recipe for Toilets
For a heavy-duty cleaner, you should mix 0.24 liters of white vinegar, ¾ cup of baking soda, five drops of lemon essential oils and 10 drops of lavender essential oils. Mix them well before scrubbing your toilet.

6. DIY Shower & Tub Cleaner
For the tub and shower, I also have two unique recipes that I use, one is for heavy-duty cleaning, and the other is for mellow cleaning.

Mellow Cleaning Recipe for Tubs & Showers: I always spray some white vinegar on the shower’s surfaces or the tub for mellow cleaning and let it sit for about half an hour before rinsing it.

Heavy-Duty Cleaning Recipe for Tubs & Showers: For deep cleaning, I mix half a cup of salt, washing soda, a cup of baking soda and five drops of lemon. Mix the mixture well and then sprinkle it on a damp floor and leave it for about 10 minutes before scrubbing and rinsing the floor.

Non-Toxic Cleaners for the Kitchen

7. DIY Clogged Sink Drain Cleaner
For clogged pipes, I have a simple yet effective formula that I learned from my grandmother. To unclog the sink drain, I always pour eight tablespoons of salt and eight tablespoons of baking soda down the drain. And then top it up with some water and let it sit for about three hours.

When dealing with a grim-clogging situation, I always leave the mixture in the drain overnight. And then repeat this process twice to clear the drain.

8. DIY Dishwasher Detergent
A huge percentage of dishwashing detergents have fragrances that trigger allergic reactions in allergy sufferers. So if any member of your family has allergies, you should try a DIY dishwasher detergent. Mix 0.24 liters of water with liquid castile soap and then add it to the first detergent compartment. Fill the other compartment with four teaspoons of lime or lemon juice and white vinegar.

9. DIY Countertop Cleaner
Instead of wasting a lot of cash on a branded cleaner with toxic chemicals, you can mix water and vinegar. If your countertops are not made from stone, granite or marble, then you can create a mixture containing one part water and one part vinegar and put it all in a spray bottle.

But for marble, granite and stone surface, you should mix 0.36 liters of water, 0.12 liters of rubbing alcohol, half a teaspoon of liquid castile soap and a few drops of your favorite essential oil. Shake the mixture well and rub it gently on the surfaces using a cotton cloth.

Non-Toxic Cleaners for the Rest of the House

10. DIY Furniture Polish
For non-wood furniture, I  mix 0.18 liters of olive oil with 0.6 liters of vinegar and apply the mixture to the furniture. This all-purpose cleaner works perfectly with a wide range of materials except for wooden surfaces.

For wooden surfaces, you need 0.96 liters of hot water, three teaspoons of white vinegar and six teaspoons of olive oil. Apply this mixture to wood surfaces and wipe gently using a cotton cloth.

11. DIY Floor Cleaner
For my floor, all I need is a mixture of warm water and three teaspoons of washing soda and I am good to go. After cleaning the floors, I always apply a mixture of white vinegar and olive oil in certain parts of the house and then rub it to create a shiny thin coat.

12. DIY Mirror & Window Cleaner
For my windows, I mix 5 parts water, 1 part white vinegar, squeeze some juice from half a lemon and some lemon peels in my spray bottle. Shake the mixture well before washing all the windows and mirrors in the house. You can spread the mixture all over the window using a cotton cloth or sponge.

RELATED STORIES:
Eco-Friendly & Sustainable Brands You’ll Feel Good Investing In
The Best Natural Skincare Products for Babies and Toddlers
Kid-Centric Clothing Companies with a Conscience
Eco-Friendly & Fashionable Diapers


I am an environmentalist who loves to share knowledge about sustainable living and how to save our lovely planet!