Here’s what all those bubbles and foam really mean

As schools start to let out for the summer, parents everywhere are starting to mentally prepare themselves for occupying their kids at home. Get started early with this fun demo video for the beaker volcano science project from The Dad’s Book of Awesome Science Experiments.

The science behind, “But, why?”

Don’t get caught off guard by your kids’ science questions! You and your family can learn about chemistry with this amazing beaker volcano science project! Best of all, this experiment can be tossed together with just vinegar, baking soda, red dye, a baker, toilet paper, and string. This is a science experiment that also expertly mimics what happens under the earth’s crust to create volcanic eruptions.

Volcano Time!

If you grew up watching endless Brady Bunch reruns you’re probably familiar with Peter Brady’s volcano—a mud-spewing, steep-sided science project that sent showers of muck and sludge all over Peter’s sister, Marsha, and her snooty friends. It was the coolest thing ever.

There’s a good chance that this one episode alone launched our love affair with kitchen-sink volcano projects—an experiment so simple that you and your lab partner can most likely do it right now with stuff you already have in the kitchen. All you really need is vinegar, baking soda, and a bottle to mix them in, but it is much cooler to use good ol’ fashioned backyard dirt to construct a volcano model around the bottle first and then conduct the experiment. Either way you do it, this is a science experiment with serious thrills. But it also expertly mimics what happens under the earth’s crust to create volcanic eruptions.

Here’s Why the Volcano Science Project Works

When the solid baking soda (sodium bicarbonate—a base) mixes with the liquid vinegar (acetic acid—a weak acid), a chemical reaction occurs and forms a gas (carbon dioxide). All those bubbles and foam? They’re evidence of gas, and as the gas expands, it looks for an escape route for all that built-up pressure. So the foam and bubbles rise until they flood out of your bottle’s opening. Pretty much the same exact thing is happening under the earth right now. The earth’s crust is made up of many sections of super thick shell—65-plus miles thick!—called tectonic plates that are always moving, very slowly, over the much, much hotter inner earth. Most of the world’s volcanoes are found where two or more of these tectonic plates meet one another. Sometimes those plates shift and sometimes they collide, forming escape routes in the earth’s crust for molten rocks and gas, called magma. Much like the carbon dioxide in your baking soda–vinegar experiment seeks the quickest escape route to relieve pressure, the gases in the underground magma do the same thing before erupting out of a volcano.

Not all eruptions are alike, however. Sometimes the gases in the magma are easily released from the earth’s crust and the result is a slow, oozing spread of superhot lava. But sometimes the gases stay trapped beneath cooled magma and rock building up pressure until they erupt in violent explosions that can send ash and boulders flying up to 20 miles high. In fact, airplane pilots keep track of volcano activity around the earth, just to be sure they don’t fly into clouds of dangerous ash.

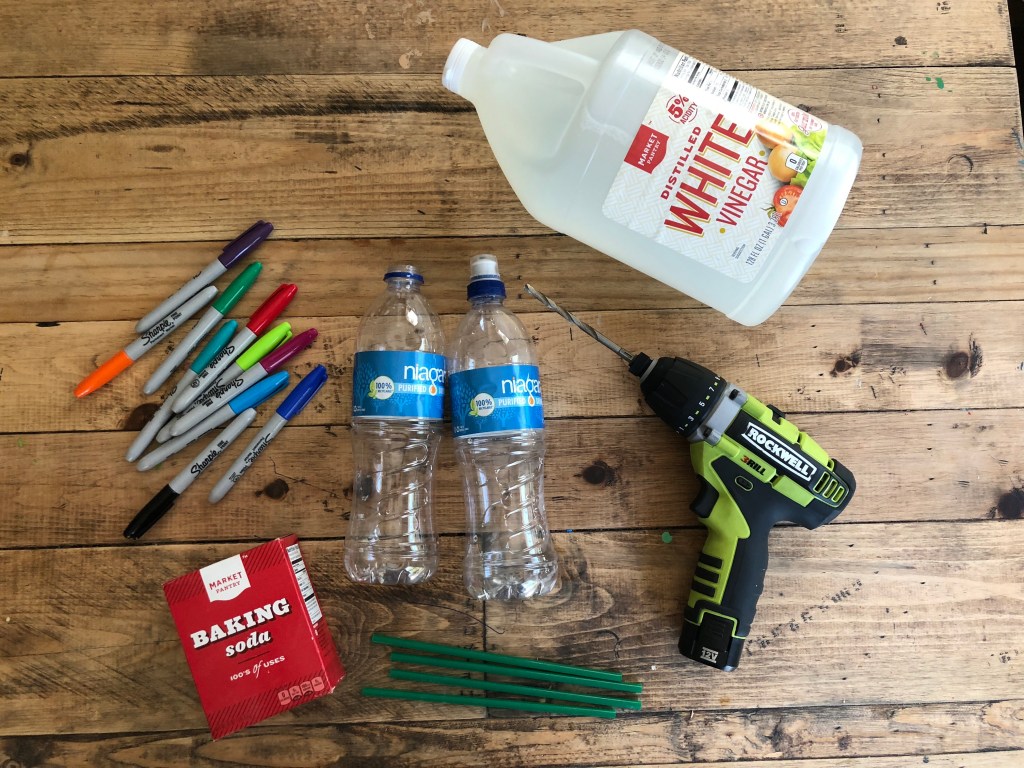
Here’s What You Need for a Volcano Science Experiment

Baking soda
Vinegar
A bottle (a good vase with a wide bottom and slender top also works well, but use whatever you can find)
Red food dye String Toilet paper
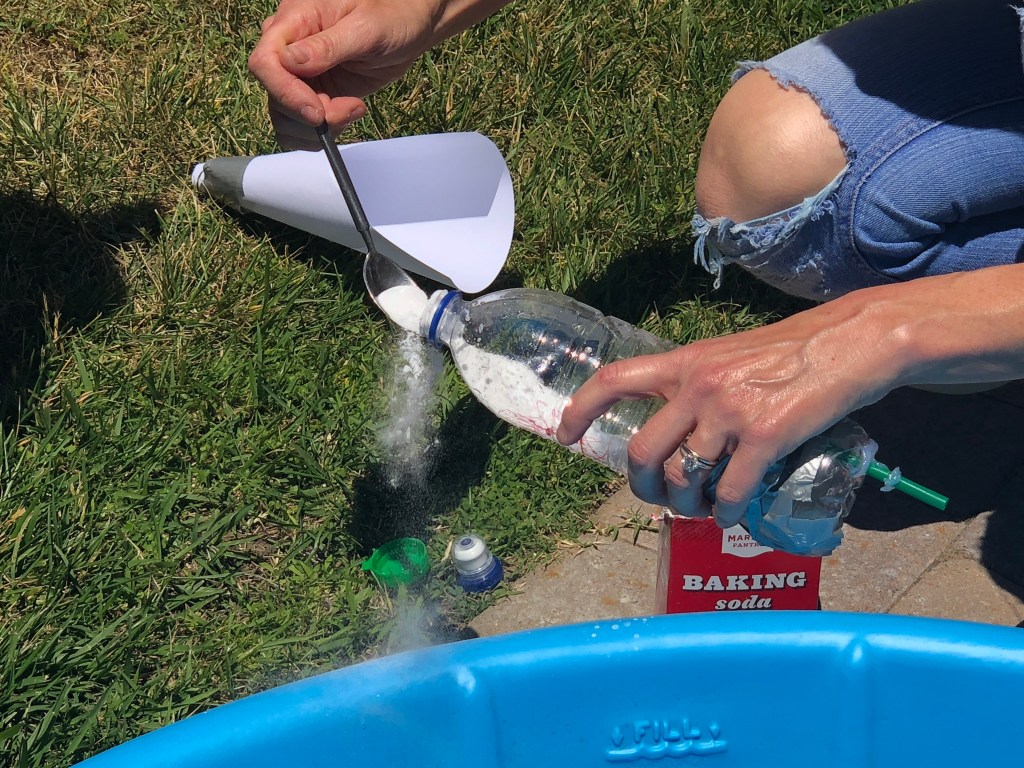
Here’s What You Do

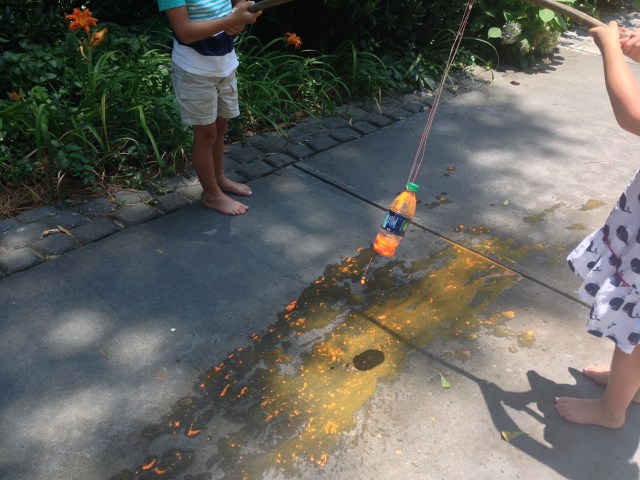
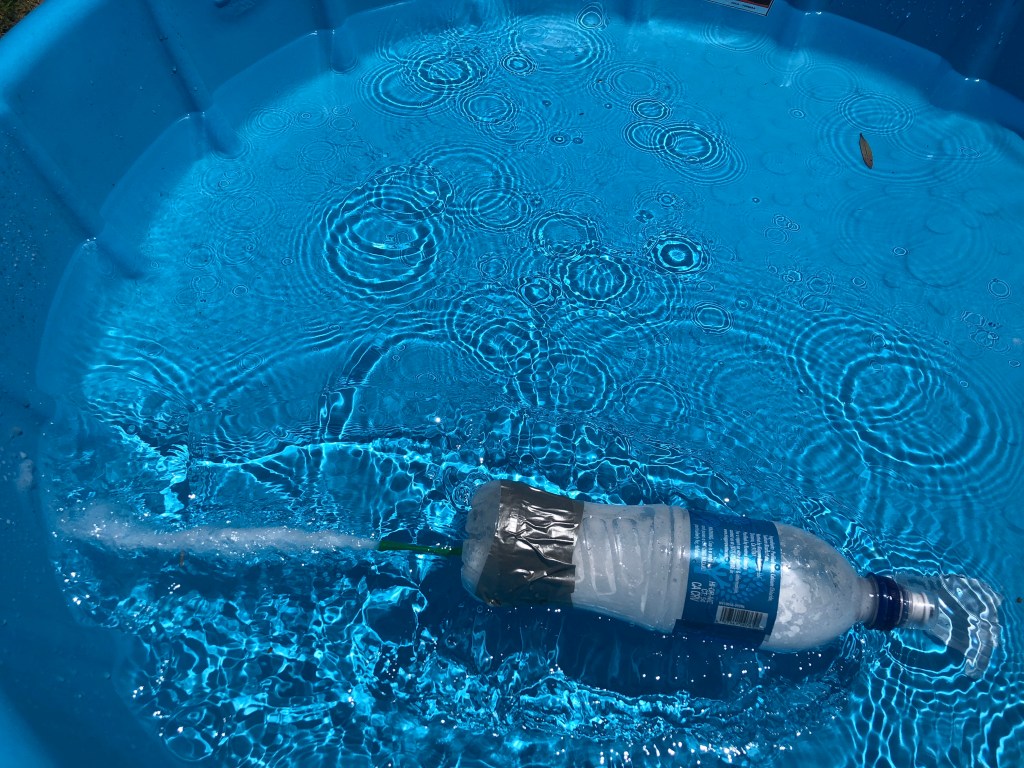
1. First add the vinegar to your bottle and dye it red with food coloring. Then, rip out a few sheets of toilet paper and make a pouch for the baking soda. Use your string to tie the pouch and then insert the pouch into your bottle, using the bottle cap to hold the other end of the string so that the pouch dangles above your “lava.” (See Fig. 1.)

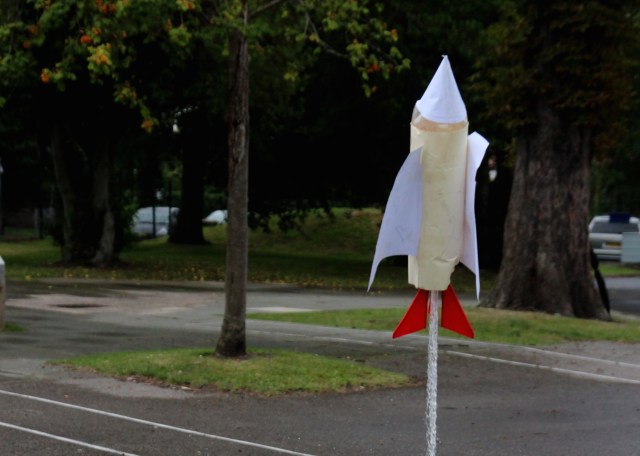
2. If you’re feeling super science-y/crafty, let your lab partner shape a volcano model out of backyard mud and dirt around the bottle. Note: you don’t have to do this, but go big or go home, right?

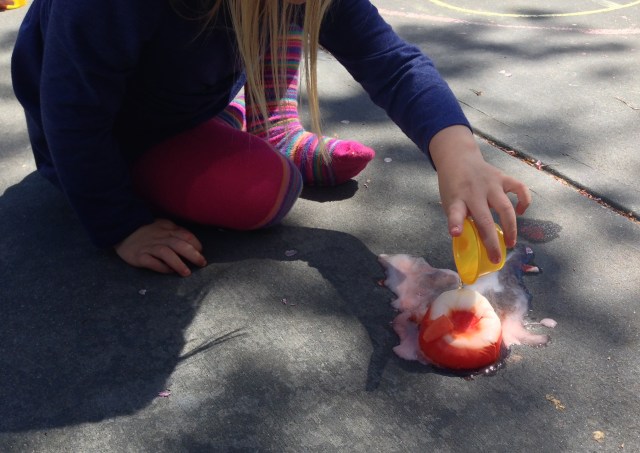
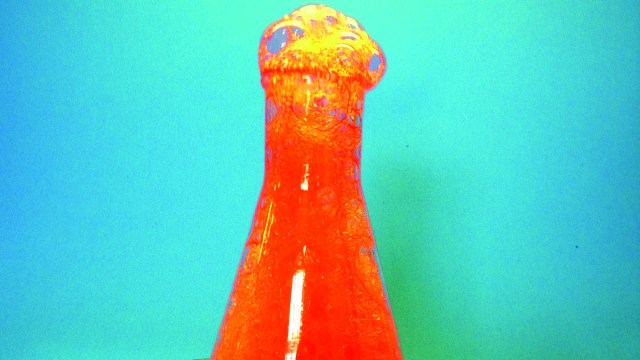
3. When your volcano model is ready, lift the cap and watch the pouch drop into the lava. It will foam up slowly, mimicking the slow buildup of earth’s gases, until the vinegar fully soaks the tissue paper. Then, the fun really begins, as the foam begins to climb the bottle, looking for an escape route. Just stand back, and watch the foam erupt. It’s really that easy!

Want More?

There are many, many ways to perform this experiment, so don’t be afraid to get creative. Try mixing the vinegar and baking soda in a bottle, and then quickly place a balloon over the bottle opening. While this doesn’t create a lava explosion, the gases will inflate the balloon. Pretty cool, right? Or, put baking soda in a small snack-size zip bag and seal it tightly with a bit of air in the bag. Place the baking soda bag in a larger zip bag that is filled with vinegar and seal that bag tightly, with as little air as possible in the big bag. Now use your fist to smash the tiny baking soda bag and stand back. You just made a sandwich bag bomb, using the same chemical reactions as your volcano.

Related: 60+ Science Experiments for Kids to Try at Home

Mike Adamick is the author of The Dad's Book of Awesome Projects, The Dad's Book of Awesome Science Experiments, and The Dad's Book of Awesome Recipes, and a stay-at-home dad who writes for the Adventures in Learning science blog at PBS.org, the San Francisco Chronicle, KQED Radio, Disney's parenting website, Babble.com, and the Daddy Issues column on Jezebel.com.

Get outside, have an epic adventure, and learn something new

Want to get outside, have an epic adventure, and learn something new? Try an at-home science experiment to really blow their minds. From walking on eggshells to becoming one with slime, we’ve got everything you need to get a big reaction from your kids. Keep reading for 20 great science experiments and projects that keep fun going.

Walk on Eggs

Photo: S. Massey

How can you walk on eggs without breaking them? Steve Spengler shows us how and teaches an awesome lesson on how an egg’s unique shape gives it tremendous strength, despite its seeming fragility. Check out this play-by-play to get started.


Insider tip: if this experiment has you in the mood for eggs, check out our list of the best egg-cellent egg recipes for kids. 

Sketch a Shadow

See what happens when you set up toys on paper in the sun, and try tracing their shadows at different times of the day. You can draw right on the sidewalk with chalk, too. Pick toys with distinctive outlines to make it easier. For more science fun in the sun, click here.

Insider tip: we love sidewalk chalk as much as you do. In fact, we compiled the best ways for kids to play outside with chalk. Scoop the story here

Experiment with Slime

Photo: Little Bins for Little Hands

By now, you've accepted your kids love of the gross. And, you've probably either tried to figure out what to do with the slime your kids have brought home, or you've ponied up and made it with them yourself. Check out this awesome collection of science experiments by Little Bins for Little Hands with ideas for testing a hypothesis, changing one ingredient to affect an outcome and more. 


Insider tip: wondering why exactly your kids are fascinated with slime? There's an actual science behind it. Hop over to this video for the explanation. 

Make a Rainbow

Photo: Trini3680 via pixabay

Some days, you have to make your own sunshine. And on those days, you should go ahead and make your own rainbows, too. Luckily for us, we've got more than one way to do it. Check out these six ways six ways to wow them with a little over-the-rainbow science. 


Insider tip: after all of these kids science experiments, you deserve a colorful treat. Taste the rainbow (literally) with these great rainbow recipes for kids. 

Percolate a Jug of Sun Tea

There might not be a better summertime science experiment than making a jug of sweet tea using nothing but sunshine. You'll learn more from this science lesson on heat (how long will it take to really diffuse the tea bags or fresh herbs, and how heat creates currents in the water) if you remember not to shake it or stir it. Just let nature take its course (and check out this tutorial and explanation of sun tea here).

Explode a Lunch Bag

Photo: S. Massey

Mix baking soda and vinegar mix together to make a booming bag. Gasses (carbon dioxide) need more room than liquids and solids, so throw a little of that in and the bag expand until it pops. Click here for Science Bob’s case notes and to learn how to do it for the biggest bang!

Create a DIY Sundial

Photo: S. Massey

Take advantage of the changing days and do a little solar searching. Since the Earth is in constant rotation around the sun, and also in constant rotation on its axis (whew!), a sundial lets us keep track of time. Want to learn more? Check out this activity by Kiwi Crate.


Insider tip: harness the sun's energy for your next kids science experiment. We've uncovered even more kids sun science experiments to make your day. 

Make a Magic Bag

Photo: S. Massey

How many pencils can you poke into plastic? Find out all about polymers and why plastic is so pliable. Check out Steve Spangler Science for your list of simple ingredients and instructions. You’ll have hours of science fun (but we warn you—turning the bag into a sprinkler is almost as fun as the experiment!).

Compare Melt Rates of Colors

kids doing at-home science experiments
Photo: S. Massey

Different colors have different heat absorbing capacities. Black has the greatest heat absorbing capacity, which results in ice melting quicker than on white, which reflects the most light. Green Planet Solar Energy shows you how to observe and report on which colors affect ice’s melting rates here.

Predict Weather with a Pinecone

Photo: S. Massey

Mother Nature has taken over for your local meteorologist. Pine cones open and close based on the humidity in the air, so set a few outdoors, and check them in the morning. What's the scoop? When the air is drier, the pine cones open up so the feather-light seeds inside can travel away from the parent plant (which doesn’t want to compete for resources with a sapling!). To find out more, check out this experiment on Science-Sparks.

Launch a Ping Pong Ball

Photo: S. Massey

If only you'd known about this simple science project before buying a pricey toy to do the same thing. Using a yardstick and a can, launch a ping-pong ball over and over again to see how far it will go. Ensure extra fun by experimenting with size and shape of objects to launch and by adjusting the size of the fulcrum (the can), too. Check out the how-to on Buggy and Buddy.

Watch Water Walk

Photo: S. Massey

Who knew the magic of a strong paper towel (other than every parent on the planet!)? Amaze the kids by using one to make water walk from one cup to another, and teach them about absorption, saturation and gravity at the same time. Check out Coffee Cups and Crayons for step-by-step instructions.


Insider tip: for more great water projects for kids, check out these science experiments.

Make Raisins

Photo: S. Massey

Grapes are made up of lots of water. The heat from the sun causes the water to evaporate from the grapes, and it also caramelizes the sugar in a grape, making it sweeter. Get your recipe from Planet Science here.

Paint with a Pendulum

Photo: S. Massey

This pendulum project is a much cooler way to learn about gravity than getting smacked in the head with an apple (looking at you Newton!). What's the scoop? Gravity attracts the cup with paint, but tension force from the pivot point pulls the cup upward. See how to do this experiment at Hand Make Kids Art.


Insider tip: for the littlest littles get them in on the science fun and make your own DIY baby-safe finger paint with our recipe here

Launch a Water Propelled Bottle Rocket

No jetpacks are needed for this awesome experiment. This fireless bottle rocket relies on the power of pressure to fly. Pump the bottle full of air, and eventually, enough pressure builds to force the bottle off the cork, displacing water (and creating room for all the air) as it goes. Head to Science-Sparks for your list of materials and construction instructions.

Stick to Ice

Photo: Kiwi Co

When you add salt to a bowl full of ice cubes and string, it lowers the freezing temperature of the ice, which allows the ice to melt, then re-freeze over the string. Check out Kiwi Crate to learn how to do it!

Bounce Smoke Bubbles

There's something about bubbles, and these dry ice versions are going to make the littles go wild. Add carbon dioxide to water, engage the use of a funnel and send the gas into bubble solution. The bubbles filled with gas from the reaction of carbon dioxide and water is a sweet sight! Steve Spangler Science can walk you through how to do it, and the materials you’ll need.

Insider tip: goodbye bubble wands, hello DIY bubbles. Learn how to make your own bubbles here. 

Erupt an Ice Volcano

at home science experiments
S. Massey

Much like in the exploding bag experiment, Ice Volcanos rely on the acid-base reaction of vinegar and baking soda to create an “eruption.” Find out how to make them at Reading Confetti and don't forget to add color for extra thrills!

Make Dish Soap Silly Putty

Photo: S. Massey

Is there anything you can't make with cornstarch? Combine it with dish soap and dilute the neutral base (the cornstarch) to make an ooey gooey substance. Find out about a process called syneresis, which is why the putty mixture stays so malleable. Get your recipe from Smart Schoolhouse here!

Cook with the Sun

Talk about whipping up an afternoon snack for your science buddies. Trap the sun’s energy to make the air inside the box hotter than the air outside the box. Then add aluminum foil to the flap to direct those burning rays into the box. The plastic wrap keeps the heat inside. The best news about this experiment? It makes killer s’mores! Check out NASA Climate Kids to learn how to make it.

Insider tip: keep the science fun cooking by making your own s'mores (sans campfire). Check out our tutorial here. 


Photo: Lingokids

The academic journal, Science, recently published a study that shows children today will live through three times as many climate disasters as their grandparents. With people around the world concerned about the current climate crisis, it’s more important than ever to have talks with your children about what global warming is and how to slow it down.

Helping Kids Understand the Climate Emergency
How do we help our children learn that they can take part in helping slow down climate change? We need to emphasize that small actions can lead to big changes.

First, it’s important to explain to them what climate change is and how it can negatively impact the earth, animals, plants, and our daily lives. This isn’t the easiest thing to do, since even as adults, we struggle to understand what climate change and global warming truly means. Conversations about energy sources and carbon dioxide emissions can be overwhelming to children. Instead, we need to talk about concepts and ideas that are familiar and relatable.

For example, you can talk about global warming in relation to how it affects polar bears. The glacial areas where polar bears live are melting away and getting too warm, making it harder for them to thrive. (The temperature has increased 1.9ºF in the past 100 years, according to NASA, and it will be 8.6ºF hotter by 2100.)

Another example is talking about the rise of ocean waters from the melting ice, which can affect coastal areas where people live or go on vacation. Or pollution occuring in the ocean because of people not recycling is another topic that can be talked about. There is so much trash in the oceans that it is making the animals and plants that live in it get sick. If we recycle, it can help with the amount of trash that enters our oceans.

There are lots of books that can help explain climate change and what we all can do to help. For example: Old Enough to Save the Planet or The Story of Climate Change are great options. You can also teach your children about young environmental activists like Greta Thunberg, who started the international movement #fridaysforfuture.

10 Steps Children and Their Parents Can Do to Help the Environment

Modeling behavior is key. Be the example to your children and show them one person can make a big difference with these easy to do examples:

  1. Turn off computers, televisions, and other devices when not in use.

  2. Save water by taking shorter showers and turning off the water when brushing your teeth.

  3. Use reusable food containers and water bottles at school instead of plastic ones that are used once and thrown away. Let your kids pick out their own special containers and bottles to pack for school.

  4. Turn off the lights after leaving a room. Open a window in the morning to let in colder air instead of turning on the a/c. During colder months, wear warmer clothing and pajamas instead of turning up the heater. Power plants emit a lot of air pollution, so cutting back our energy usage is important.

  5. Recycle. Make it a fun activity for kids by having different colored bins for the different items and make it part of their daily activities.

  6. Reuse. Find items in your recycling bins that can be repurposed for crafts or imaginative play.

  7. Walk or ride a bike instead of driving. It’s a great way to save on gas, get exercise and spend time as a family.

  8. Create a vegetable garden together to help everyone be more excited to eat more vegetables and less meat. #meatlessMonday

  9. Teach them to always put their trash in trash cans or recycling bins. Go for a walk in a neighborhood park or beach and pick up any trash you see! Make it a fun competition and see who can collect the most!

  10. Use cold water when washing laundry and hang dry your clothes instead of using the dryer to save energy.

Encourage your children to have these conversations with their classmates and teachers. Have them ask their teacher what they can do at school to help make it part of their daily activities. Always emphasize and praise that their small contributions can lead to big changes that are beneficial for our world.

How Can Lingokids Help Your Kids Understand the Climate Catastrophe
At Lingokids, we firmly believe that children learn by example. We want to make a difference and help you raise the children of the future. For example: improving upon their critical thinking about important issues like climate change or their creativity when it comes to thinking about how they can help their neighborhoods.

At Lingokids you can find entire in-game lessons that are focused on protecting the earth. Your child can enjoy games, songs, and traceables while learning about recycling and sustainable habits. Throughout the app, they can also learn about animals and ecosystems all over the world, from the North Pole to tropical rainforests.

By expanding children’s awareness of these environments at an early age, we can set the stage for conversations and then actions around protecting endangered animals and nature conservation.

Sara Mateos-Aparicio
Tinybeans Voices Contributor

Sara Mateos-Aparicio is the Communications Manager at Lingokids, an early childhood education platform. Sara studied Journalism in Madrid, writing for years for radio stations and print magazines. Sara has worked for a variety of education startups, most recently joining Lingokids in 2019 to lead their communications initiatives.

Spring has arrived and warmer weather is here which means it’s time to get the kids outside and away from their screens. But what can we do to keep kids entertained while still learning and innovating?

Check out these stimulating and fun outdoor STEM activities that can be made with materials you have at home.

Tiny Rocket
This activity is out of this world.

Test different amounts of water and Alka-Seltzer and see how high your rocket can go! When you mix these effervescing tablets with water, a chemical reaction takes place between the citric acid and sodium bicarbonate contained in the tablet and the water. This chemical reaction creates many, many bubbles of carbon dioxide gas. When the lid can’t hold all that gas anymore, the canister goes shooting off! This action can be explained using Newton’s Laws of Motion.

Materials:

– Film canisters

– Alka-Seltzer

– Water

Instructions:

– Fill your film canisters with varying amounts of water.

– Drop ¼ to ½ of an Alka-Seltzer tab into your water and quickly replace the cap and turn it upside down.

– Test different ways to make your rocket go off, just keep faces clear of the exploding canisters!

Exploding Bags 
A new kind of baking soda and vinegar activity.

Watch as your bag explodes! Popping the inner bag releases the vinegar and mixes with the baking soda causing the solution to quickly make bubbles and gas until the bag can’t take it anymore! Try this activity with different measurements and record your findings!

Materials:

– 1 medium to large zip bag

– 1 small to medium zip bag (this bag needs to be smaller than your other bag)

– Baking powder

– Vinegar

Instructions:

– Pour some vinegar into the small bag and zip closed. Make sure there’s some air left in the bag.

– Pour some baking soda in the larger bag, add the smaller bag of vinegar, and close the bag making sure to get out as much air as possible.

– Lay your bag on a flat surface and smack it until you pop the inside bag, shake, and watch as your bag inflates and eventually pops!

Lemon Juice Balloons 
Ever needed a new way to blow up a balloon? 

How big can you make your balloon? When the acidic lemon juice mixes with the baking soda base, it rapidly creates carbon dioxide and blows up the balloon! What combinations make the biggest balloon?

Materials:

– Balloon

– Lemon juice

– Baking powder

– Bottle or jar (the mouth needs to be small enough for a balloon to fit over it)

– Funnel (optional)

Instructions:

– Add lemon juice to your jar.

– Add baking soda to your balloon using a funnel.

– Stretch the opening to your balloon and fit it over the mouth of the bottle. Tip the balloon up and let it fall into the lemon juice.

– Watch the chemical reaction blow up your balloon!

This post originally appeared on Tierra Encantada.
Tierra Encantada is a warm, community-oriented Spanish Immersion Daycare and Preschool headquartered in Minneapolis, MN and currently expanding nationwide. We offer quality child care for children ranging from 6 weeks – 6 years of age. We focus on the growth of the whole child and believe children learn best by doing. Our award-winning bilingual education program fosters early cognitive development and teaches a respect for diversity.

We live in a world of convenience and waste. We want things right now and within easy reach. Yet do we truly think about what happens to all the things we buy for convenience? Are they ever used? Are they disposed of properly? I’ve been a long time advocate for the environment and I’m here to tell you that yes, you can limit your need to buy everything out of convenience!

This year marks the 51st anniversary of Earth Day, a crucial movement dedicated to learning, helping, and understanding the need to protect our environment. Whether you believe in climate change or not, know that helping the environment can only be a positive endeavor even if you do one small act. 

I’ve been leading an environmental program at an elementary school for years and it’s always a joy when a student has that “A-ha!” moment. The moment they realize that their small act of compassion for the planet can indeed make a huge impact! Below I’ve listed 10 easy swaps you can make for Earth Day and every day of your life!

1. Swap out single-use plastic bottles for reusable water bottles. Buying a reusable water bottle saves you money on buying single-use plastic water bottles. Plus you are eliminating unnecessary plastics in landfills.

2. Swap out single-use plastic sandwich bags for silicone or paper sandwich bags. These handy reusable bags last for many years and are compostable.

3. Swap out grocery store bags with reusable bags. Store grocery bags are usually made from a material that is not recyclable. It’s best to invest in a better quality reusable grocery bag or tote.

4. Swap out store-bought herbs and plant your own herb garden. Planting your own garden helps you have fresh herbs on hand and it reduces your carbon footprint by buying in stores.

5. Swap out polyester materials with eco-friendly materials. Materials made from organic cotton, repurposed cotton, and Tencel are great alternatives, plus they wear well!

6. Swap out driving a short distance to get groceries to walking to the stores. If you’re within walking distance to a store, then try walking there to reduce carbon dioxide made by cars.

7. Swap out packaged produce to picking your own produce at a farmer’s market or a free-standing produce rack. The plastic packaging wrapped around produce is truly unnecessary.

8. Swap out plastic utensils and use reusable stainless steel or bamboo utensils. Just say “NO” when you’re offered plastic utensils. It’s easy to bring your own or use your own utensils.

9. Swap out new books with used books. Yes, that new book smell is quite delightful! But gently used books keep the circular recycling effective.

10. Swap out the need to recycle by reducing and reusing. Follow the 5 “R’s” and you’re on the path to reduce plastic use! Refuse, Reduce, Reuse, Repurpose, Recycle.

We can all do our part to make our planet healthier and cleaner. We all wish to breathe cleaner air and let nature reset itself so that our planet can stay healthy for many generations.

Happy Earth Day!

I am a mom first and foremost. I might not be a supermom, but I am constantly learning and growing.Topics I stand with are parenting, the environment, and living a healthy and happy lifest‌yle. I work at an elementary school and I have 30 years experience in the health industry.

Every Tuesday and Thursday our youngest boy, Jackson, has soccer practice. It’s in a wonderful park by the river, and when the weather is nice it’s a great place to take a stroll on the miles of paths. Or, if you aren’t up for a walk, you can certainly set up a folding chair in the shade of some old Sycamore trees and watch your second graders play soccer. 

However, another option seems to be the most poplular choice, which is to sit in your idling car with the air conditioning on while texting for the entirety of the 90-minute practice! 

I’m not kidding, this is what the other moms do. Last night it was a beautiful evening, about 70 degrees and sunny with slight breeze and I was the only parent out in the fresh air. At times one of the moms would leave the sterile, air-conditioned nirvana of their idling SUV to walk over to another car to chat, but most stayed put for the entire duration of soccer practice. 

So, a beautiful spring evening is not the only thing wasted in this scenario, as idling for long periods of time wastes gas and dumps carbon dioxide into the air. This practice is obviously not environmentally friendly—and here’s the math to prove it. 

  • An idling SUV uses about 7/10 of a gallon of gas per hour and releases about 9 pounds of CO2 into the air.
  • These moms idle for 90 minutes each, which means that during every practice each of these cars waste over a gallon of gas and releases about 14 pounds of CO2 into the atmosphere.

Last night, six of the 10 moms engaged in this wasteful practice, so for each practice that equals more than 6 gallons of gas plus 82 pounds of carbon dioxide released into the air during just one soccer practice. 

(Sidenote: With that amount of gas, a Prius could drive from Philadelphia to Boston!)

Anyway, this peticular Spring soccer session has 10 weeks of practices, so you can imagine how this adds up. 

I’m not trying to preach about the environment here, I’m just fascinated by this practice on several levels. Every week this armada of idling SUVs and minivans slowly forms like clockwork, and every week I’m the only person out in the fresh air.

Most nights I’ll take our dog for a walk on the scenic paths along the river, but for at least part of the practice I’ll just be just sitting there on my folding chair, listening to the din of idling cars. (I’ve been guilty of using a few minutes of the time to track my WW points, but I try to keep my phone holstered.) So, I need to know why they do it! 

Here are a few possibilies:

  1. These moms are afraid they might encouter a mosquito. 
  2. Kids’ peanut allergies get all of the attention while millions of parents (like these) silently suffer through severe grass allergies.
  3. It’s not a random grouping at all. These moms are not texting, but coding! In fact, they may be our last line of defence against Russian hackers! 

More than likely, they are just acting like pampered zombies.

They say that “grit” is the key ingredient to success, so what kind of example are these timorous parents setting for their kids? I want to yell at them, “Turn off the A/C, put down your phone and get outside!”

Anyway, I’m trying to figure out if this is just a local phenomenon or a common practice around the country. They say that about 3 million kids play soccer each year, so if this is happening everywhere, I may have discovered the hidden source of climate change!  

I'm Missy, a mother of three and a middle school drama teacher at a private school. I'm obsessed with my Vizsla (dog), traveling, and the musical Hamilton. I also enjoy writing and sharing fun parenting stories, which is what brought me here.

Looking for a fun science experiment to keep your little Einsteins busy? This simple baking soda and vinegar experiment is a perfect outdoor activity and demonstrates how a chemical reaction can really get things moving. Read on to find out to discover how to make a baking soda vinegar powered steam boat.

You’ll need: 

– Baking soda

– White vinegar

– Plastic bottles

– Straws

– Sharpeez (optional) for decorating the boat

– Hot glue (not pictured)

– Baby pool or bathtub (not pictured)

Step 1: Decorate your “boat.”

Take the labels off the plastic bottles and let your kids decorate their “boats” using permanent or (oil-based) paint markers. This is optional, but fun—especially if you’ve got more than one little captain at the helm.

Step 2: Drill a hole in the bottom of the boat—then put a straw in it.

Using a drill or soldering tool, make a small hole (the size of a straw circumference) in the bottom edge of your plastic bottle. Caution: Wear safety glasses—and keep kids at a distance—to make sure bits of plastic don’t fly into your eyes). 

Place a three or four-inch straw into the hole so that about an inch of sticks into the bottle and the rest sticks out the back). To secure the straw so that no liquid drips out the sides, apply hot glue around the edges.

Step 3: Fill it up and watch it go!

Turn the bottle sideways, and cover the straw end with your fingertip while you pour about 1 cup of vinegar into the bottle. Then, keeping the bottle flat and the straw side up (so nothing spills out), drop a few spoonfuls of baking soda into the bottle. Make sure to keep the baking soda on one end and the vinegar on the other.

Give the bottle one quick shake, and place it quickly into your pool or tub. And it’s off!

The science of it: What’s happening?

When vinegar (an acid) meets baking soda (an alkali), they react to form a gas (carbon dioxide). This gas must escape the bottle, so it pushes out through the straw, which in turn powers your boat across the pool. Once all the gas has escaped, your boat slows down.

Step 4: Tinker with the steps (and let your kids take over!).

Now that you’ve done the experiment once, it’s time to hand over the ingredients to your kids. Let them try to figure out (on their own, hopefully!) how to get the boats moving as fast as they can. Some things kids can explore include:

Does more baking soda change how fast the boat moves?

Does more vinegar change anything?  

What about how you combine the ingredients? For instance, does a quick shake help things move? Or a slow fizz?

Story and photos by Melissa Heckscher


RELATED STORIES:

Classic Science Experiments for Kids

It’s Alive! Gross (But Cool) Science Experiments for Kids

Mason Jar Science: Slimy, Squishy, Super-Cool Experiments

Easy Science Projects for Kids That Use Water

Science Experiments That Use Candy


As a parent, you’re going to worry. You’ll worry about concrete things like whether your baby has gotten enough to eat or if your toddler is warm enough without a jacket. You’ll worry about abstract things like if your child is happy or whether they’ll always “do the right thing.” And you’re going to worry about sleep. Especially when they are a newborn, you’re going to worry about sleep. It’s kind of ironic but some of the biggest worries during the newborn stage are likely to occur when your baby isn’t crying and is actually sleeping peacefully.

But the anxiety is real. Sudden Infant Death Syndrome (SIDS) is a terrifying reality that impacts over a thousand American families per year. While SIDS is the leading cause of death in babies under 1 year of age, most SIDS deaths (90%) occur in babies under 6 months of age.

There are many unknowns about SIDS—part of the reason why it is so frightening—but the truth is, there are many things parents can do to help prevent SIDS both during the highest-risk period and beyond.

According to the American Academy of Pediatrics (AAP), there are several things you can do to ensure your baby is sleeping as safely as possible.

  • Place your baby on their back to sleep
  • Ensure a firm, flat sleep surface
  • No loose bedding, soft objects, toys, or bumpers in the crib
  • Avoid the use of commercial devices inconsistent with safe sleep recommendations (only things labeled as a “crib,” “bassinet,” or “play yard” are approved for safe sleep)
  • Keep the bedroom/nursery temperature between 68°-72°F to allow for temperature regulation
  • Do not allow smoke around your baby

In addition to sharing what you can do to promote safe sleep, I want to tell you why safe sleep is so important. Knowledge is power and I truly believe that when we know better, we’ll do better!

Suffocation: Putting babies to sleep on their tummies, with blankets surrounding them, or even snuggled in a positioner-type “nest” can put your newborn at risk for suffocation. Stuffed animals, bumpers, and soft blankets certainly do make cribs look warm and cozy. But as boring as it sounds, a firm, flat mattress is the best and safest option for your little one. Infants can get tangled up in blankets and loose bedding and can have their airways blocked. When they are very little and not strong enough to free themselves on their own, anything extra in the crib poses a suffocation risk.

Note: When placing your baby to sleep in their crib or bassinet, you should always be placing them on their back. However, once your baby is able to roll both ways independently, most pediatricians agree that if they roll to their tummy, they are okay to stay there. Run it by your provider first!

Positional Asphyxiation: Sleeping on a firm, flat surface may not seem like a big deal, but when babies are placed to sleep at an incline, it can put them at risk for something called positional asphyxiation. Because babies’ heads are so large and heavy compared to the rest of their body, they are likely to flop forward when their bodies relax into sleep. Babies’ tracheas are also very small and this along with their lack of muscle strength and inability to control their head and neck can cause their airways to become blocked very easily. If you are looking for an alternative place to nap your baby outside of their nighttime sleep space, I would recommend a portable bassinet or play yard—both of which are safe and approved for sleep.

Carbon Dioxide Rebreathing: The concept of “carbon dioxide rebreathing” is why even things marketed as “breathable” are still not safe to use in your baby’s crib, your bed, or for any sleep situation. What many people don’t realize is that experts believe that carbon dioxide rebreathing is highly linked to SIDS. As your baby breaths in oxygen, they breathe out carbon dioxide. If their face is too close to fabric (like the side of a positioner or a bumper in the crib), that little space begins to fill with carbon dioxide which they will begin to inhale more than oxygen. This is also why it’s important to only have a firm mattress in your baby’s crib; softer materials like memory foam can create tiny air pockets that can increase the chances of carbon dioxide rebreathing.

Safe sleep is easily attainable and should be a non-negotiable in my book. I’m all for “you do you” when it comes to most things parenting; whether or not you want to have a medicated or unmedicated birth, breastfeed or formula feed, work in or out of the home, or even how you choose to discipline. But when it comes to sleep, I feel obligated to speak up about unsafe sleep practices. Please know, this does not come from a place of judgment or shame; it is my job to educate families on how to sleep safely because, frankly, lives depend on it!

When you’re in the throes of exhaustion, it can be very easy to rely on any variety of the devices and apparatuses that promise to help your baby sleep well. It can be tempting to bring your baby into bed with you at 3 a.m. when they just won’t fall asleep after a feeding or strap them into a swing because you know it can buy you an extra hour or two before they wake up again. Unfortunately, you now know that these are not safe sleep practices, and as parents, we have enough to worry about to spend time stressing about our babies’ safety when they’re sleeping. It is possible for your child to sleep well and safely and if you need any help, sleep coaches (like me) can help you achieve this. 

Jamie is a Certified Pediatric Sleep Consultant and offers personalized sleep solutions to exhausted families nationwide. With a background in child development and infant mental health, she keeps up to date on the latest evolutions in the field which allows her to blend technical knowledge with empathy and compassion to tailor her support.