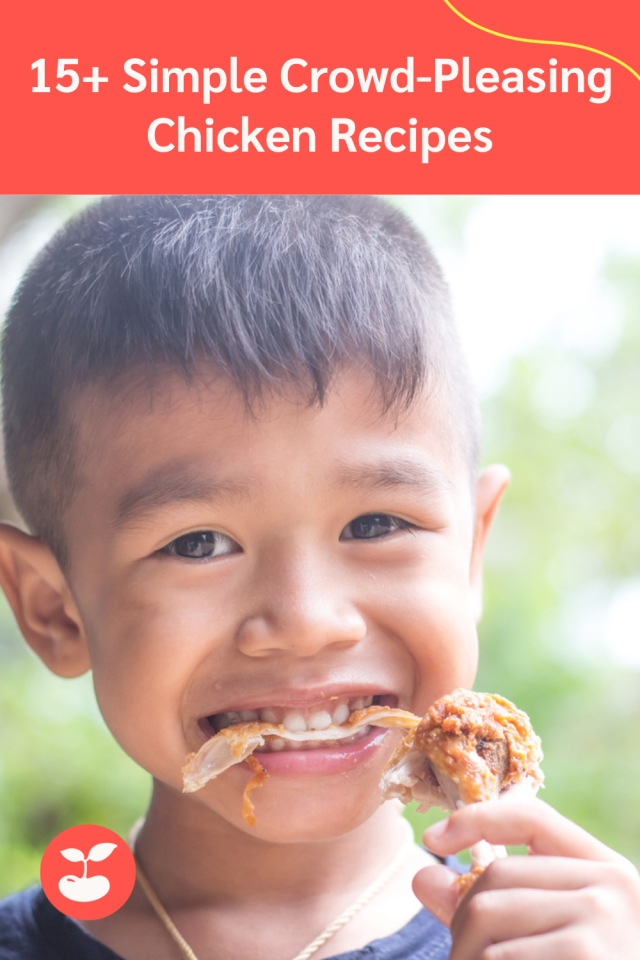
We’ll be the first to admit that we love chicken. Why? You can’t beat its versatility. Fried, poached, roasted, broiled, baked, slow-cooked—you name it, we’ve tried it. Here are 11 of our favorite kid-friendly chicken recipes, which will make this week’s meal plan a cinch.
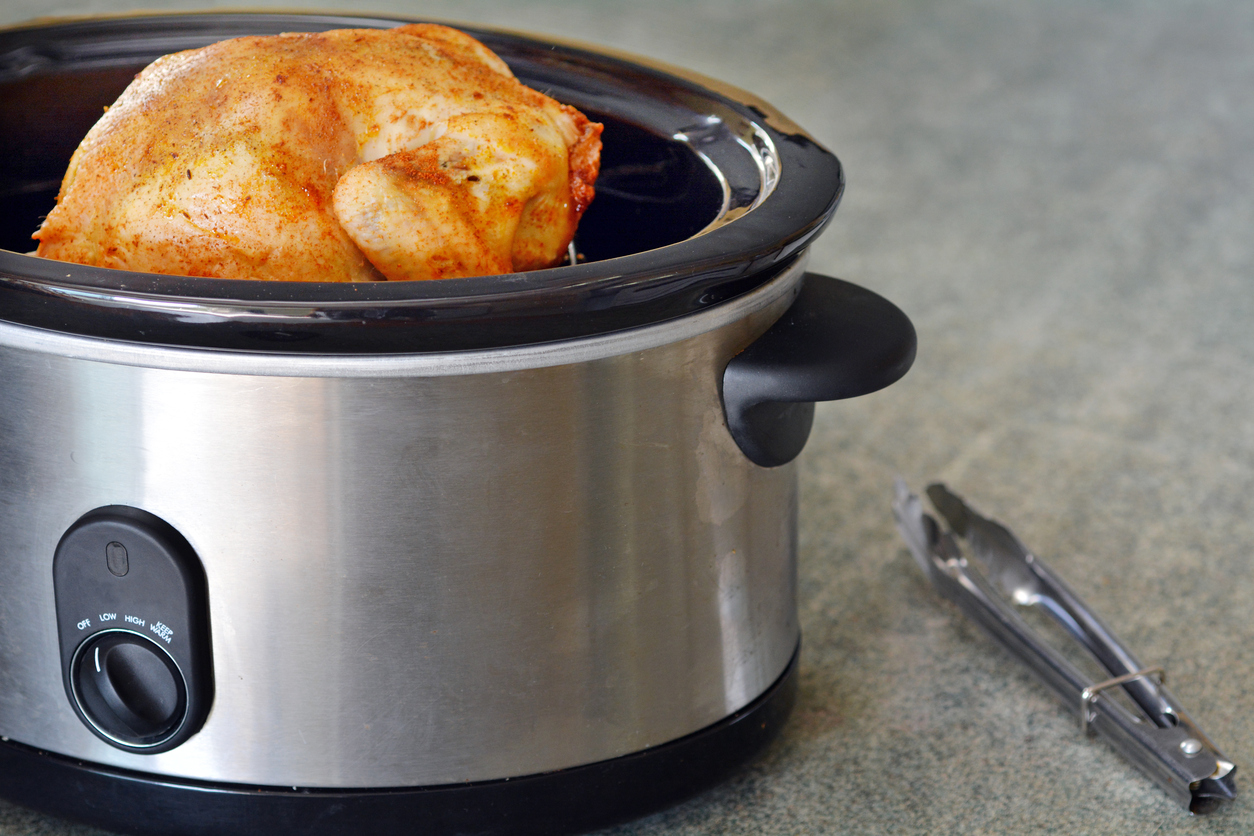
photo: iStock

1. Perfect Roast Chicken
If you’re anything like us, trying to perfect the roast chicken has been one long struggle. Not only do you need the ideal amount of flavor but it’s hard to gauge how long to leave the chicken in the oven. Well, thanks to this amazing recipe, our struggles are now over. Say hello to the perfect roast chicken.

2. Chicken Satay with Peanut Dipping Sauce
If you’ve got picky eaters at your table, a good way to get them to eat is to let them dip their foods in fun sauces. Here’s a great, easy chicken meal. Simply put the chicken on a skewer and dip away!

3. Slow Cooker Chicken Stew
With the winter weather approaching, there’s nothing like a hearty stew to warm us up. This recipe features chicken, potatoes and veggies, which are always a crowd-pleaser. The best part? It uses the most parent-friendly kitchen appliance of all: the slow cooker.

4. Mustard & Maple Syrup Glazed Chicken
This recipe is a favorite of Red Tricycle’s managing editor. Why? It only requires four ingredients (well, five if you count vegetable oil). Part sweet, part spicy (if you don’t like spicce merely use less mustard), this chicken is sure to wow your fam.

5. Thai Basil Chicken
Take a stab at making your own Thai Basil Chicken with this kid-friendly recipe courtesy of Seattle mama and Red Tricycle contributor, Pat.

6. Slow Cooker Chicken Verde
Did someone say slow cooker? There’s nothing like the feeling of whipping up a great meal with the handy crock pot. Throw all of your ingredients in the pot and voila — you have a fantastic piping hot Chicken Verde dinner.

7. Greek Stuffed Chicken
Stuffing is a great way to dress up chicken. Here a normal ol’ chicken breast is stuffed with fresh and flavorful ingredients. Your kids will love digging into these treasures of goodness.

8. Teriyaki Chicken Wings
Chicken wings are the perfect size for little fingers. This recipe is a favorite of our Managing Editor, mainly because the wings are oh-so-easy to make in a cinch, and the wings are coated in scrumptious homemade teriyaki sauce. Just remember that your fingers will be quite sticky when eating these so you’ll want to line up some wet paper towels in advance.

photo iStock

9. BBQ Chicken with Green Beans
Nothing screams summer more than BBQ. Boneless skinless chicken breast will make this dish amazing and you can either use store bought BBQ sauce or if you’re feeling adventurous, make your own. Serve with a side of green beans to make up the nutritional value of this dish.

10. Curry Fried Chicken
Spice up your fried chicken recipe with some curry flavor. Serve this recipe hot at dinner or cold for a picnic. Your kids will love it.

11. Black Bean Chicken Quesadilla
Chicken is broiled and paired with pureed black beans and a simple salsa made from tomatoes, onion, cilantro and lime juice. Yum!

12. Quick Marmalade Chicken
Marmalade adds a bit of sweet flavor to this chicken recipe, which is ideal for those kiddos who don’t like to eat their meat. The best part? This meal can be made in 30 minutes or less!

photo: iStock

13. Chicken Parmesan Goes Light
Chicken Parm is one of those dishes that everyone loves, but nobody truly wants to eat too frequently because of its unhealthy reputation. Here Chicken Parmesan goes light with a healthier take on this age-old favorite.

14. Chicken With Creamy Mustard Sauce
Creamy mustard sauce adds extra flavor to this healthy recipe. It’s fast, easy and delicious — what more could you want?

15. Crock Pot Tuscan Chicken
With a few simple steps (you can open a can, right?) this meal will be ready to go by the time you get home. Serve it with pasta, rice and veggies for a complete meal. Oh, and did we mention that this kid-approved recipe only requires five ingredients?

16. Homemade Chicken Noodle Soup
Can’t you just smell this one through the screen? This soup is comfort food to the max and so easy you won’t resort to canned again.

—Kate Loweth


RELATED STORIES

60+ Slow Cooker Recipes We’re Obsessed With

Stew & Chili Recipes to Warm You Up This Winter

20 Comfort Food Recipes to Get You Through Winter

With so many people staying at home, now is a great time to bake with your kids. Add a tasty baking craft to your everyday in-door routine with some sticky sweet one-on-one time. Not only is it a fun activity, you also get to eat something yummy when it’s done!

Best of all, what’s better than a DIY twist on the classic candy bars? Take a closer look at two of the top favorite treats from my collection of recipes that are absolute family favorites.

Chocolate-Dipped Coconut Balls 

Are you low on flour? Coconut balls will save the day. They are soft and chewy, and when you dip them in chocolate they are irresistible. You can call these whatever you want but these yummy treats remind me of a Mounds candy bar, only with a citrus zing! I swapped out the honey/maple syrup for 4 Tbsp. of my tangerine marmalade to this recipe I found @pinchofyum.

Ingredients

2 cups dried coconut (I only had the big flaked coconut on hand so pulsed in a food processor until coarse but not too fine)

4 Tbsp Marmalade

1 tsp vanilla extract

4 Tbsp. Coconut oil

Directions:

1. In a medium-size bowl, mix the ingredients until thoroughly combined.

2. Squeeze into small balls and place on a cookie sheet and put in the fridge for about 20-30 minutes.

3. While the little treats are chilling, slowly melt 4 oz dark chocolate in a bowl over hot water. I used chopsticks to roll the balls in the chocolate and lay them on parchment paper. Place them in the refrigerator to chill or just eat them up.

Raspberry Chocolate Truffles

Ingredients:

12 oz semi-sweet chocolate chips or bar broken in pieces

1/2 c. heavy cream

2 Tbsp. unsalted butter

1/2 c. Just Jan’s Seedless Raspberry Spread

Pinch of salt

Unsweetened cocoa powder (sifted) to coat truffles

Directions:

1. Place chocolate pieces in a bowl.

2. Heat cream and butter together in a heavy bottom saucepan until it comes to a boil.

3. Pour cream and butter over the chocolate and let stand for a minute or so.

4. Stir vigorously until smooth.

5. Add Just Jan’s Seedless Raspberry Spread and pinch of salt.

6. Stir until well combined.

7. Put plastic wrap on top of the chocolate in the bowl and chill in the refrigerator for at least 2 hrs. (may leave it overnight).

8. Sit on counter to warm up a bit before forming the truffles.

9. Using a teaspoon, scoop chocolate mixture into your hand and roll between your hands until you have a ball. It doesn’t have to be perfect. Roll in sifted cocoa powder on a plate.

Ruthi Davis is a the Founder of Ruth Davis Consulting LLC with over two decades of success in advertising/marketing, media/publicity, business development, client relations, and organizational optimization for a variety of clients. Ruthi is a proud mom and influencer in the parenting and family market as founder of the Superfly Supermom brand.

photo: iStock

Amber Guetebier, Red Tricycle’s Mobile Editor shares this recipe and tells us, “I made these for my Sicilian friend for Christmas. They are totally time-consuming (over 2 hrs from start to finish) but perfect if you want something autentico for the holidays, and if your kids are tenacious and into baking and getting covered in flour and honey. If your kids are a little less patient, try making the dough the night before. The filling is delightfully sticky and the end product has a wonderful, not-too-sweet flavor. Traditionally these are covered in a powdered sugar based icing and then covered with sprinkles, but I skip that step and add sprinkles after the egg wash to get them to stick, because you don’t want to skip the sprinkles!”

Ingredients:

Dough:
4 cups of flour
1 1/2 tbsp. baking powder
1/4 tsp. salt
1/2 sugar
1 cup butter
1 large egg
2 tbsp vanilla
1/2 cup milk

Filling:
2 cups of dried figs (soaked in warm water for about 20 minutes)
2 cups of dried dates
1/2 cup of raisins (soak in warm water for about 20 minutes)
1/2 cup of honey
1/2 cup of orange marmalade
2 tsp. cinnamon
2/3 cup walnuts, coarsely chopped

Egg wash: 1 large egg white beaten with 1 tbsp. water for an egg wash
Sprinkles

baker henrik

photo: Amber Guetebier 

Method:

1. Sift together dry ingredients (flour, baking powder and salt) and then stir in sugar. Using a fork, cut the butter into the flour mixture. Tip: freeze the butter and then use a grater to shred it into the flour mix, much like you would for a pie crust. Beat the egg, vanilla, and milk together and slowly add to the flour mixture, working with hands to make dough. Turn that out on to a floured surface and knead for 5 minutes or so, until nice and smooth and soft. Divide into 4 pieces, wrap each piece, and place put in refrigerator for at least 45 minutes (or overnight).

2. Grind the figs, dates, raisins and nuts (if not coarsely chopped) in a food processor until coarse. (You can also just chop them, but a food processor is easier). Put this mix in a bowl and add the honey, cinnamon, and marmalade.

3. Preheat the oven to 375ºF. Lightly grease 2 cookie sheets.

4. Take out the dough and roll each piece into about a 12 inch square. Cut the dough into 4×3 rectangles. Put about 2 tbsp of the filling into the center (in a line) and roll the dough over. This makes a tube. pinch the ends and then shape lightly into a crescent. Make diagonal slits across the top, and then place onto pan. Brush with egg mix and sprinkles (before baking).

5. Bake for 25 minutes or until golden brown.

—Amber Guetebier

RELATED STORIES 

Sugar-Free Chunky Monkey Cookies to Make Right Now 

Chocolate No-Bake Cookies You Can’t Live Without 

All the Pie Recipes You’ll Ever Need for the Holidays

20 Cookie & Baking Hacks to Save Your Holidays

Looking for a room refresh? Bed Bath & Beyond has just introduced Marmalade, its first private line of kids furnishings and the whole collection looks amazing.

This exclusive new collection features looks that are whimsical enough to light up your toddler’s room, but stylish enough to still be cool once they hit tweendom.

The Marmalade line includes everything you need to furnish your kids’ rooms including furniture, like beds and dressers, as well as rugs, lamps, decorative accessories and even wallpaper.

Each piece is designed with bold patterns and vibrant color schemes designed to give a playful, but totally hip vibe all at once.

“We are beyond excited to bring Marmalade to life and into the homes of our customers who desire to outfit their little one’s space with just as much style and care as the rest of their home,” says Debbie Propst, Chief Brand Officer. “This collection encourages curiosity and creativity to be present throughout the home design. With Marmalade, we are providing customers with the pieces necessary to create a space for their children that is functional, fun and uniquely their own.” 

The affordable line ranges in price, with decorative items starting at $14.99 and furniture starting at $79.99. Luckily, most of those Bed Bath & Beyond coupons you love can be applied to this collection. The full collection is now available to shop at Bed Bath & Beyond and buybuyBABY online, as well as at select locations of both stores.

—Shahrzad Warkentin

All photos: Courtesy of Bed Bath & Beyond


RELATED STORIES

Drew Barrymore’s Home Line Just Released Kids Furniture & It’s Time to Redecorate

IKEA’s New Foldable Furniture Is Every Family’s Dream

Walmart Just Put IKEA on Notice with Its Chic New Line of Furniture

Grab your hats and marmalade and get ready for some fun, new adventures with the greatest Peruvian bear you’ll ever meet. Now every family can invite a bear into their homes, thanks to a new Paddington Bear TV series!

In partnership with Studiocanal, Nickelodeon will produce a brand new animated series about Paddington Bear. The new show will feature Ben Whishaw, the same talented voice behind the lovable little bear in the two Paddington Bear feature films. The new show will be aimed at a preschool audience.

“Paddington is such a beloved character for all of us at Studiocanal,” CEO Didier Lupfer said. “We are incredibly happy to be back in his world introducing new generations to his kindness, generosity and spirit.”

The new Paddington Bear series is set to debut later next year on Nickelodeon.

—Shahrzad Warkentin


RELATED STORIES:

SpongeBob Squarepants Is Getting a New Spinoff Series, Says Nickelodeon

The “Carmen Effect” Explains Why Your Kids Will Love Netflix’s New Carmen Sandiego

Everything Coming to Disney’s New Disney+ Streaming Service (So Far)

With a limitless imagination and endless enthusiasm, there is no better author than a small child. Put their natural storytelling skills to paper with these three easy ways to write a story together today. Scroll down to get scribing.

1. Story Jar
Fill a jar up with small pieces of paper and big ideas. You can list three things, as in: dragon, fireplace, child, or put a starter sentence, i.e., “This is the story of how I lost my hat.”  Have each person in the family create a short story from their draw. Parents, you might want to write it down for future reference (awwww).

2. Mad Libs
You can write your own version of these for the kiddos to fill out or print out our fairy-tale themed ones (find them here). Younger kids may need reminding what a noun, adjective and verb are (teachable moment!) but older kids can fill in the blanks on their own. Print more than one and have everyone do theirs at once, then have a storytelling session after to share your creations.

3. Shared Tales
All you need for this one is a pen and a piece of paper. Each person will write one sentence in sequence. You can limit it to a specific number of pages (like 2 or 3) if you want to make sure it doesn’t become the neverending story. Simply kick off this creative session with a sentence such as “Once upon a time there was a” and unleash their imagination. Pass the paper around and have every family member write their one sentence, or if your kids aren’t writing yet just have them tell you and you can be the scribe. You can designate number of sentences per person to keep it fair and square with multiples. This one is great in a group and at family gatherings, because it becomes even funnier if you don’t see every sentence as it builds. 

Alternate: Do the above but fold the paper each time so that each person can only see the sentence before them.

4. Reinvent an Old Favorite
Take a classic that the kid’s love and have memorized down off the shelf and read the first page (or paragraph if it’s a chapter book). Instead of finishing the story as it is written, invent a new plot or ending to the tale.

5. Section It Out
Take your time creating a story in stages. Start by choosing a setting: where will the story take place? What does it look like there? Have the kids write 2-3 sentences minimum about their setting. Now work on your character or characters: who is you main character? What are they (boy, girl, robot, dog). Who else is in the book? What do they wear, eat, smell like? Now tackle plot! What will happen in the story? You’ll want an intro, some kind of conflict (i.e. a problem to solve—what will Bear do when he finds out he is out of jam?) and then resolution (Bear’s buddy Snake shows up with marmalade! They dance the night away in The Happy Woods!). You can even work on these one day at a time.

6. Dictionary Draft
Using a dictionary (a real one, the kind that looks like a book!) to randomly select 3-5 words that each kid has to work into their story. Let siblings choose the words for each other. This one has the added bonus of getting learn new words.

Need more lit-inspired fun? Check out our ideas for acting out your favorite story with the kiddos.

What is your favorite way to write a story with your kiddos? Share it with us in the comments below. 

words and photo by Amber Guetebier

When I asked my 4 year-old daughter what she wanted her room to look like, she said “lots of colors!” For a kid who often wears every color in the rainbow and enjoys mixing a lot of patterns, this wasn’t very surprising. The problem is, I (somewhat selfishly) wanted to like her room too, since I can see it from the living room. I wanted a room we could both be happy with.

I love modern design, and I wanted a room that was colorful, but not tacky or overwhelming. Stripes are obviously a big trend in rooms right now, but I didn’t want a whole room of stripes, and it felt like lots of colorful stripes could quickly overload the senses. I decided to pick six colors and do diagonal stripes – and not across the entire wall. To tone it down even further, I chose black and white accents (the black and white dot rug is from Ikea, $20).

I can honestly say that the stripes project was a pain in my tuchas and I was really glad that I decided to only do six stripes. It required a lot of painter’s tape and measuring so that the stripes were lined up perfectly.

This was a cheap project, though, thanks to paint samples from Home Depot. Each 8oz sample was $3, and I still have paint left after painting two walls and the borders of all her picture frames.

In case you’re curious, the colors are Glidden from Home Depot. Yellow is Sunflower (GLY01), Blue is Peacock Blue (GLB01), Green is Lucky Shamrock (GLG05), Pink is Watermelon Smoothie (GLR09), Red is Red Geranium (GLR06), and Orange is Orange Marmalade (GLO04).

As you can see, only half the wall is painted; the other half I left white. I gave the picture frames (Ribba from Ikea, which she’s had in her room since babyhood) some pizazz by painting the edges. I mixed in some other colorful stuff too – a vintage blackboard and a Felix the Cat ceramic piece I did in high school.

Another priority for me is storage. These are from Ikea’s Trofast collection.

At four, C can’t read yet – but she also can’t remember which drawer is for which toys. I labeled each one and drew a picture of what’s inside. This method works only part of the time, haha.

The other wall is very different – I painted circles freehand on the opposite wall. The white clock is from Target ($7), and the mid-century dresser and bookshelf are vintage. When I saw the little coat rack at Ikea ($25), I couldn’t believe how perfectly it matched the room and I had to have it. She hangs her coats and doctor jackets there.

Her dresser has a few knickknacks, mostly from my childhood, and a fan I spray-painted pink (she was thrilled!).

C loves books (and so do I!). I love this old bookshelf I found at the antiques fair for $20.

I’ve been carting these cute star garlands in bronze, silver, and gold around for years (they’re from Paper Source), and hung them from the ceiling. Good thing there’s no theme here and I can do what I want. ;)

On the left, below, you can see the blackout shade situation. This is a very wide window, and after battling for over a year with a ridiculous blackout shade from Home Depot that kept falling down, I finally decided to get two smaller shades from Ikea. These are much higher quality – the inside is made of metal, rather than cardboard like the Home Depot shade. Yes, there is a space between the two shades which lets light in, but it doesn’t bother C. I got the idea to use two shades from my friend Reichel, who did the same in her kids’ room – they aren’t bothered by the light either.

The night stand was $15 from the antiques fair. It works perfectly and can take a beating. She loves her “special drawer.”

Overall, I wanted C to feel at home in her room, and be delighted every time she enters it. From her perspective, there’s color everywhere. From my perspective, it’s fun, cute, and not tacky at all. Success, I’d say!

Sara Olsher is a single mama based in the San Francisco Bay Area. She is fascinated by emotional intelligence, confidence, and resilience in young kids.