The days are warmer, the birds are chirping, and spring is finally here. And while we love seeing all the blooms, bugs, and muddy puddles popping up all over the place, we’re not quite sure we want to invite all those natural elements into our house (especially that rainy day mud). But not to worry, these spring sensory activities for babies and toddlers focus on all the outdoor elements they love without messing up the place.
Looking for more sensory activities for toddlers? Check out our favorite busy boxes for young kids, fun outdoor learning activities for young kids, and our ultimate list of sensory play for babies and toddlers.
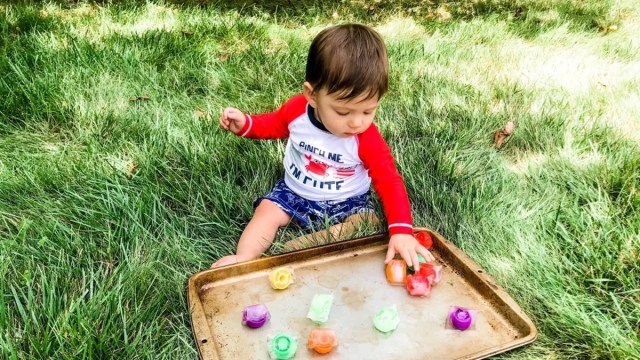
1. Make Spring Sensory Soup
If you’ve got flowers, you’ve got everything you need for a spring sensory activity. Get a bin, and fill it with water, flowers, leaves, and whatever else you think will be engaging, give your baby or toddler a spoon and a cup and watch them get to work. Of course, if you’ve got a mouthy babe, be sure to watch them at all times.
2. Muddy Truck Sensory Bin
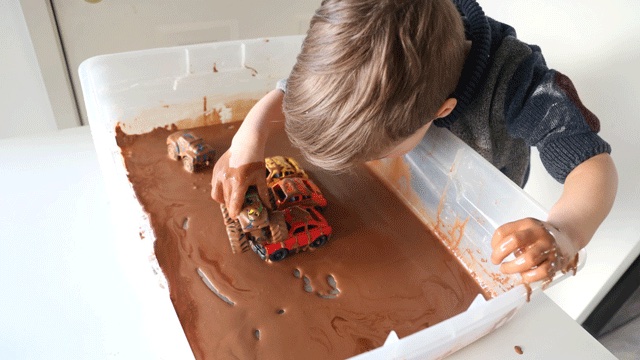
If you're not up for playing in actual mud, make your own! This spring sensory bin from Mama. Papa. Bubba is safe for kids to sneak a taste of and smells delicious. Why? Because it's made with cocoa powder! Littles can move the trucks around so they make muddy tracks, as well feeling the texture of the mud with their fingers. You can even add small scoopers and measuring cups for new ways to experience the mud. You may want to lay down a towel or plastic tablecloth underneath to help contain the mess.
3. Rainbow Water Beads
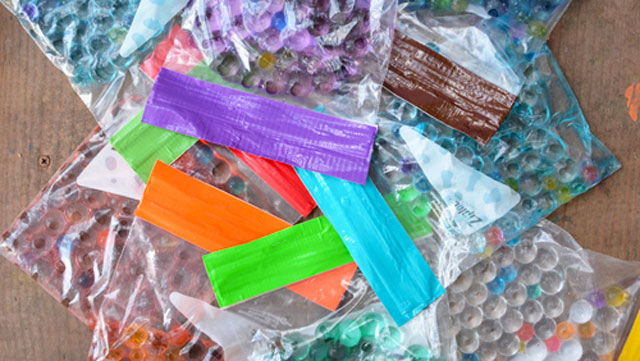
Pop by any preschool classroom and you’re likely to find kids and parents equally enamored with water beads. Something about their squishy texture just screams “Play with me!” However, because they aren’t edible, sharing them with young children means getting creative. Meri Cherry has the great idea to fill resealable bags with these beads, seal ‘em up with duct tape, and let your little one squish, mush, and roll to their heart’s content (under your supervision, of course).
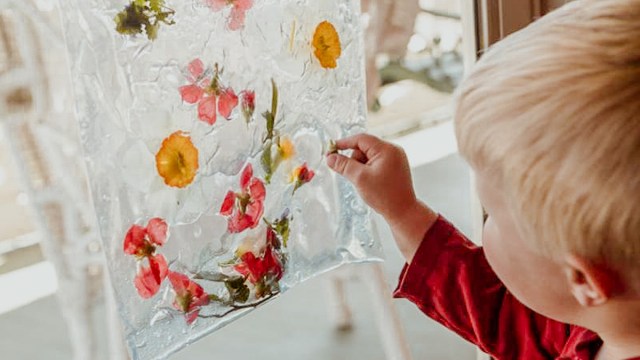
4. Nature Sensory Bag Suncatcher
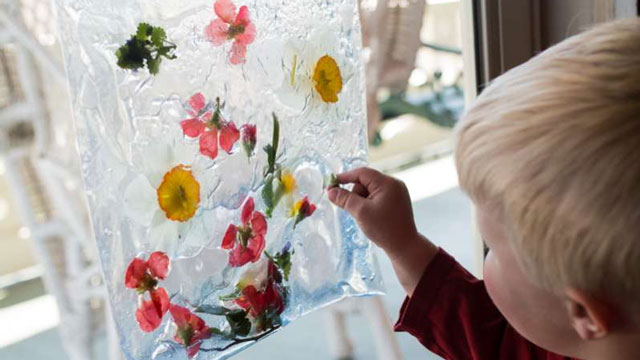
Nature lovers will be entranced by this eye-catching sensory bag from Hands On As We Grow. Head out to your backyard or local park to gather pretty leaves and flowers, and then craft the suncatcher with your child for a perfect spring sensory activity.
5. Colorful, Edible Water Beads
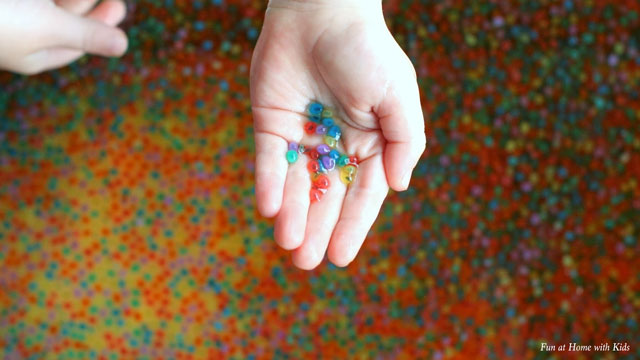
From our friends at Fun at Home with Kids comes this edible (safe for babies and toddlers) spring sensory activity that uses basil seeds instead of the more common water beads. These seeds absorb water, resulting in a squishy, jelly-like consistency, and can be dyed any color you like. From there, your little one can scoop, pour, fill, empty, press, swirl, and more—all without you worrying about a choking hazard. To bring spring alive in this bin, be sure to add fun touches like plastic farm animals, tractor toys, and even fabric flowers to the mix.
6. Texture Eggs
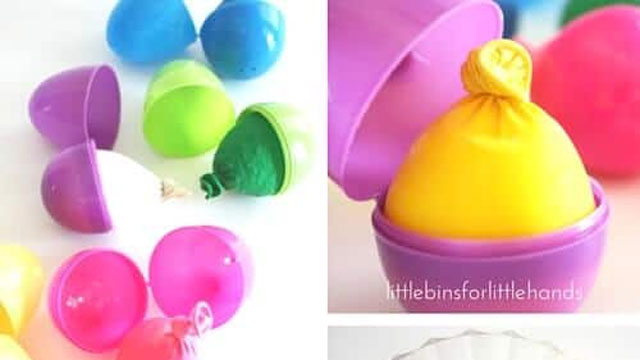
If you have plastic Easter eggs, put them to good use with this fun idea from Little Bins for Little Hands Inside each egg, place a balloon filled with items of different textures, such as rice, baking soda, or flour.
Related: DIY All Day: 20 Sensory Activities for Toddlers & Babies
7. Chicks and Flowers Sensory Bin
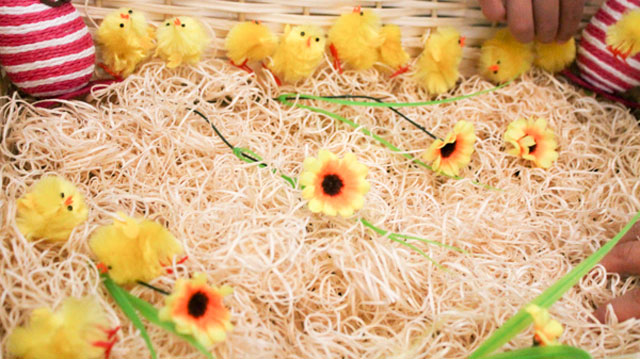
We love this cheery sensory bin idea from In the Playroom incorporates straw and little chicks. The littles can practice their counting, hide the chicks in the straw, and feel the different textures.
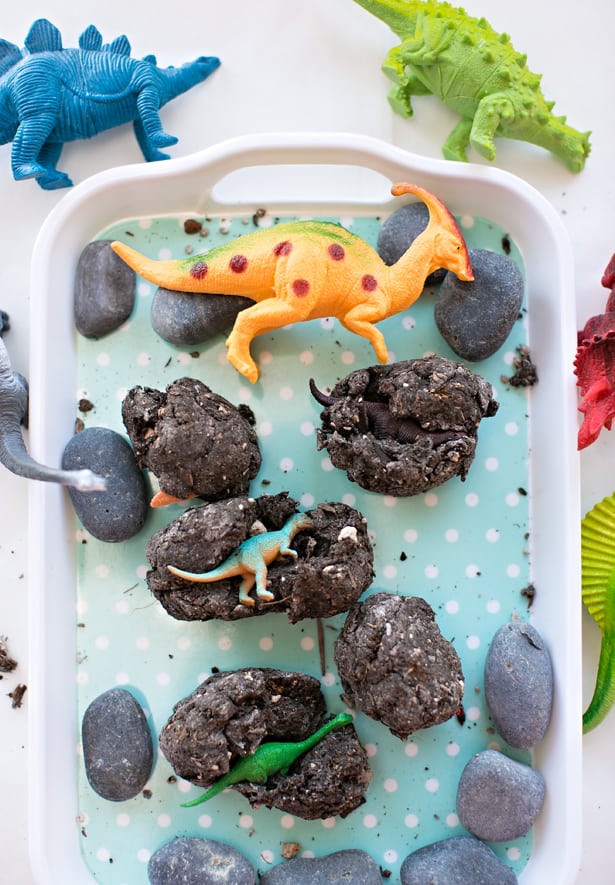
8. Insects and Bugs Sensory Bin
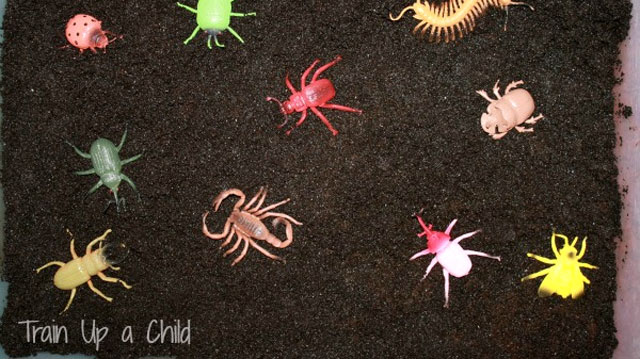
Little ones who don't mind getting their hands dirty will love searching for insects and bugs in this dirt-filled sensory bin from Learn, Play Imagine. Be sure to use larger plastic bugs (that aren't choking hazards) for your baby.
9. All the Colors of the Rainbow
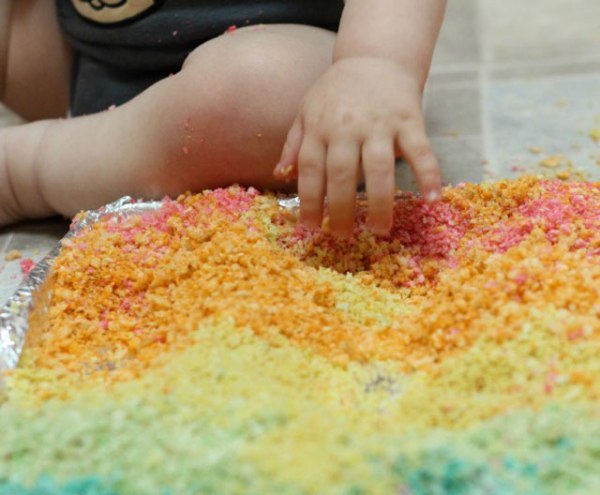
Does your little one put everything in their mouth? Katie of Happily Ever Mom shows you how to turn regular bread into a rainbow-colored activity for your little one to crunch, smash, and have fun manipulating. Because it's edible, you don't have to worry about baby taking a nibble.
10. Pom Pom Seed Bin
This easy spring sensory activity is best for toddlers since you’ll need dried black beans to create the “soil.” Throw in a few fake plants and flowers and let your kiddo dig to their heart’s content.