There isn’t an entire book called The Womanly Art of Breastfeeding for nothing—it truly is an art. And for some of us artists, myself included, it just doesn’t come as naturally as we’d hoped. There are so many things I didn’t know before I started breastfeeding, from the cracked nipples to the awkwardness of doing it in public, but I was especially unaware that there are so many different breast and chestfeeding positions, not to mention the fact that you can pick and choose based on your unique needs.

Whether your breasts are large, you have twins, your baby won’t latch (same here), or you’re just really freaking tired (which you will be), rest assured that there’s a position for that. When feeds don’t go smoothly, or even when they do, it can be super empowering as a new parent to have a full menu of the best breastfeeding positions to pull from and know exactly how to maneuver them—and we’d bet you haven’t heard of a few of these. So stick with us. We’ve asked two lactation experts to explain how each position works and which to use for specific situations that may come up during your bodyfeeding journey.

The best breastfeeding positions start with a solid latch

Both experts agree that there’s no one-size-fits-all position when it comes to breastfeeding. Amy Peterson, IBCLC, a lactation consultant for Evenflo, says that while it can take great patience to get nursing going smoothly, the best breastfeeding position is one where the baby can latch effectively, the milk transfers well, and everyone is comfortable.

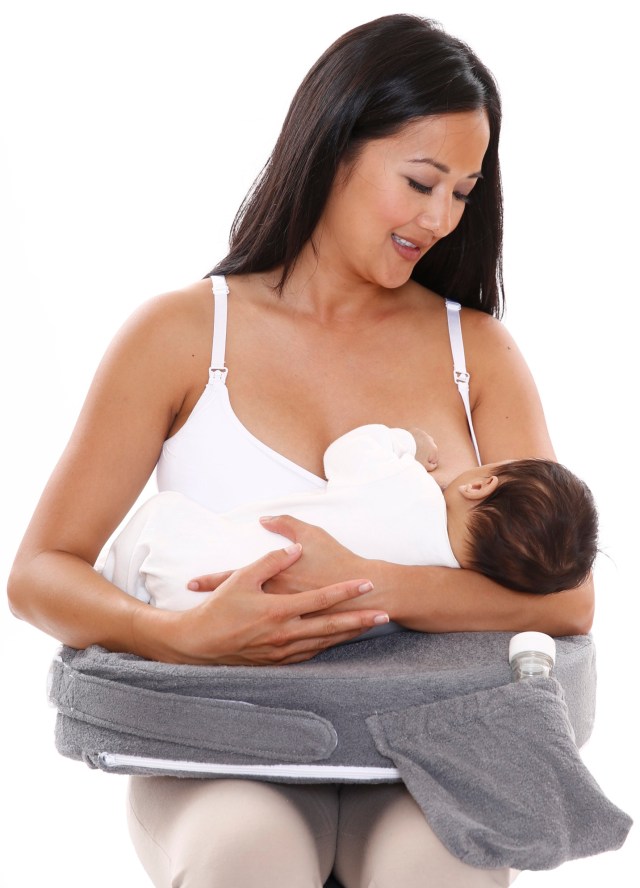
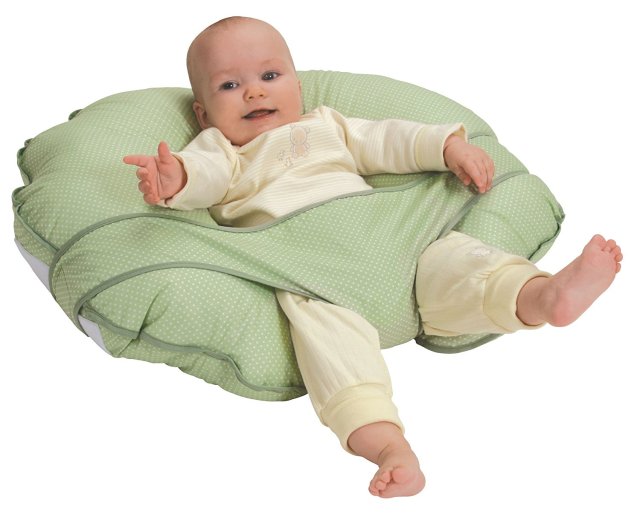
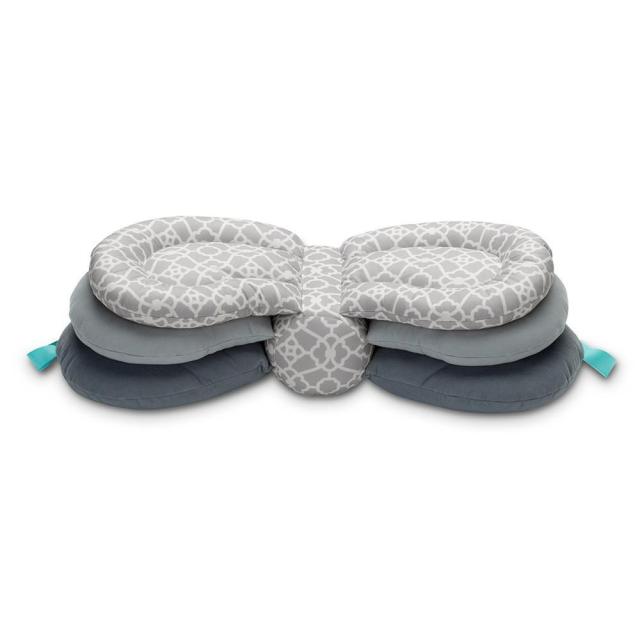
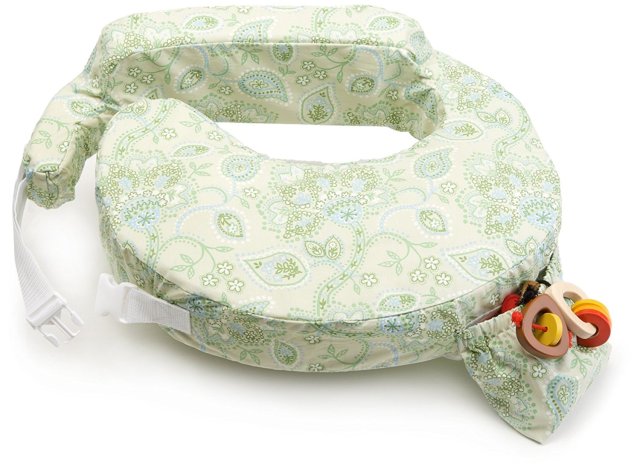
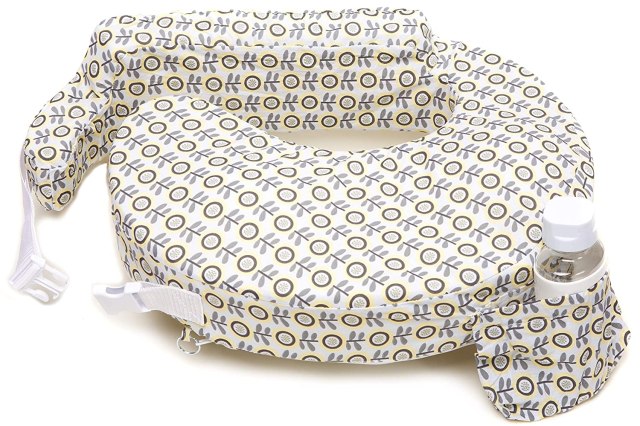
To get your baby latched and eating, the basic steps involve positioning yourself comfortably, positioning your baby close to you, supporting your breast, and attaching your baby to your breast, according to La Leche League International. Baby can be resting on a nursing pillow (a C-shaped pillow that often fastens around the parent’s waist), a regular pillow, or no pillow at all, depending on what works best for you. When attaching them, you want to start with their nose lined up to your nipple, then touch their chin to the lower part of your nipple, let them open their mouths, and pull them onto your nipple (it should be aimed at the roof of their mouth) with your hand forming a “second neck” to support them. Always be sure to bring the baby to your nipple height rather than leaning over them to avoid back and neck aches or sore nipples.

While the steps for getting into your breastfeeding position are pretty set, how you choose to hold your baby while nursing is totally up to you—and there are plenty of great options to try, practice, and perfect. The cradle hold is one of the most popular positions because parents so naturally hold their babies this way, says Molly Petersen, a certified lactation counselor with Lansinoh, but did you know you can nurse your baby like a koala, too? Petersen urges new parents to experiment and explore a number of styles that offer different benefits. Here are some of the best breastfeeding positions to try, from the tried and true to ones that probably aren’t on your radar.

First, the classics…

Cradle hold breastfeeding position

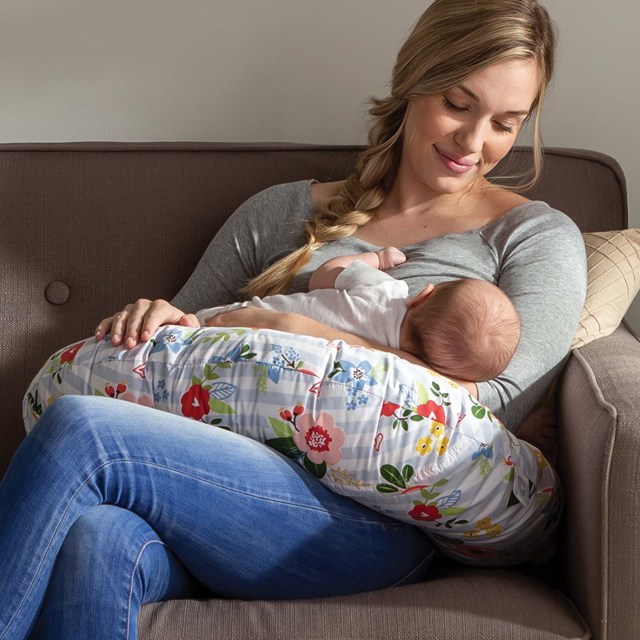
“The cradle hold is often very popular with new moms, as it is how we most often hold new babies and most people are comfortable with it,” Petersen says. “It works for all different breast sizes, and makes it easier to see if your baby is getting a good latch.”

Using a nursing pillow or regular pillow to support your baby, have them lie on their side facing your body with their hip and mouth level to your nipple. Baby’s head should be resting on your forearm with your inner arm and palm supporting their back and bum. To help your infant latch, try a “U” hold” or a “C” hold—meaning you can use your hand to support your breast underneath to make a U shape or hold it from the side like the letter C.

Cross-cradle hold breastfeeding position

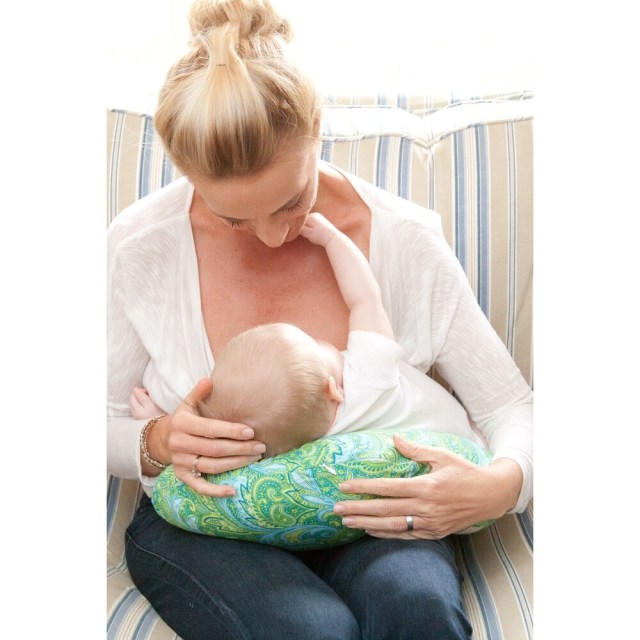
For smaller newborns and preemies, or babies who aren’t yet experienced eaters, this position is a great choice because it provides ample support. Baby’s position is similar to the cradle hold, tummy to tummy across the width of your body, but they’re nursing on the breast opposite the arm you’re using to support them. So rather than supporting their head in the crook of your arm, you hold their lower body and bum in the crook of your arm and support their neck with your fingers (and your palm resting in between their shoulder blades). It’s helpful to have a comfy chair with armrests to support your elbows.

Football hold breastfeeding position

If you have twins and want to tandem breastfeed or are recovering from a c-section, you’ll want to get acquainted with the football hold. The only drawback, according to Peterson, is that you can’t see the baby’s bottom lip to evaluate the latch, so if you’re new to nursing or have had issues with latching you may want to have your partner, a friend, or a family member take a closer look while you’re feeding.

For this hold, find somewhere where you’re comfortable, supported, and upright, like a large chair or sitting against your headboard, Petersen explains. “Place a pillow on the side you will be feeding from or, if feeding twins, on both sides. Lay your baby on top of the pillow with their feet tucked between your elbow and your side and their head pointing toward your feet.” Just make sure the pillow is high enough to bring baby’s head to breast height so you aren’t hunching over. To support their head, use the arm on the same side they are lying to cradle their neck in your palm with your pinky and thumb curving towards their ears, Petersen says. Ensure that baby is tucked tightly next to your body and isn’t putting pressure on your tummy, adds Peterson.

…And the ones you probably don’t know about but should

Laid-back breastfeeding position

“Laid-back feeding has you sit in a reclined position supported by pillows, and your baby lays on your stomach with their head resting next to your breast,” says Petersen. “This position can be great for moms with a forceful let-down, as it allows the baby to better regulate milk flow.” The laid-back breastfeeding position is intuitive and comfortable, according to Peterson, which is why it’s so popular.

It also offers a number of benefits. “Laid-back positioning uses gravity to promote baby’s reflexes to kick in and help with latching,” she says. “It also takes advantage of gravity—baby is fully supported on mom’s body.” It can also be a form of tummy time for older babies who hold their necks up for part of the feed. Best of all, if your babe is suffering from a gassy tummy, this position can help offer some relief.

Related: Breastfeeding Essentials for Nursing Your Baby

Side-lying breastfeeding position

“Side-lying is a great position for babies who seem to pull away from the breast,” Peterson says. “It is also just an all-around relaxing position worth mastering.” If you’ve had a c-section, have larger breasts, or are doing nighttime feeds, the side-lying breastfeeding position may be the one for you, according to Petersen. This sometimes underutilized option is also just goals in general because you get to lie down, and honestly, that’s the dream when you have a baby.

So how do you do it? “In a side-lying position, you lay on your side with your head supported by a pillow,” Petersen explains. “Place your baby on their side facing you with their mouth lined up with your nipple.” You can then pull your bottom arm up under your pillow or head, whatever is most comfortable, and if you’re worried about your little one rolling away you can put a pillow or rolled-up towel behind their back. We have a feeling this will become a fast favorite.

Related: What If Breastfeeding Gear Was Actually Cool

Koala breastfeeding position

The koala breastfeeding position is a bit more acrobatic, but Peterson says just think of it like you’re sitting your baby up on a table. “Baby’s legs straddle mom’s thigh, and mom supports the baby for an upright feed. This can be beneficial if there are some oral motor weaknesses or oversupply issues,” she says. Petersen adds that “if your baby is smaller you can also use a small pillow or rolled-up towel on top of your leg to boost them higher and bring their mouth in line with your nipple.”

Koala is a great position for babies with reflux or chronic ear infections and parents with a forceful let-down because it better allows baby to control the flow of milk and the pace of the feed.

A cheat sheet for the best breastfeeding positions for any parent and baby

If you’re looking for the best breastfeeding positions for specific scenarios, here’s a list of common concerns and the nursing options to help you handle them.

Breastfeeding Positions for Newborns

With so much uncertainty in the newborn stage and while still trying to perfect that latch, it’s nice to lean on positions that feel extra secure for everyone. These positions provide a lot of support and optimal positioning to make it easy for your baby to latch.

  • Cradle Hold Breastfeeding Position
  • Cross-Cradle Hold Breastfeeding Position
  • Football Hold Breastfeeding Position
  • Laid-Back Breastfeeding Position

Breastfeeding Positions for Reflux

If your baby has reflux you’re probably dealing with a lot of spit up. To reduce pressure in their tummy and for the milk to work with gravity instead of against it, breastfeeding positions where they’re sitting up with their head above their waist can help immensely.

  • Koala Hold Breastfeeding Position
  • Laid-Back Breastfeeding Position

Positions for Breastfeeding Twins

Twins require some maneuvering where breastfeeding is concerned. If you’re feeding them in tandem, you need positions where they can fit on either side of you comfortably or be laid on top of one another in a parallel position. You can do one position at a time, or combine two (e.g. simultaneously using the football hold for one and cradle hold for the other).

  • Football Hold Breastfeeding Position
  • Parallel Cradle Hold Breastfeeding Position
  • Laid-Back Breastfeeding Position

Breastfeeding Positions for Gas

Similar to reflux, to help your gassy baby it’s best to keep their head above their waist. In feeding them while basically sitting up, there’s less potential for extra air to build up in their tummies.

  • Koala Hold Breastfeeding Position
  • Laid-Back Breastfeeding Position
woman breastfeeding
iStock

Breastfeeding Positions After C-Section

These positions are all about comfort for parents while they heal after having major surgery, which means keeping babies away from their incision.

  • Football Hold Breastfeeding Position
  • Side-Lying Breastfeeding Position

Breastfeeding Positions for Large Breasts

Those with large breasts may have a hard time breastfeeding because of visibility issues (not being able to see how the baby is latching) and a sore neck and back from certain breastfeeding positions.

  • Side-Lying Breastfeeding Position
  • Cradle Hold Breastfeeding Position
  • Laid-Back Breastfeeding Position

Picking the best breastfeeding position is super personal and will probably include some trial and error. If you’re having issues latching or finding the best position for you and your baby, you can always reach out to an IBCLC lactation consultant in your area to help with your journey.

Once baby is fed and happy, make sure to capture all their firsts—and share them with your family and friends near and far—with the Tinybeans app. The secure platform puts parents in total control of who sees and interacts with photos and videos of their kids.

If you’ve been putting off the day when you clear the clutter from your kids’ room, it’s time to take action. Tackle your kids’ bedroom or playroom—the spaces that require daily work to keep clean—with a real plan of attack. We asked the experts to weigh in and offer tips on how to clear the clutter and keep things organized (for real). From prepping for the big day to what you need to toss out, here’s our guide on how to clean out your kids’ room.

How to Prep for the Day You Clear the Clutter

1. Make a plan.

you need a plan to clear the clutter
iStock

A good way to start is to identify what you want to accomplish while cleaning. Are there a lot of old toys that can be given away to a friend or sold at a garage sale? Does your kid need more space for books? Write down the tasks you want to tackle, and you’ll feel better about the job.

2. Start where you are.
It’s the secret motivational boost for what can feel like a daunting task. As contributor Jennifer Landis recommends, any spring-cleaning project should start with one room, and look—you’ve got your kid’s room already picked out. Whether you tackle an all-purpose bedroom or have a designated playroom, grab your “to keep,” “to donate,” and “to toss” bags, and get going!

3. Move out.
If it’s been a while since you’ve vacuumed under that epic fort in the corner, it’s time to move things around—or at least to the middle of the room. It’s not only the best way to clean out nooks and crannies, but you’ll be more mindful of what you bring back in.

Related: The Secrets Professional Organizers Use to Stay Sane & Clutter-Free

What to Toss While You’re Cleaning

1. Random tiny toys.

Nik via Unsplash


All those little plastic toys your kids get while cruising the petite party circuit? If it hasn’t found a place of honor in your kid’s play rotation yet, toss it.

2. The last of the baby gear.
Do you still have a nursing pillow in the closet? How about an activity gym or a Bumbo seat? If you’re done adding to your family, it may finally be time to pass these on to newer mamas or donate to those in need. And upcycle! Add flair to formula or diaper wipe containers for extra storage or paint those baby food containers for a color wheel crayon organizing system. Check out more clever ways to upcycle old baby gear.

3. Anything broken.
No matter what project you’ve undertaken, little feels better than being on a roll, so start with easy toss-ables, such as anything broken. That play purse that lost its handle. Those three missing parts that don’t add up to anything. Crayon stubs you know you’ll never melt into little DIY gifts. Clear all that clutter and enjoy the immediate breathing room.

4. Stuffies that aren’t lovies.
We’ll admit it, this one is going to be a battle, but if your little hoarder is old enough to rise to the task without suddenly growing inseparable from each stuffie you attempt to discard, then this presents a wonderful opportunity to donate those in good condition.

5. Too-tiny clothes and shoes.
Kids grow fast in the early years. Before we know it, the pants are too short and the shoes are tight. Take honest stock of what your kid wears (oftentimes it’s a few favorite outfits), and purge what’s outgrown, stained, or simply not your kid’s style. You can even go the capsule wardrobe route, check out our tips on how to make it happen here.

6. Odd socks. 
It’s a mystery as to where they all go, but we do know that socks love to disappear. Accept the fact that, for some reason, they’re gone, and toss the solo sock. You’ll have more space in your drawers and it’ll make laundry day much more pleasant.

7. The endless piles of paper.
Royal crowns from birthdays gone by? Notebooks long ago scribbled in? Coloring books of yesteryear? How about all those school Valentines or party favors? Take a quick flip through for anything indicative of early artistic genius, then recycle, recycle, recycle.

8. Outdated wall decor
Have you changed your preschooler’s wall art since you set up the nursery? Every few years, it’s nice to switch things up. If you’re still planning to add to your family, put the sweet baby giraffe print in storage with the Rock ‘n’ Play, and update the walls. Etsy has thousands of affordable printables, or you can clear wall space for an educational mural from Wallsauce. Here are other great ways to design a kids’ room that grows with them.

9. Ripped, broken books and board books (if your kids are beyond the baby stage).
Like little bodies outgrow clothes, big minds and imaginations outgrow books. If your bookworm’s shelves are bursting, it’s time to save a few sentimental titles and donate the rest.

How to Keep It Clean After You Clear the Clutter

1. Pick up regularly.

Now that most of the hard work is over, save time in the future by going through this clean-up process regularly, especially after birthdays and holidays, as NEAT Method recommends. Read on for other great pro tips and secrets to organizing success from moms.

2. Don’t micromanage the small stuff.
Toys and parts often migrate under the couch, appear underfoot, and end up right on your last nerve. While these Shopkins and snap-ins may be tiny, they need a big home. Rather than spend time every day re-assigning them to individual containers, consider one big bin or this fun Swoop Bag, which also works wonders for LEGO, train sets, and play food. The best part? Clean-up is a cinch, even for mini-mess makers.

3. Don’t go overboard on storage.
It’s a little counterintuitive, but hear us out. We are all for stylish, sensible ways to organize—and storage solutions are certainly keys to a clean room—but any additional containers are bound to fill up. Work with what you have to minimize excess—the answer isn’t always to store it.

4. Save the sentimental stuff.
Parents, we are one of the biggest reasons it’s so hard to clear out what our kids have outgrown—physically and developmentally. It’s emotional! We remember when he walked off to his first day of kindergarten in that sweatshirt or that toy dinosaur she carried everywhere for a year. Select choice pieces for cool and surprising ways to repurpose the sentimental stuff.

5. Upcycle “new” toys.
With everything streamlined, the last thing you or your budget want to do is rush to fill it up with new stuff. The next time the kids beg for the latest, get creative! Sand-filled juice boxes make for awesome stacking blocks and corks morph into stamps. There are loads of great reasons why you should be upcycling anyway.

6. Use the “out of sight, out of mind” method. Have a place to stash the toys they haven’t played with in a while and give yourself a time limit. If the time has passed and no one has asked for it, you can donate or toss it. Get more on how to make this work here.

7. Let (some) clutter go.
At the end of the day, it’s a kid’s room. It should look like a kid lives, plays, and imagines there, which means extra stuff is sometimes just part of the fun, messy wonder of it all. So relax, and remember that the next time clutter accumulates.

It’s all about the little things when it comes to flying with a baby

You want to go places, but let’s face it: Your little bundle of joy may not be so joyous 15,000 feet up. Never fear, there’s no need to put off travel! Whether you’re trying to figure out where to sit on the plane or what you need to bring in your carry-on, we’ve compiled everything you need to know about flying with a baby to make your family’s jet-setting experience a little less bumpy. And if you’re looking for destination inspiration, check out our top spots to visit before the kids grow up.

First Things First: At What Age Can Your Baby Fly?

You may be ready to show off your new addition to long-distance relatives, but pediatricians recommend waiting until your baby is at least three months old—or had their first set of shots—before traveling by plane. Even though airplane air is filtered before it is recirculated, it is still a closed cabin full of people, and that might pose a challenge for brand-new immune systems. That said, common sense precautions are what doctors advise once babies are old enough to fly

"In general, I think flying is relatively safe," said Los Angeles pediatrician Elle Raker. "I’d prefer everyone else was still masking, but unfortunately, that’s changed." Raker recommends maintaining social distancing when traveling, if possible, and keeping your hands and nearby surfaces clean while aboard the plane. That means sanitize, sanitize, sanitize! (Pssst: These airplane tray covers are super-convenient for keeping little fingers safe from dirty airplane trays!)

Related: Stylish Diaper Bags for Your Family Adventures

Booking Your Flight: The Best Time and Day to Fly with a Baby

toddler in an aiport
iStock

The flight you choose—what time and what day—can make all the difference when you've got a pint-sized plane partner. So follow these guidelines to set yourself up for smooth travels:

Book your flight for a Tuesday or Wednesday
According to Airadvisor.com, flights on Tuesdays and Wednesdays are almost always cheaper and less filled than flights that bookend weekends or on Saturdays and Sundays. This means you'll have a better chance of having an empty seat next to you (which is like winning the lottery when it comes to flying with the fam).

Fly direct—or choose a long layover 
Ear pain tends to be worse on takeoff and landing—so minimize these painful times for your baby by choosing a direct flight! Flying direct also minimizes the number of dirty airport floors your little explorer will want to crawl all over. If you can't bear the thought of 17 hours on an airplane, try to book a layover that allows you to spend the night (or two!) in your layover city rather than just waiting at the airport. This gives you and your brood a chance to recoup and explore a new city. That's what Mommy travel blogger Carrie Bradley, former flight attendant and founder of FlyingWithABaby, advises. "I prefer breaking up the journey just so everybody can get some rest," Bradley said. "We like to take like 48 hours and make it a mini vacation."

Pick a morning flight
Regardless of your baby's sleep schedule, Travel & Leisure says morning flights are the only flights you should book since they are the least likely to be delayed or canceled. Early morning flights are usually less bumpy, which means more time letting your little one out of the car seat to explore the cabin (a must for new walkers). If that isn't possible, and you've got a by-the-clock napper, book a flight that coincides with nap time.

Where to Sit On the Plane when Flying with a Baby

Dad flying with a baby
Laura Green

Where you sit on the plane matters! If you're able to choose your seats for the flight, here are some things to consider:

If it's an option, get a bassinet seat (located at the bulkhead seats) 
Got a baby under six months? Many long-haul or international flights offer travel bassinets that clip into the wall of the bulkhead seats. These can be lifesavers for harried parents (and exhausted infants). To score these seats, you'll need to book your seats super early. The rules vary by airline, but most bassinets are only available for infants under the age of one and less than 25 pounds. For details on where your chosen airline stands, check out this comprehensive list of bassinet seats on 50+ airlines.

Book a window and aisle seat and hope for an empty row
Middle seats are always the last to be picked on a plane, so reserving a window and aisle ups the chances that you'll get all three seats to yourself (Note: You can even do this if you're flying with a family of four; just book two windows/aisle seats). You can always switch if someone does book that seat between you.

Don't put your baby in the aisle seat 
Passengers in the aisle are in the line of fire should luggage fall from the overhead bins during a flight (this happens more than you'd think, with an estimated 4,500 travelers hit by falling airplane luggage each year). These seats can also be risky for little ones who may get their fingers or feet pinched by carts coming through the aisles. Babies and children are safest in the middle or window seats.

Don't sit right next to the bathrooms, but don't sit too far away, either!
Sitting too close to the bathroom means your sleeping baby may be startled awake by the crowd noise after mealtimes (when most people go to the bathrooms). But don't sit too far from one, either; you want to be able to dash to the changing table when blowouts strike.

Seats over the wing are the least turbulent 
If you are worried about turbulence, a seat near the wings will offer the smoothest ride. This makes a difference when you're trying to aim a little spoon into your finicky baby's mouth during feeding time.

Related: Best Airports When Traveling with Kids & Babies

What To Know About Getting Through Security

Family going through airport security line
iStock

Airport security lines aren't fun for anyone, but they're extra stressful when you're contending with wandering toddlers or fussy infants. Here are some tips to help you prepare for (or avoid!) the wait: 

Formula & breast milk are allowed on your carry-on
Nursing and pumping mamas, relax! According to TSA press secretary Carter Langston, you can bring your breast milk through the security lines—even if the baby is not with you at the time (such as if you're away on business and want to bring that "liquid gold" home for your baby). This is because the TSA considers formula and breast milk "medically necessary liquids," which are allowed in carry-on baggage in quantities greater than 3.4 ounces (that's the limit on other, non-medically necessary liquids). As of July 2022, the TSA also updated its guidelines online to add that ice packs, freezer packs, gel ice packs, and similar items required to cool medically necessary liquids are also allowed through security.  

Baby food is OK
Food pouches and jars of baby food are also considered medically necessary, so they're also exempt from the 3.4 ounces rules.

It's easy to get TSA approved 
If you think getting TSA PreCheck status is a difficult process, we're here to tell you it's not! A quick online application and an in-person interview are all you need to do to get what is essentially a "fast pass" through the security lines. Even better, as long as your littles are under 13, they can whisk through security with you without needing their own TSA approval! Apply for the pass here: tsa.gov/precheck.

Kids don't have to take off their shoes
If your kids are under 12, they don't have to remove their shoes when going through security.

Ask if there's a TSA Family screening line
Many large airports have a special security line for families. The signage may not be obvious, so ask a security representative to direct you if you're not sure.

Take your baby out of her stroller or car seat  
This is another reason to keep your baby awake until you get aboard the plane. Babies must be carried through security (though they can be carried on you in a sling) with strollers and car seats going through the X-ray machine separately. (Strollers that don't fit through the X-ray machine will have to be inspected manually.)

Children under 18 don't need a passport or ID to fly in the United States—but they DO need a passport to fly internationally
To apply for a passport, go to travel.state.gov to download the forms. And don't wait! According to the U.S. Passport Office, it takes 10-13 weeks to process a new passport and "expedited" passports take 4-6 weeks. You must bring your documents to your local passport office (you can't mail them in), and both parents need to be present (or have a notarized form saying why they're not). 

Ultimate Supply List for Flying with a Baby

Mom getting ready to fly with a baby
iStock

Packing for a flight with babies and toddlers requires a LOT of prep work. Wipes? Check! Diapers? Check! Sanity? TBD. Here's a checklist of things to put in your carry-on when flying with a baby: 

The Essentials: 

    • Baby carrier/ sling - Even if you brought a stroller through the airport, a carrier is a great way to go hands-free in the airplane while your little one snoozes. Many a mom has strapped that baby to their bellies even when making a restroom trip. Trust us: you'll be happy to have your hands. 
    • Pacifiers/comfort items - If your baby uses a pacifier, bring at least four of them on the plane (they WILL be dropped).  
    • Breast milk, formula, baby food - Most airlines won't provide special meals for babies, so be sure you bring everything your baby will need for the flight (and extras in case there are any delays or if you're stuck on the tarmac). 
    • Feeding supplies - Bibs, spoons, bottles, bowls (these bowls that stick to surfaces work great with the tray table)
    • Finger foods - Never underestimate the power of food to keep your baby busy. Light finger foods like puffs or teething crackers are great because they can keep on nibbling without getting too full. 
    • Wipes - Separate from the wipes you'll put in your changing kit, an extra pack of wipes is essential for all those other times you'll be cleaning up your baby (and yourself). 
    • Changing items - Diapers, wipes, changing pad. Bring double the number of diapers and wipes that your baby usually uses in the period you expect to be traveling. Tip: Keep all changing items in a separate bag (Ziploc bags work great) so you can easily grab them from your carry-on and dash to the bathroom. 
    • Pull-ups, if your baby can stand - These make diaper changes way easier since you don't have to lay your toddler down on that tiny table in the tiny airplane bathroom. 
    • Toys - For younger babies, rattles, teething toys, and other sensory toys will keep your baby entertained for short spurts; older kids may want books, dolls, or puppets.  
    • Clips to keep toys/pacifiers from falling - If your baby is anything like every baby ever, they'll be tossing said comfort item overboard shortly after they get a hold of it. Toy clips like these are an easy fix.
    • Baby pain relief/medications - Bring a small "emergency bag" stocked with liquid baby pain relief (Tylenol for babies of any age; Advil for babies over six months), gas drops, and any medications your baby may need. 
    • Burp cloths 
    • Nursing pillow (we recommend the My Brest Friend) - This may be cumbersome to carry around, but it can work as a comfy bed for your baby post-feed (and you can pass the sleeping baby to your partner easily when your baby is asleep on the pillow) It also has an attached cup-holder for when Mom or Dad gets thirsty, too. 
    • Sanitizing wipes/ tray covers - Your baby—and especially your toddler—will want to touch everything their little fingers can reach. So be sure to bring plenty of wipes and wipe down all nearby surfaces. For the trays, disposable tray covers are great, too.
    • Muslin cloth - These are great for covering babies when they're sleeping or as a nursing cover. They're also nice to cover the baby's head if they are getting overstimulated by the busy surroundings. 
    • Blankets - One for comfort and warmth and another for the floor at the airport.
    • Extra clothes for baby AND parents (because blowouts happen!) - Choose clothes that are easy to take on and off (no buttons!) and bring layers for when the cabin swings from cold to hot and vice-versa. 
    • Ziploc bags for wet/soiled clothes. 
    • Car seat (and car seat stroller for the airport)- If you are buying your baby a seat (recommended, but not mandatory), bring your car seat so your baby has a comfortable, familiar place to nap. This also helps to get your baby (and your stuff) comfortably around the airport. You can gate-check the stroller part when you get on the plane, and it'll be ready for you when you step off. 

Note: The American Academy of Pediatrics says the safest way for your baby to fly is in an FAA-approved car seat or airplane harness device approved for your child's age and size installed with the airplane's seat belt. Booster seats cannot be used on airplanes.

Gadgets Worth Buying (but not necessary)

  • Wraparound headphones - Older babies and toddlers will love being able to hear songs or stories with these wraparound fleece headphones that won't easily slide off and also keep your baby's head warm. 
  • Lap baby - Carrie Bradley of Flyingwithababy.com called this "a really useful product for babies of all ages." It works like a seat belt to keep babies over three months secure on your lap so you can be hands-free and baby can be comfortable.  
  • The Flyaway travel bed - This L-shaped inflatable mattress lets toddlers lie flat and sleep aboard the plane. It also works to fill the floor space so that items your toddler is playing with don't plunge into the abyss of the airplane floor. For a less-expensive option, these inflatable footrest pillows do the same thing.
  • Travel play tray - This tray attaches to the airplane tray table and has raised edges to keep small toys from sliding off the tray (it also covers that dirty tray table). It's also useful for toddlers who like to play with crayons or other small items.

Airline Perks You Should Know About When Flying with a Baby

Sure, flying with a baby can be a challenge—but it's not all a drag! Some airlines offer special perks to families traveling with babies and toddlers, including:

Baby and toddler meals
Most airlines offer a kids' meal that you can order ahead of time, but only a few airlines (mostly international) will serve a specialized baby or toddler meal. These usually consist of jarred baby food or meals that are soft and easy to chew. Qantas, Air France, Emirates, Eva Air, Japan Airlines, Lufthansa, Malaysia Airlines, and Singapore Airlines are some of the airlines that offer this, according to this article from Flyingwithababy.

Bassinet seats
As mentioned above, many long-haul flights offer bassinets (mostly suitable for babies under one) that can clip into the bulkhead wall. These seats usually cost more, since they're in the bulkhead row, but are worth it for parents of finicky little sleepers.

Priority boarding for families
When you hear that announcement that "families with young children are welcome to board," grab your roller suitcases and go! Getting all those essential carry-on items in position is crucial, especially if you'll have stuff in the overhead compartments that you'll need to access mid-flight. If you're worried about your antsy toddlers, traveling mommy blogger Samantha Brown recommends having one parent stay in the terminal with the kids while the other boards with the stuff. That way, the littles can run around, then get on the plane after getting all their wiggles out.

Free toys and activity kits
You read that right—free toys! According to Conde Nast Traveler, Lufthansa, Emirates, Nippon Airways, British Airways, Qatar Airways, Cathay Pacific, Qantas, Etihad, and Japan Airlines are among those who give out free kits for tiny passengers. These kits can include everything from stuffed animals and stickers to play dough and puzzles. Just ask the flight attendant when you board.

Worst-Case Scenarios: What To Do If…

Your baby may be all smiles at the airport, but what do you do if everything changes mid-air? 

Ear pain
If your baby is crying and tugging at her ears—or if the crying started just as the plane took off—it could be an earache. Give your baby a pain reliever that's safe for their age—Tylenol (acetaminophen) is safe at any age; Advil (ibuprofen) is safe for babies over six months. You can also ask the flight attendant for a cup of warm water and a washcloth; holding a warm, moist towel against the baby's ear may help relieve the pain. Also, keep your baby sucking or chewing since this can help equalize ear pressure.

*The American Academy of Pediatrics advises against giving Benadryl to children ages two and under unless it is directed by their doctors. 

Vomiting
If your child vomits while on the plane, the protocol is the same as if you were on land: give sips of breastmilk or formula (or water) to prevent dehydration. You can also ask the flight attendants for some washcloths to put on your child (and you) to keep the clothing changes and seat mess to a minimum. Thankfully, children under two rarely get motion sickness, so your chances that a bumpy flight will lead to a troubled tummy are small.

Teething
Liquid pain relievers can help, as well as teething toys.

Nonstop crying
If no amount of peekaboo, feeding, or rocking can ease your baby's cries, all you can do is try to relax. "Make sure you stay calm," says mommy blogger Jennifer Durban in this Howcast video. "If you're stressed out, your baby will be stressed out, so try your best to relax." She also suggested getting up and walking around the cabin. "It's amazing how fascinating a bathroom can be to a little one."

Remember: Flying with a Baby Is Only Temporary

You've packed. You've prepped. You've fed, rocked, and cuddled. Still, when it comes to air travel, it's anyone's guess how your new little human will react to the experience. So what do you do if nothing "works" and your baby is that baby, the one who cries the whole flight? 

"I try to tell other parents you may think everybody is looking at you—and you may feel these eyes peering—but they’re not," said Bradley, who has taken her two young daughters on international flights since they were both infants. "You just relax and do your thing, and remember that it will end. It's not forever. Just concentrate on your family."  

Bradley said it's also important to remember that it's not the kids who generally cause the most problems on board. "Sure, kids cry and it can be irritating—I get that," she said. "But it’s mostly fully grown adults we’ve had bigger problems with." 

And she said it's OK for parents to ask the flight attendants for help. "Even if the flight crew aren’t parents, they can help. It’s what they do," she said, adding that, as a flight attendant, she held many a baby when the parents just needed a break to use the bathroom or have a bite to eat. "I would always tell parents, 'I'm happy to hold your baby.'"

This is our kind of pillow talk

Breastfeeding can be a beautiful and comfortable bonding experience between you and your baby, but it can also be a pain in the…well, several different places, actually. Especially if you’re just starting out, you may be battling some soreness, stiff arms, maybe an achy back. That’s all totally normal, for the record. And that’s where the miraculous invention of the nursing pillow comes in. These little (or bigger, if you prefer—whatever works best for you) wonders can make all the difference in comfort and ease during those long feeding sessions. Plus, they’re more supportive, comfortable, and convenient than a bed pillow or couch cushion. These are designed for breastfeeding, and once you try one, you’ll never look back.

Don’t know which of the multiple options in nursing pillows to chose? No sweat. We’re here to help you navigate the world of nursing pillows—where foam, fabric, and fluff collide to create the ultimate breastfeeding sidekick. With these pillows by your side (literally), you’ll be able to conquer any feeding challenge that comes your way. Meet the superhero companions of every breastfeeding superheroine (that’s you)—the best nursing pillows out there. Get ready to change your whole breastfeeding game with one of these beauties.


Boppy Anywhere Nursing Pillow

Boppy

You already know Boppy makes great nursing pillows. Here's why their latest is a game-changer. It's a smaller pillow with an open design and a yoga-inspired fabric belt to attach around you for a customized fit. That means it's comfortable for women of all shapes and sizes, even those recovering from a C-section. Take this smaller pillow with you on your travels, while running errands, anywhere you plan to be. It's also machine-washable and folds up compactly so you can fit it in a diaper bag. Boppy Anywhere Nursing Pillow ($30.00)—Buy Here!

My Brest Friend Super Deluxe Nursing Pillow

My Brest Friend/Amazon

A longtime mom favorite, the My Best Friend wraparound nursing pillow is celebrating over 25 years of helping moms and babies with breastfeeding with an upgraded pillow with even more thoughtful features. These include increased back and lumbar support to keep moms comfortable, increased height and thickness in the front cushion to help baby into more optimal positioning, an attached pouch for necessities like burp cloths and nipple cream, a waterproof inner cover, and a tracker to help you remember which side you last nursed on. Like the original and the inflatable travel pillow highlighted below, this pillow wraps around mom's body and fastens with an adjustable clasp to give moms back and arm support so they can focus on baby's latch and comfort. My Brest Friend Super Deluxe Nursing Pillow ($59.95)—Buy Here!

DockATot La Maman Wedge Nursing Pillow

DockATot

Finally! A nursing pillow that doesn't look like one. This gorgeous pillow curves around your body to support baby or mama's arms while nursing. When not in use, you'll be happy to leave it on display—and you can keep using it as an accent pillow when your nursing days are behind you. Available in four elegant patterns, this pillow is part of DockATot's collection that coordinates with its other products (bassinets, swaddle sets, and more). DockATot La Maman Wedge Nursing Pillow ($75.00)—Buy Here!

littlebeam Nursing Pillow

littlebeam

This breastfeeding pillow is small in size but big on added perks. In addition to positioning your baby at the right height for feeding in all nursing positions, it's also great for bottle feeding, as a tummy time support, or to give mom a little comfort as a head rest, lower back support, or between your legs for more comfortable sleep. Created by a family nurse practitioner and board-certified lactation consultant, the littlebeam nursing pillow is also the perfect companion for travel and daily outings, since it's small enough to fit in your diaper bag. littlebeam Nursing Pillow ($45.00)—Buy Here!

Boppy Classic Feeding and Nursing Support Pillow

Boppy

Trusted by moms for decades, the award-winning Boppy nursing pillow is a time-tested option. The firm but flexible U-shaped pillow allows for more ergonomic feeding positions and also works great for tummy time and supported sitting. The slipcover is removable and washable, and with the pillow at a reasonable price point, you can afford to have an extra cover (and there are a bunch to choose from). Boppy Classic Feeding and Nursing Support Pillow (From $45.00)—Buy Here!

Béaba Big Flopsy Maternity and Nursing Pillow

Beaba

For the expectant mother, the Big Flopsy doubles as a maternity body pillow. Although one of the largest nursing pillows on the market, the non-toxic micropearl fill keeps it lightweight and flexible. Both the cover and pillow are machine-washable. From helping pregnant moms find a comfortable sleeping position to providing support for nursing moms and supervised playtime with toddlers, the Big Flopsy is one you can use for years to come. Béaba Big Flopsy Maternity and Nursing Pillow ($109.95)—Buy Here!

The Nursie

Nursie

The Nursie was designed with portability in mind by wrapping around mom’s arm, much like swim floaties go around a child’s arm—no straps needed. It can be used for any nursing position, is small enough to fit in a carry-on bag while traveling, and is machine-washable. It props baby up to help reduce reflux and give mom the right position to avoid back and neck pain. The Nursie ($34.95)—Buy Here!

Nook Organic Niche Nursing Pillow

With its 100% organic, breathable and sustainable materials, the Niche Nursing Pillow is perfect for the environmentally conscious mom. The squared U-shape provides more surface area than the rounded options. The covers come in several colors and are machine-washable. In addition to being used for feedings, the pillow can serve as an armrest, a tummy-time support and a body pillow for ages 2 and up. Nook Organic Niche Nursing Pillow ($89.00)—Buy Here!

Leachco Cuddle-U Nursing Pillow

Keep your little wiggler in a reclined position for optimal post-feeding digestion with the patented seat wrap on the Cuddle-U Nursing Pillow. The wrap is adjustable and tucks away into a concealed pocket on the bottom of the pillow when it isn't needed. The pillow is generously sized for those moms who find it most comfortable when baby is boosted up a little. The pillow and cover are not washable, so you may want to splurge on the sham-style removable cover that’s not included. Leachco Cuddle-U Nursing Pillow ($34.95)—Buy Here!

Twin Z Pillow

For moms of twins, there’s no need to buy two nursing pillows when you have the Twin Z Pillow. This pillow was specifically designed for nursing or bottle-feeding two babies at one time. The dual holes where babies sit have buckles that make them smaller for newborns. It can also be used as a maternity pillow, at tummy time, and as an infant support pillow. Twin Z Pillow ($142.00)—Buy Here!

Infantino Elevate Adjustable Nursing Pillow

The innovative design of the Elevate Adjustable Nursing Pillow allows for three different elevation levels, which can help babies latch. Find the perfect height for you and baby, no matter the feeding position. It also supports upright feeding for babies with reflux. Fold it in half and secure it with the ribbon for easy storage. Oh, and it’s machine washable. Infantino Elevate Adjustable Nursing Pillow ($49.99)—Buy Here!

My Brest Friend Inflatable Travel Nursing Pillow

My Brest Friend

The Inflatable Travel Nursing Pillow is the same design as the original nursing pillow from My Brest Friend but ideal for moms on the go and for traveling with your little one. When deflated, it packs flat in a diaper bag or purse. The wraparound shape and straps secure the pillow in place, and the straps are release silently to avoid waking baby. It comes with a handy pocket on the side (for burp cloths, bottles, toys or your phone) and a price that's friendly on your wallet. My Brest Friend Inflatable Travel Nursing Pillow ($30.01)—Buy Here!

Blessed Nest Nesting Pillow

Snuggle baby into this pillow. Its buckwheat hull filling conforms to baby, instead of simply being underneath. The pyramid shape of the fill molds like a beanbag but holds its shape, so mom doesn’t have to provide as much support and can try out many different feeding positions. The pillow is also certified organic with a washable slipcover. Blessed Nest Nesting Pillow ($98.00)—Buy Here!

All the products listed are independently & personally selected by our shopping editors.

If you buy something from the links in this article, we may earn affiliate commission or compensation. Prices and availability reflect the time of publication.

All images courtesy of retailers.

There’s no shortage of breastfeeding supplies out there, so we’ve put together a list of our favorites

We fully believe fed is best. Bottle or breast, you have our complete support. Both come with their own benefits and challenges, and we hope we can help no matter which route is best for you and your babe! If you’re reading this, we’re assuming you’re either a breastfeeding mama or considering being one, so we’ve rounded up some of our favorite breastfeeding supplies to make your feeding journey as easy and comfortable as possible. Considering how many products there are on the market, it can be a real challenge to wade through all the options.

These are the best breastfeeding supplies we’ve come across on our own nursing journeys. They’re from trusted brands that you’ve probably heard us mention a lot, and with good reason. Brands that have set the standard for baby gear and have been around a long time. We’ve found everything from pumps, pads, and even a free virtual breastfeeding class to support you along the way!

Tinyhood Free Virtual Breastfeeding Class

Tinyhood

In this free breastfeeding class, discover what milestones to expect in the first few hours, days, and weeks of your breastfeeding journey. Tinyhood's expert lactation consultant will introduce key concepts, including latch and positioning, how much and how often baby needs to eat, and more. Breastfeeding doesn't always go as planned, so learn the basics and get set up for success. Plus, refer back to it any time once baby has arrived!

Tinyhood Free Virtual Breastfeeding Class—Watch Now!

Momcozy Seamless Nursing Bra

Momcozy

This isn't your average nursing bra! It's buttery-soft, supportive, and so comfortable, you could sleep in it. We wouldn't blame you if you continued to wear it long past your breastfeeding journey.

Momcozy Seamless Nursing Bra ($29.99)—Buy Now!

Momcozy S12 Double Wearable Breast Pump

Momcozy/Amazon

Imagine a hands-free, portable, wearable pump that prevents you from being tied to a corded machine. Boom. Momcozy delivers and we're in love. With 2 modes, 9 levels, and a clear LCD screen, pumping has never been easier or less disruptive to your day! (Not that we mind, but it's nice to have both hands free while we pump.)

Momcozy S12 Double Wearable Breast Pump ($145.99)—Buy Now!

My Breast Friend Nursing Pillow

My Breast Friend/Amazon

The My Breast Friend Nursing Pillow is a dream, thanks to the totally adjustable design and back support! The storage pockets hold water, snacks, and the remote (or whatever your personal nursing time kit needs), and there's a removable slip cover for easy washing (pictured in Sunshine Poppy).

My Breast Friend Nursing Pillow ($44.95)—Buy Now!

Lansinoh TheraPearl 3-in-1 Breast Therapy Packs

Lansinoh/Amazon

Whether you use these soft therapy packs hot or cold, they offer incredible relief from swelling, engorgement, clogged ducts, and more. They're a must-have for your nursing kit!

Lansinoh TheraPearl 3-in-1 Breast Therapy Packs ($12.23)—Buy Now!

Frida Mom Breast Care Self Care Kit

Frida Mom/Amazon

It's not likely you're used to caring for your breast health quite as much as when you're nursing, and this Breast Care Self Care Kit gives you all the tools you need! It comes with a 2-in-1 lactation massager, heated breast packs, a lactation breast mask, hydration breast mask, and a carry pack!

Frida Mom Breast Care Self Care Kit ($39.99)—Buy Now!

Organic Nipple Butter Breastfeeding Cream by Earth Mama

Earth Mama/Amazon

With over 53K verified Amazon reviews raving about it, we couldn't skip this skin-savior!

Organic Nipple Butter Breastfeeding Cream by Earth Mama ($13.52)—Buy Now!

Lansinoh Stay Dry Disposable Nursing Pads

Lansinoh/Amazon

These soft pads can hold 20x their weight so you'll stay dry and comfortable day and night!

Lansinoh Stay Dry Disposable Nursing Pads ($19.89)—Buy Now!

2 in 1 LaVie Lactation Massager Roller

LaVie/Amazon

Breast massage is so awesome at helping to maintain milk flow, comfort, and clear ducts, and this roller is even more effective than hand massages!

2 in 1 LaVie Lactation Massager Roller ($17.89)—Buy Now!

Munchkin Milkmakers Lactation Drink Mix Supplement

Munchkin/Amazon

Over 4,000 moms in the Amazon reviews agree: this drink powder supplement supports breast milk production and nourishes your skin with a healthy dose of collagen!

Munchkin Milkmakers Lactation Drink Mix Supplement ($15.41)—Buy Now!

Milkies Freeze Organizer Storage System

Milkies/Amazon

Freezing milk when pumping is a given, but this freeze organizer takes storage to the next level.

Milkies Freeze Organizer Storage System ($27.95)—Buy Now!

Milkies Milk-Saver Milk Catcher Breast Shells

Milkies/Amazon

If you find yourself feeling like you're wasting precious drops of that liquid gold during pumping, nursing, or when wearing breast pads throughout the day, these are the perfect answer!

Milkies Milk-Saver Milk Catcher Breast Shells ($27.95)—Buy Now!

If you buy something from the links in this article, we may earn affiliate commission or compensation. Prices and availability reflect the time of publication.

All images courtesy of retailers.

Expecting… again? Take our word for it, these are the second baby must-haves that you’ll actually use

Congrats, baby number two is on the way! That means more love in your heart, but also more stuff in your home. And it begs the question: what do you really need? We asked parents with multiple children to weigh in on what items to keep, what to donate, and what to toss to create the ultimate list of second baby must-haves. As you’ll see, not everyone was in agreement, but that’s where your opinion comes in, because you’re an experienced parent now, too. For all the parents out there who have ever wondered “what do you need for a second baby?”—this one’s for you!

Before you start the sorting process, remember to give all items a thorough check and discard any that are past their expiration date, recalled, or have wear and tear that might pose a safety hazard.

a mom holds her new baby by a window feeindg him with a bottle, second baby must haves includes feeding accessories
iStock

Feeding

“Make sure to keep fresh bottles and formula on hand for the second baby, even if you didn't use them with the first. You always want to be prepared in case you need them for a middle-of-the-night feeding.”—Julianne

“Don’t keep the baby food maker. I made all my first child’s baby purees. However, I found I couldn’t keep up with the peeling, dicing, steaming and mashing with my second and working full-time. Buying storebought ended up being so much easier and less stressful. If you’re concerned about the regulations in storebought brands, my pediatrician recommended checking the Clean Label Project website. Or, there are fresh baby food subscriptions you can join, such as Yumi.”—Ashley

“I liked having my same familiar nursing pillow for baby two. You can always get a new cover to freshen it up or make it match any new decorating you do.”—Kate

“We had extra breastfeeding pillows from keeping one at a parent’s house, so we donated one of those. We learned from baby one which bottles we didn’t like, so we gave away those extras.”—Kelly

Diapering

“One product I found that was not necessary was the changing table. The floor was so much easier as I was usually sitting on it anyway, and the older sibling was right there to help as well. Pulling out extra wipes was a helpful job and having the older sibling be a part of it made it special for her and easy to keep eyes on both kiddos, which was a mom win!”—Meghan

“Don’t keep a purse-style diaper bag. Get a diaper bag backpack instead! I had a crossbody style for my first, but being hands-free was so much easier with two.”—Ashley

“Between babies one and two, we switched to cloth diapers and so donated that horrible diaper genie!”—Andie

“After the first one, I realized the waste of the diaper genie and wipes warmer. A plastic shopping bag works just the same and is much cheaper than the refills, while the wipes warmer dries out the wipes too quickly.”—Shelly

“Keep the wipe warmer. I was a skeptic. I left it in the box. I mean, really—one more thing to plug in and maintain—so unnecessary, right? Well, three kids later, the youngest (now 4) still insists on a warm wipe when the pull-up comes off in the morning. And in retrospect, who can blame her—have you ever tried to use a cold wipe on a chilly morning? Case closed!”—Kelly

Sleeping

“I was so grateful to have kept our bassinet for the second baby.”—Kerry

“Keep the crib. I reused my crib and put my son straight into a big boy bed. But don’t keep the crib mattress. You want a firm, clean mattress for the new baby!”—Ashley

“Cribs are expensive, and getting a new one for every child would be incredibly wasteful. So long as it meets safety standards, it makes sense to tighten up all the pieces, give it a good cleaning, and buy new sheets for the next baby.”—Adam

Related: 13 Signs You're on Your Second Baby

iStock

Clothing

“We have three boys, so we saved a lot of baby clothes, only getting rid of those that were stained or damaged. We kept it all organized by size in canvas storage containers and pulled them out as needed.”—Kate

“Don’t keep all the old clothes. I had a girl after having my son, and as much clothing as I saved to be practical, I found I couldn’t resist buying some new clothes. People also gifted or handed down plenty to me. Jammies, however, keep! You can never have too many and they’re all adorable. I loved seeing my daughter in her big brother’s shark and construction jammies for some reason.”—Ashley

Car Seat

“As a mom that had her second child five years later, so much had changed. My newest family member was over ten pounds, so the infant car seat was extra heavy. So we used a convertible one and wore him as much as we could.”—Meghan

“The JJ Cole Bundleme is an absolute lifesaver. The ease of zipping it right into the car seat and not having to worry about putting coats on and off is well worth it! With multiple winter babies, I couldn’t imagine not having it!”—Rebeka

Stroller

“Time to upgrade the stroller. I like the sit-stand type so my older kid can jump on and off.”—Christopher

“If you have kids close together, a sit-and-stand stroller is great. The older one wants to be independent but still gets tired easily so it's great when they want to hop off to walk with you.”—Shelly

“We never bothered with a double stroller since the boys are four years apart.”—Kerry

“I definitely kept the strollers. I held on to almost everything if I’m being honest!”—Lindsay

Related: The Ultimate Baby Registry Checklist for New Parents-To-Be

iStock

Play Time

“I donated anything we never used with baby one, anything broken, chewing toys with plastic, gifts we didn’t use. Babies need very little. A soft place to play on the floor, a place to sleep, an eating chair, clothes, diapers, a car seat, stroller, and a few things to play with and teeth on.”—Kelly

“One baby item I made sure to keep was the swing. It was great for the baby to take an afternoon nap in. Or a safe spot to keep the baby entertained while I made dinner. There were even a handful of nights it helped during the witching hour when everyone was at wits' end! Definitely one of the most useful baby items in our house.”—Nicole

“The playmat is a must keep. It makes the dreaded tummy time a little more manageable. And older siblings love having a turn demonstrating all the toys to the new baby.”—Kate

“Keep any safe place to put the baby when things get hectic. This includes pack and plays, swings, seats and loungers. Also, just because your first didn’t like something doesn’t mean your second will be the same. I was gifted a baby swing that my son never enjoyed using, but my daughter loved.”—Ashley

“We kept my BabyBjörn bouncer, the jumper toys, my lightweight baby carrier, our swings, all of our ‘teach the ABCs’ toys, and our ride-on lion!”—Kerry

It’s Not All About the Stuff

“I’d say that after having one child, when you’re preparing to have a second, you realize how few of the things you registered for or got with your first that you actually used. All you really need are a crib (or similar), car seat, some clothes and diapers, and a stroller and/or carrier depending on your parenting style.”—Phoebe

“The best advice I can give to parents from going from one to two kids is to give yourselves time and some grace as you adjust. Say yes to help from grandparents or friends when they offer. Try to dedicate some special time every day to your first child when the baby sleeps or other parent is home and engage in a craft, walk, reading a book or just playing with toys.”—Lindsay

Whether you’re new to nursing or an experienced pro, this breastfeeding essentials checklist will help

If you’re nursing, these are the breastfeeding essentials that will make your journey easier and more comfortable for you and your baby. Some may surprise you, and others will become your new can’t-live-without-it favorites. From nursing bras and breastfeeding pillows to nipple creams and pumping parts, it’s all here.

baby drinking from bottle with smiling parents - breastfeeding essentials
iStock

Nursing Basics

Prenatal vitamins. Yes, you’re post-natal, but many health-care professionals recommend continuing to take prenatals while you breastfeed so you and baby can get more essential nutrients. Talk to your doctor about what vitamins you need.

Burp cloths. You probably received cute, colorful cloths at your baby shower, but a plain cloth diaper is also an excellent, and highly absorbant, way to protect your clothing and wipe baby’s face after a spit-up situation.

Nipple shields. A lifesaver for many women in the beginning. This thin, clear silicone nipple shield can help baby latch if they're having trouble or you have flat or inverted nipples.

Nursing bras. These bras make it easier to feed your child and are more comfortable for you, especially in the first few months. If you're pumping, you'll want combo nursing & pumping bras that let you pump hands-free. Check out our guide to nursing bras for everything you need to know.

Nursing pillows. Holding a nursing baby in your arms gets real old, real fast. You don't need to invest in a nursing pillow, but it will help your baby latch at the right angle for feeding and can be more comfortable for your back. Read about the top nursing pillows.

Breast milk collection cups. You won't lose a drop of liquid gold with a cup designed to catch milk from the breast your baby isn't nursing on. They're also handy for hand expression and some are shaped to allow your baby to drink right from the silicone cup.

Nursing apps. Track which side you last nursed on, when baby nursed and other important nursing data in these amazing apps. Many apps will also track diaper changes, nap schedules and health history so you have all of your baby data in one spot. Check out awesome organizational apps for new moms.

Lactation consultants. If breastfeeding is painful or you’re concerned about whether baby is getting enough milk, talk to a lactation consultant. Ask local moms for recommendations, or explore online resources.

Related: New Mom, Who's This? The Best Nursing Clothes of 2023

iStock

Breast Soothers

Nipple creams. Heal sore, dry, cracked nipples with breast milk, coconut oil, lanolin or a store-bought nipple cream. If you buy a cream, look for one that doesn’t need to be washed off before baby nurses.

Nursing Pads. Disposable or reusable breast pads can comfort sore nipples and protect against leaks that stain your clothes.

Breast pain relievers. From massagers that soften the breast to work out clogged ducts to pillows and gel packsyou heat up to quicken milk flow, there are products to soothe the most common breast discomfort.

Pumping Products

Motorized breast pumps. Many insurance companies cover the cost of a breast pump, which is great. But there are sometimes restrictions, and you might want or need a different kind of pump. New moms can also rent pumps from hospitals after birth.

Manual pumps. Many breastfeeders love the convenience of a hand pump. It’s quiet and doesn’t require batteries or an outlet, so it’s great for late nights, air travel and road trips. You can use a hand pump to increase supply, catch leaking milk while baby is nursing on the other breast, and relieve pressure before nursing if you’re engorged.

Pumping accessories. A hands-free pumping bra is a must with a traditional breast pump. There’s a slit in each cup of these clever bras that allow you to slip the flanges into the bra and connect the bottles and hoses outside it. And speaking of flanges, the correct size flanges can make a difference in pumping output. If you’re concerned about milk production, confirm you’re using the right size flange for your breast and nipple size.

Storage & cleaning. Breastmilk storage bags and cups come in silicone and plastic versions. For heating milk, invest in a breastmilk warmer that safely heats the milk evenly. To clean storage cups and pump parts, use a bottle and dish soap with gentle ingredients that's free of fragrances. Babies are sensitive to new smells. 

Milk coolers. If you're pumping at work, on outings or while traveling, you need a sturdy insulated bag for toting your pumped milk. Look for one with reusable ice packs and/or insulated panels. 

Related: 9 Apps to Track Baby's Naps, Feedings, Health History & More

iStock

On-the-Go Essentials

Water bottle. Breastfeeding makes you super thirsty, so a water bottle is an absolute must. Choose a bottle that's easy to clean and not too heavy to carry, since you’ll also be lugging baby’s bottles and gear.

Lip balm. Your lips are likely to dry out from nursing, and the right lip balm keeps your lips soft for all those baby kisses. 

Nursing cover (optional). It’s legal to breastfeed in all 50 states, but you may feel more comfortable with a nursing cover. Use a swaddling blanket or scarf if you don’t want to buy a separate product, but a cover can offer you more privacy and convenience. Look for a multi-use cover that works to cover car seats for added shade.

Lactation Snacks

Lactation drink powders. These drinks combine combine vitamins, minerals, protein, fiber and lactation-supporting herbs into a powder you can add to your favorite smoothie or other snacks.

Lactation tea & coffee. A hot beverage is a soothing way to get your lactation support and extra hydration. 

Lactation treats. New moms deserve all the snacks. From cookies and brownies to bars and gummies, there are lots of tasty ways to boost your milk while satisfying that sweet tooth.

Pro Tip: Talk to your health care provider or lactation consultant before taking any snacks or supplements to boost your milk supply or overall nutritional intake.

Related: 22 Hacks for Feeding Baby on the Go

Model and mom-of-three Ashley Graham has her hands full these days. As with a lot of new moms, she’s been spending a lot of time getting the breastfeeding game down right, which we can only imagine would be even trickier with twins. Trickier… and tiring.

“Tired. But we’re here.”

She’s been sharing pictures of her breastfeeding journey since she had her twins, Roman and Malachi.

“Double fisting, peep the whacky tan lines,” she wrote on Instagram next to a gorgeous picture of herself nursing the twins. While all looks calm and serene, she explained a bit more about the process in her Instagram story (hint: it takes a village).

In her story back then, she also posted a photo breastfeeding both boys using a nursing pillow. “My normal position for when I tandem feed the boys,” she wrote. “This took me a solid few weeks of trial/error and lots of tears to latch consistently. My doula, who is also a lactation consultant, was so kind and gentle with me in helping all three of us figure out how to do this together.”

Her twins, who were born Jan. 7, were welcomed by Graham, husband Justin Ervin, and big brother Isaac, who is two. She’s been open about her path to becoming a mom and has posted images of herself breastfeeding in the past, normalizing the process for those who choose to and are able to breastfeed.

“My boys have been the greatest teachers and biggest reminders that I can do hard things,” she wrote earlier this year. “This has not been easy, but it’s so worth it. still can’t believe I have 3 children.”

She’s also been quick to thank everyone, like her lactation consultant and others, who have helped her get here. “I’m just like any other mom going to work and doing what we have to do,” she said during a Byrdie interview last year. “I lean on community. I’m so lucky to have my mom and my in-laws and Justin pitches in. I have to really schedule out my time, which is how I’m getting my work done.” She also kept it real, admitting, “Balance doesn’t exist; it’s more about how you are managing everything you put on your plate.”

Cheers to you, mama. You make motherhood look good.

Have baby, will travel? Yep! Make it much easier to leave your home with these tricks for feeding your baby when you’re out and about. Whether you’re breastfeeding, formula feeding or if your kid more of a snacker, our list of helpful hacks promises to make your park trips, errands, road trips and flights go more smoothly. Keep reading to see it all.

Hacks for Nursing & Bottle Feeding

Rainier Ridao via Unsplash

1. Get an inflatable travel nursing pillow to keep in the car, and pop it in your carry-on when you travel by plane. When you’re not in transit, that pillow can give your baby a cozy, supported spot to sit or lay on.

2. No need to cry over spilled or spoiled milk. Just bring more formula or pumped breast milk than you think you’ll need. On active days, especially warm ones, your baby will likely be more thirsty than when you’re chilling at home, and a change in routine can also mean a change in feeding habits.

3. Pre-portion formula into small, snack-size plastic bags and fill clean bottles with the amount of water you need. Mix and shake, and it’s bottle time! Bring along additional water in case of spills or if you need more water for drinking.

4. While at home, get your child used to bottles made with room-temperature formula or breastmilk in case you aren’t able to warm bottles while you’re out. With powdered formula, water must be heated to at least 70 degrees Fahrenheit and then cooled until it’s safe for baby to drink.

5. If your babe isn’t going for the room-temperature beverage, there are ways to get hot water to heat your formula bottles or breastmilk bags. Fill large-mouthed travel mugs with hot water before you leave the house, and they’ll keep the water hot for hours. When it’s time for feeding, place the formula bottle or breastmilk bag in a bowl or empty travel mug and pour the hot water into it. Gas stations and coffee shops will also give you hot water (usually for free!) if you tell them you’re using it to warm up your baby’s bottle.

iStock

6. Keep pumped breast milk cold with an ice cooler or freezable lunch bag until you can refrigerate it.

7. Wear a nursing tank under your top so your stomach isn’t exposed when you’re breastfeeding. It also keeps you warmer on chilly days.

8. A swaddle blanket isn’t just for tucking around your baby when it’s chilly or covering the car seat during naptime (leave some of the car seat uncovered so it doesn’t get too hot under there). A swaddle blanket is also handy for slipping over yourself if you’d like some privacy to breastfeed.

9. This is a game-changer for road trips and car outings: If you pump milk, buy the accessories so you can pump in the car. Get an extension cord that plugs into your cigarette lighter, and you can even pump in the backseat!

10. Bring soapy water that you can use to rinse out formula or breastmilk from bottles. Give the bottle a shake to clean them out, and you’ll remove most of the liquid and smell. Pack a clean plastic bag or another container to keep them in until you can wash them properly.

11. Changing your routine might change your focus while breastfeeding. To remember which side you last nursed on, place a hair tie or ring on that hand. Move it after each nursing session, and you’ll always know which side to start nursing on.

Hacks for Baby Snacks

Csifferd via Pixabay

1. When you’re out and about, whether you’re in a stroller, car seat or sitting outdoors, snack cups with lids that allow little ones to reach their hands in are the key to less mess. The cups are fairly spill-proof, and your child will love the autonomy of grabbing their own snacks.

2. Have you seen those plastic pillboxes they sell near the pharmacy at drugstores? Pick up a large one and pack it with a variety of small snacks, like puffs, Goldfish crackers and dried cranberries. Kids will love having an array of options, and you’ll be glad not to have to pack big containers of snacks. Open all the compartments for a baby buffet or just one at a time to contain messes. When kids get older and hungrier, switch to a larger container with small compartments, like a crafting box or a tackle box.

3. Freeze applesauce pouches or yogurt pouches before you leave the house, especially on hot days. They’ll act as ice packs for veggies and sandwiches when you’re en route, and then you can give your child a cool, slushy treat.

4. Bring along sandwich bags filled with folded paper towels (wet towels in one bag, dry towels in the other). The towels can wipe up any spills, and you’ll have a baggie for food wrappers and other items you’re throwing away.

5. Coffee liners make handy snack plates you can throw away—one less thing to lug around.

Aline Ponce via Pixabay

6. If your child is just starting solids, bring along foods that don’t need to be heated, just mashed, like bananas and avocados. Just bring a spoon to mash them up and a knife to cut the avocado.

7. If you’re going on a longer outing, like an all-day or multi-day trip, save some new snacks for the trip home. If your child is over the traveling, a different snack will perk them right up.

8. Looking for a healthy, filling meal you don’t need to heat up? At home, mix raw eggs with finely chopped veggies—roasted or raw. Pour the mixture into mini muffin cups and bake to make a toddler-size treat you can bring with you anywhere.

9. Bring plastic wrap and straws with you if you’ll be getting food from restaurants. If a restaurant only has plastic or paper cups, wrap plastic wrap over the top and pop a straw through. If the cup gets knocked over, the mess will be mostly contained.

10. If you frequently travel by car, a portable car vacuum can keep your car, including the car seat, from getting covered in crumbs. Get the kind that plugs into the cigarette lighter, and you won’t have to worry about it losing its charge.

11. In your kitchen, keep a dedicated snack drawer or shelf with baby-approved store-bought snacks so you can grab and go when you’re in a hurry. Keeping all the kid stuff together also makes it easier to see when you’re running low.

—Eva Ingvarson Cerise

RELATED STORIES:

On the Go: The Top Portable High Chairs, Booster Seats & Travel Seats

14 Can’t-Live-Without Hacks for Traveling With Baby

Road Trip Checklist for Trips with Babies & Toddlers

Who knew a tiny baby would need so much stuff? We did! So here it is, our definitive list of everything you could possibly need when your baby arrives. We’ve grouped items into categories and divided them into must-haves and nice-to-haves so you can make smarter choices about exactly what to add to your baby registry. From baby sleep needs and diaper essentials to products just for mom, you’ll find it all here.

Sleep

iStock

⚬ Wrap swaddles and/or swaddle blankets
⚬ Sleep sacks
⚬ Video and/or audio baby monitor
⚬ Pacifiers
⚬ Nightlight
⚬ Sound machine
⚬ Bassinet
⚬ Crib
⚬ Crib mattress
⚬ Mattress pads
⚬ Crib sheets

Nice to have:
⚬ Sound machine or music player
Blackout window shades
Play yard/travel crib
Glider or rocker
⚬ Mobile

Diapering

iStock

⚬ Diapers
⚬ Diaper covers (if using cloth diapers)
⚬ Wipes
⚬ Diaper rash cream
⚬ Diaper pail & liners
⚬ Portable changing pad

Nice to have:
⚬ Changing table
⚬ Changing table pad
⚬ Changing table cover
⚬ Diaper caddy
⚬ Wet bag for storing dirty diapers

Feeding

iStock

⚬ Bibs
⚬ Burp cloths
⚬ High chair 
⚬ Baby spoons

For bottle feeding:
⚬ Baby bottles
⚬ Bottle cleaning brush
⚬ Fragrance-free bottle soap
⚬ Bottle warmer

If using formula, add:
⚬ Formula
⚬ Formula dispenser
⚬ Formula-mixing pitcher or dispenser machine

If pumping, add:
⚬ Breast pump & pump parts
⚬ Hands-free pumping bra
⚬ Breast milk storage bags

For nursing:
⚬ Nursing pillow
⚬ Breast pads
⚬ Nipple cream
⚬ Nursing bras
⚬ Nipple shields

Nice to have:
⚬ Baby food maker
⚬ Bottle drying rack
⚬ Dishwasher basket for bottle nipples & pacifiers
⚬ Nursing cover
⚬ Hand pump
⚬ Nursing-friendly clothes
⚬ Insulated bags to hold baby bottles
⚬ Suction-bottomed baby bowls
⚬ Handheld vacuum cleaner
⚬ Bottle sterilizer or microwavable sterilizing bags
⚬ Toddler cups

Health & Safety

iStock

⚬ Nail clippers
⚬ Nail file
⚬ Rectal thermometer
⚬ Bulb syringe/nasal aspirator
⚬ Hand & face wipes
⚬ Hand sanitizer
⚬ Gripe water
⚬ Baby sunscreen
⚬ Outlet covers
⚬ Cabinet & drawer latches
⚬ Corner/sharp edge protectors
⚬ Window cord protectors
⚬ Furniture & TV straps
⚬ Baby gate
⚬ First aid kit (adhesive bandages, antibiotic ointment, petroleum jelly)
⚬ Mirror for viewing baby in the backseat
⚬ Baby-safe cleaning products

Nice to have:
⚬ Cool-mist humidifier
⚬ Digital thermometer

Bathing

iStock

⚬ Washcloths
⚬ Baby hairbrush or comb
⚬ Baby-safe shampoo & body wash
⚬ Baby-safe body lotion

Nice to have:
⚬ Baby tub
⚬ Hooded towels
⚬ Bath water thermometer
⚬ Tub faucet cover

Gear

iStock

⚬ Infant car seat & base
⚬ Baby stroller
⚬ Rocker
⚬ Baby wrap or sling
⚬ Structured baby carrier

Nice to have:
⚬ Baby swing
⚬ Baby floor seat
⚬ Car seat base for second vehicle
⚬ Lightweight travel stroller

Clothing

iStock

⚬ Onesies/bodysuits
⚬ Newborn hats
⚬ Sleepers, gowns or pajamas
⚬ Short-sleeve tops
⚬ Long-sleeve tops
⚬ Leggings
⚬ Footed pants or pajamas
⚬ Baby sun hats
⚬ Weather-appropriate clothing (shorts or sweaters)
⚬ Dresser
⚬ Kid-size clothing hangers
⚬ Clothes hamper
⚬ Baby-safe laundry detergent

Nice to have:
⚬ No-scratch mittens
⚬ Baby booties
⚬ Baby socks
⚬ Going home outfit
⚬ Dress-up outfit

Play

iStock

⚬ Playmat
⚬ Teething toys
⚬ Rattles
⚬ Sensory balls
⚬ Books
⚬ Lovey

Nice to have:
⚬ Activity gym
⚬ Toy storage baskets
⚬ Child-size chair
⚬ Developmental toys
⚬ Stuffed animal

Mom Necessities

iStock

⚬ Postpartum or C-section underwear 
⚬ Guide to baby development
⚬ Water bottle
⚬ Diaper bag

Nice to have:
⚬ Heating & cooling gel pads
⚬ Cozy pajamas
⚬ Soft robe
⚬ Belly band
⚬ Postpartum recovery kit

—Eva Ingvarson Cerise

RELATED STORIES:

New Health & Safety Innovations for Babies & Toddlers

Breastfeeding Must-Haves All Nursing Moms Need

Awesome Gifts for New Moms & Moms-to-Be