Handprint calendars are a perfect way to spend a long afternoon between Christmas and New Year’s Eve

Hanging around the house for the holidays? Spend an afternoon or two working on a handprint calendar for 2023. It’s an easy project anyone can complete, and little helpers will love to lend a hand or two. After all, you’ve got a long winter break to fill with activities and printables, and by New Year’s Eve, you’ll have reached the point where painting your kids’ hands sound like a rational idea!

What You’ll Need to Make a Handprint Calendar
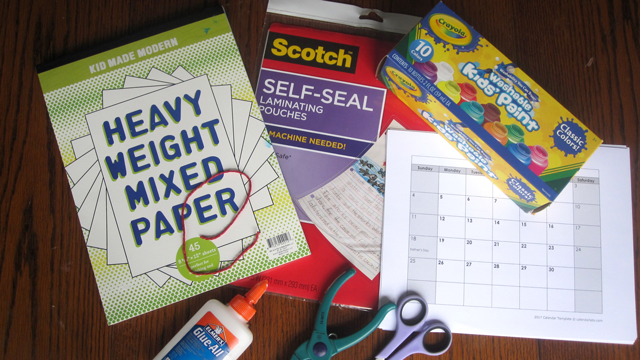
supplies to make a handprint calendar

Heavyweight paper

Washable paint

Paper plate

Brushes

Glue

Laminating sheets (optional)

Hole punch (optional)

String (optional)


Plan It Out

We love this project because there’s no right way to make one. Keep it simple, or get super crafty— it’s all up to your kids’ imagination. Use the guide below to get started, and decide in advance what you’ll make out of each handprint. This is much easier to do before your little helper has paint all over their hands!  

Related: How to Make a Vision Board for Kids in 2023

The Painting Part

how to make a handprint calendar

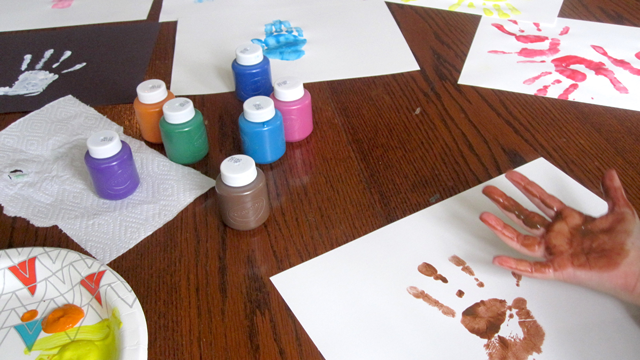
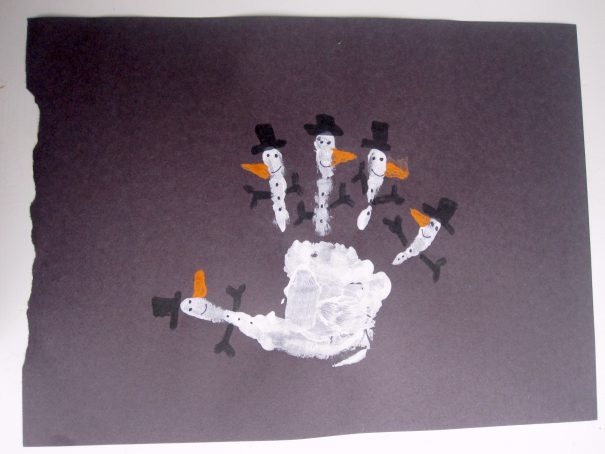
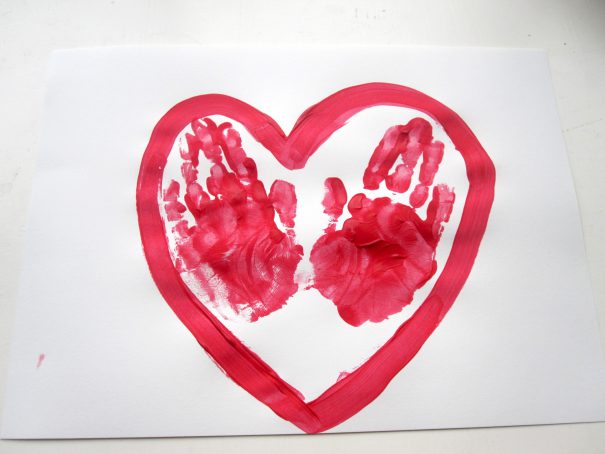
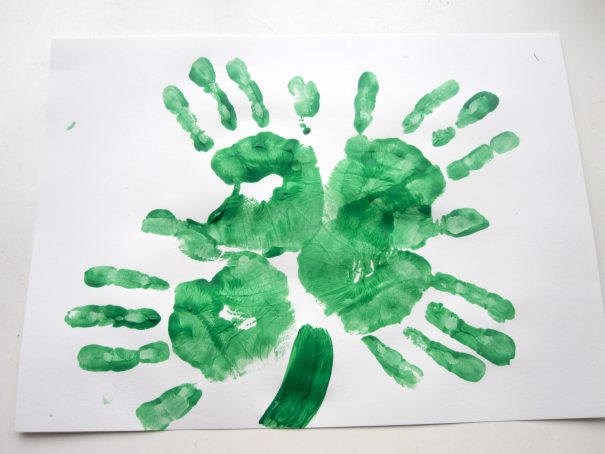
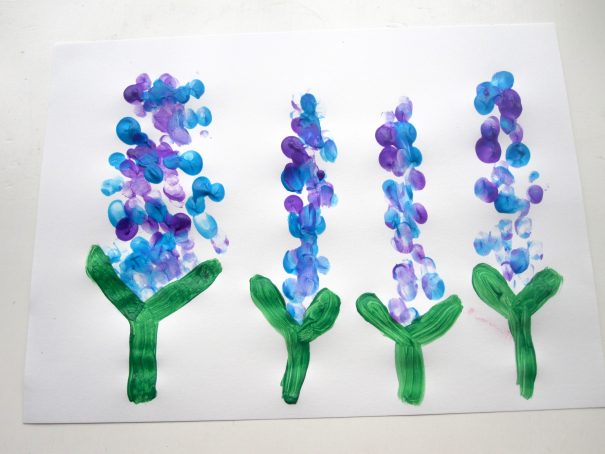
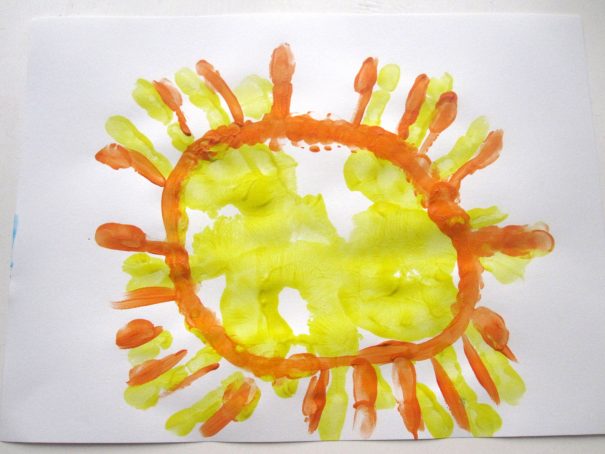
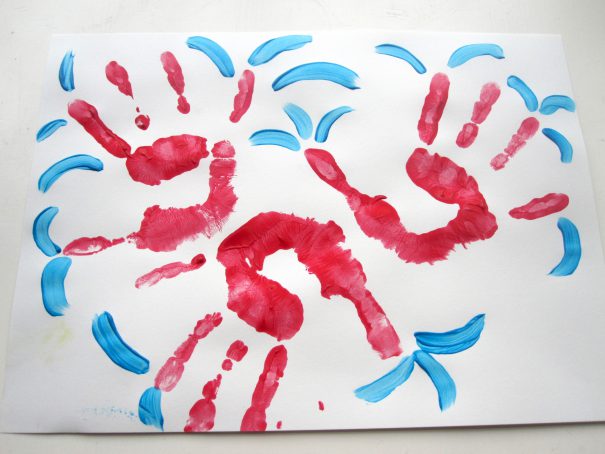
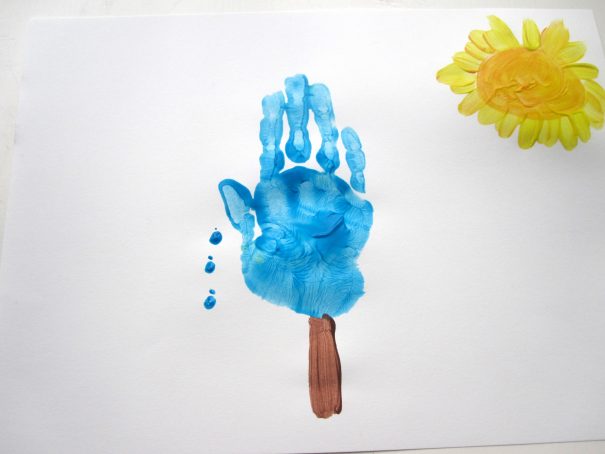
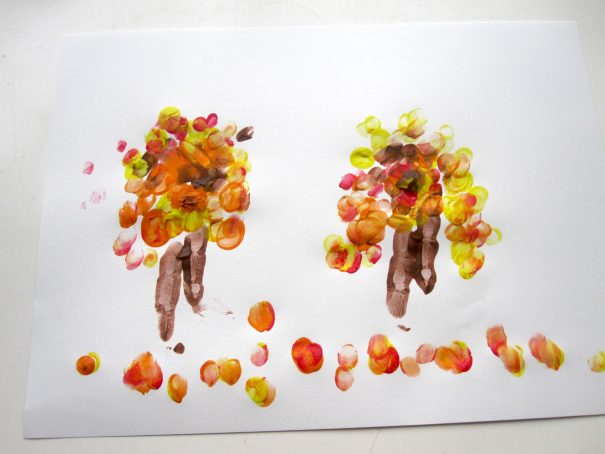
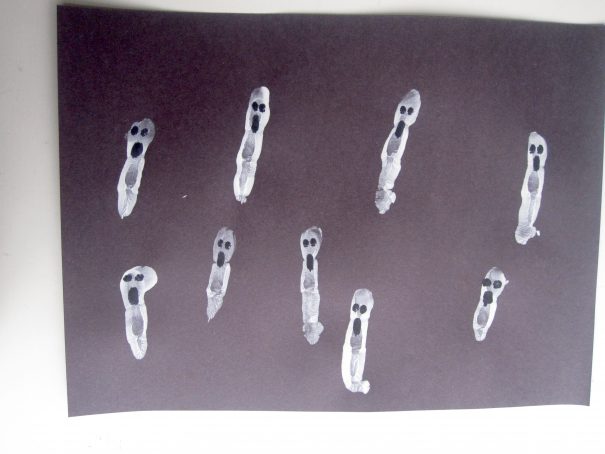
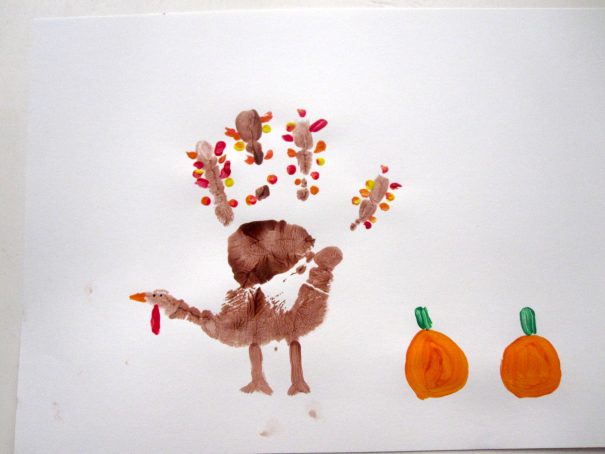
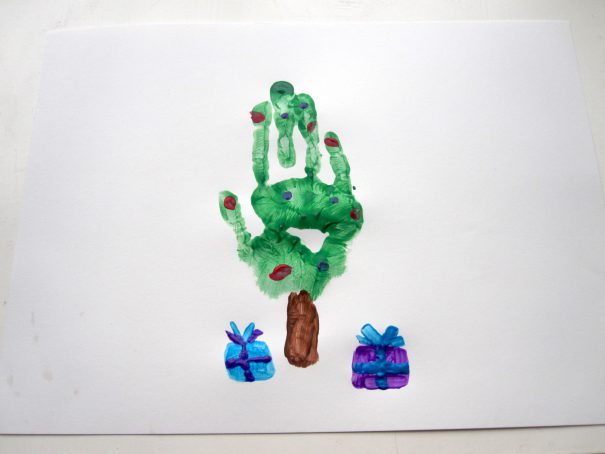
Paint your kids’ hands with the selected colors and have them make a print on each piece of paper. Colored paper is also an option if you want to use white paint (see January and October). Depending on your design, you may need just one handprint, a fingerprint, or even a footprint. Be sure to wash and dry your hands between each month, and continue through the year, from January to December. If you think it doesn’t look like much, don’t worry! After each month has dried, and you add the details, it’ll look awesome.

Insider Tip: Let your kids have some input with this project. While you may have a perfect vision in mind for how to execute a gorgeous Christmas tree using their sweet little hands, they might have another idea, and that’s okay. 

Put it Together

little girl showing off her handprint calendar

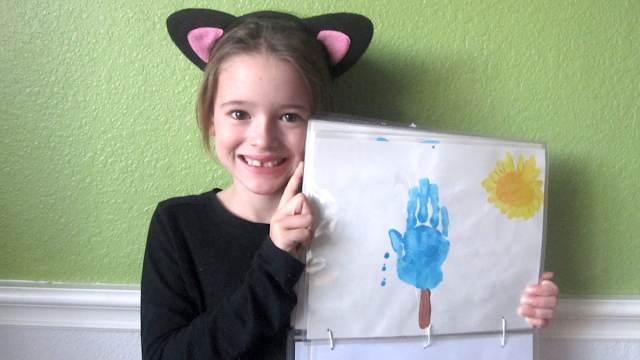
Now that you have all of the months ready to go (and dry!), it’s time to put your calendar together. The easiest way to go is to order a ready-made blank calendar, such as this blank wall calendar from Amazon. For under $10, you won’t have to mess with binding or stapling, or fussing with the assembly of the calendar—glue or use double-sided tape to attach your own homemade monthly pictures to the blank template and you’re good to go.

Related: New Year’s Eve Confetti Poppers You Can Make with the Kids

If you want to DIY your handprint calendar, check out the simple steps below.

Print out a blank 2023 calendar from Calendar Labs. One by one, place the pages behind the handprint so that when it flips upward, you’ll have the right picture and month. For example, the calendar days for January should be glued to the February picture, the calendar days for February should be glued to March, and so on.

Insider Tip: Make sure to place the calendar month on the backside and bottom of the handprint, so as you flip each month, the painted picture is positioned the correct way.  

making a handprint calendar

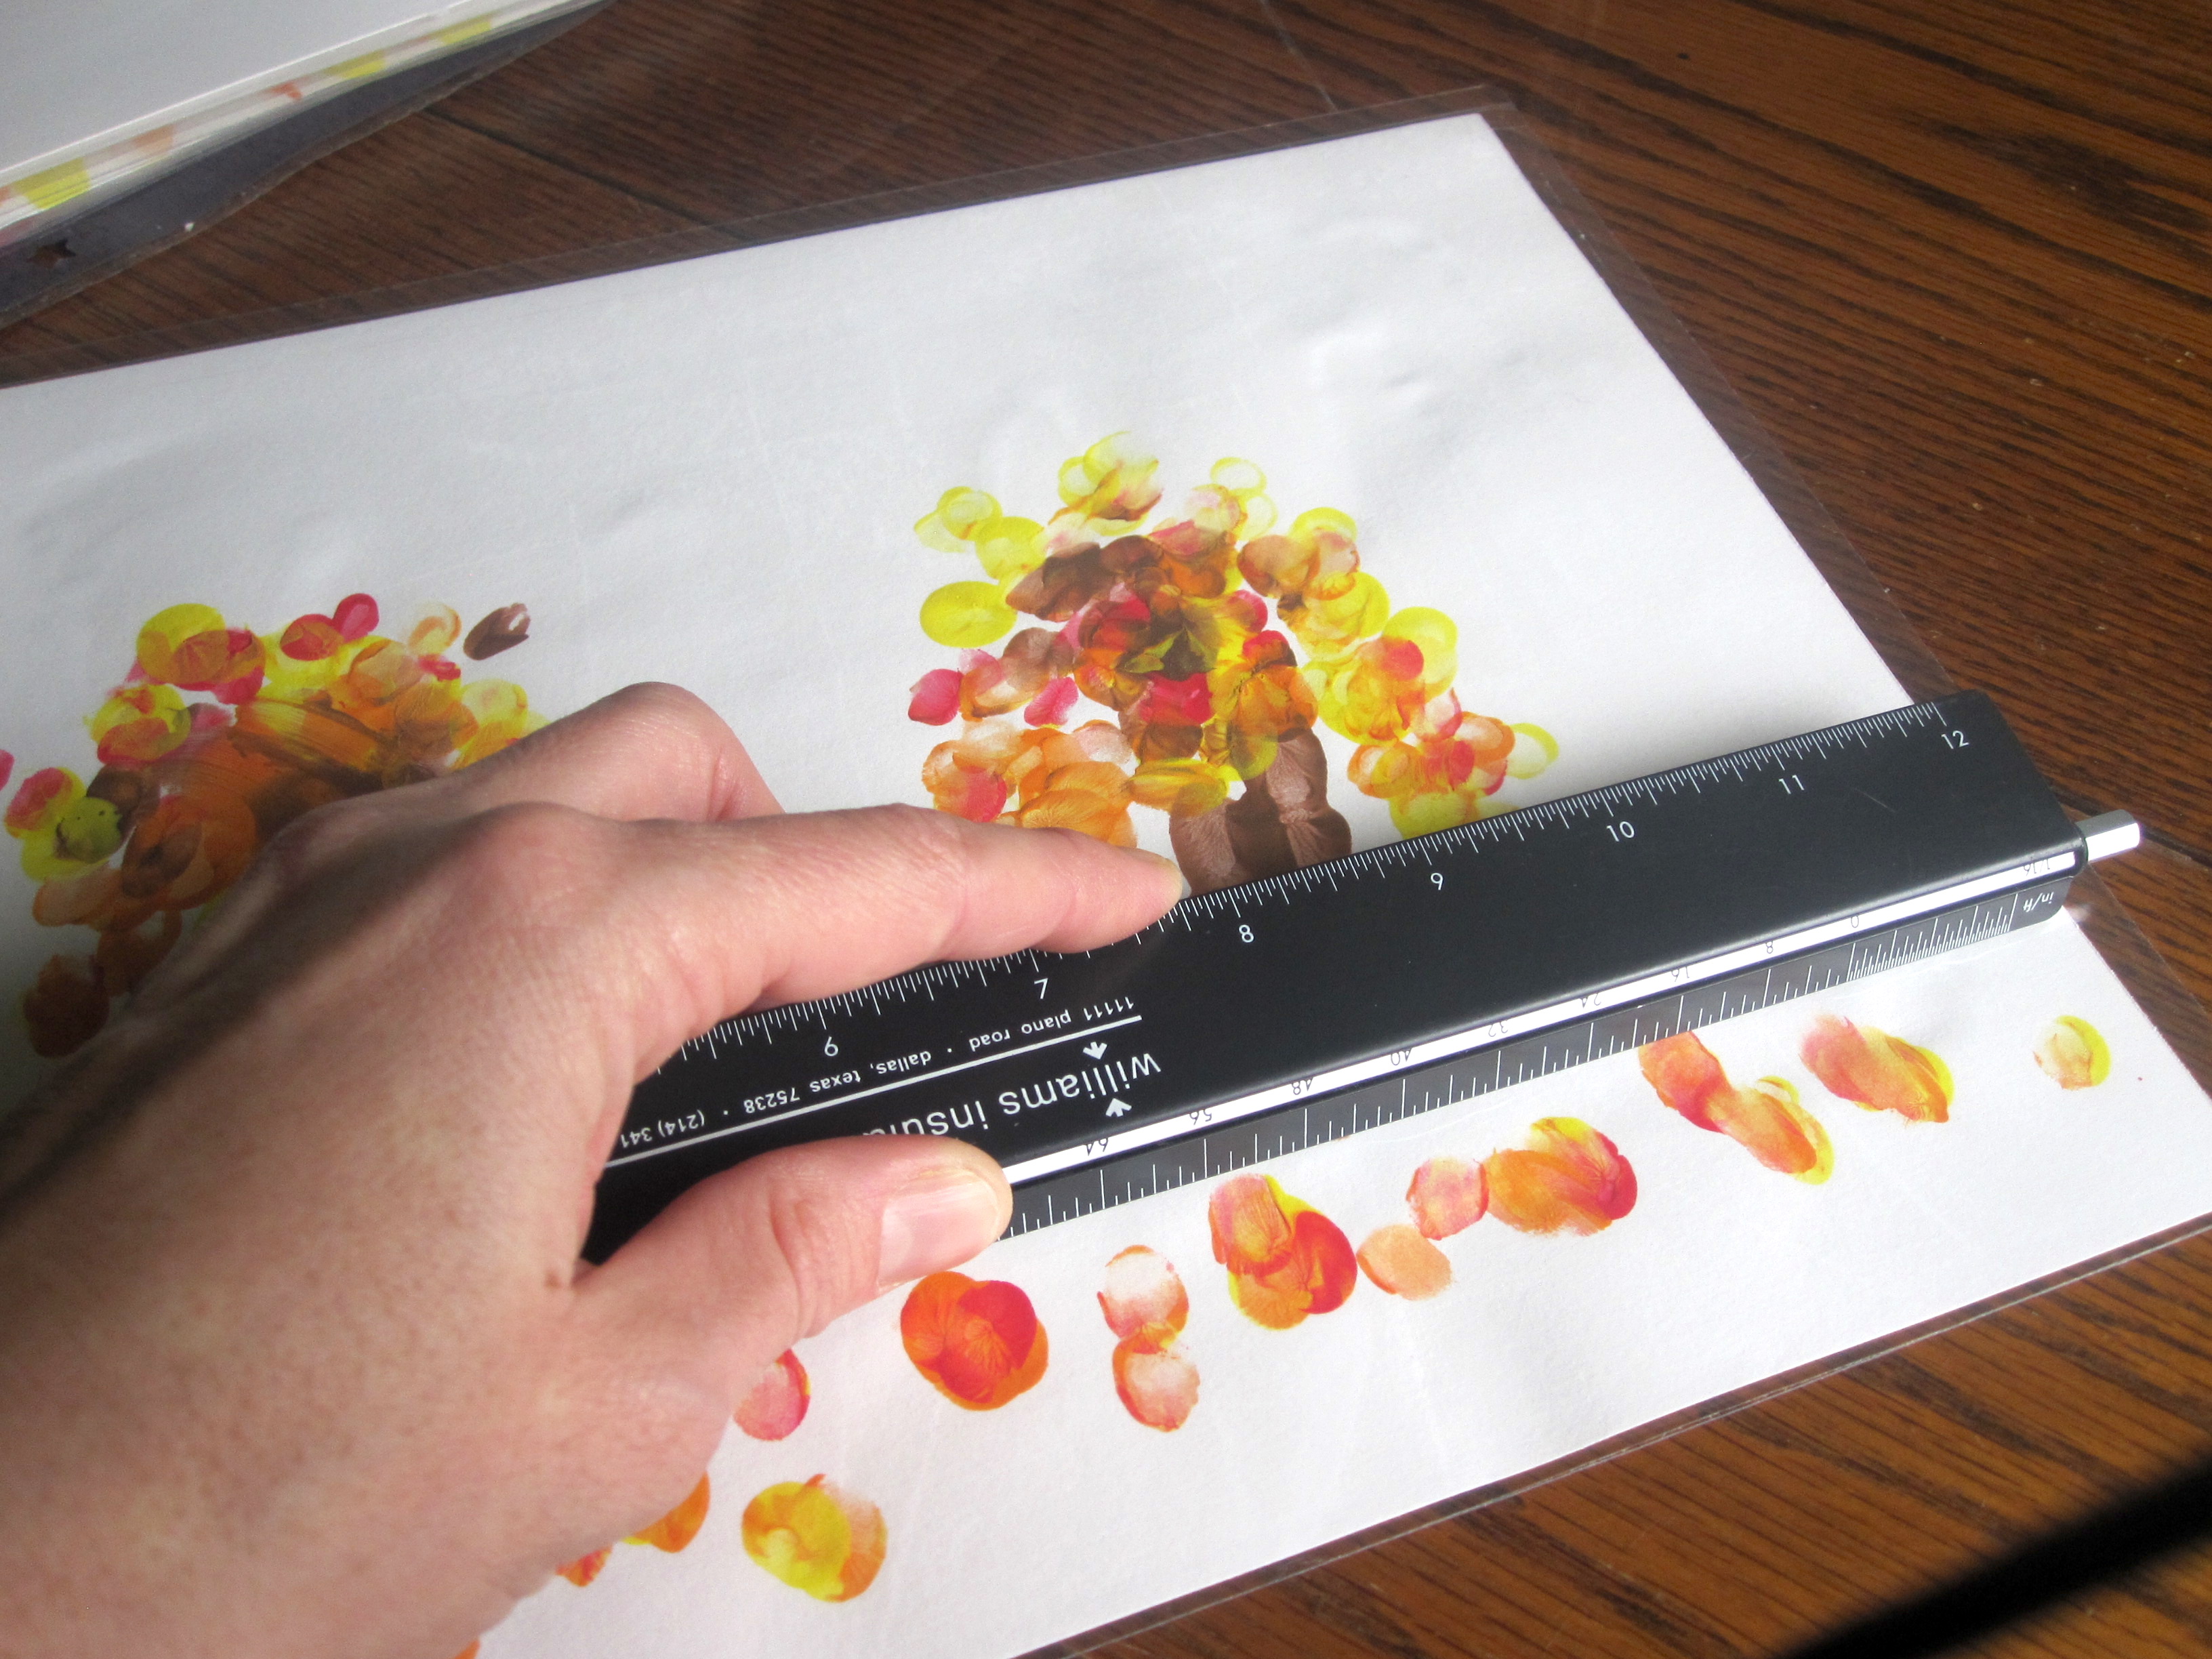
Once you’ve glued all the calendar pages to the handprints, use the laminating sleeves to seal each one. Follow the instructions on the package, and use a ruler to eliminate any air pockets or creases.

making a handprint calendar

Using a hole punch, make three holes at the top of each page (the calendar month should have the holes at the top) and one hole at the bottom (this is where the calendar will hang on the wall).

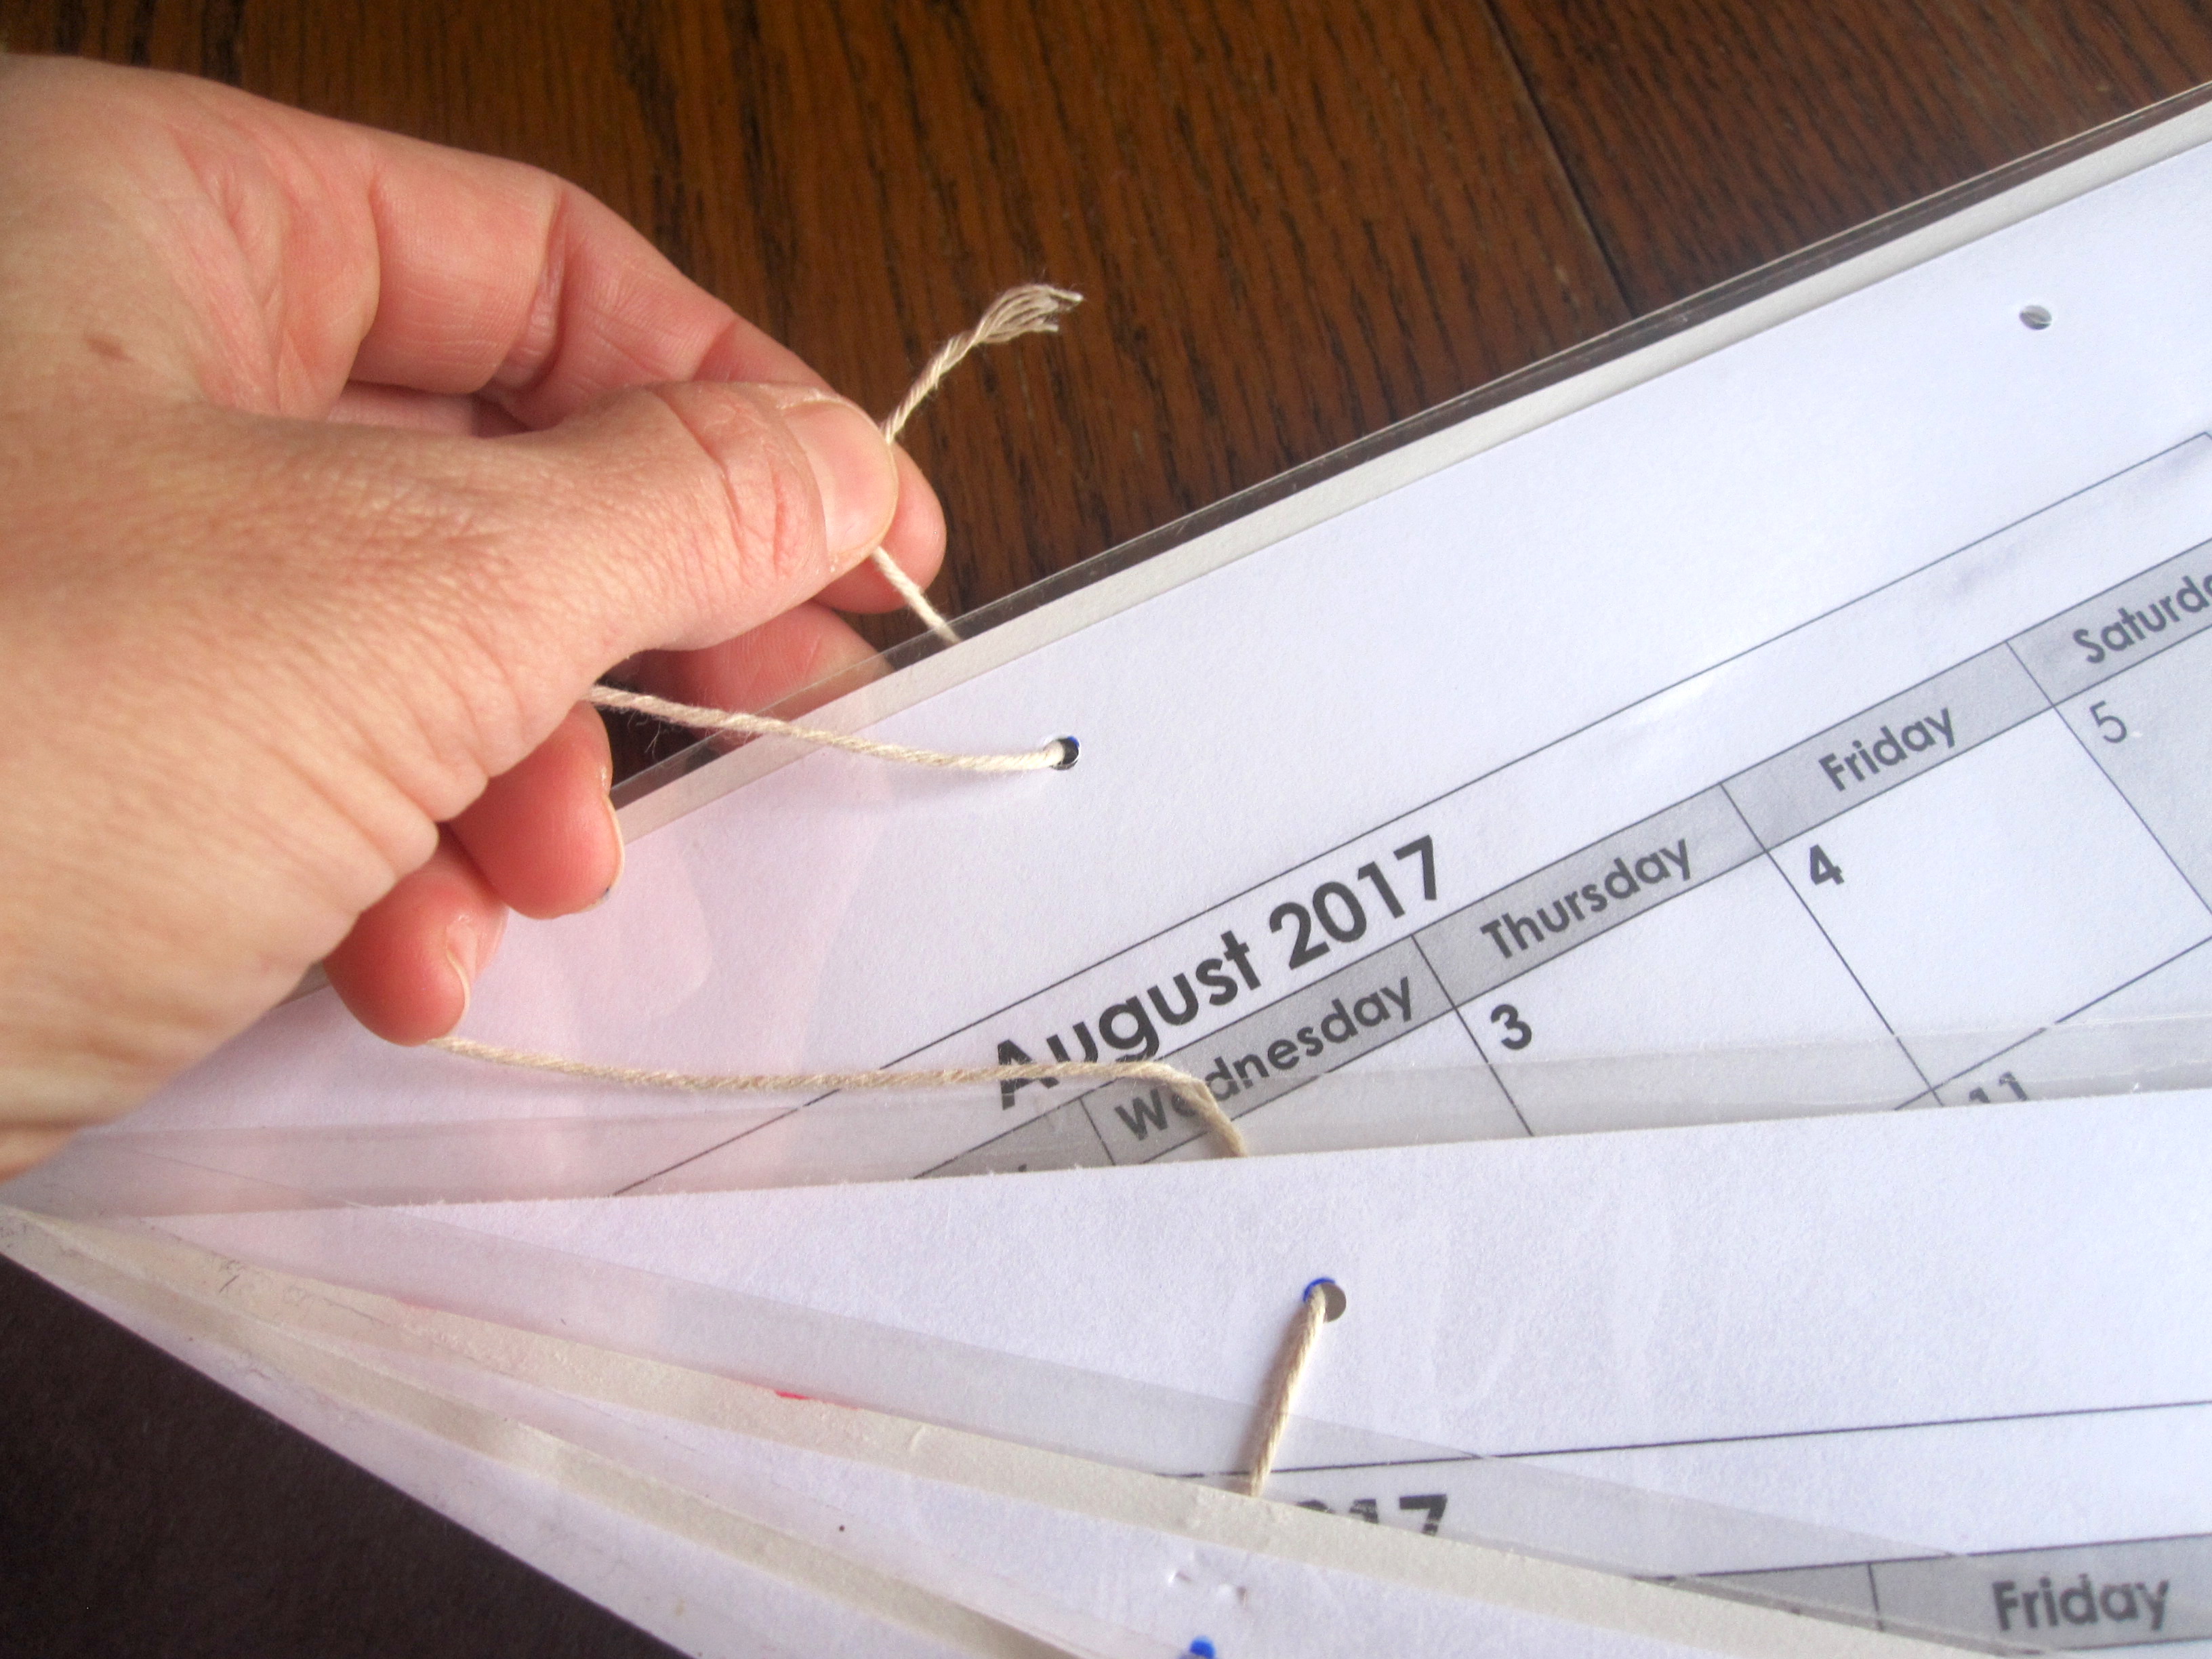
Then, using string or thin twine, run a length through each of the three holes and tie it up like you would a book (it should open from the right side). That’s it! You’ll have a fun keepsake that will hang around for an entire year.

Flip through the gallery below to look at each month of the calendar!

January

  • January handprint calendar
  • February handprint calendar
  • April Handprint calendar
  • May handprint calendar
  • July handprint calendar
  • August handprint calendar
  • October handprint calendar
  • December handprint calendar


These baby shadow box ideas are simple to make

A newborn shadow box is a beautiful way to display baby treasures like the hospital ID bracelet, birth announcement, going-home outfit, and first teeny hat. A baby shadow box is quick to DIY (just three steps!) and makes a special addition to your nursery. You’ll never forget the details of the amazing day you met your babe.

Step 1: Gather Your Keepsakes

Taking Care of Monkey Business

First, decide what to display. You could include a sonogram, baby's first photo, hospital ID bracelet, hospital hat, first socks or booties, baby's going-home outfit, the first pacifier, birth announcement, tiny footprints, crib shoes, or a piece of a beloved swaddling blanket. We love what Alli from Taking Care of Monkey Business included in hers (see above).

Related: 7 Pro Tips for Taking Monthly Baby Photos You’ll Want to Share

Step 2: Buy the Supplies

Or So She Says

Head to your favorite craft store (or open Amazon) to pick up items for your keepsake shadow box. First, you'll need the shadow box itself. We like the Studio Decor 4-Way Adjustable Shadow Box because it's flexible in depth so it can accommodate larger items like crib shoes or lovies. It's also sized well for this project at 12 inches square. 

You may also want to include small wooden letters for your baby's initials. To add color or a pattern, use scrapbooking paper for your background.

And finally, you'll need something to hold your keepsakes in place inside the shadow box. Try a few pretty pearlized pins or mini clothespins so you don't have to cover your keepsakes in glue. Visit the Or So She Says blog to see how Aimee put her shadow boxes together.

Make sure to capture all the giggles—and share them with your family and friends near and far—with the Tinybeans app. The secure platform puts parents in total control of who sees and interacts with photos and videos of their kids.

Vacation is an adventure, and anyone who’s ever changed a diaper in a tiny airplane restroom can attest, adventure isn’t always, uh…easy. Take the distance out of traveling and take “staycation” to heart by playing tourist in your own town. Whether you live in the city, the country or somewhere in between, we’ve got some great ways to make your everyday into something postcard-worthy. Read on for ideas.

iStock

Dress the part: Comfy walking shoes, a fedora and sunglasses and weather-appropriate layers. A giant camera around the neck is optional, but it's ever-so-fun. Binoculars make a great accessory. Bonus points for socks with sandals, brightly colored floral tops and anything that has your town's logo on it.

Pack lightly and carry a big crayon: Any parent ever will tell you that the packing process for a vacation is just that: a process. Get the kids involved in this small-scale version by creating a checklist, with items like pens or crayons, stamps for your postcards, a journal, a camera, small bags for collected treasure or whatever seems to fit your day out.

Create an agenda without an agenda: Visit your chamber of commerce (or chamber’s website) and check out the brochures for local fun! Let your kids choose one touristy thing to do, likely something that you’ve never done before. Go on a duck boat tour, rent bikes if you don’t have any of your own, stop into a local museum you keep walking past or just take your time going into a few shops.

Look up and look down: Observe local architecture. Use binoculars to view the features of downtown buildings in greater detail. Stop and admire a sign. Let the children lead without a rush.

Ask out loud: Take time to ask the barista, shopkeeper or local on the park bench a question or two. What do they know about the history of your town? How long have they lived here? Tourists are known for being friendly and curious!

Close up of a young family enjoying city life while traveling
iStock

Get lost: Try using a paper map to navigate your way. Have each person in your crew pick a place from the map they'd like to visit. Don't use your GPS to get you back on track unless you're in dire need or feel unsafe. Enjoy what comes your way. If you get lost, ask someone for directions! Nothing says "tourist" more than that!

Make a written record: Stop by the local drugstore/tourist shop/gas station and grab a postcard. Then find a spot in a park or a coffee shop, grab a drink and write out your cards. Send one to your best friend, even if they live next door. Use the postcard to record a cool observation about your town. Parents can secretly write one out to their kids. If you didn't pack stamps, tromp over to the post office to grab a few. 

Spend your hard-earned extra cash: Book a hotel room (try a last-minute deal on a travel site like Priceline). The beauty is you barely have to throw more than PJs and toothbrushes into a suitcase. And you can jump on the bed, splash in the pool and just vaycay without any muss or fuss (or too much cleaning up).

Put down the selfie-stick: If you have an older digital camera you don't use as much, let the children be in charge of taking photos all day. At least once, whether with your phone or your camera, stop and ask a nice-looking local to take your group photo. It's not just about getting the shot; you'll make a connection and bring a smile to a stranger's face. If you see someone you know, have them take your photo or get in on the photo! They'll love hearing about your crazy local adventure.

Gather souvenirs: You don’t have to load up on magnets and shot glasses. Save a receipt from a meal you loved, a penny you found on the ground, even a wayward pinecone your kid insisting on picking up. Put all these items in a mason jar with a label for the day, or press them into a scrapbook.


—Amber Guetebier

Rams wide receiver Van Jefferson might have caught four passes for 23 yards in the Rams’ Super Bowl victory last night, but his biggest play was off the field—immediately after the game—when he rushed to be with his wife during the delivery of their second child.

After going into labor mid-game, wife Samaria at 40 weeks pregnant was carried out of the stadium on a stretcher. But if we know anything about the will of a woman going into labor, it’s that you don’t mess around with her wishes. And the universe—somehow—kept the news from reaching Jefferson on the field.

“He is going to play. He is going to keep playing,” said Samaria prior to the game, via The Athletic. “I said, ‘You play, I’ll see you at the hospital afterwards.’ That’s what it is. I will never take that moment away from him. I want to see him glorify God on the field that day. … Knowing Van and how he is so caring, he just worries so much about me and the kids. … If I did tell him or someone told him during the game, he would come off that field. We’re saying, ‘Hey, you go play. We’ll see you after.'”

When. the game ended and the celebration on the field began, Jefferson passed on the confetti and headed straight to the hospital with his 5-year-old daughter Bella, and his dad. He may be a receiver, but he definitely logged some rushing yardage last night, too. “It was a great day, bro,” he said on Instagram Live. “I got three prizes today – my wife, my son and the Super Bowl.”

And while this is certainly a Super Bowl story, it’s also the best Valentines Day one we’ve heard today, as well. Samaria and Van were high school sweethearts. He recently shared photos from high school on his Instagram account, along with a picture together with his wife. “Thankful I’ve been able to share these moments with you since high school! ❤️” It’s fair to say they’ve added another memorable one to their scrapbook.
Van Jefferson/Instagram
—Shelley Massey

Break out the paints, pastels and pretty papers—because it’s time for a whole new round of Valentine’s box ideas. Your kiddo needs to prep for their school’s holiday party (they’re back!), and we’ve got ideas that include everything from a unicorn valentine box to heart-printed paper. So go ahead and break out the cardboard shoe boxes you’ve been saving all year, it’s time to get crafty. See our favorites below.

Wrapping Paper Unicorn

hello, Wonderful

With a printable template in hand and a roll of your kiddo’s fave patterned wrapping paper, you can create this adorable unicorn valentine box from hello, Wonderful!

R2D2

Joys of Boys

Head to your local Dollar store, pick up a white swivel-top trash can and you're halfway to making this simple R2D2 Valentine Box. Joys of Boys Blogger (and mother of FOUR boys!) Kara Lewis has the instructions here. Bonus: If your Star Wars fanatic wants to send some Force-ful Valentine cards, check out her free Star Wars Valentine printables.

Unicorn Box

Sara Albers and Melissa Fenlon via Alice & Lois

We are in love with the bright colors and adorable graphics in this whimsical unicorn Valentine's Day box created by Alice & Lois for Oriental Trading Co. The best part? All you need to do is supply the paper. 

Rubik's Cube

Peppermint Plum

Go retro and create this cute Rubik's cube box from Peppermint Plum!

Punkin Patterns

It's a little bit traditional, a little shabby chic—this Valentine Box from Punkin Patterns lets you put your own special stamp on your project by wrapping a carefully folded cereal box with whatever scrapbook paper fits your kiddo's personal style. 

Faux Flower Unicorn

A Girl and Her Glitter

Make magic with this faux flower-filled unicorn art activity. Get the full how-to steps from A Girl and Her Glitter here.

Plaid Online

Your Valentine will be ready to pack up and head out with this easy project that makes a suitcase-style Valentine box. What's more, the case is just a repurposed cereal box (with a whole lot of decorations on top). Kids will love collecting their loot and then whisking their box away by the handles when the end-of-the-day bell rings. Get the instructions at Plaid Online.

Printed Paper

Mini Monets and Mommies

Forget about the plain holiday wrapping paper everyone else uses. Your child can get creative crafting their print for a stand-out Valentine’s Day box. Celebrate the winter season and use snow-like cotton balls to paint print heart shapes onto red or pink paper. Wait for the paint to dry and wrap a reused shoebox.

Easy-to-Make Monster

One Creative Mommy

Let's be honest: Not all parents have it in them to pull off a Pinterest-worthy project every time their kids have a special occasion. For moms and dads who don't have a lot of time (or money) to prep their kids' projects, this Valentine box is uber-simple (with a free printable!) and totally adorable. Head to One Creative Mommy to get the instructions.

Feed Me Box

Small Fry

For kids who want to get noticed, this "Feed Me" Valentine box is sure to do the trick. Your little ones will love seeing their silly faces magnified for this mailbox craft that uses your kids' wide-open mouths as the letter slots. Find out more from the crafty Mamas at Small Fry Blog.

A Real Mailbox

Make and Takes

Sometimes, the best Valentine's mailbox is simply, just... a mailbox. This Little Pink Mailbox project may take a little bit of thrift-store scouring to score the perfect mini mailbox, but once you find it, all you need is a fresh coat of paint to make it Valentine-ready. Plus, this little beauty can be used all year long (because, really, any day is a good day for a love note!). Get some inspiration from Kami at Make and Takes.

Mail Box Box

Camp Clem

Your kids will love the real postal box look of this "You've Got Mail(box)" created by southern mama Gina Cleminson at Camp Clem. The faux USPS box may look complicated, but it's all made with a shoebox, some carefully cut slabs of cardboard, and a printed logo.

—Melissa Heckscher and Erica Loop

Featured image: iStock 

RELATED STORIES:

9 Valentine’s Day Scavenger Hunts

10 Valentine’s Day Science Experiments

15 Brilliant Valentine’s Day Gifts for $20 & Under

Between decorating, sending cards, getting gifts and finding time to make family memories, you have a lot on your plate this holiday season. To make gift giving a little easier, we’ve rounded up a few of our favorite items that little ones will love! Check out these mom-tested holiday picks when you’re making your list (and checking it twice) this year:


Melissa & Doug Examine & Treat Pet Vet Play Set

With help from this pretend vet set, our pet lovers can go the extra mile to nurse their (stuffed) animals back to health.

$32.49 BUY NOW

Squishville Mall

Your littles will be thrilled with this new playset that opens up a whole world of huggable fun and includes two of everyone’s favorite Squishmallows: Pei the Rainbow-Banded Panda Pegacorn and Rhiannon the Pink Fox—in a 2-inch size.

$29.99 BUY NOW

Solar System Sidewalk Chalk Set

A universally adored gift! We love how artsy explorers get a peek into the colorful core, layers and crusts of each planet (plus Pluto!) after multiple uses.

$43.00 BUY NOW

Melissa & Doug Take-Along Shape Sorter Baby and Toddler Toy

A shape sorter that isn't a massive plastic or wooden contraption that takes up too much room? Yes, please.

$24.79 BUY NOW

Hello Nature Activity Book

We love encouraging our kids to go wild—in this case, drawing, coloring and recording outdoor adventures in a beautiful nature scrapbook.

$18.99 BUY NOW

Eco Finger Paint

When our kids are inevitably covered in from head to toe, we prefer it be with these adorable paints, made from organic fruit and vegetable extracts.

$18.99 BUY NOW

Real Mom Reviews

The Olympics are a fan-favorite time of year for a multitude of reasons. Whether it’s the winter, summer Olympics or Paralympics, it’s expected that you’ll find athletes with superhuman abilities and the big life moments that led them there. Simply put, it’s a time filled with a never-ending well of inspiration.

These incredible displays of athleticism inspire people of all ages, adults to children alike. But the most exciting and heartwarming part of it all is the mark it leaves on children around the world. Parents and families take to social media to share videos and pictures of their children hooked on watching the spectacle. They’re inspired by what they see and are curious about how they can be just like that athlete one day.

Although it may not seem like it, the time after the Olympics has finally held its closing ceremonies can be the perfect opportunity to begin to push your child to explore what inspires them. The age old question is always, “How? How do I do it?” The answer to that question, which is a lot easier said than done, is: “Talk to your child.”

Not all children will feel inspired and driven by the same thing, so it’s important to first listen to your child and watch what they gravitate towards. Then, you can begin to build some activities and language to push them a little further. Here are 5 fun things you can do at home to help to foster a sense of pride and inspiration in your own home:

1. Hold a family awards ceremony. Your child can make certificates or ribbons to hand out, celebrating their own personal talents and those of others in the family.

2. Select a book focusing on inspiration and being your best self. Find moments during the story to ask your child questions during some inspiring moments like, “Have you ever felt like the character when she was in that situation?” See our recommended reading below.

3. Start a scrapbook together. Have your child document his or her “firsts” or special accomplishments. Share the pictures and tell stories about how proud you felt seeing him or her do the things in the pictures.

4. Share information about your family’s culture with your child. Explain to them some of the cultural values and traditions that your family holds and how it makes you feel proud. Talk about your own story growing up!

5. Host your own mini Olympics. Pick some Olympic fan favorites like soccer or a track race to host right in your own backyard, or use some of your own family’s favorite games. It can even be an Olympics filled with board games like Scrabble or Twister! Take some inspiration from one of our own Academies, Kiddie Academy of Fisher’s Landing here!

As we talk about inspiration and pride, an often-overlooked aspect is also helping children learn how to deal with failure. They won’t be successful every time they attempt something, but that’s natural and is merely an outcome, not a reflection on the child.

When things don’t work out, assure them that you’re proud of the effort, that you love them regardless of the outcome and that next time, the outcome could be different. Talk to them about the emotions they felt towards losing and what good sportsmanship looks like. Even in the face of a loss or undesired outcome, it’s important to congratulate the winner and show respect to teammates, coaches, and opponents. In addition to bolstering their self-esteem and sense of pride, this teaches them about resilience.

There are some terrific books for helping your child learn about what it means to be proud. Here are a few classics you might consider reading together:

Joy has over 20 years of experience in early childhood education. As Vice President of Education at Kiddie Academy Educational Child Care, she oversees all things curriculum, assessment, training and more. Joy earned a B.S. in Education from Salisbury University.

Fabulous! LEGO just dropped another epic set and it features five guys you know and love. The LEGO Queer Eye – The Fab 5 Loft set showcases the original loft from the first two seasons, with plenty of fantastic details.

Tan, Bobby, Antoni, Jonathan and Karamo have been transformed into some of the most stylish minifigs we’ve ever seen. Tan’s hair shimmers in silver, Karamo is rocking his signature baseball cap, Jonathan’s long mane is perfectly coiffed, Antoni features his classic bandana and Bobby is wearing one of his familiar printed button ups. Don’t forget Bruley the dog!

This set features 974 pieces and it’s packed with plenty of pieces you’ll recognize from the show. Look for the “STYLE, TASTE, CLASS” sign and the “Yaaas Queen” print in the kitchen. You’ll also find the guys’ tools of the trade: the kitchen island, the clothes rack, the couch and scrapbook, a salon area and a laptop plus ideas board. And of course, the TV to watch the transformations!

Finally, there’s an extra special touch with the inclusion of Kathi Dooley, one of the show’s most memorable characters. She’s Jonathan’s former high school teacher and she receives an emotional makeover on the show. The set includes before and after minifigures, plus a transformational chamber, to capture the spirit of the reveals.

You’ll be able to add this fabulous set to your collection on October 1. It retails for $100 on LEGO.com. As Jonathan says, “You’re strong, you’re a Kelly Clarkson song, you got this!”

—Sarah Shebek

All photos courtesy of LEGO


RELATED STORIES

LEGO Is Dropping Two New Sets Just in Time for Spooky Season

The summertime season always holds so much promise and potential. Whether you’re a parent or a child, almost everyone has been looking forward to a couple of months of rest, relaxation and FUN. We want our children to have a memorable summer, too. However, without fail, most of us hit that summertime lull of boredom where we’ve exhausted almost every activity, playdate and local attraction.

National Anti-Boredom Month, which is conveniently celebrated annually throughout the month of July, is all about fighting that lull of activities and preventing boredom. It also sparks an opportunity to try some new activities with children that can help ease them into a learning mindset and boost confidence for the upcoming start of the school year. At Kiddie Academy, we pay close attention to the passions of children. It’s all about child directed play, encouraging them to take advantage of the curiosities and activities that catch their attention.

This can help get children out of the mindset that learning only occurs during the months of August to May and helps create a safe and open environment for children to ask questions and build on curiosity. So, here is a list of five easy activities that fuse together learning and fun to help celebrate National Anti-Boredom month and kick that summertime lull to the curb:

1. Practice Simple Yoga Poses
This is a great way to encourage low-key activities while being physically active. This can help children develop independent play skills while practicing mindfulness and body awareness. You can even have a short yoga session outdoors!

2. Host a Photo Scavenger Hunt
Introduce your child to the world of technology and curiosity. Give your child a digital camera, smartphone or tablet, along with a list of items, and challenge them to find and take a picture of each item on the list. Don’t forget to hide each item around the house and align the challenge of the hiding spot with your child’s ability to find things.

3. Create a Scrapbook of “Firsts” Together
Create a scrapbook with your child documenting his or her “firsts” or special accomplishments. Share the pictures and tell stories about how proud you felt seeing him or her do the things in the pictures. Boost your child’s confidence and self-esteem while exercising their creative muscles.

4. Build an Index Card Tower
For a fun STEM activity, challenge your child to build a tower using only index cards and tape. Encourage them to think of ways they can change the shape of the cards to provide strength to the tower! Who will build the tallest tower?

5. Cook a Family Meal Together
Invite your child to help with family activities like helping plan and cook a family meal. Children want to feel like a valuable part of the family! Allowing them to have a role in making dinner a success, they can develop teamwork skills and confidence in their ability to complete a task. What a great way to boost executive function skills!

Of course another way to combat boredom is checking out your local Kiddie Academy for free community events throughout the month of July. To locate and register at participating Academies nationwide, visit these sites: Storytime LIVE!, STEM Adventures and Music & More where we help build relationships and get young minds moving.

RELATED STORIES:

Joy has over 20 years of experience in early childhood education. As Vice President of Education at Kiddie Academy Educational Child Care, she oversees all things curriculum, assessment, training and more. Joy earned a B.S. in Education from Salisbury University.

Despite your best intentions to cut down on waste, chances are scrap paper, old newspapers and magazines from 2014 you promised yourself you’d read one day inevitably end up in your recycling bin. Before sending your paper goods off to recycling heaven, check out the below ideas for upcycling your remnants into cool creations.

Homemade Cards

Glitter on a Dime

Skip the card aisle on your next Target run, and use up that pile of scrap paper instead! This easy idea is great for kids or adults, and simply involves cutting creative-shaped pieces of paper and pasting to a folded card. Need some inspo? We love this idea from Glitter on a Dime!

Paper Bunting

iStock

Whether you use glue or a sewing machine, its simple to use those scrap paper pieces for DIY bunting. Cut into your desired shape, then string up. We love this heart-shaped idea from One Bunting Away.

Create a Scrapbook

iStock

Those beautiful bits of scraps are perfect for a scrapbook! Help your little piece together the bitty bits to make a background or jazz up an otherwise boring page. This is a great on-going activity!

DIY Bookmark

Kasturi Roy via Unsplash

Never lose your place in your favorite read again armed with a handy homemade bookmark. Options for this easy upcycling project is to have your kids decorate or doodle on scrap paper or to cut up an old postcard into bookmark-worthy shapes.

Shining Star Garland

Mer Mag via Julep

All you need is a bit of paper, imagination and some time to create this shining star garland. Want to really make your garland really shine? Use LED lights like Mer Mag did. Visit Julep for the full instructions.

Notepad

david_martin_fot via flickr

If you have remnant construction paper or one-sided documents you no longer need, turn them into a notepad. All you need is scissors, a stapler and extra paper!

Photo Frame

yamunah2002 via flickr

Show-off those smiling faces with a handmade frame. Opt to use colorful pieces of scrap paper or origami paper to make your frame really pop. For the step-by-step tutorial hop over to  Make: for the scoop.

Colorful Crumpled Paper Art

Sharon McCutcheon via Unsplash

Roll your scrap paper into small crinkled balls and let your kids go wild painting them. The end result is a colorful, frame-worthy piece of art. Get the full instructions from Buggy and Buddy blog.

—Erin Lem & Karly Wood


RELATED CONTENT:

23 Kid-Friendly Crafts to Celebrate Earth Day

50 Ways Families Can Save the Planet

23 Ways to Upcycle Your Leftover Plastic Easter Eggs