A cool pumpkin carving stencil will make all the difference

Your kids have picked out their favorite Halloween costumes, and you’ve decided whether you’ll go trick-or-treating or attend a Trunk or Treat. Now it’s time to carve out a place of honor for your pumpkin in the neighborhood Halloween parade with one of our cool pumpkin carving templates. Whether you want a Ninja Turtle, Peppa Pig, or classic witch carving stencil, you’ll find a little bit of everything (and all skill levels) in our collection of pumpkin carving stencils. Feeling extra creative? Try your hand at these other amazing Halloween crafts for kids, DIY Halloween decorations, and easy Halloween-inspired treats

What’s the History Behind Pumpkin Carvings and Jack-O’-Lanterns?

The tradition of carving pumpkins has origins in the Irish myth of Stingy Jack. People began carving faces in turnips to keep Jack’s (and other evil spirits) soul away, and when immigrants came to the United States, they started using pumpkins. Halloween is rooted in the Gaelic celebration of Samhain, which starts on Oct. 31 and ends on Nov. 1 and celebrates bringing in the harvests and ushering in the dark winter months. People would go from house to house in search of food and drink. They would also often carve makeshift lanterns out of potatoes and other root veggies, and as the years passed, several of these traditions blended to become what we now celebrate as Halloween.

How to Use a Pumpkin Carving Template

So, you’re ready to pick your pumpkin carving stencil and get to work. But, do you know the tips and tricks for carving a pumpkin? We love this tutorial from HGTV that offers advice on how to get the best-looking pumpkin on the block. We also recommend using tracing paper with a dry-erase marker or pencil on your pumpkin and having the best tools at the ready. A serrated knife is a must, as is a big spoon for scooping out the seeds and a paring knife is good for carving. You can also invest in a pumpkin carving kit, which will include everything you need to get started.

Ursula Pumpkin Stencil

Ursula pumpkin carving template
Disney on Ice

The live-action remake of The Little Mermaid was a smash hit, and while we adore Melissa McCarthy's take on the legendary Sea Witch, there's just something about the original animated form. Download the template here. 

California Sea Lion Jack-O'-Lantern

Marine Mammal Center

It's a jack-o'-lantern but with an ocean twist! This adorable California Sea Lion pumpkin stencil is one you won't see on many porches. Download the pumpkin carving template here

Cute Ghost Pumpkin Carving Template

Ghost in the window pumpkin carving template
Muse Printables

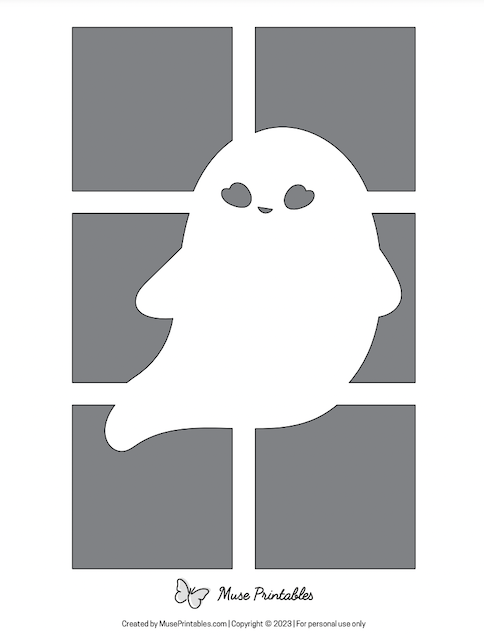
Who says ghosts have to be scary? This adorable pumpkin carving template from Muse Printables is perfect for families with toddlers experiencing their first Halloween. Download it here

Soccer Ball Pumpkin Carving Template

Soccer ball pumpkin carving template
Pumpkin Pile

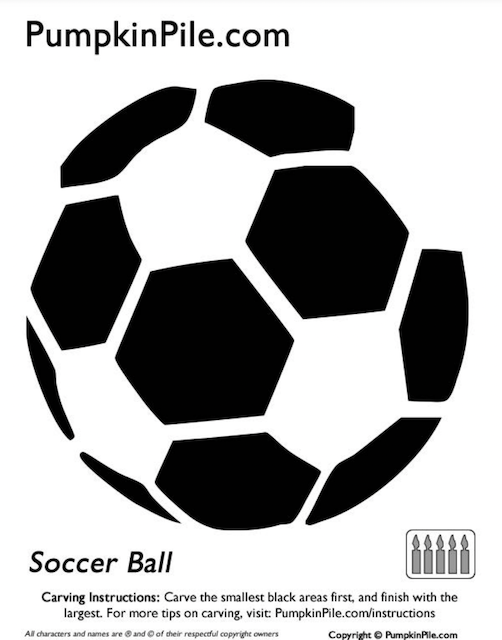
Got a Lionel Messi fan in the house? Show your love of the game with a soccer ball pumpkin! If there's another sport that your family holds close to their heart, don't worry! There are pumpkin carving stencils for everyone. Check them out on Pumpkin Pile


Classic Tombstone

Free Stencil Gallery

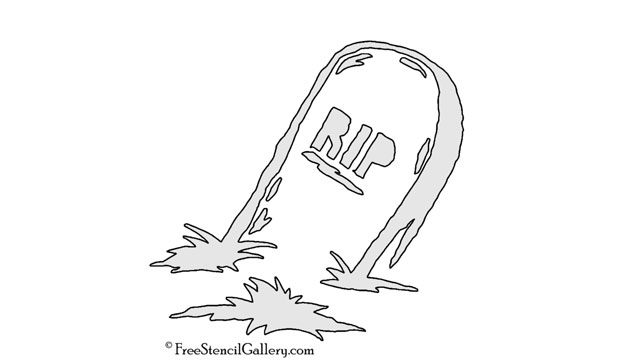
This classic Halloween-themed pumpkin carving template will look perfect next to your witch, zombie, or monster! Download the free printable pumpkin stencil at Free Stencil Gallery.

Steve

pumpkin carving stencil pumpkin carving template of Steve from Minecraft
Pumpkin Pile

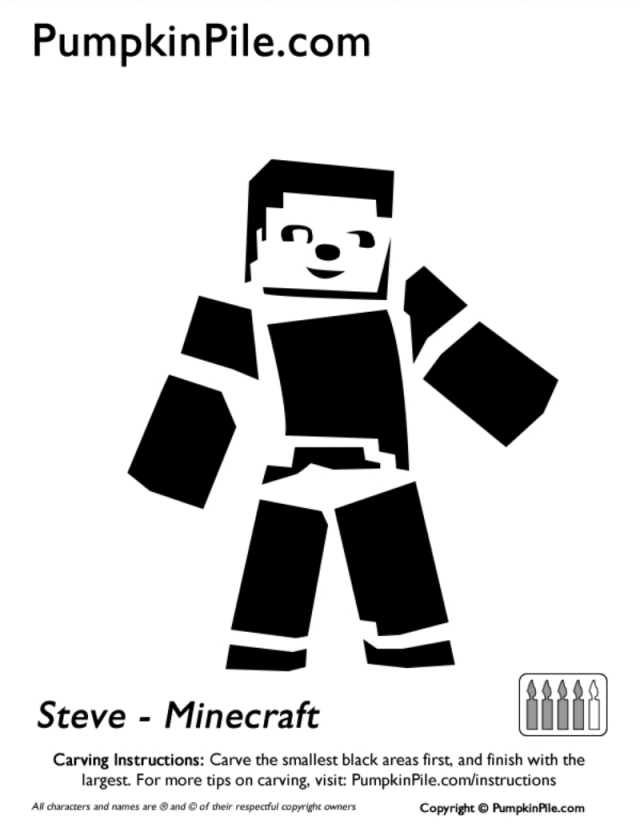
If your kid is a Minecraft fan, then this pumpkin carving stencil of Steve will thrill their little building hearts. Download the free pumpkin printable from pumpkinpile.com.

Donatello

pumpkin carving

The new movie came out this summer, so why not add one of your favorite teen turtles to the front porch? Download it here

Peace Sign

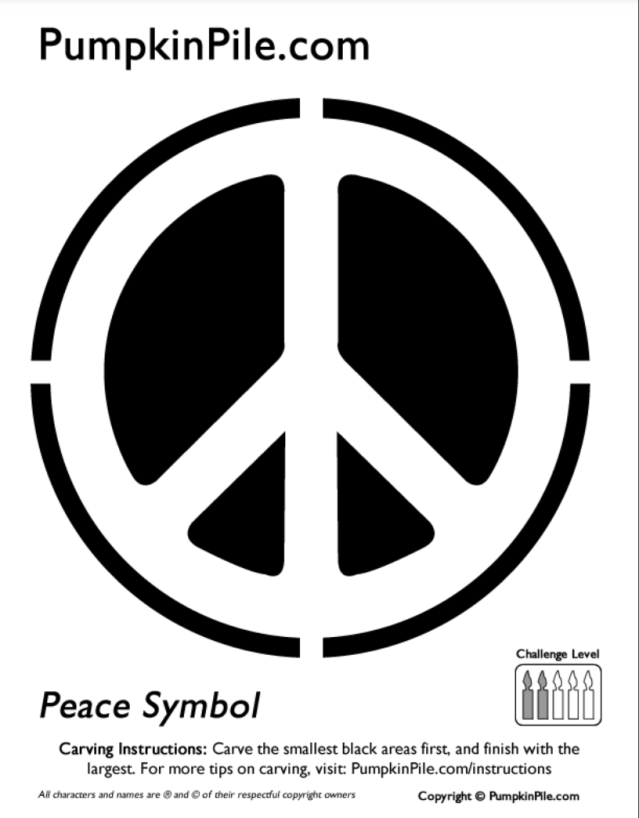
This peace symbol pumpkin pattern will bring good vibes on Halloween night. Download it from Pumpkin Pile

The Mona Lisa

pumpkin carving
Spookmaster

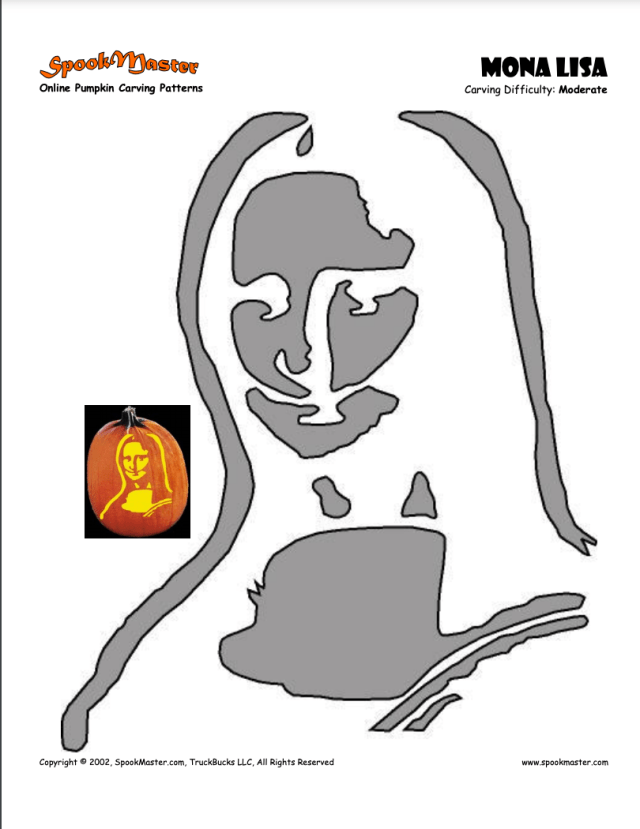
Carve the world's most famous painting onto your pumpkin with this Mona Lisa pumpkin carving design from Spookmaster. 

The Child

pumpkin carving
Woo Jr.

Carve up a glowing Grogu this year for Halloween by using a Mandalorian pumpkin stencil. This one from Woo Jr. is super fun. 

CurliCrow

pumpkin carving
Pumpkin Lady

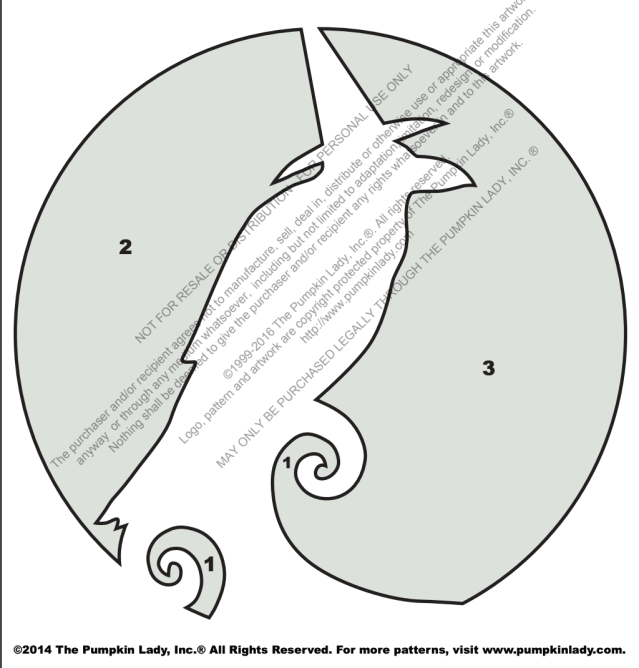
This spooky crow must have picked up his witch friend's hat! Get the pumpkin carving stencil over at Pumpkin Lady

Enter if You Dare

Pumpkin Pile

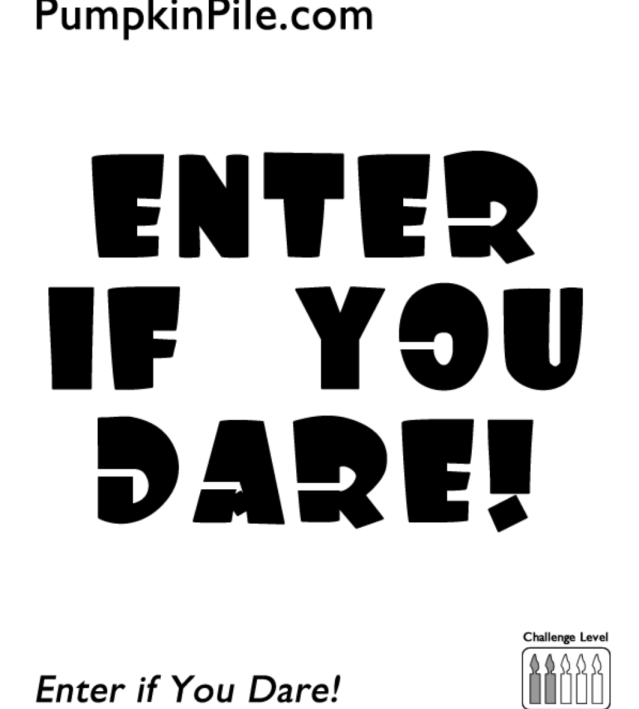
Simple phrases are fun, and this one is perfect for a house that has plenty of Halloween decor. Download the pumpkin carving stencil from Pumpkin Pile

Tiger

pumpkin carving
Spookmaster

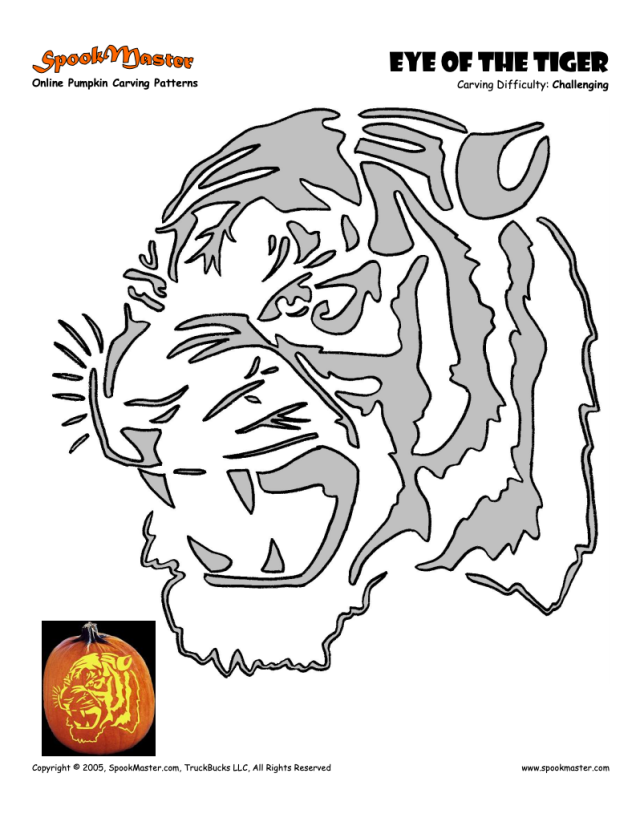
Hey, all you cool cats and kittens! This tiger pumpkin carving design is a way to give a shout-out to the docu-series that rocked our world when the pandemic hit in 2020. Download the pumpkin carving template over at SpookMaster

Related: 27 No-Carve Pumpkin Decorating Ideas We Adore

DLTK

Say it with an emoji this Halloween. Not only is this adorable, but this pumpkin carving design is perfect for beginning carvers. Download the template over at DLTK

Witch Pumpkin Stencil

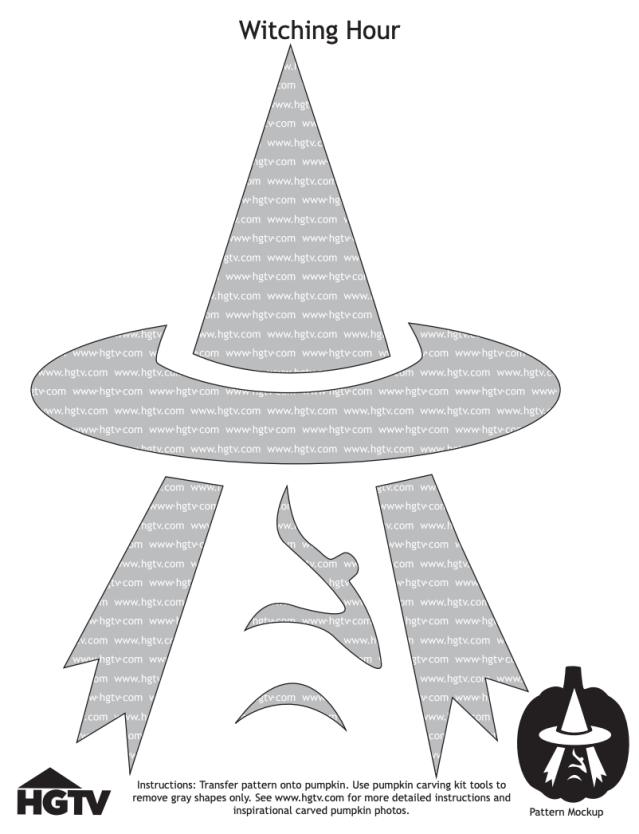
What's Halloween without a proper witch pumpkin stencil? We love this one from HGTV. It's a basic pumpkin carving template that'll pop at night.

Albert Einstein

pumpkin carving
Pumpkin Glow

This is an advanced pumpkin carving template, but it's an amazing one! Pay tribute to one of mankind's most luminous minds with this fun design. Download the template from Pumpkin Glow.

Frankenstein

Mary Shelley's iconic monster does not disappoint. We love Better Homes & Gardens version of the classic Halloween character.

Jolly Roger Flag

pumpkin carving
Pumpkin Pile

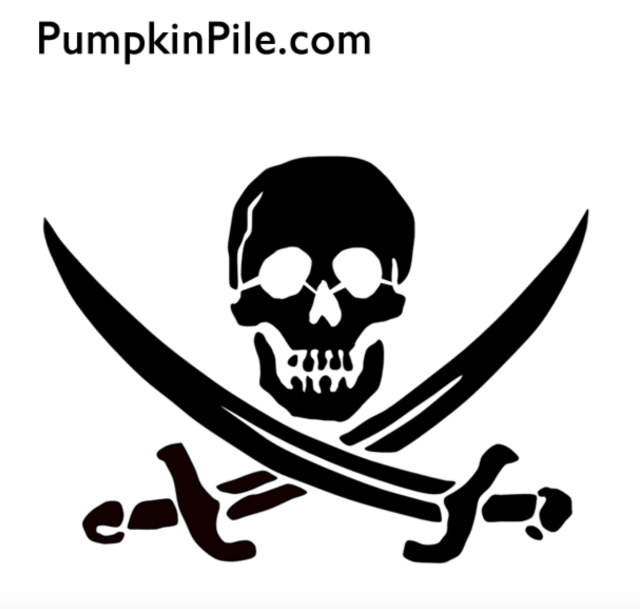
Candy looters beware!! The Jolly Roger looms near. This fun skull and crossbones design is especially fun for pirate-loving folks. Grab the download over at Pumpkin Pile

Indominus Rex

pumpkin carving
Pumpkin Pile

For your Jurassic Park fans, this fairly simple pumpkin carving template of an Indominus Rex is perfect. Download for free at Pumpkin Pile

Meow

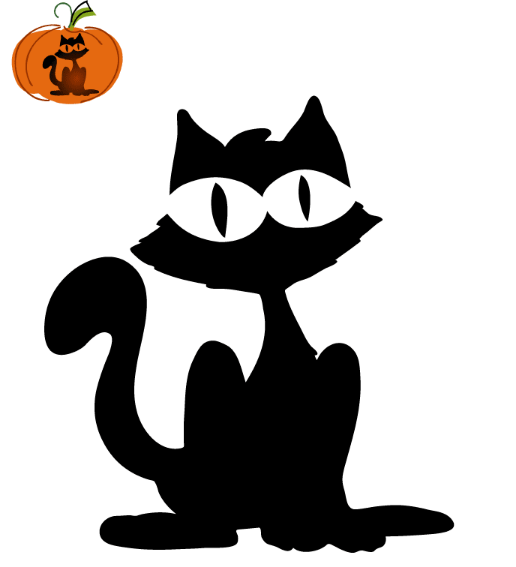
It wouldn’t be All Hallows Eve without a black cat lurking about, and we think this stencil from Woo Jr. is just the right balance of spooky and sweet. 

Wednesday Addams

pumpkin carving
Leopard Toes via Devian Tart

In honor of the Emmy-nominated Wednesday, why not carve Wednesday's unforgettable face on your pumpkin this year? Download the design by leopard toes via Devian Tart

Goofy Jack-O'-Lantern Template

pumpkin carving

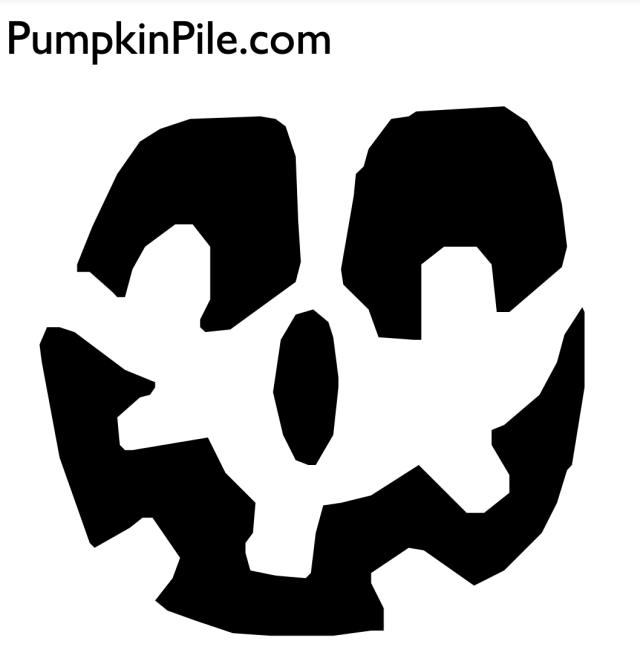
A classic jack-o'-lantern is always fun, and this one gives a little goof to the iconic pumpkin carving template. Download the design from Pumpkin Pile

Who You Gonna Call?

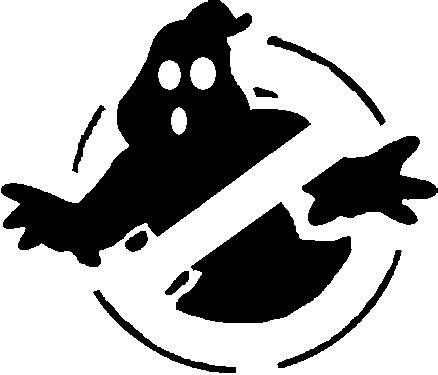
Keep the ghosts at bay with this perfectly themed template from Pumpkin Carving Templates. (And have your kiddo dress up as Holtzmann for bonus points.)

I Am Groot!

pumpkin carving

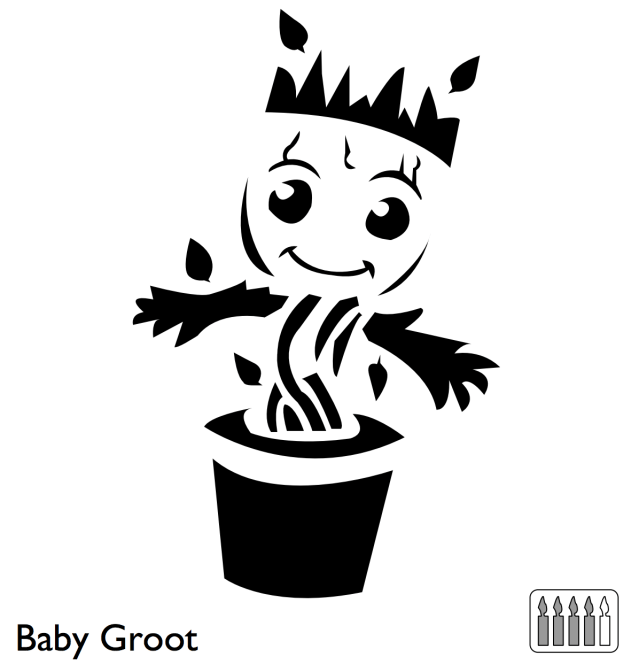
If you’re a Marvel fan, then you’ve got to make a Baby Groot pumpkin this year, even if only for the cute factor. Get the template from Pumpkin Pile.

Peppa Pumpkin

pumpkin carving

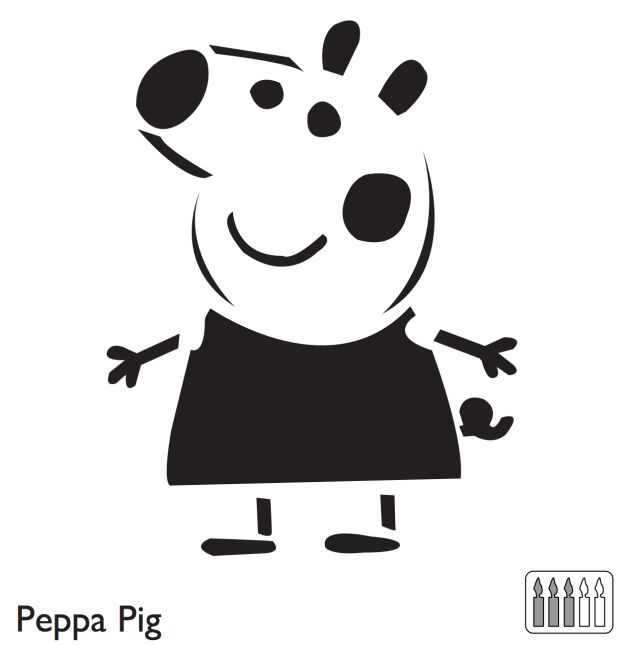
Everybody loves Peppa Pig, and she’ll look fabulous on your front step this Halloween. Grab the pumpkin carving template from Pumpkin Pile.

Related: 22 Things to Do with Pumpkins After Halloween

Pikachu

pumpkin carving
Pumpkin Pile

Pokemon is as popular as ever, and who doesn't love Pikachu? Parents, you’ll love how easy this design is to carve. Download the template.

Cool Cauldron

Double, double toil, and trouble! Give trick or treaters traveling by broom their own cauldron for the big night with this pumpkin stencil. The hardest part will be making sure the bubbles in the mysterious brew turn out just right. Grab the design over at Celebrating Halloween.

Super Mario

pumpkin carving

The Mario Bros. have a smash movie hit on their hands, and we are totally loving it! Keep the feels going with this fun carving template. Download the stencil over at Mario Mayhem.

Room on the Broom

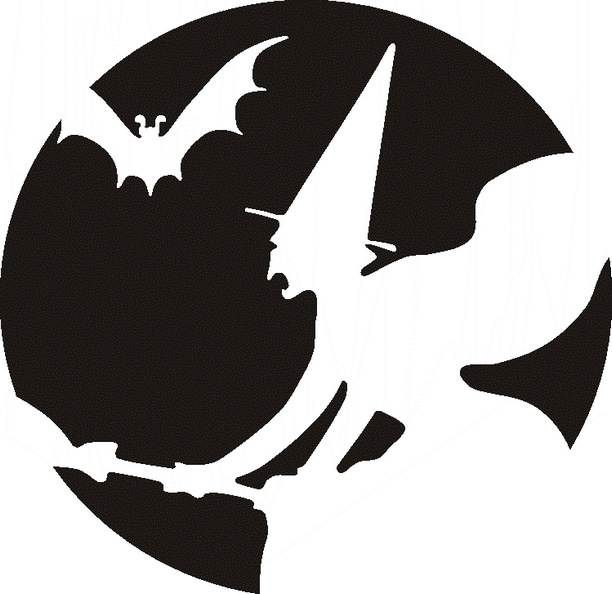
Go the more traditional route with Home Life Weekly‘s classic carving, featuring the spooky silhouettes of a witch and her bat friend. Let the little ones carve the large parts like the witch’s hat, and you can take the reins for the details of the bat.

Simple Spider

pumpkin carving

Spiders love to drop in for Halloween, and with this pumpkin carving template, it's easy! The big sections that need to be carved out make this one perfect for beginners. Click here to grab the pdf.

Feel the (Carving) Force

pumpkin carving
Star Wars

If your Star Wars fans aren't so sure about joining the dark side, there are plenty of other characters to choose from too. See them all at Star Wars.

Owl Orb

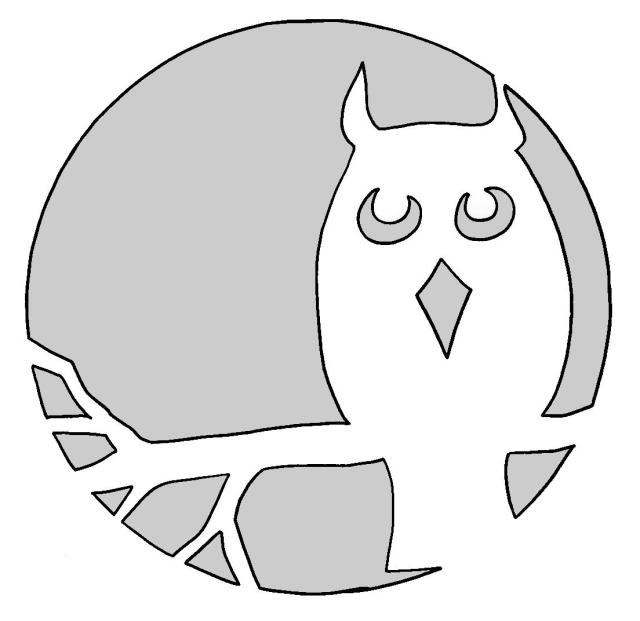
Whoooo wants to carve a pumpkin? A simple and sweet design featuring an owl resting on a branch will make little ones smile. Get the pattern from Pumpkin Carving Templates.

Candy Carving

pumpkin carving
HGTV

We love the clever way HGTV uses a pumpkin to make a statement. With this candy arrow, no trick-or-treaters will be left behind.

Guide the Way

pumpkin carving

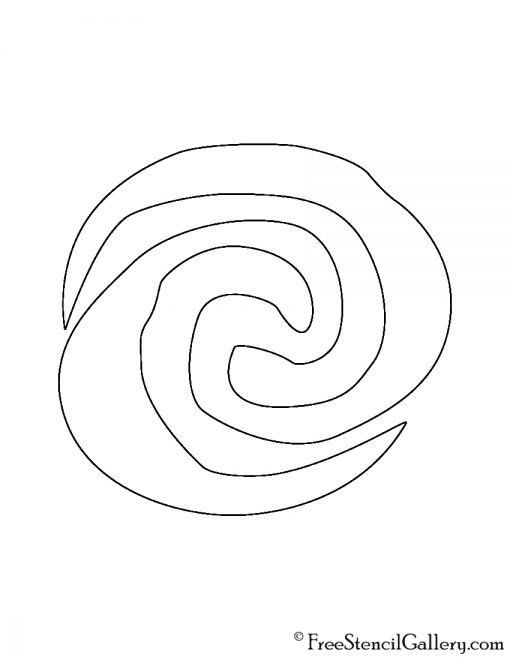
Little Wayfinders will be guided by the heart of Te Fiti when it glows brightly on Halloween night. This simple but stunning design will be a hit with the porch parade! Get the stencil over at Free Stencil Gallery.

Light the Way

pumpkin carving

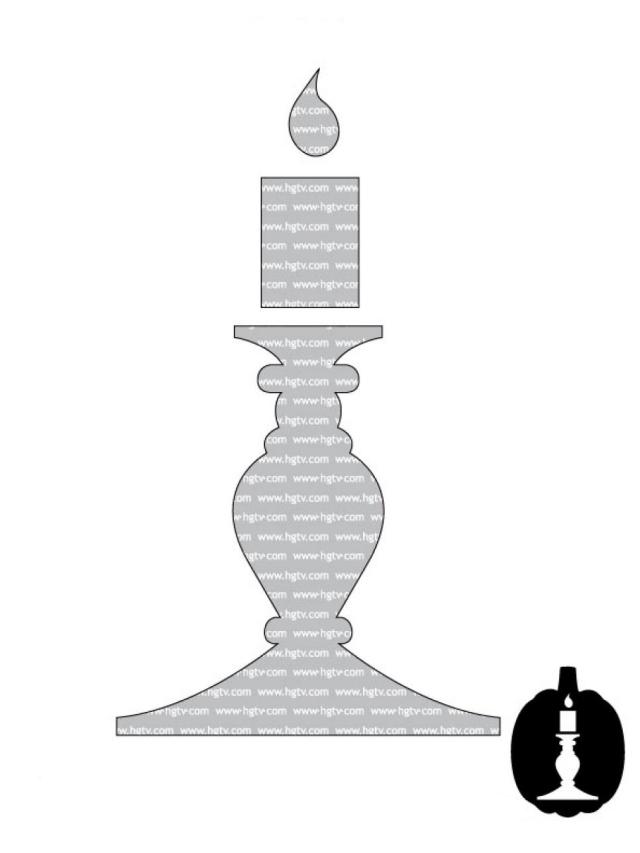
For a different take on glowing pumpkins, try this candelabra design from HGTV. You can either go spooky with an eerie glow or make it classy with bright shiny light. 

Vampire Pac-Man

This design from Woo Jr. takes us back to our days of Pac-Man and pinball machines—with a Halloween twist! The large blocks of pumpkin to be cut out make this a pretty easy design for little ones to pull off, too.

Spell It Out

This one simply says it all. Download it from Pumpkin Pile now!


Pirate Pumpkin

pumpkin carving

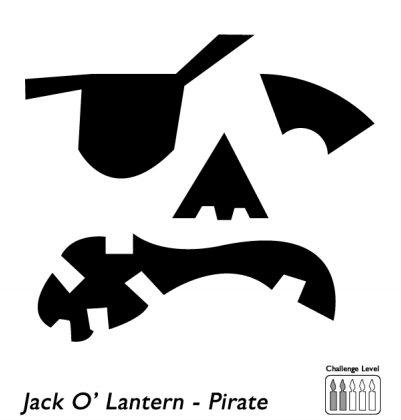
Arrrr! A pirate pumpkin is perfect for the plunder that is Halloween night. Your little buccaneers will even have a fellow matey to welcome them home after a night of collecting serious booty. Download the design over at Pumpkin Pile.

Mummy

pumpkin carving
HGTV

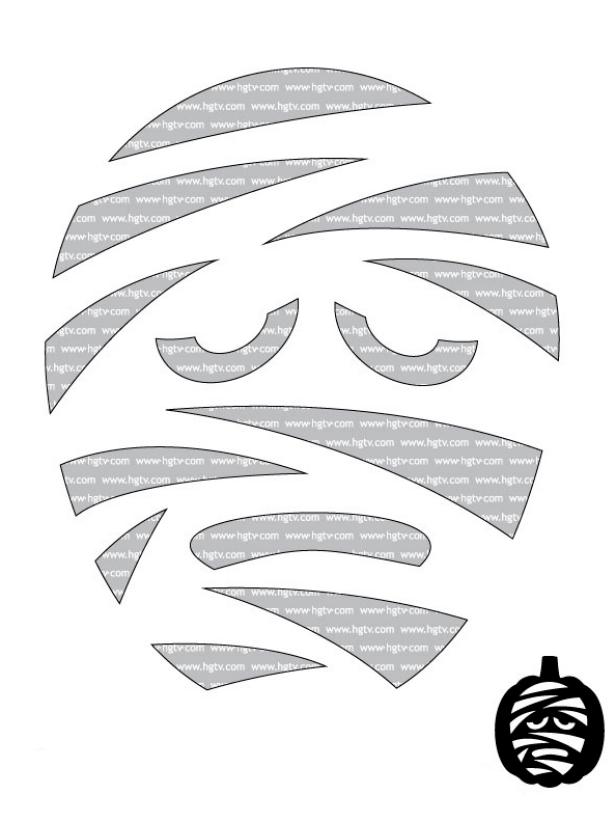
A classic Halloween character, this wrapped up moaning monster will be a fun addition to your porch this Halloween. Download the printable from HGTV

Make sure to capture all the fall fun—and share them with your family and friends near and far—with the Tinybeans app. The secure platform puts parents in total control of who sees and interacts with photos and videos of their kids.


Photo: Hannah Tasker via Unsplash

Some children are picky eaters, while others gobble down practically everything in sight. For those parents who struggle with getting their kids to eat, mealtime can feel nightmarish. Lucky for you, change is possible. Prepare to turn even the most challenging appetites into miniature foodies.

Here are 7 creative ways to feed your kids:

1. Use Fun Utensils. If you have a fussy eater, now’s the time to buy those adorable kid’s utensils you’ve been eyeing at the store. There are forks shaped like airplanes, trucks made to hold tacos, and even plates that make eating a game!

Honestly, with devices like this, mealtime should be just as much fun as playtime.

2. Make Tasty Treats. This tip is twofold. Firstly, if your kids don’t have food restrictions, get in the habit of cooking adult food. Season it as you would your own food and demonstrate how much you enjoy eating it. This is likely to make your youngsters curious enough to try it.

If they grow up eating bland kiddie food, you’ll have a greater challenge transitioning them to adult foods. However, keep in mind that people frequently use salt to season their dishes. While you may appreciate the taste, children require very little sodium in their diet. Instead, focus on other healthy seasonings like turmeric, garlic, and ginger.

Secondly, offer your children dessert if they finish the food on their plate. Frozen fruit smoothies and popsicles can be a sweet but healthy end to their meal. Pretty much every kid has a sweet tooth — making a tasty treat the perfect incentive for them to finish their veggies.

3. Space Out Meals. The human body has limits on how much it can eat at a time. If your child had a big lunch, they might not be as hungry at dinnertime. Space out the meals and offer nutritious snacks throughout the day. Babies usually feed every one to three hours, while toddlers and older kids will eat a mixture of snacks and larger meals each day.

4. Cook Together. Do your children help in the kitchen while you prepare their meals? Cooking together is a terrific way to teach them about nutrition. As they help you prep dishes, they can try new ingredients. By involving them in the process, you are sparking their interest and imagination. If they’ve helped you make the dish, they’ll be much more likely to try the food.

As a bonus, your children learn vital life skills that will be useful when they move out of the house. Many people struggle with cooking, and teaching your kids will help them cultivate these skills early.

5. Form Interesting Shapes. You can transform most foods into something fun and interesting with a cookie cutter or stencil. Everyone knows that a star-shaped lunch is much more fun to eat than a basic square sandwich! You can apply this same method to other foods like fruits and vegetables.

If the ingredients are difficult to cut, you can position them on the plate to form an image or word. Even a simple smiley face is more enjoyable than shapeless blobs of food. While distracted by the unusual designs, your kids won’t mind feeding themselves. For an educational twist, ask them to name the icons you made.

Easy shapes to create include:

  • Stars
  • Triangles
  • Letters
  • Numbers
  • Faces

6. Invent Wild Names. Sticking with the theme of making mealtime fun and exciting, try inventing wild new names to pique your child’s curiosity. These can range from entirely different words to fun descriptions that will make trying new things an adventure.

Some examples include:

  • Broccoli, also known as miniature trees.
  • Bananas, also known as monkey food.
  • Grapes, also known as tiny juice balloons.
  • Carrots, also known as x-ray vision carrots.
  • Pretzels, also known as tree branches.

7. Eat at the Same Time. Do you eat at the same time as your child? Some parents choose to eat separately because they’ve only had time to prepare their kid’s meal and not their own. Break this habit by cooking more meals that are suitable for the entire family. A quick toss in the food processor will make atypical meals soft enough for your toddler to enjoy. However, make sure to follow safety suggestions regarding portion size and consistency to avoid potential choking hazards.

Besides encouraging your kids to try new foods, eating at the same time teaches them the importance of family mealtime. They’ll learn they have to wait at the table while everyone is finishing, which means they’ll have more time to nibble on their leftovers.

Look Forward to Mealtime

Using these creative tricks, your kids will be looking forward to mealtime. Remember to stay positive as you try these various methods with your family. Some will be more successful than others, but the key is to remain enthusiastic and optimistic. Children can sense things, and if you’re worried or stressed, it could impact their actions.

Keep an open mind, and feel free to try variations of these ideas. Maybe bright colors will interest your child more than fun shapes—do what works for you and your family!

Jennifer Landis is a mom, wife, freelance writer, and blogger. She enjoys long naps on the couch, sneaking spoonfuls of peanut butter when her kid's not looking, and binge watching Doctor Who while her kid's asleep.  She really does like her kid, though, she promises. Find her on Twitter @JenniferELandis.

Show your civic duty and instill in them at a young age the importance of voting. We uncovered baby and kids tees that make a statement and celebrate the future voters of America. Don’t forget to register to vote and head to ballots on November 3 (or mail yours in advance) to have your voice heard. Their future depends on it.

Bloomaire For Our Future organic tee

These soft crew neck tees are made with 100% GOTS certified +  Fair Trade Certified™ GMO-free combed organic cotton. Bonus: they come in adult sizes too so you can match with your mini-me. 10% of the proceeds will be donated to When We All Vote, a non-profit, nonpartisan org that is “on a mission to increase participation in every election and close the race and age voting gap." Buy now.


Mochi Kids

These tees from Mochi Kids perpetually sell out so preorder yours today. They come in baby, kids and adult sizes, all hand printed on super-soft, made-in-the-USA apparel. Buy now.


Piccolina Suffrage Heroes Tee

Celebrate those who paved the way with this sweet tee that honors five trailblazing women. Available in size 2T-14. Buy now.


Kids Rainbow Vote Tee

Show your voting pride in this Kids Rainbow Vote tee, which you can snag in two colors: black and heather. Buy now. 


Maisonette Vote Sweater

Maison Me Adult Vote Sweatshirt

Maisonette just launched Maison Me “VOTE” sweatshirts and masks for mom and mini’s made to ignite conversations, and inspire even the littlest ones to use their voices in a big way. Buy now. 


Little Miss Suffrage Shirt

Vote equality! These shirts are screen printed in water-based ink. Choose from six different colors and celebrate everyone’s right to vote. Buy now. 


Youth Vote Tee

Celebrate your power to vote and empower your kids to take action in the future with this tee that’s available in 10 different colors. Buy now. 


Vote Like My Future Depends On It Tee

Truth is: their future does depend on it. We love the motto of this tee, which you can buy in three different colors. Buy now. 


Vote Screen Printed Toddler Tee

Get your littlest tots in on the Voting action and have them wear this tee with pride when they accompany you to the polls. Buy now.


Toddlers for Change T-shirt

They may be resistant to potty training but we bet your toddlers will embrace real change when it counts. These hand-painted stencil shirts are 100% cotton jersey and made to order. Buy now. 


I am a (future) voter tee

It’s never too early to proclaim your (future) right to vote. This tee is brought to you by I am a voter.® is a nonpartisan movement that “aims to create a cultural shift around voting and civic engagement by unifying around a central truth: our democracy works best when we all participate.” Buy now.


Makoshey T-shirt

Mom-owned Makoshey helps make the conversations around voting and the election fun with election-inspired clothing that’s comfortable and Chicago-made. Read more about Makoshey and then buy your tee here.


—Erin Lem, Maria Chambers and Jennifer Swartvagher

photos from each retailer. At the time of publication all t-shirts were available for purchase.


RELATED STORIES:

This “Vote” Necklace Gives Back to Charity

Election Day Games for Kids

Best Face Mask for Kids & Adults

Fresh Mom & Me Styles That Make a Statement

The Very Best Kids’ Online Consignment Shops

Durable Kids Shoes You Can Buy Online

If you’re like most parents, you’ve heard the phrase “I’m bored!” a lot over the past few days. But boredom doesn’t have to be a daily occurrence in your house. KiwiCo creates interactive crates that are both entertaining and educational, and keep kids engaged without screens. They’re perfect for learning at home and staying indoors.

Every month, KiwiCo delivers a craft kit that includes different activities and projects. KiwiCo has eight unique subscription lines​ to fit different ages and interests, and each kit is designed by experts and tested by kids. So if you have an 8-year-old budding Picasso artists, rest assured another young artist helped test every activity in the crate to make sure they are engaging and fun. Let’s face it— what’s the point of having an enriching project if the kid doesn’t want to do it? And the best part? All of the materials are provided in each crate. So busy parents don’t have to make dozens of trips to the store to buy craft supplies.

Here are the different crates available and their themes:

Panda Crate (0 – 24 months) — Even the littlest minds can explore and discover with this kit that includes age-appropriate kit subscription options.

Koala Crate (2 -4 years) — Kids will play and learn with high-quality materials and activities to inspire creativity at a young age.

Kiwi Crate (5-8 years) — This kit is focused on science, art and engineering. Kids create their own pinball game, kits and more.

Atlas Crate (6-11 years) — This geography and culture kit helps kids get globally inspired with projects and activities to explore different cultures. The Atlas Adventure books comes with the crate and includes collectible cards and stickers for a passport keepsake book.

Doodle Crate (9 – 16+ years) — Kids create and craft awesome projects such as a DIY clock, soap and stained glass stencil kits.

Tinker Crate (9 – 16+ years) — This awesome create includes all the materials and supplies to create science and engineering projects. Kids learn and make the science of slime and create their own animation.

Maker Crate (14+  years) — Using art and design, kids create amazing projects that are unique and useful. Past projects include pillows, hanging plants and sewing projects.

Eureka Crate (14+  years) — This kit includes an engineering project with high-quality materials and step-by-step instructions. Kids also receive a Maker’s Guide that lets them explore the science and technology behind the design.

How does KiwiCo work?

To order your KiwiCo crate, here’s what you need to do:

1. Pick a line based on your kiddo’s age and stage.

2. Your crate will be delivered monthly. And your first kit is shipped in two days! And you pay no shipping fees.

3. Have fun! Watch your kiddo enjoy their create and see their imagination grow as they start exploring immediately.

You also have the option to skip the subscription and shop directly from the KiwiCo store.

Ready to give KiwiCo a try? You can cancel or pause your subscription anytime. Save 30% on your first crate with code REDTRI!

—Leah R. Singer

Every child has a story to tell, so why not get carried up up and away and write your own comic? Use words and pictures (which means less writing, more action). Get your child to the drawing board and start creating a comic book all his own. Scroll down to learn how.

DIY Comic materials

What you’ll need: 

Fine point black Sharpie marker (and other colors if your child wants to color in her comic)

Pencil with eraser

Card stock paper

ruler

Craft knife (X-Acto Knife)

Before You Begin: Decide on a story

Brainstorm story ideas. Make sure to explain to your child the importance of a story’s “beginning,” “middle,” and “end.”  If your kiddo can’t come up with an idea on his own, have him think about something he did recently — or something he wants to do — that can be explained in in three simple pictures. Anything goes!

DIY comic step 1

Step One: Make a comic strip stencil

This is crucial if you want to do more than one comic strip (or if your little artist makes a mistake and wants to start over). Make a 10″ by 5″ rectangular cutout that will fit three comic panels comfortably.

DIY Comic Step 2

Step 2: Pencil in a template

Using the stencil, let your little illustrator pencil in the borders of the comic strip on a plain piece of white paper (card stock is better because the marker won’t bleed through). Then, draw two vertical lines so that your rectangle becomes three panels. You can mark these 1,2, and 3 to give your kids a guide for the beginning, middle, and end of their story.

DIY Comic step 3

Step 3: Make ruled lines for dialogue

Using your ruler, mark three or four lines across the top of all three panel lines (you’re going to erase them later, so keep them light). This is where your kiddo will write the dialogue or narration of his story. Note: Don’t skip this part! Guiding lines help your child write his letters correctly (especially important for newbie writers) and give his comic a professional look when it’s finished.

DIY Comic step 4

Step 4: Tell your story!

The stage has been set — now’s the time for your little creator to get to work. Have kids write their dialogue or narration on the ruled lines, leaving the square below to draw corresponding pictures.

DIY Comic step 5

Step 5: Make it permanent

Once the story and words are written, have your child trace over his words and pictures using a permanent marker.  Note: Grown-ups can do this part if little artists are wiped out.

DIY Comic step 6

Step 6: Erase the pencil lines

Here’s where your kiddo’s comic starts to shine. Erase all the pencil marks from the page using light strokes (you don’t want to smudge any marker lines).

DIY Comic - standalone

Step 7: Make some bubbles

Add bubbles or squares to make the narration or dialogue pop. Lastly, have your storyteller sign his comic. For proprietary reasons, of course — this little gem is going to be worth something when your cartoonist makes it big! After all, bestselling Captain Underpants author Dave Pilkey was just a second-grader when he came up with the winning idea for his scantily-clad superhero.

DIY Comic Done

For more comic-creating fun…

Want to make an online comic you can share with friends via e-mail or on Facebook? Check out Marvel’s online comic-creation tool and you’ll be going WHAP! SPLAT! ZOINKS! in no time.

-This craft was inspired by the clever folks at mykidsadventures.com.

— all photos and copy by Melissa Heckscher

With Halloween around the corner, your little ones may still be deciding … dragon or dinosaur? Moana or Maui? Too many trolls to choose! With the transformative power of face paint, a last minute mind change will never mean you have a costume to return. We rounded up easy ways to trick out your Halloween and keep imaginations spinning all year long. Keep reading to see them all.

photo: Clare Jeffery via Flickr

1. Keep their eyes on the prize.
Whether your trick-or-treater wants to be a wizard or a witch, an eye mask always completes the makeover. You can find a slew of eye inspiration here, or design your own fun shape and embellishments for a truly unique look.

photo: Donnie Ray Jones via Flickr

2. Try out a prowl.
Does it get any easier than a set of whiskers? We don’t think so. And really, they’re all your shy cat or fierce lion needs to play the part. Any black eyeliner will do the trick. In fact, look no further than mom’s makeup bag for tons of fun ways to use everyday makeup as face paint.

photo: Lynne Bailey via Flickr

3. Color inside the lines.
If freestyling is leaving you uninspired, invest in a stencil set like this one from Create A Face for dozens of great ideas. With plenty of options on hand, these can be reused for birthday parties or rainy-day dress-up down the road. And don’t forget about arms and legs—you can stencil on temporary tattoos too!

photo: clappstar via Flickr

4. Face off with a friend.
A partner in candy crime can double the fun. For any full-coverage commitment, be sure to go with natural, non-toxic paints like these from Elegant Minerals. In general, check that any face paint you buy is water-soluble and free of lead, nickel, chromium, or any other skin allergens—the only Halloween heavy metal we’re interested in is of the musical variety.

photo: Nathan Rupert via Flickr

5. Go abstract.
Bold colors and swooping lines are a simple way to pull off a strong, dramatic, and one-of-a-kind look. And if you only need a handful of colors, Go Green Face Paint’s organic, stackable kit packs in plenty o’ paint to get the job done.

photo: Becky Baran

6. Add a little lip.
Nothing is cuter than when your pup starts talking like a toddler. If you want to make the mouth a key part of the animal fun, again ensure safety by going with food-based ingredients. It will take a little extra prep work, but you’ll save a lot of time worrying! This recipe by Mommypotamus largely consists of cornstarch, flour, honey, water, and natural food dye.

photo: Diana Beato via Flickr

7. Bling out.
If you have a kid who will jump for gems, they are a perfect way to add that little extra pizazz. Mama Clown’s assorted self-adhesives make it easier than ever to bedazzle your design. Try adding a necklace or forehead hat or crown to complete the look.

photo: James Kim via Flickr

8. Get in the hot seat.
Why not take the first spin? Your Halloween artists may come up with ideas they never would have thought of without brushes in their own hands. If you’re in need of the right tool for the job, check out Silly Farm’s extensive assortment of supplies.

photo: Jessie Bailey via Flickr

9. Remember a ‘stache.
Second to whiskers, little is easier than adding a mustache. Consider going multi-colored to kick things up a notch. Extra points if you make use of eyebrow real estate! Dress Up America’s Face & Body Crayons will give you extra control with color and are another great option for kids to use themselves.

photo: USAG- Humphreys via Flickr

10. Cheek to cheek … and sweet.
Less can truly be more. Give everyone you trick or treat a reason to smile with something as simple as a rainbow, heart, or peace sign. The Klutz Face Painting Craft Kit has several step-by-step cheek designs to pull off that most classic look of all.


Plan to face paint this Halloween? Share your ideas in the Comments below!

—Jennifer Massoni Pardini

Get ready for your kids to unleash their inner Guitar Heroes. With the world’s largest playable guitar, a rave room, custom rock star photos and dozens of guitars on display, OMSI’s new exhibit, Guitar: The Instrument That Rocked the World, is definitely going to rock yours. Read on to get the scoop.

credit: OMSI

The World’s Largest Guitar

Walk in and behold every hair band rocker’s dream: wall-to-wall guitars under glass, including a larger than life, 43.5-ft. long, 16 ft. wide, 2,244 lb. Gibson Flying V, the world’s largest, playable electric guitar. This monster axe was built by the Academy of Science and Technology in Houston and was certified the largest by the Guinness Book of World Records in 2001. Kids are allowed to climb on it, turn the knobs (almost to 11) and pluck its thick strings.

credit: Suzie Ridgway

Keep on a’Rockin

An impressive collection of every guitar imaginable is situated throughout the large hall, including the ancient Chinese pipa that can be traced back to the Quin Dynasty. You can also ogle modern acoustic and electric guitars on display, like the the Ock Rock, the only playable 8-neck guitar in the world, as well as—wait for it—the air guitar. Facts accompany each of the guitars that range from antiques to guitars of the future that include televisions built right into the instrument’s body. Touchscreen displays in the exhibit allow for hands-on fun throughout with a variety of games that expose kids to the sounds and stories of different instruments. Other highlights include music you can play with flip-flop soles, and an impressive array of percussion implements including xylophones

credit: OMSI

The Science of Sound

Keep an eye on the the clock over the stage near the front of the exhibit as it counts down to the next Science of Sound show. You’ll know it’s starting when you hear the gong. Grab a seat on the rows of benches and get ready learn about how sound travels through air, how sound waves can make a candle flame flicker and more with the help of a charismatic, lab-coat wearing scientist/performer playing with Tesla coils, water goblets and a Ruben’s Tube.

credit: Suzie Ridgway

Rave On

Head toward the rear of the exhibit, on the cafeteria side, and you’ll see a small, black tented area with jams pumping out of it. This is the La’Ha Laser Music Room. An iPod lets kids control whether the music will be Ambient, Drum Circle, Spoken Weird, Trap, Glitch Hop or House. After that, it’s up to the other people in the room to break the laser beams on the metal, triangular structure in the center of the room to add sounds to the music already in progress. It’s like a family rave in there.

credit: Suzie Ridgway

The Picture Maker

Don’t leave without having your kids’ photo snapped in front of the giant white screen near the back of the exhibit. You can customize it into a rock n’ roll photo with disco balls, lights, microphones, guitars and stencil designs using a remote control that looks like a tiny spray paint can. Take one home for $5 or just have fun creating it for free. Additional copies for friends are just .50 cents.

Details
Guitar: The Instrument That Rocked the World runs now through Jan. 10, 2016
1945 SE Water Ave.
503-797-4000
9:30 a.m.-5:30 p.m. Tues.-Sun.
$9.50-$13.50; free for members and children 2 & under; $5 parking
Online: omsi.edu

Are you planning to rock out at this awesome exhibit? Let us know in the comments below!

—Suzie Ridgway

Give peace (crafts) a chance! For your next afternoon of creativity, we’ve rounded up projects with a peace-themed twist. These ideas are perfect for International Day of Peace (September 21) or a regular ol’ Saturday. And while you’re getting crafty, you can use the opportunity to talk with the kiddos about what peace means to them. Scroll through the crafts below for painted peace rocks, a special pinwheel, and more.

Photo: Peace Rocks

1. Painted Peace Rocks
We love this idea for spreading peace via colorful painted rocks, discovered on the Peace Rocks blog. This is an easy craft if you’re not big on supplies–just snag a rock from the backyard and paint away. Decorate your own home or leave your painted treasures for someone to find. Learn more here.

Photo: Cupcakes & Cutlery

2. Easy Yarn Dreamcatcher
For cute bedroom decor and peaceful dreams, why not whip up a yarn dreamcatcher? This craft from Cupcakes & Cutlery is made all the easier if you’ve got an embroidery hoop handy. If not, a hanger or cookie cutter could sub in as a circle base. Learn more here.

Photo: Buzzle

3. Peace Sign Coloring Page
The bonus of this peace sign coloring page is that there will likely be some peace and quiet while your little artists are at work. You can head to Buzzle to download this page (plus lots of other peace-themed coloring pages) for free.

Photo: To the Lesson!

4. Fingerprint Peace Dove
This idea from To the Lesson! is a great way to explain to the youngsters that there are lots of symbols for peace–and they’ll love using their fingerprints to put their own personal stamp on a dove of peace. Head here for more inspiration.

Photo: Working Mom Wonders

5. Paper Plate Peace Signs
Little finger painting enthusiasts will get a particular kick out of this idea from Working Mom Wonders. If you’ve got masking tape, paper plates, and some paint, you’ll all set for some easy-peasy peace signs. Learn more here.

Photo: No Time for Flashcards

6. DIY Peace Poster
We love how this idea from No Time for Flashcards gets kids thinking and lets them be creative, too. Outfit them with a clipboard, coloring tools, and this peace poster and then let them find a peaceful place outside and get down to artsy business. Learn more here.

Photo: Lea Rankin

7. Peace Chalk Art
The easiest way to create a path toward peace? With sidewalk chalk! This activity will get the kids outside, doesn’t need any special materials, and may even make the whole neighborhood smile. Shout out to Lea Rankin for the inspiration!

Photo: ASHLEY10043 via Artsonia

8. Sign Language Peace Sign Craft
This is a great way to teach the littles the sign for peace. It’s as easy as tracing their hands on construction paper, folding the fingers to create the peace sign, and decorating! Thanks to ASHLEY10043 for this craft’s inspiration.

Photo: One Crayola Short

9. Pinwheels for Peace
Take a cue from One Crayola Short and make your own Pinwheel for Peace. It’s a fantastic Peace Day project started by two Florida art teachers as a way for kids to express their feelings about what’s going on in the world and in their own lives. With a downloadable template, the pinwheel is easy enough to create. Add colorful decoration and some words about what “peace” means, and you’ve got a craft that perfectly represents the day. Learn more about Pinwheels for Peace here.

Photo: A Little Craft in Your Day

10. Peace Shirt
Give this peace tee a chance! Sure, it may need a little more prep than the rest of our roundup, but the result is a reminder of Peace Day that can be worn all year long. Grab some spare tees for the kids, some Sharpies, and then make your own peace stencil. Get the whole scoop from A Little Craft in Your Day here.

Which craft will you try out for Peace Day? 

—Abigail Matsumoto

A step stool has the ability to magically reveal a whole new world to a toddler. Suddenly, brushing their teeth and washing their hands poses no problem for their diminutive stature, and the once daunting kitchen counter becomes a new frontier for kids to explore their inner chef. You may want to build two of these step stools: one for the bathroom and another for the kitchen.

This is a great project to involve the kids, so let the creativity soar and have fun with color and paint. Your child may even want to customize the stool with his or her name or go wild with stencils and stickers.

Materials and Tools
jigsaw
cordless drill and 1/2″ bit
square or ruler
2″ wood screws
wood glue
sanding block and medium-grit sandpaper
1x12x8 pine board (11-1/4″ wide is standard)
2 standard hinges
paint if desired

Cut List
2 sides at natural width of board at 11-1/4″ and cut length 14″
2 storage panel pieces (front and back) at 11-1/4″ and width 12″
2 storage box bottoms and kick panel pieces at 11-1/4″ and 5-1/4″
2 step stool tops 14″ width and 7-1/2″ length

Step-by-Step Directions:

1. Mark the Cuts: After assembling the tools and materials, use a square and pencil to measure and mark the cuts for all sides of the step stool as well as the handle holes. All pieces of this stool can be cut from one piece of 1x12x8 pine board.

2. Cut the Wood: Using the jigsaw, make each straight cut. For the best results on the handles, first drill a hole a bit larger than the jigsaw blade in the center of the area to be cut out. Then insert the jigsaw blade and follow your markings around the circular handle openings. Finish by cutting out the bottom decorative arches.

3. Sand It All Smooth: Sand all edges using medium-grit sandpaper. Remember, this stool will likely be moved from room to room and handled by precious toddler skin, so take extra care in making sure all edges are as smooth as possible.

4. Dry Fit All the Pieces: Line up all of the cut pieces and make sure they fit together nicely. If any adjustments need to be made, do that now.

Note: If you choose to paint or stain your stool, you will get the most professional results by doing this before each piece is assembled.

5. Attach the Back to the Sides: To assemble the pieces, start by attaching the back of the stool to the sides by first gluing the pieces together, then securing them with the screws.

6. Add the Bottom: Attach the bottom of the stool to the back and the sides using that same technique.

7. Attach the Front Piece and Step: Secure the front section of the stool storage area, then the front kick panel. Attach the bottom step.

8. Add the Hinges: Prepare the lid by installing the hinges. Line up the hinges 3″ from the outermost end and attach them to the bottom of the lid. Finally, attach them to the inner side of the back panel.

For added safety and traction, consider adding grip tape to the tops of each step. Since little hands aren’t very adept at doing anything gently, you can add a felt strip where the top lid touches the stool to reduce “slamming” the lid when it is closed.

9. Paint and Decorate: Lastly, paint, stencil, engrave and decorate your storage stool to your heart’s content.

Parents to a little guy who’s two feet tall, Timothy and Laura Dahl founded Built by Kids as an extension of their adventures in raising a capable, confident and independent man. The Dahls are inspired by the Makers of the past and are passionate about introducing the next generation to the skills and creative thinking that will help empower their future.