These cool teacher gifts are A+
Ah, the end of the school year. That time of year where teachers can kick back and relax knowing they made it through another year of shaping your kids’ future, grading papers, and at least one student with the sniffles at any given moment. We know they don’t do it for the gifts, but that doesn’t mean they don’t fully deserve a token (or 10) of our appreciation! But even if they’ve only been teaching for a short time, there’s a really good chance they’ve already amassed a major “World’s Best Teacher” coffee mug and apple-shaped paperweight collection, so we’re definitely on the hunt for fun, memorable, unique, and fully wish-list-approved cool teacher gifts for our favorite educators.
Whether it’s a classroom teacher, a coach, or a music instructor, finding the perfect gift can be a little tricky. We’re sort of pros at gift-giving, so we’ve done the research for you and rounded up some of the absolute best teacher gifts!
E-Mail to the Administration Team

This one is a must. Take a few minutes to email your school's admin team detailing all the ways your favorite teacher(s) is exceptional. In fact, we encourage you to do this alone or in addition to one of the great gifts below! Putting your appreciation in writing for the decision-makers to read really can't be topped. E-Mail to the Administration Team—Completely Free!
Hold That Thought Notebook Set

Each has 64 lined pages and vivid prints! Hold That Thought Notebook Set ($16.95)—Buy Now!
Johnny Was Home Set of 3 Votive Candles
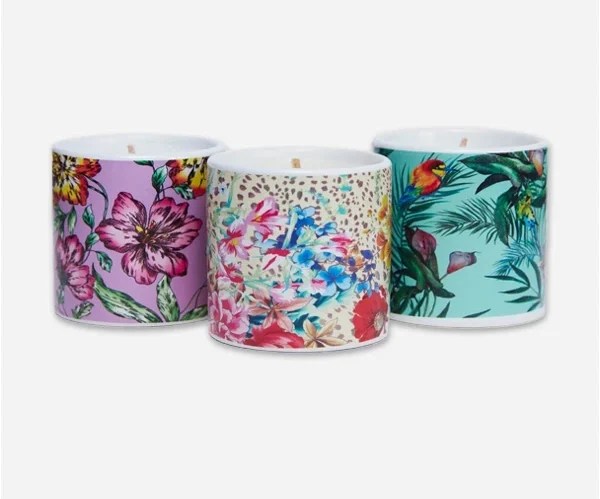
These absolutely gorgeous votives from Johnny Was (who else?) are perfect for their home or their desk. Scents include the sandalwood and vanilla scent of Pacific Amber, the ginger flower and iris blossom of Bohemian Bloom, and the bright lemon and red currant of Coastal Poppy. Johnny Was Home Set of 3 Votive Candles ($118.00)—Buy Here!
Bertiveny Teacher Stamps
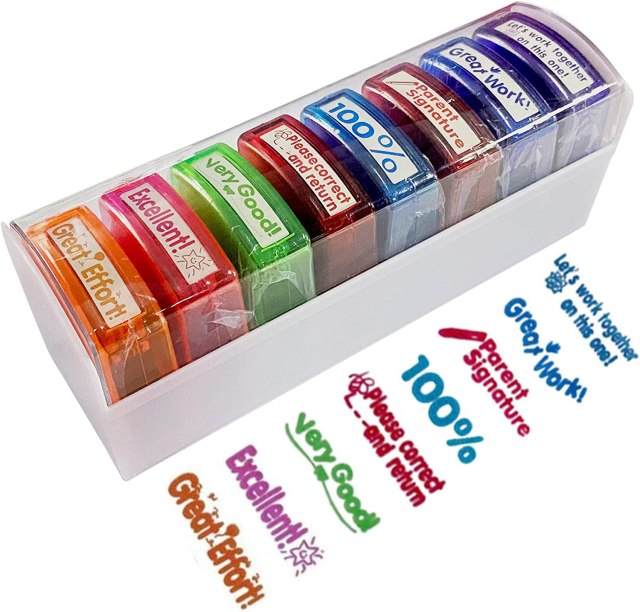
Set of 8 self-inking stamps! Bertiveny Teacher Stamps ($9.59)—Buy Now!
Makeblock Coding Robots & STEM Tools

Makeblock's coding robots are the perfect classroom addition! Makeblock Coding Robots & STEM Tools—Buy Now!
Music Notes Measuring Spoons
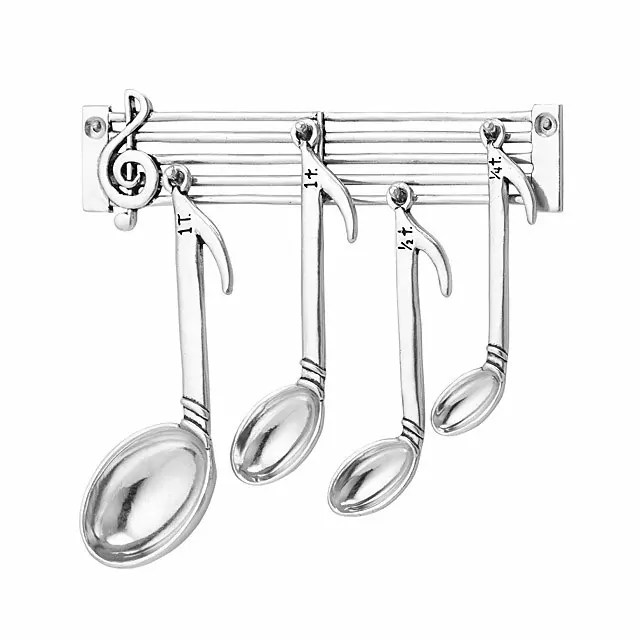
The perfect pewter measuring spoon set for the music teacher your kiddos love. Music Notes Measuring Spoons ($60.00)—Buy Now!
Teacher Wine Bottle Holder

Quirky and crafty, you can also slip a pretty bottle of olive oil or balsamic vinegar instead of a bottle of wine! Teacher Wine Bottle Holder ($59.49)—Buy Now!
Personalized Teacher Globe Wooden Keepsake
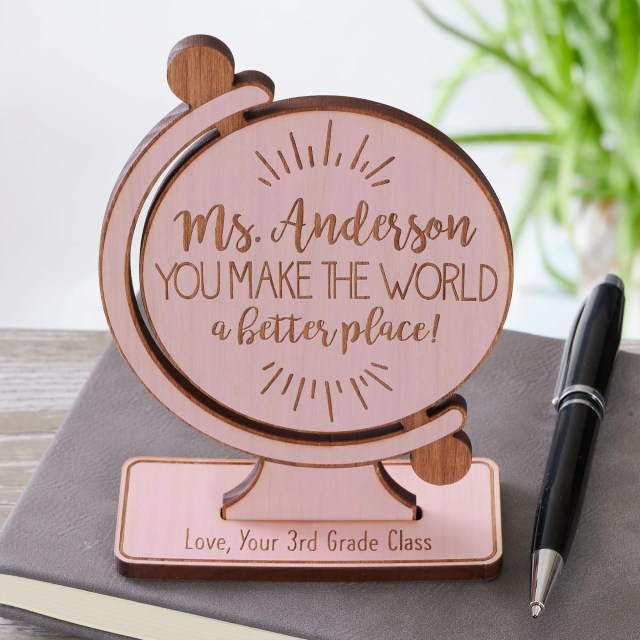
Laser-engraved globe shape features any name and 1 line of text on the base! Available in multiple stain color options. Personalized Teacher Globe Wooden Keepsake ($17.99)—Buy Now!
Teacher Custom Bobblehead With Engraved Text
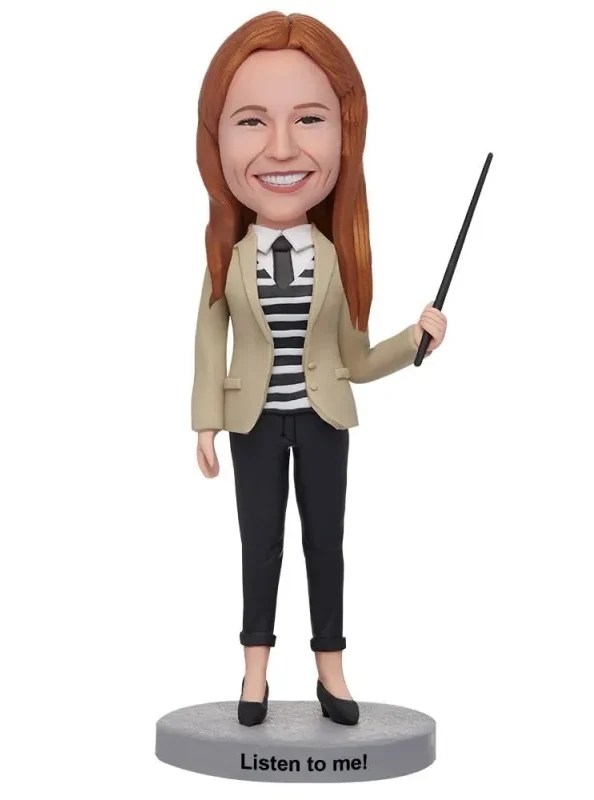
Show us someone who doesn't love a good bobblehead and we'll show you someone who is definitely not telling the truth. Teacher Custom Bobblehead With Engraved Text ($79.95+)—Buy Now!
ABCD Tee
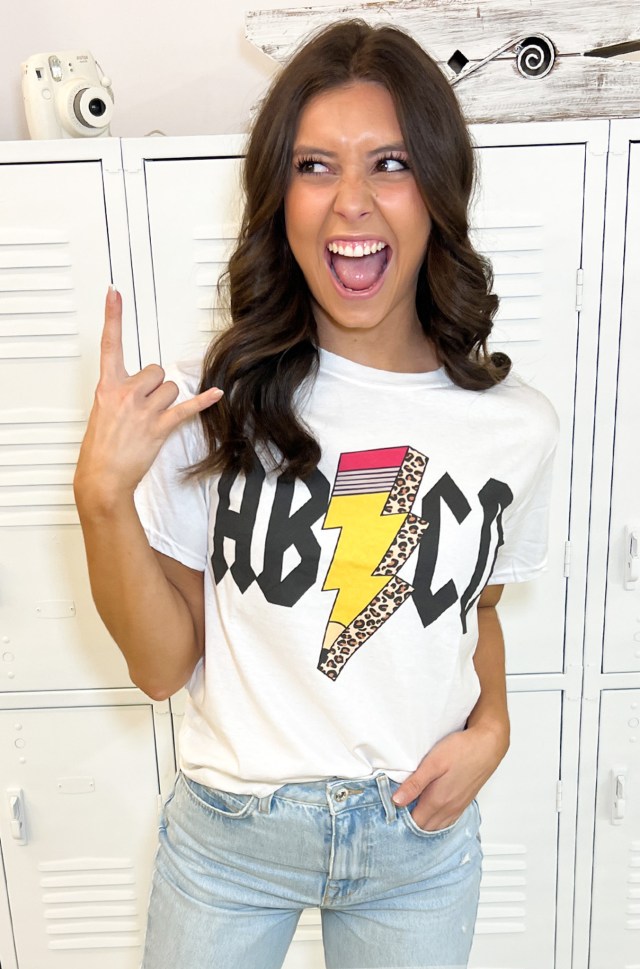
Tees2UrDoor actually has some seriously cute teacher tees (for Pi Day, 100 Days, holidays...), but we think this tee really shows how much your teacher rocks! ABCD Tee ($13.95)—Buy Now!
Large Capacity Pencil Case & Stationary Storage
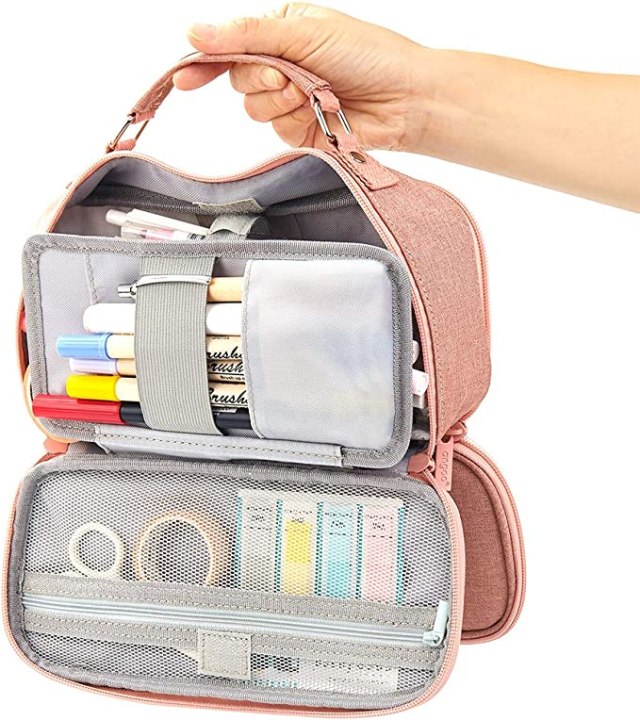
Teachers have a lot of reasons to need pens, pencils, markers, note cards, and more. Help them keep it all together! Large Capacity Pencil Case & Stationary Storage ($14.99)—Buy Now!
Colored Curve Pens
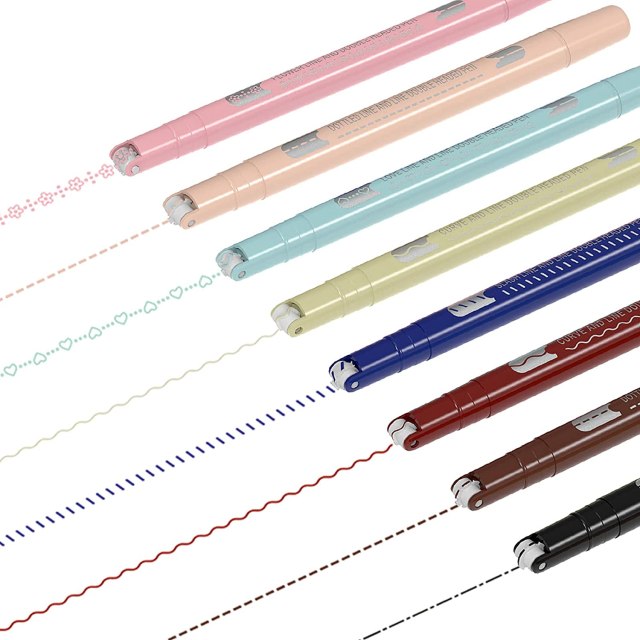
These pens are perfect for personalizing notes and journals! Colored Curve Pens ($16.99)—Buy Now!
App Controlled Label Maker
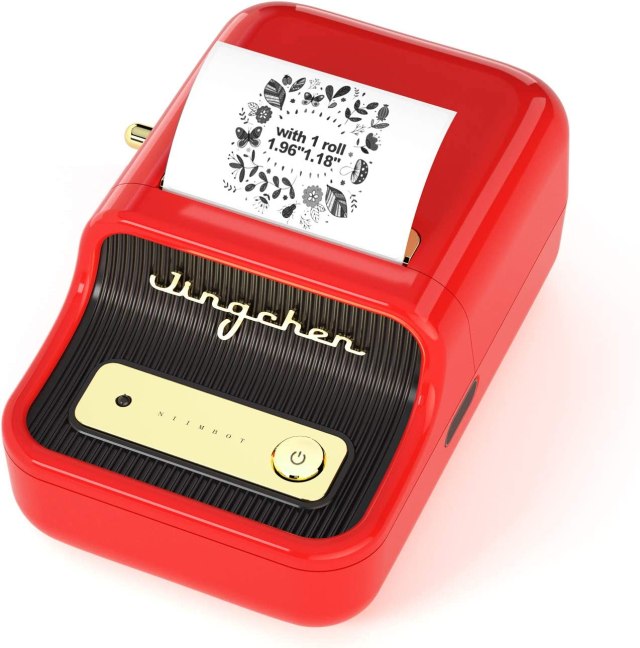
This isn't one of those old school label makers! App controlled and adorable, it comes in 4 colors. App Controlled Label Maker ($65.99)—Buy Now!
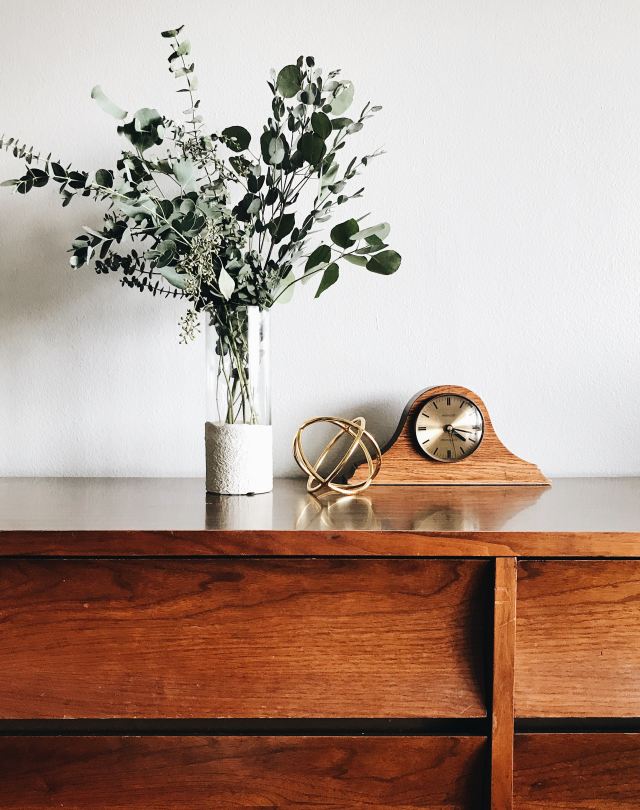
Sharper Image World Clock
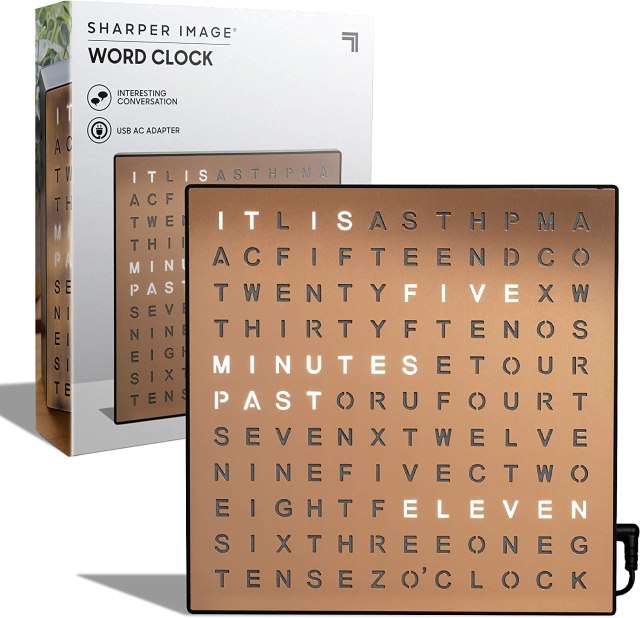
This ultra-cool clock comes in brown and black! Sharper Image World Clock ($24.99)—Buy Now!
Johnny Was Kaleida Pen Set
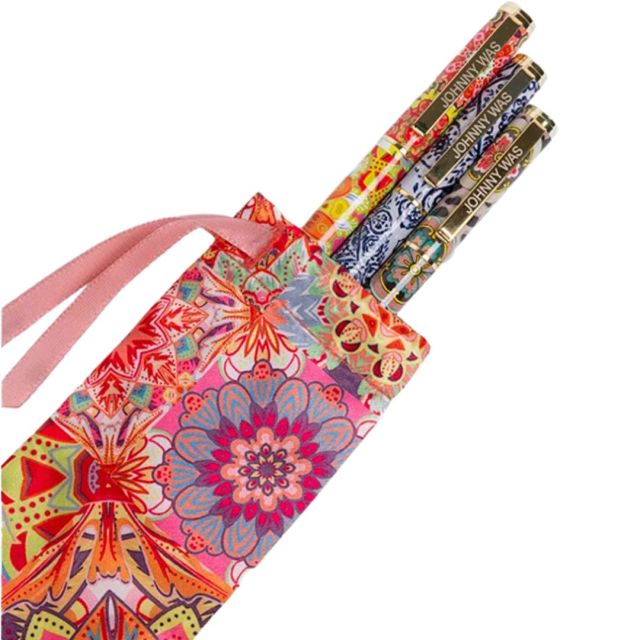
They're already writing all day; make it fun with these beautiful pens from Johnny Was. Plus, the bright colors make it much harder to lose (or have a student accidentally keep it!). Johnny Was Kaleida Pen Set ($28.00)—Buy Here!
Transparent Sticky Notes
We'll say it again. Transparent. Sticky. Notes. Juome Transparent Sticky Notes ($9.99)—Buy Now!
Women in Science: 100 Postcards
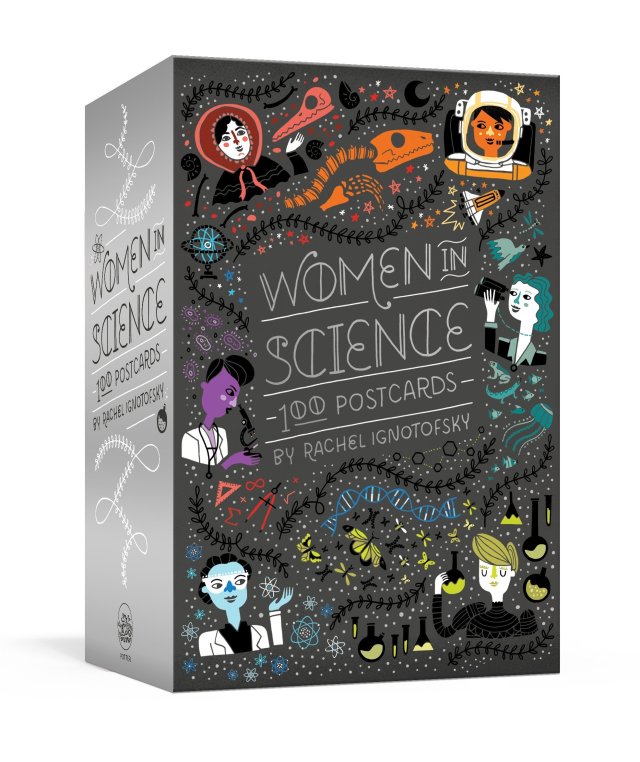
Collecting the fifty most iconic illustrations from the book Women in Science, this box of 100 postcards is the perfect gift for fans of Rachel Ignotofsky’s work, budding scientists, and anyone who wishes to champion the great contribution women have made to all branches of science. Women in Science: 100 Postcards ($20.00)—Buy Now!
Thanks For Putting Up With My Kid Candle
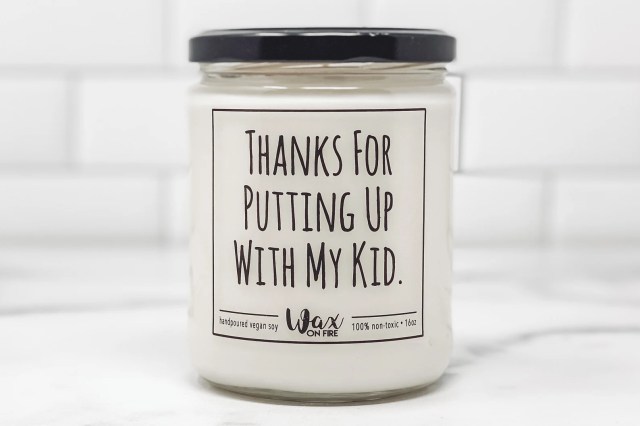
Of course we think it's super cute, but there are so many scents to choose from to personalize this candle! Thanks For Putting Up With My Kid Candle ($11.20+)—Buy Now!
Paper Mate Flair Felt Tip Pens

With an almost full 5 star rating from over 70K Amazon reviewers, you can be sure these are going to be a win! Paper Mate Flair Felt Tip Pens ($23.18)—Buy Now!
Ember Temperature Control Smart Mug 2
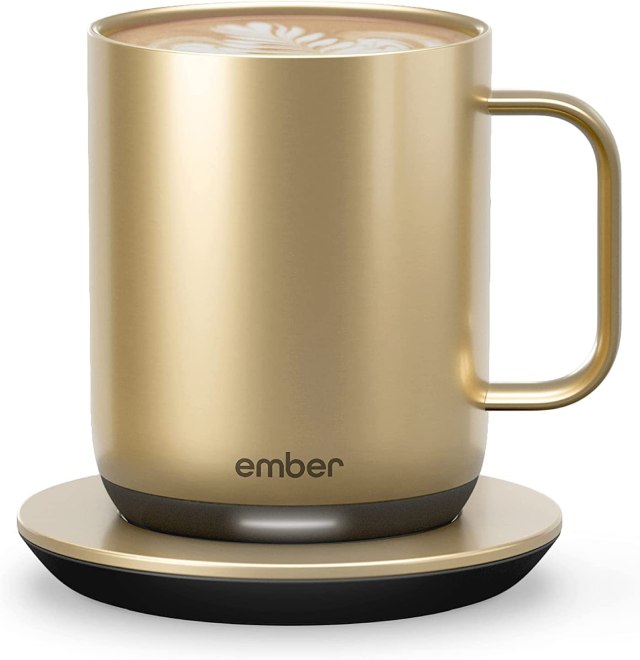
Self-heating, programmable, and perfect for the teacher's desk, the Ember is always a hugely popular gift! Ember Temperature Control Smart Mug 2 ($149.95)—Buy Now!
Teacher Desk Nameplate
A nameplate that truly trumps those old gold metal ones. Available in a ton of colors! Teacher Desk Nameplate ($21.59)—Buy Now!
Personalized School Map
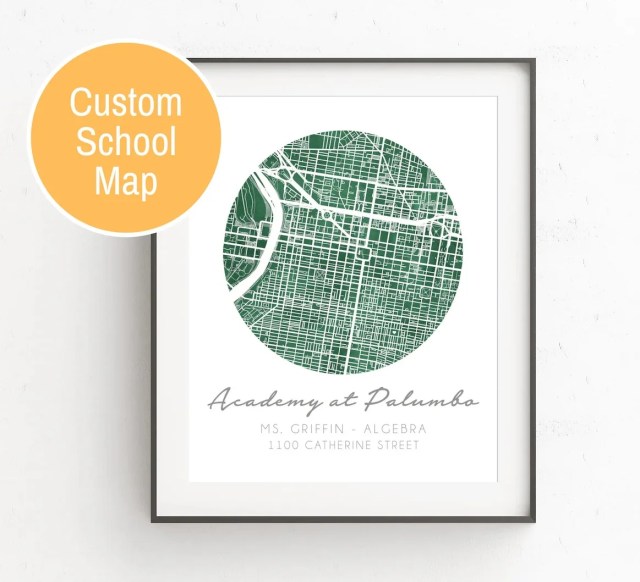
Even if they one day end up moving to a new school, this map will remind them of their time with your kids! Personalized School Map ($38.00+)—Buy Now!
The Flora
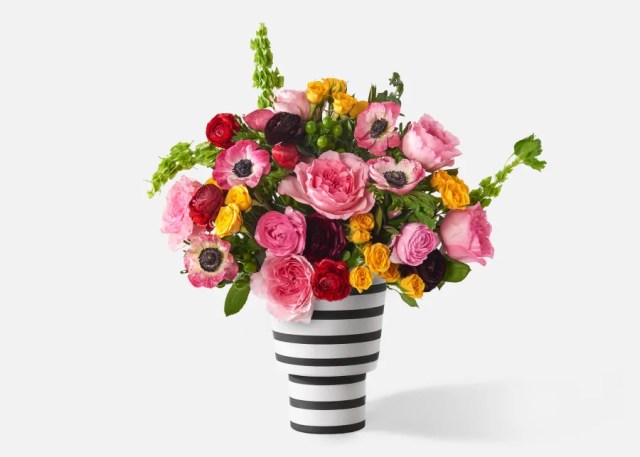
Urban Stems offers the coolest arrangements that are sure to brighten up the classroom (or house or office...) Urban Stems The Flora ($150.00)—Buy Now!
Bezel-Set Round Aquamarine Solitaire Pendant
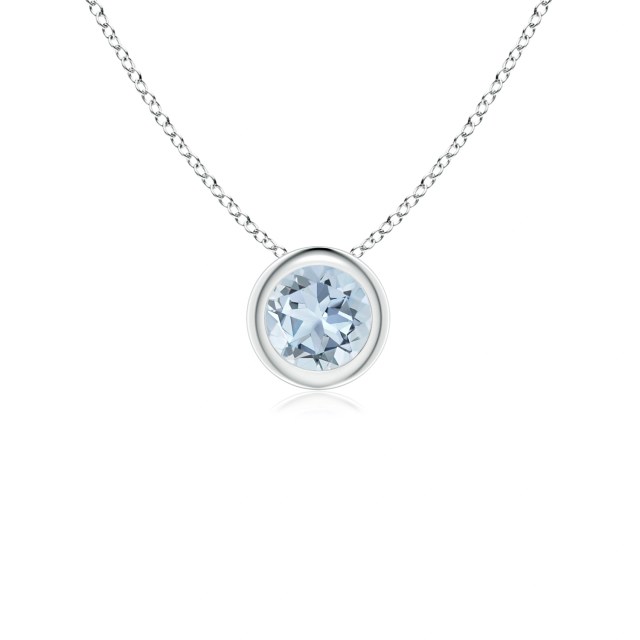
We definitely love teacher supplies that are helpful to their everyday, but there's something special about something that makes them feel, well, special. This stunning pendant from one of our favorite jewelers, Angara, is the perfect way to say, "Thank you for helping our kiddos sparkle". Cheesy? Maybe. But true, too! Angara Bezel-Set Round Aquamarine Solitaire Pendant ($159.00+)—Buy Now!
Elina Planter
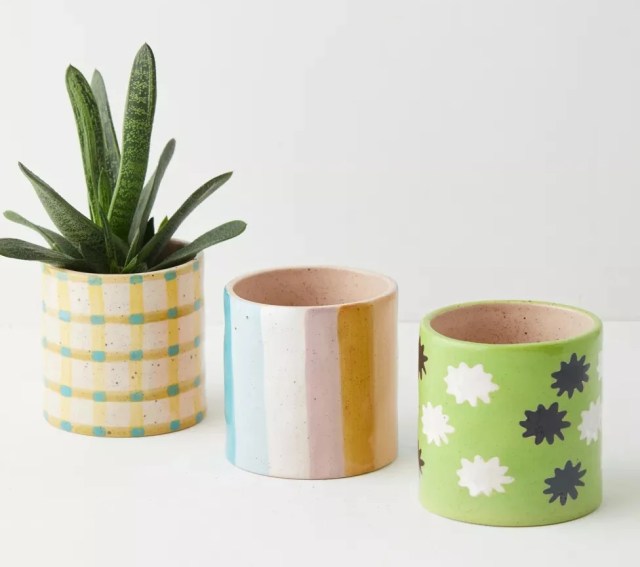
This planter is playful and bright, and with 3 different prints to choose from, you're sure to find one that fits their style! Elina Planter ($22.00)—Buy Now!
Crayon Shadowbox
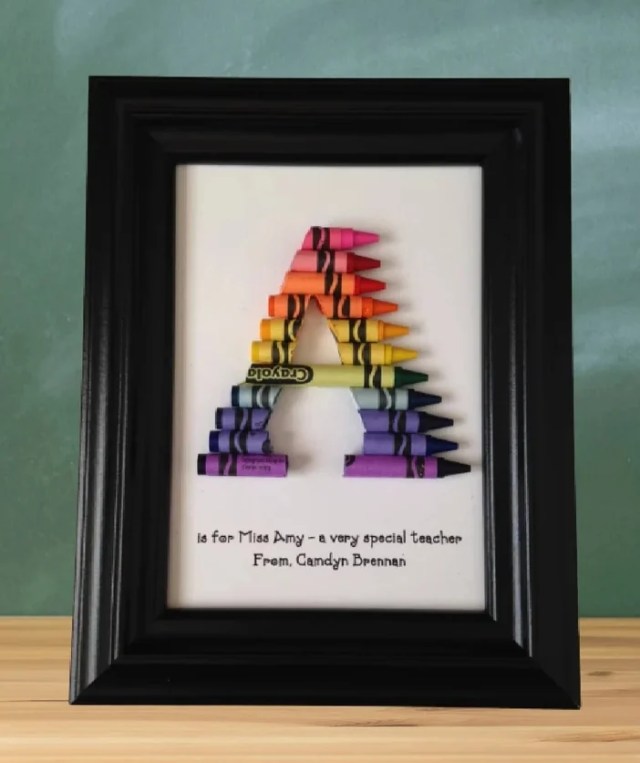
Pick their initial, one of the cute captions, and a frame color for a fab personal gift! Crayon Shadow Box ($19.99)—Buy Now!
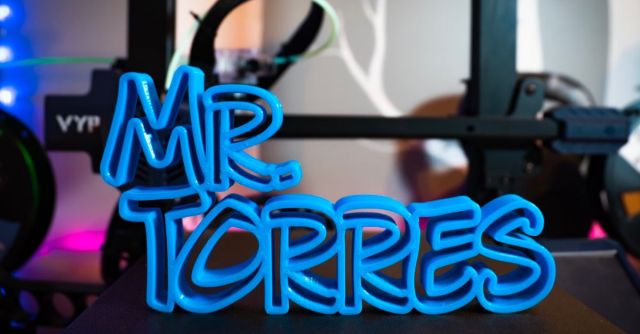
Teacher Name Sign
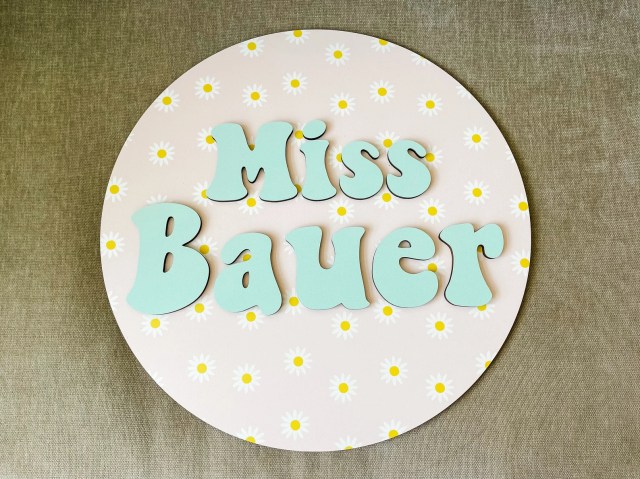
Available in a bunch of cute fonts, prints, colors, and sizes, you absolutely can't go wrong! Teacher Name Sign ($37.50)—Buy Now!
Sprinkles Favorites Dozens Box
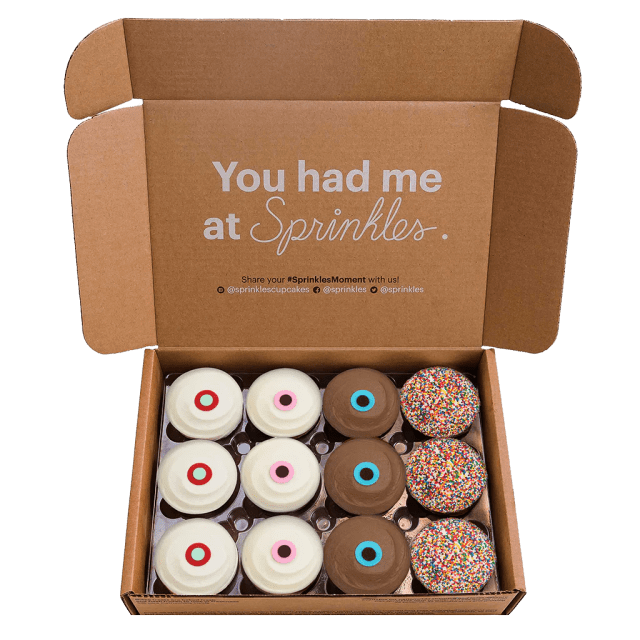
No one turns down a Sprinkles cupcake. No one. Sprinkles Favorites Dozens Box ($75.00)—Buy Now!
Clorox Air Purifier

This is the gift that keeps on giving for both teachers and students! Keeping classrooms fresh and filtered is really important (where do you think your kiddos get all those germs they bring home?). Who else would you trust but Clorox when it comes to clean, too? Clorox Air Purifier ($99.00)—Buy Now!
All the products listed are independently & personally selected by our shopping editors.
If you buy something from the links in this article, we may earn affiliate commission or compensation. Prices and availability reflect the time of publication.
All images courtesy of retailers.