Make the best of shorter days when the time change arrives
Pre-kid, you never really thought about Daylight Saving Time (what’s an hour here or there?). But kids can make this seasonal change a challenge. With the end of Daylight Saving coming up soon (Sunday, November 5), falling back means it’s super dark, super early. Before you set your clocks back an hour, read on for some tips and tricks for keeping that precious, tenuous sleep/wake routine in place.
Bit by bit. You can try moving their bedtime back for a few days leading to the time change. This will help set your kids’ little clocks before the big day so it won’t be a total shock. Consider arming them with a cute (and practical) alarm clock to help make the transition a bit easier. Care.com recommends 15 minutes for babies, 20 minutes for toddlers ages 1 and over, and 30 minutes for school-aged kids.
Be consistent. If sleep time comes later, that means waking up time will, too. If you’re letting time creep up a few days before, do the same with wake-up time, breakfast, lunch, dinner, etc. Their entire day from top to bottom should feel the same, even if you’re adjusting and fudging with timing. They shouldn’t even notice a change, especially if they’re too young to tell time.
Use light and dark to your advantage. Since light and darkness influence our kids’ internal clocks, give them plenty of outdoor time during the day so it’s a bit easier to stay up later at night. Once it’s time to start winding down for that later bedtime, make sure their room is nice and dark.
Eat Later It can be tricky when your family is used to their routine, but if you can bump dinner a bit later each night, it will help your kids’ internal clocks. Be sure to offer toddlers their afternoon snack a little later, too, and adjust your baby’s feeding schedule if possible.
Ignore it. Not the best strategy for some, but if you keep chugging along, so will they. Just switch everything on the day of, and move on. Kids are resilient. But try to keep their routine (mostly) intact.
Be realistic. Your child may not even notice a slight change or they may go bonkers. But it’s important to remember to listen to them, understand why they’re upset, and work from there. Children are all so different—who knows how they’ll each react or even how one will react from year to year!
Be sympathetic. Remember to put yourself in your kids’ shoes and stay calm if they’re a hot mess for a few days. By staying calm, you’ll help kids adjust to fall daylight savings in no time.
When your kids have adjusted to the time change, make sure to capture all their cutest moments—and share them with your family and friends near and far—with the Tinybeans app. The secure platform puts parents in total control of who sees and interacts with photos and videos of their kids.
Set your baby up for a good night’s sleep with these helpful tips for establishing a bedtime routine you’ll both enjoy.
If baby ain’t sleeping, ain’t nobody sleeping. To set the whole family up for a better night’s rest, implement a bedtime routine. A consistent routine is soothing and helps your child understand what’s coming next. Read on for tips on how to create a calming daily ritual that will send baby to bed without all the fuss(iness).
A consistent bedtime routine signals to your baby’s brain that it’s time to go to sleep. The predictable pattern and timing can ease your baby into a calm state that allows them to fall asleep more easily. It’s great bonding time and may even help with the sleep regressions that are a normal part of baby development. Once you’ve established a routine, it can also help other people put baby down when you won’t be there for bedtime.
What Age to Start
A good age to start is once your baby begins to show a pattern of sleeping and wakefulness. This can occur as early as 6 to 8 weeks old and as late as 4 months of age. Before 6 weeks, it’s not likely that your newborn will have any kind of established sleep schedule for a set bedtime. If you’ve missed these windows, it’s beneficial for a baby of any age to have a bedtime routine, so get started now.
The first thing you want to consider when picking a bedtime is baby’s schedule. Look for signs of sleepiness, like fussiness, yawning and sucking on fingers or a pacifier. Notice what time these signs appear and figure on beginning your routine 30 to 60 minutes before that so baby doesn’t get overtired during the routine. You’ll also want to consider your family’s schedule, taking into account when everyone is home from work or school and when you typically eat dinner. Generally, that means starting between 6 and 8 p.m.
Consistency Is Key
The best bedtime routines are short, simple and most of all consistent, lasting from between 20 minutes to an hour at the most. The most important thing is to make it a true routine, so that it’s the same every night and occurs at the same time. Ideally, it’ll happen in the same location as well, like in the room with baby’s crib. If you expect to have differences in sleep locations, make sure whatever you include in the routine can travel with you.
What to Include
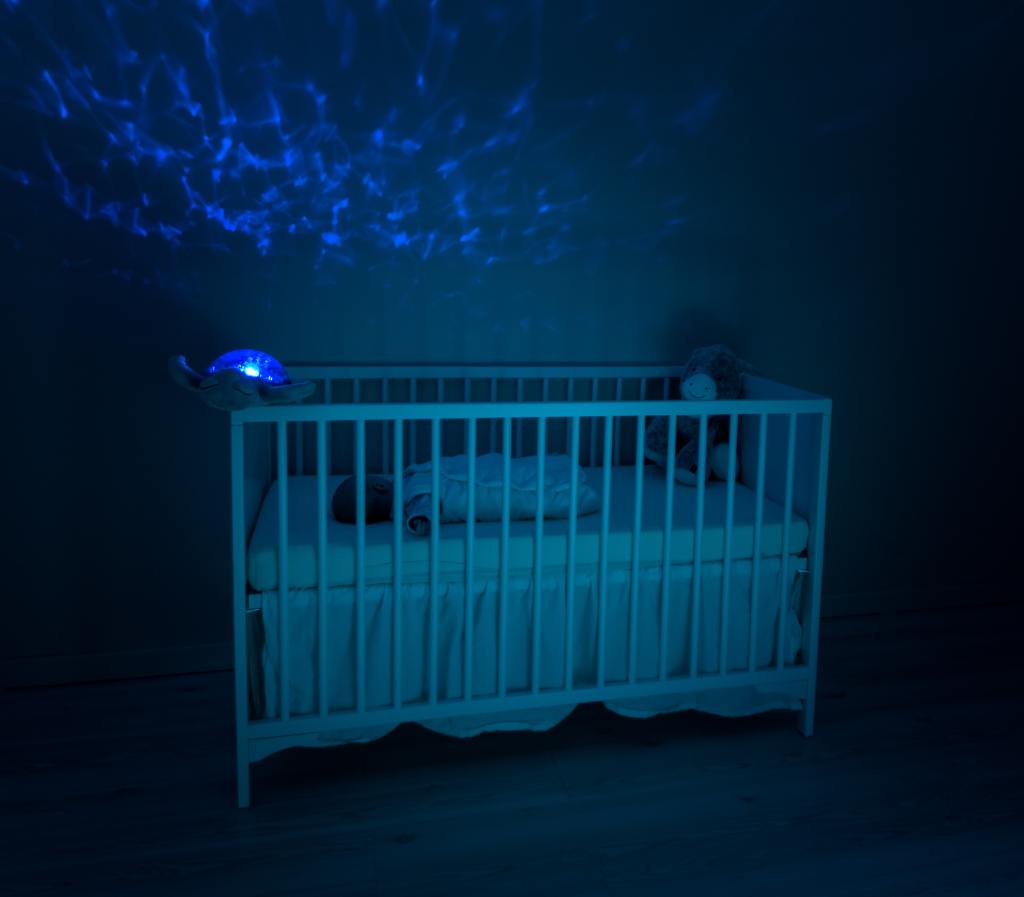
Keep it simple and relaxing. You can include a bath if baby gets one every night. Next, a massage with lotion—like Burt’s Bees Baby Nourishing Lotion—and then a fresh diaper, pajamas, and a swaddle or wearable blanket. Cuddle your little one while you sing a quiet song or look at a short book. Dim the lights to continue the calming vibe. Nursing or bottle feeding is helpful for lasting fullness before bed. Any quiet activity that gets baby ready for bed and relaxes them works, as long as it doesn’t put them fully to sleep.
You’ll want to put your child to bed drowsy but not asleep. That will give them the chance to learn how to self-soothe and fall asleep on their own. Ambient noise can help with this as well as drown out any other household noises while they settle down. Try the Sleep Sheep from Cloud B that attaches directly to the crib. You can give them a gentle rub before quietly slipping out of the room.
You may need to tweak your timing and activities until you get into a good groove, but avoid big changes at first to let your little one get used to the routine. It’s also likely that adjustments will need to be made as your infant grows and develops. Any change in the daytime or non-bedtime night activities, like eliminating a nap or dropping a feeding, may call for a change in the bedtime routine. If baby seems fussy, it may signal that it’s time to move bedtime earlier. A true routine takes time to work, but with consistency and little persistence, it should pay off with better sleep for baby and you.
If you are looking for a new (and free!) adventure, take your kids to explore our local tide pools—it’s a fantastic way to get outdoors and learn about sea life at low tide. Grab your ground-gripping shoes and head out to nimbly navigate our rocky shores to get close looks at crabs, sea stars and other ocean dwellers. Parenting Pro Tip: Check the tide charts before you visit so you can time your adventure (nothing worse than a tide pool day ruined by high tide). PS: The next California King Tides (the highest and lowest tides of the year) will be December 23-24, 2022 and January 21-22, 2023. Mark your calendars to explore the coastline during the lowest tide of the year—exposing sea life that is normally hidden.
Come for the tide pools, stay for the photo-ops. The Point Loma tide pools at Cabrillo National Monument surround you with breathtaking views. Located on the windy ocean-side of the point, little adventurers will spot a large and diverse amount of sea critters in this multi-leveled tidal zone area. Bonus: Sometimes docents are available to answer questions.
Good to Know: To reach the tide pools you must travel 1/4 to 1/2 miles down a dirt path with approximately 100 feet of elevation change.
Cost: $10/per vehicle
1800 Cabrillo Memorial Dr. San Diego Online: nps.gov
2. Shell Beach
Grab the crew and head down to Shell Beach during the low or minus tides and you're 'shore' to find giant sea anemones and skittering crabs. Even more, you’ll see plenty of seals here too. Also, good to know that if low tide occurs near sunset, this is the spot to be to catch a magnificent view!
You’ll need to hike down a long set of stairs to access this beautiful beach––before finding tons of sea critters at low tides. Look for the 45 million year-old oyster fossils in the rocks (which is called tabletop by the locals). You’ll spot starfish and hermit crabs, sea hares and cucumbers. Head down at minus tide to explore! Note: there's a small parking lot that’s free and also street parking.
New to tide pooling? This winter, connect with the Birch Aquarium at Scripps Institute to search for sea life at Dike Rock, or if you can't wait, you can explore on your own. Crouch down and be still to see scampering hermit crabs and gently touch a sticky sea anemone. If your timing's right and you hit the extreme low tides, you may get a glimpse of sea stars and sea hares ensconced in the rocks. To access this spot, park near El Paseo Grand St., then start walking north on the beach (just past the pier).
Good to Know: The closest bathrooms are at La Jolla Shores Beach parking lot.
Park along Pacific Coast Highway (just South of Cannon Rd.) and go down the stairs, located at the last house. Once on the beach, head one block and you’ll find this hidden gem of a tide pool (only viewable at extreme low tides). Free to park, no restrooms, but worth the trip to find loads of hermit crabs, sea anemones and other critters skittering around in the water.
A quiet little gem in La Jolla to find sea anemones and other little creatures. To get to the rocks at low tide you’ll need to go down a steep staircase. You’ll see hermit crabs and sea anemones, sea urchins and lobsters (if lucky!). The best time to go is during a minus tide. The rocks are slippery, so remember to put the crew in the right shoes to navigate this terrain.
You’ll love the fact that this small surf beach is easy to get to and has a laid back vibe. Your little sea stars can spy cute critters from snails and star fish to barnacles and limpets. The parking lot is a breeze to find, and there are basic beach bathrooms. Head north of the surfing area to find the tide pools, then, stay and watch the surfers and the sunset.
Although it's a pay parking lot, it’s just a few steps to this sandy shore that's full of treasures. Seaside Beach (the South end of Cardiff State Beach) is a sweet tide pool spot at low tides. So grab the stroller, pack a lunch, leash up the dog and soak up the sunshine while exploring the creatures this coast reveals. This tide pool has quick and easy access, with restrooms in the parking lot. Bring cash for the parking fee.
South Parking Lot Pacific Coast Hwy. Cardiff-by-the-Sea Online: parks.ca.gov
What You Need to Know about San Diego Tide Pools Before Going
According to the National Park Service, "Late fall and winter are the optimum times for a visit to the tide pools. Unlike the summer months, when low tides occur in the middle of the night, the good low tides—including the outstanding negative low tides—in fall and winter occur during daylight hours. A general rule of thumb is that the tide pools can be visited approximately two hours before low tide time (when the tide is receding) and two hours after (when the tide is coming back in)." This doesn't mean that tide pooling during the summer is for naught—you will still be able to explore the wonderful coastline and its creatures—you may just have to adjust your expectations.
I’m covered in crumbs. Also, in milk, in about a tablespoon of applesauce and in sweat. That’s because I’ve been on an airplane wrangling my 17-month-old toddler and my four-year-old daughter for the last five hours. The four-year-old is doing just fine, actually. She’s getting a ton of screen time and I know I’ll pay the price later for the movie marathon we’ve allowed, but I’m okay with it given it’s a special circumstance.
The toddler on the other hand? Well, it’s just a tough age. Too old for cuddling and napping as we zoom through the sky, too young to hold her focus for any length of time. She’s in constant motion. If this plane does not speed up and get to our destination ahead of schedule, I may collapse in an exhausted heap.
Our trip—for which I am actually completely grateful because it’s a privilege to take my kids to a new place with new adventure—made me think about the first time I ever traveled with a child. It took me back to how I overpacked, how I overstressed and how I underappreciated how simple it could actually be.
There are tons of parents who ask me in my office if I have any advice for the plane or the airport with a baby. Turns out, you can optimize your travel experience by taking these easy steps:
Carry As Little As Possible, Check the Rest
Know how, when you go through the airport, your carry-on luggage and personal item seem to somehow get heavier and heavier the further you walk? Multiply that times ten with a baby because you now have an extra PERSON you are lugging. There are obviously some items you have to bring with you – a small stack of diapers, wipes, a change of clothes, bottles if formula-feeding. But, the less stuff you have to lug through security, through the terminal or into the overhead bins, the better. Better to check it and forget it, in my book.
Don’t Spend Extra Time In the Airport, Except When Boarding The Plane
A lot of new parents think they should get to the airport super early if they are traveling with a baby or child. Usually, though, that just means extra chances for meltdowns (for your baby, not you) and germs. Obviously, give yourself enough time to make your plane, but don’t plan to linger excessively. On the other hand, when it’s time to board the plane, consider your unique situation.
Airlines offer family boarding early on in the boarding process, which can be tempting. If you don’t have an assigned seat or you have carry-on luggage that demands overhead bin space, take full advantage of this perk. If you haven’t brought much with you, though, consider minimizing the amount of time you have to sit “trapped” in a small space with your infant.
Stay Away From Sick People
This is a hard one since, notoriously, airports and airplanes tend to be germ fests. The number one way to avoid a baby getting seriously ill from air travel? Don’t take them until after they are old enough to receive their first set of vaccines and are out of the highest infection risk zone.
In our practice, we don’t give the first set of vaccines until at least six weeks old and recommend waiting a few weeks after vaccination for the shots to take effect before flying. I waited until about three months until flying with my first baby. Once you’re on your way, it pays off to wash your hands well with soap and water often and to keep your baby away from direct contact with sick people.
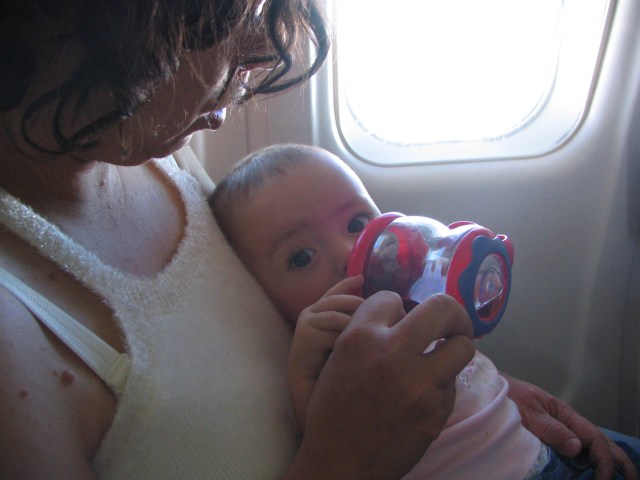
Give Baby Something to Suck On
Once you depart on your flight, you’ll want to help minimize discomfort in your baby’s ears, which can build as the pressure changes with altitude shifts. Giving baby something to suck on (a pacifier, a bottle or a breast) can really help. On the way up, it’s obvious when you need to pay attention to helping your little one with this but, on the way down, it’s easy to get the timing wrong.
Instead of waiting for the flight staff to tell you you’ve started your descent, be observant. When you start to feel the plane descending, get your baby going on an ear pain prevention plan by initiating some type of sucking motion (note: if they are asleep, let them sleep).
Forget Over-Apologizing
So you have a baby on a plane? Oh, well. Tons of other passengers have been in your situation and we’re not irritated when we hear your baby cry. Those who are will have to just suffer through. If your baby wails the entire trip, it makes sense to at least acknowledge the patience and understanding of others around you.
But those little gifts some propose to assuage your neighbors preventatively? Unless you have tons of free hours you would not rather spend doing ANYTHING else, I say forget it. You paid to be on the plane just like everyone else and you’re doing way more hard to work to make the trip successful than any of your seatmates.
In the end, traveling with a baby can actually be significantly easier than you first imagined. Hey, at least it’s not traveling with a toddler. Pack light, get the timing right and feel confident–you’ll be there in no time.
I'm a pediatrician and a mama mindset expert. I host The Modern Mommy Doc Podcast, and am a mom to two young girls in Portland, Oregon. I'm also author of The New Baby Blueprint and The Working Mom Blueprint from the American Academy of Pediatrics.
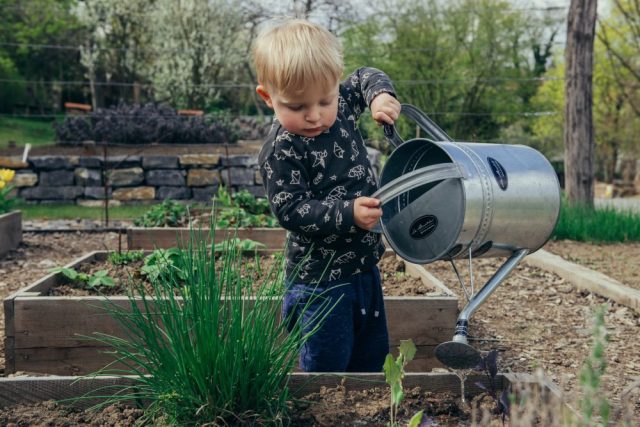
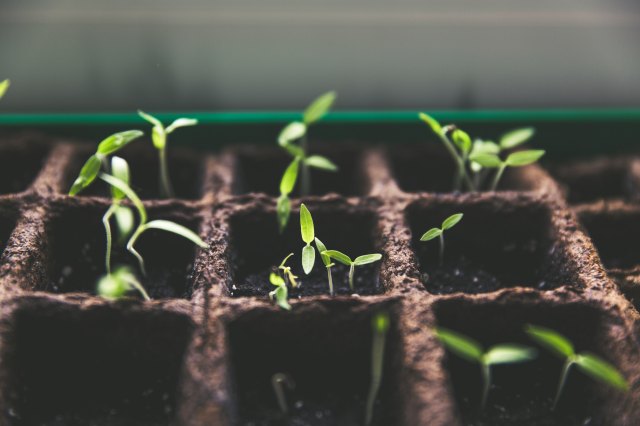
Never mind the snow: spring is coming! It might seem early to be making plans to garden with the kids, but the truth is, it’s almost time to start seeds indoors! (A cool, educational thing to do with kids in the final days of winter.) Lots of families learned the joy of urban gardening when it swept NYC last year, and rest assured: anyone can grow and nurture plants with some research and the right advice. We spoke to local experts about how you can garden with kids in NYC whether you have a windowsill or a wide open field. Read on to get growing!
You know this from grammar school—heck, your kids know this from grammar school—but just to review, these are the key ingredients for happy, healthy plants.
Emily Carter, Brooklyn Botanic Garden's Children’s Garden Assistant Coordinator, stresses that getting these basic plant needs right will lead to a good experience for both your family and the plants: "Remember that sun, water, and nutrients (healthy soil) are the fundamentals of happy plants, so focus on how you can provide those basics."
Location, location, location First, some good news: You can grow many things indoors, as long as you pick your plants carefully. If you're gardening for the first time, that's the first thing you'll need to consider — your available space.
Where will you put your plants? You can grow plants indoors, grow them in-ground or in pots outdoors, use a window box, or some combination of these. The space you have for your little garden will determine what kinds of plants you get, so give it some thought before you go seed shopping!
Sunlight Another important factor to consider is the sunlight available in your space.
Does your place get a lot of natural light throughout the day, or are you working with a square foot of direct sunlight for an hour in the morning? (That's the experience of this writer, and we still managed to get some plants to grow, so don't be disheartened!) Even if you have outdoor space, think about how often it's in shadow. Depending on the amount of sunlight you have at your disposal, you can consider supplementing the natural sunlight with some grow lights, but it's often easier to choose to grow plants that suitable to the conditions you have.
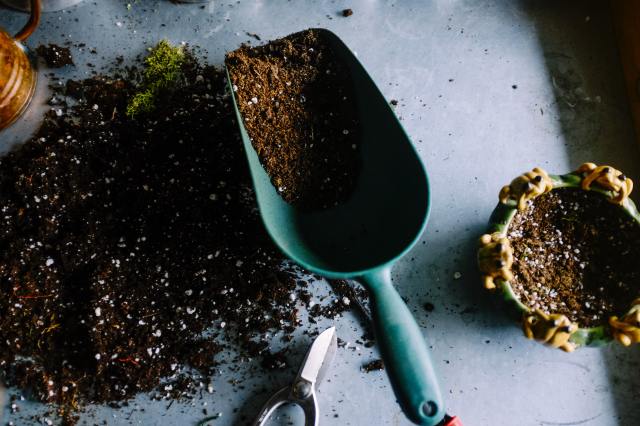
Quality soil Not all soil is made equal! The NYC Parks Department describes the best potting soils as containing "peat, sphagnum moss, perlite, and vermiculite." Stay away from the dollar store stuff and invest in a quality soil that contains those components listed as primary ingredients. It really makes all the difference!
Water Once you get your plants situated, you'll need to water them, of course. You don't need any special sources or water here: Tap water — and NYC tap water in particular — should be perfectly safe for your plants, though it's recommended that you leave the water sitting until it's room temperature to reduce the chances of shock from the temperature shift in the soil.
You might think that the more water, the better but the truth is actually closer to the opposite: Many first time plant owners tend to overwater their plants, causing them to die! Juliette Vassilkioti, founder of NYC-based indoor plant experts My City Plants, recommends that you make sure top of soil is completely dry before watering your plant. (You can stick a finger into the top inch of soil to make sure it's dry — a task the kids are sure to love taking part in!)
Are you getting plants because you think they’re beautiful or delicious? Do you want your kids to actively participate or do you plan to turn the experience into a full teaching moment? Your reasons for starting a garden (indoor or out) will guide your plant- and seed-purchasing decisions.
Set yourself up for success by picking plants that are more forgiving of beginners.Here are some of the best starter plants for first-time gardeners and budding young botanists.
”
Vegetables & Herbs
Davor Denkovski via Unsplash
Both Carter from the BBG and the gardeners at Wave Hill recommend leafy greens and culinary herbs for growing plants with kids. Plants like lettuce, arugula, mesclun, mustard greens, basil, thyme, mint, and oregano are not only easy to grow, but they also "put on growth that kids can harvest at any stage and don't have to wait for a whole season," point out Wave Hill experts.
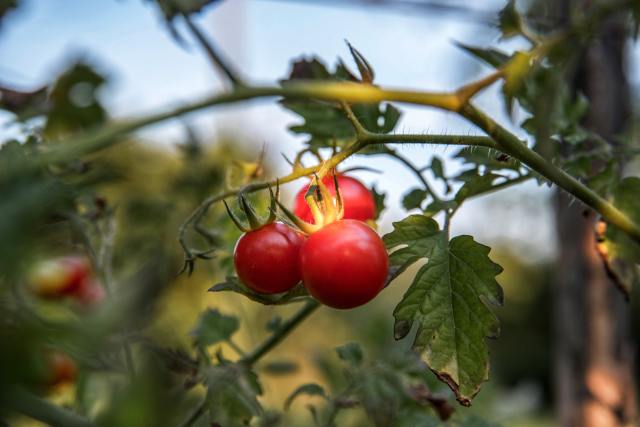
Carter notes that "These plants have edible leaves, which means they require less solar energy and time to be edible. Plants like tomatoes require much more solar energy and time to grow leaves, flowers, fruits, etc. Therefore, they are not the best match for small indoor spaces." (In general, vegetables and fruits need a lot of direct sunlight.)
If you do have an outdoor space that gets six to eight hours of sun available, Wave Hill and the BBG name eggplant, pepper, and tomato as good plants to start indoors. Move them outside when the weather warms, whether your plan is to replant them in the ground or into larger pots. You can either start these from seed (more on that below) or buy "starter", or smaller plants at your local garden center. If you do plan on potting your plants in containers, know that some varieties have been developed specifically for growing in containers, which means you'll likely have more success with them.
If you have the luxury of a patch of sunny soil, Carter recommends radishes and carrots. "If you can grow in-ground, many radish varieties have a quick harvest turnaround and carrots come in lots of exciting colors."
Beans and other legumes are a good choice for beginning botany. Per Wave Hill, "[They are] a fun crop because they offer an introduction to seed biology and plant structure. The large seeds produce cotyledons and roots that help kids visualize how seeds can transform into full-grown plants."
You can also settle somewhere in between by planting the BBG's recommended choices for large outdoor pots, whether that's in your garden or in a window box: Herbs like rosemary, lavender, lemon balm, cilantro, and dill. (Hot tip: cilantro often "bolts" or produces seeds, especially as the weather warms; one way to maintain a supply is to periodically seed throughout the season.)
Flowers
Robert Zunikoff via Unsplash
If you're looking to brighten up your space and attract wildlife and insects, flowers are a great choice. BBG's Carter recommends marigolds (shown above)— their seeds germinate easily indoors and they can be moved into larger outdoor pots later in the spring. Nasturtium are also a good choice— you'll need to soak their seeds overnight then start them indoors or plant them directly outside in May. (Once they flower, you can add their vibrant flowers to your salads!) "And don’t forget your giant sunflowers," adds Carter. These are definitely outdoor plants, as they can grow up to 16 feet tall depending on the variety! (Smaller varieties are available as well.)
Planting flowers native to this area is also a good bet, as they are more likely to thrive in conditions here. For outdoor containers like window boxes, balcony pots, or gardens, NYC Parks suggests planting native perennials, which return every year, such as milkweed... bee balm, and native grasses which are great for bees, butterflies, and moths."
A mix of flowers and herbs can also be used to create a sensory garden with plants that stimulate the senses with "Strong smells (basil, mint), unique textures (nasturtium, snap dragons), beautiful colors that attract pollinators (zinnias, marigolds, and other flowers)."
When to plant inside For plants you plan to move outdoors, start them from seeds about six weeks before the last frost, which typically occurs in NYC in April. So if you plan to move your plants outdoors in early May (past May 7 is officially listed as a "safe" time to plant without fear of frost), you'll need to start your seeds around late March.
Wave Hill's gardeners add that "many warm-season vegetables such as tomatoes and eggplant benefit from transplanting seedlings. But most vegetables and flowers that are recommended to be started indoors can also be direct-sown, you just have to be a little more patient. The most important factor in timing seed starting is your area’s last, frost-free date and the specific needs of each plant."
Some seeds may need extra help Know what your plant needs to do its thing. For example, some plants like basil, tomato, and pepper can only germinate when the soil is warm (between 65- and 85-degrees Fahrenheit), so if you're planting inside to get things started, consider buying a heat mat or placing the seed tray above your heater.
When to plant outside If you're planting your seeds directly in the ground outdoors, they'll require a bit more care. In addition to choosing your planting time based on the need of each plant, you'll also need to consider compost, mulch, and pest control.
Mid-April to mid-May is a good time to start planting outdoors, since you're likely to be safe from frost by then. According to NYC Parks, April and May are also when you'd typically plant flowering plants like dahlias, sunflowers, and cosmos.
But at the end of the day, each plant has its own needs and requirements. "Remember," says Carter, "The back of seed packets and a quick internet search of the plants you hope to grow will let you know exactly what each plant needs, to better guide your decisions."
Additional food for thought Whether you're sowing outside or starting your seeds indoors, Carter also has some more intuitive advice if you want your little garden to yield vegetables and other edible goodies: "If you are hoping to grow outside, a good way to gauge timing is to think about what is 'in-season' in your grocery store throughout the year. Radish peas, beets, and arugula are the freshest in the spring, which means that starting your seeds in late winter will allow you to have a harvest several months later. Tomato, pepper, zucchini, beans, and eggplant is fresh and abundant at the farmers market in the summer. They like to grow in warm temperatures, which tells you that starting those seeds may be best in early to mid-spring so that they can grow big in the summer heat."
"Again," says Carter, "refer to your seed packets when you are thinking about timing for your plants! Agricultural extension webpages can give more specific seed starting times for the region that you live in, but it’s also exciting to think intuitively and follow the weather patterns of your area."
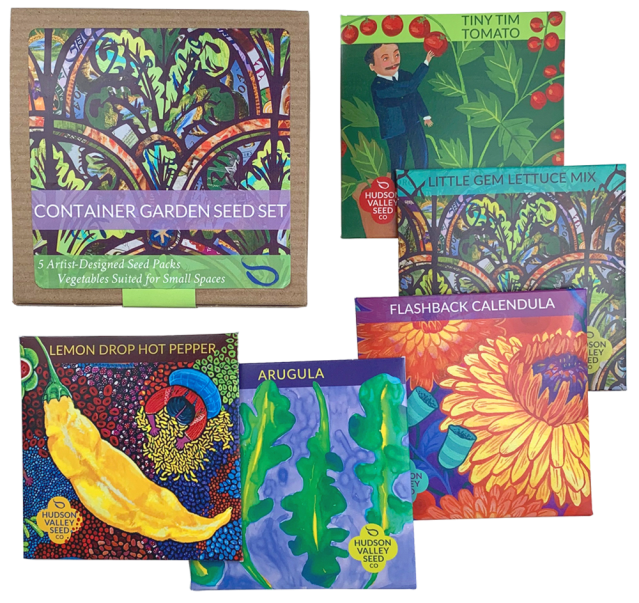
The easiest places to get seeds and starter plants are plant nurseries, hardware stores, and garden centers. There are also many, many seed resources online (packages from one of our favorites Hudson Valley Seed Company shown here), but it can be fun to go to a store and pick out the seed packets with the kids. Know that the hard-core gardeners are already snapping up packets online and some seeds are selling out.
Beyond shopping around, there's one other excellent place where you can get some great plants to start with: Your kitchen. "Get creative!" says Carter. "You can use kitchen scraps to experiment with regrowing plants, try planting nuts and seeds you find outside, and reuse milk cartons or plastic drink containers to house your plants." Be sure to punch drainage holes at the base of recycled containers.
See What Works
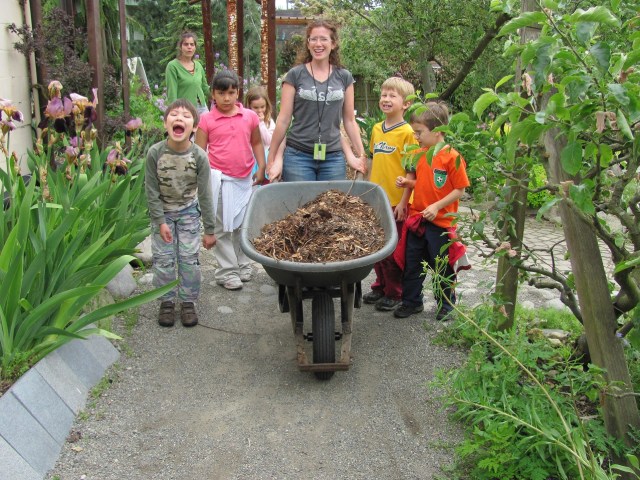
Tilth Alliance @ Good Shepherd Center, Children's Garden
In the end, it's important to remember that while science is a big part of gardening, it's not an exact science. Any seasoned gardener will tell you that trial and error is part of the process; it often takes seeing what doesn't work to find out what does. "The best lesson that we have learned in our gardening journeys is to 'give it a try!'," says Carter of the BBG. "Plants are very resilient and the best way to learn is to put a seed in soil and keep track of what happens. Some may die and others may thrive, but diving right into the experience is the best way to learn."
Whether currently, or at one time or another in our lives, I think most of us have experienced the feeling of not having control in a situation, or not knowing what to do, or what is the best decision to make. Perhaps you’ve felt helpless, emotionally overwhelmed, or as if you just couldn’t stand one more thing occurring. Being the mom of a child with profound special needs definitely generates those feelings in me on a frequent basis.
In my opinion, life is about learning to cherish every moment granted to us, especially the sorrowful or ordinary ones because each moment that passes us by holds eternal weight. I’ve identified three ways to encourage myself to retrain my daily focus—to learn, appreciate and soak up how each moment, happy or difficult adds value to the overall story of my life.
Seize the Day
How often do we tell ourselves that we will call our friend later, start eating healthy, focusing on self-care or we’ll start working on accomplishing that life-long dream when the timing is right—then never actually do it? It seems that we are always putting things off because we tell ourselves that we don’t have time right now. If the COVID quarantine has taught us anything it’s that ‘timing’ isn’t the issue. What we may be lacking is the motivation or confidence to live for today and identify the value in the little things.
Regardless of the challenges each day may bring, and with special needs children those can be unique and plentiful, remember your ‘Why.’ Each day presents an opportunity, whether it’s large or small to push ourselves to grow and learn and appreciate the now. That is my ‘why.’ By seizing the most out of each day, I’m modeling for my kids the importance of never settling and to keep seeking ways to turn lemons into lemonade.
Especially on days when I’ve lost my patience because my son has thrown his food to the floor and his hitting was at an all-time high, all while I was extremely sleep deprived, I recognize that how I handled those tough moments doesn’t define me or my entire day—but rather refines me and how I will handle adversity in the future. I instead choose to be grateful for the sweet family moments, random acts of kindness, laughter and the chance to experience it all again tomorrow.
Attitude Is Everything
The longer I live, the more I realize the impact a positive attitude has on one’s life. I truly believe a person’s attitude is more important than money, than failures or successes, and certainly more important than outward appearances and social-media profiles.
We have a choice every day regarding the attitude we embrace for that day. We cannot change how others act, the things they say (or post), or the inevitable outcome of many situations. I am convinced that life is 10% what happens to me and 90% of how I react to it. We are in charge of our attitude!
I also hold onto a strong belief that everything happens for a reason. I wake up each day with the intention of smiling and laughing more while not wasting energy on gossip, negative thoughts, or things beyond my control. The benefit of maintaining a positive attitude (and constant resetting throughout the day if needed) is that when situations go awry it’s so much more productive to laugh and develop an alternative solution rather than being stressed and angry.
Stop & Appreciate the Beauty in & around You
It is so easy to become hypnotized by a daily routine and feel that everyday actions such as driving to work or coordinating therapy sessions are mundane and monotonous thus causing fatigue and burnout. I would wager that we don’t get burned out because of what we do. We get burned out because we forget why we do it.
We must remind ourselves that we are surrounded by the beauty of God’s creation and we ourselves are a part of that. Choose to focus on what you “get to” do versus what you “have to” do. Life is a gift, not an obligation.
“Learn to enjoy every minute of your life. Be happy now. Don’t wait for something outside of yourself to make you happy in the future. Think how really precious is the time you have to spend, whether it’s at work or with your family. Every minute should be enjoyed and savored.” ― Earl Nightingale
I was scrolling through Facebook the other day and saw a post that took me back a little. It laid out the year 2021 in words like this: Twenty Twenty One. Say that to out loud yourself……get it? Hear it? I guess many people would feel as though it is true, that 2020 was the year that defeated us, the year that WON.
I’ll be the first to admit that I’ve felt like giving up many times this past year. Life with special needs kids has always been hard but this year just seemed like the icing on the cake. There was that week back in March where we were told that this “quarantine” thing would only last a week or so. Then a week turned in weeks, a month into months, and so it continued.
Every little detail, every ounce of hard work that I put into getting my children the services they needed was stripped away from them within a week. As time went on, we started to get some services back gradually as fall neared. Things seemed to get back to some sort of “normal” although not really sure if that is the right word to use or if there is such a thing as “normal” anymore.
As we came around the corner to the end of the year, my girls took their turns in the hospital with relapses of seizures. I was once again reminded of how strong they truly are. I could go on and on about the many struggles of 2020, the year of defeat, but I’m done. Instead, I’m going to re-focus on some positives of 2020 and rename it the year of “OVERCOMING.”
We found a new house that met all our family’s needs in the right timing and location. Belle learned how to walk independently. Bryleigh learned how to write her letters and her name. Bryleigh learned how to start reading short sentences with sight words. Bryleigh and Belle started receiving additional therapy services and made big gains. And I found a tribe of women who truly understand this journey and feel supported.
So here’s to 2021, what I’m calling the year of “REDEMPTION.” Here’s to claiming happiness, health, and hope!
My name is Mandi. My husband Lucas and I have 3 beautiful daughters. They are Bryleigh (6), Belle (3), and Briella (2).
Bryleigh and Belle have a rare genetic syndrome called Pitt Hopkins Like 1 Syndrome. Characteristics include epilepsy, developmental delays, low muscle tone, Autism, etc.
The Amazon Echo Wall Clock just got a new Disney look that might remind you of your first watch as a kid.
If you grew up in the ’80s, chances are you sported a Mickey Mouse watch or wished you had one like your friends. Now you can get that same awesome design that features Mickey’s arms as the clock arms! Disney’s Mickey Mouse Edition Echo Wall Clock is a little smarter than the Mickey wristwatch, however.
Just like the original Amazon Echo Wall Clock, the smart clock is compatible with Echo devices and includes features like countdown animations and the ability to set multiple timers. All you have to do is ask Alexa.
The clever device can help you with everything from timing your dinner in the oven to giving kids a countdown till it’s time to go––all without lifting a finger. Even the setup is a breeze. Just say, “Alexa, set up my Echo Wall Clock,” and you’re ready to go.
You can score the Disney’s Mickey Mouse Edition of the Echo Wall Clock on Amazon for $34.99 during Amazon Prime Days!
Get excited for cookie season. Today the Girl Scouts of the USA (GSUSA) kicked off a countdown to the 2021 Girl Scout Cookie season with the announcement of a new cookie in select areas. Toast-Yay!, a French toast–inspired cookie dipped in delicious icing and full of flavor in every bite.
Amid challenging world events and a global pandemic this year, Girl Scouts created moments of joy by donating cookies to thank frontline workers and using the cookie earnings to support their communities. When Girl Scout Cookie season returns, Toast-Yay! will give consumers a new way to celebrate these moments alongside other favorites, like Thin Mints and Samoas/Caramel deLites. And though social distancing measures may keep families and friends apart, cookie customers will be able to share joy and stay connected this season through a giftbox option that ships directly to others via the Digital Cookie/Smart Cookie online platforms.
Consumers will be happy to know that each cookie purchase is an investment in girl leadership in their own community. With every sale, the Girl Scout Cookie Program teaches girls how to think like entrepreneurs as they run their own small businesses and learn skills like goal setting, people skills, and decision making. Girls can also decide how to use their portion of the proceeds for unforgettable leadership experiences and community projects, while councils are dependent on the funds to deliver life-changing Girl Scout programming to 1.7 million girls.
As the COVID-19 pandemic became widespread during the 2020 cookie season, many girl entrepreneurs quickly changed their emphasis to virtual sales as they experienced the same challenges as other businesses. GSUSA also offered a new national online platform, Girl Scouts Cookie Care, that enabled customers to safely order cookies for home delivery or to donate cookies to first responders, volunteers, and local causes. Thanks to their customers, Girl Scouts donated millions of cookie packages last season. In the 2021 season, Girl Scouts will again embrace their entrepreneurial spirit by selling cookies through online platforms and innovative “virtual cookie booths” on social media (with parental supervision). Many girls will offer socially distant or contactless sales and delivery options. If local guidelines allow, in-person sales may also be available in certain areas, keeping girls’ safety top priority.
Although the start of cookie season is recognized nationally in January, timing and product availability varies locally, so contact your local council for more information about sale dates and specific cookie availability.
Do you want the luxury of a private pool without installing one in your backyard? Swimply, the only online pool sharing marketplace, offers families a chance to get out of the house and into the water. This app allows people to rent swimming pools by the hour and owners can choose to include other amenities like the use of a grill or fire pit
The Swimply website and app, available on iOS and Android devices, provided non-contact entry to private pools. Use Swimply for entertainment, exercise or even a spot for swim lessons.
Non-pool owners can read about available pools, see reviews, and book directly through Swimply.com and on the app. Owners are able to list their pool onto the website and include customized information on availability, rules and prices with a guarantee of an effortless transaction within 24 hours of the reservation.
Each pool is inspected for safety prior to listings and owners can utilize in-app purchases like pool cleanings and maintenance before and after usage. For assistance with booking and listing, the Swimply support team ensures that the entire process of listing, reserving, and payment is as smooth as possible for all involved.
Pools are available for booking in Arizona, California, Connecticut, Florida, Maryland, Massachusetts, New Hampshire, New Jersey, New Mexico, North Carolina, New York, South Carolina, Texas, and Virginia. The average pool costs $45 per hour and is based on pool area size, amenities, timing and demand.
Pools can be booked and listed on www.swimply.com or on IOS and Android app.
Never leave your child unattended around water. Check out these water safety tips.