Get out that gauze and get ready to recreate a few of these mummy craft projects that are just the right amount of creepy.
Pumpkin carving might not be so easy (unless you have these pro templates) but these mummy crafts are actually very simple to pull off. Spend an afternoon with the kids and make a festive decoration that will last for Halloweens to come. If you’re looking for other Halloween crafts for kids, we’ve got those too!
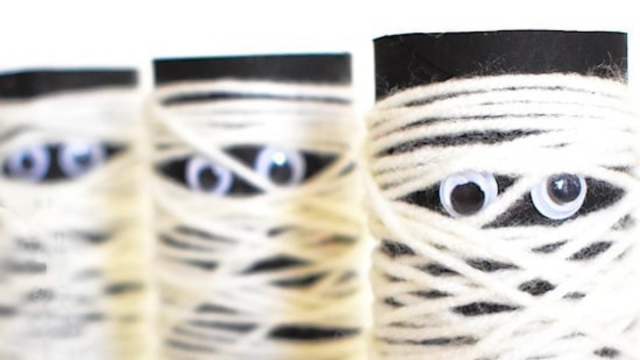
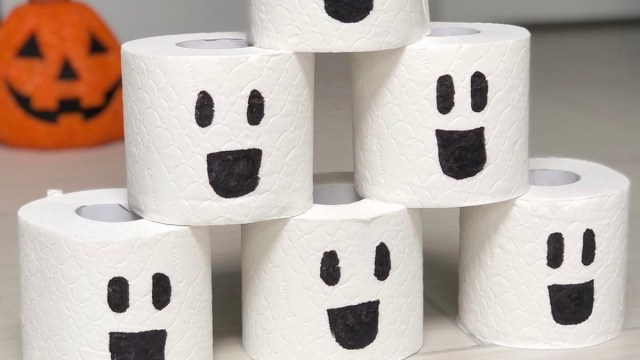
Even if you don’t “do” crafts, you can still do this. Save a few rolls, buy string and googly eyes, and get to work. You can paint them, or not, it’s up to you and your kids.
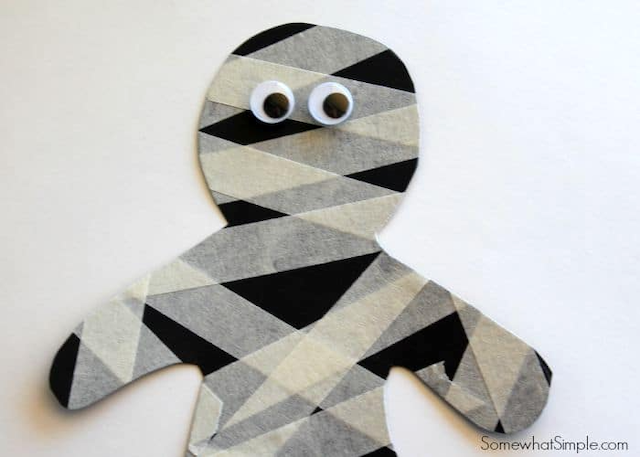
We love this sweet and simple masking tape and construction paper mummy craft by Eighteen25 that's perfect for preschoolers who are still honing their fine motor skills. And if you want to extend the playtime after the mummy's made, just add a popsicle stick to the back, and voila! You've got yourself a puppet!
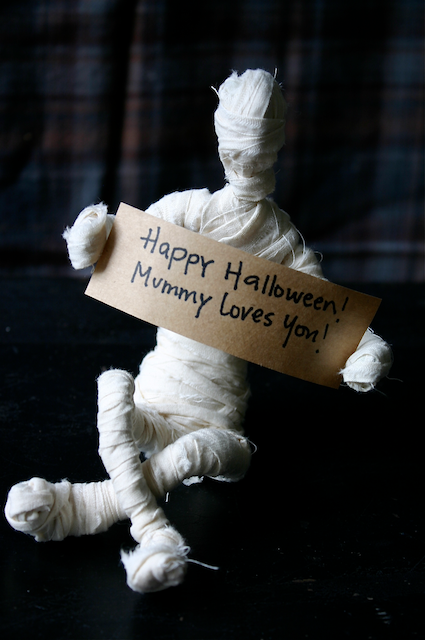
Your kids will love bending these DIY mummy figures to fit their needs. Who knows? You may just find a chain of them dangling from the chandelier, your rearview mirror, or even the showerhead. Check out Family Chic for inspiration and how-to.
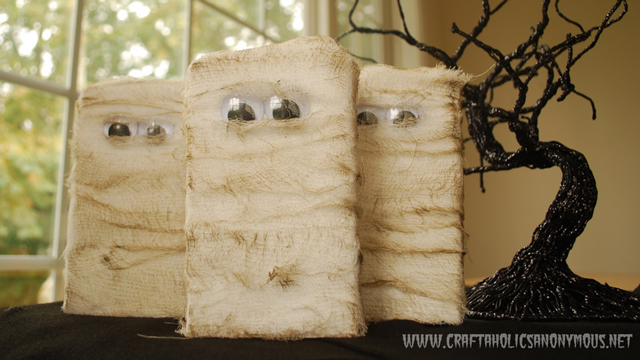
Yes, there is a possible trip to the hardware store for this one, but your reward will be an adorable DIY decoration that you'll pull out every Halloween for years to come. We love this tutorial by Craftaholics Anonymous. Can't stomach the thought of loading up a carload of kids and navigating the lumber yard? Try substituting cereal boxes for a temporary decoration, instead.
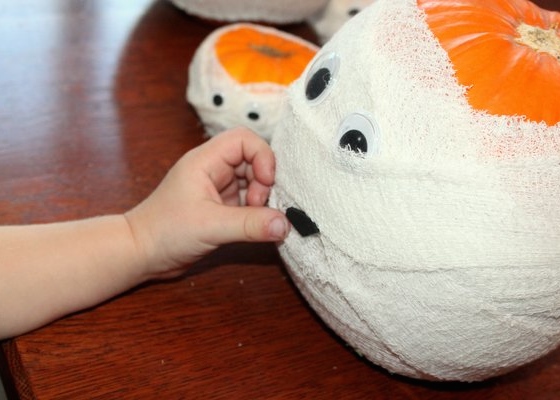
Hands On As We Grow has an idea for the friendliest little mummy pumpkin you'll ever meet, and you can get the step-by-step here. Googly eyes and no-mess cuteness? Yes, please!
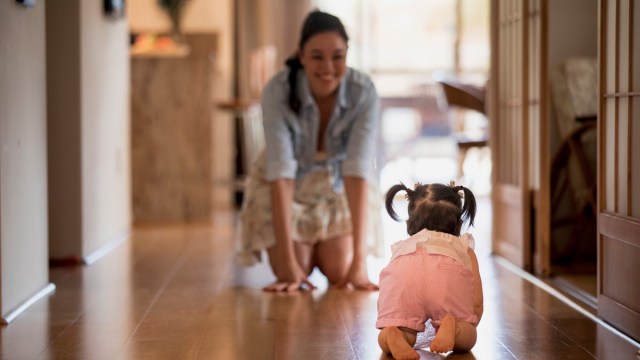
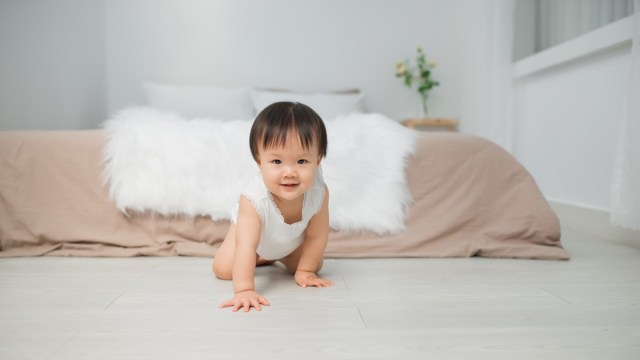
Now that baby’s crawling it’s time to start babyproofing the house
Traffic may slow to a crawl, but when a baby starts crawling, they’re zooming. Your former stationary buddy is now heading headfirst down the stairs or digging into your purse, and you’re feeling like you’ll never get a moment to yourself again. Keep kids safe from your home’s danger zones with these clever babyproofing tricks and activities.
1. Safety First
A crawling baby means a new round of babyproofing. Padding furniture corners, covering electrical outlets, tying up loose cords, and installing stairway gates are an excellent start, but there are plenty of less obvious spots that need to be secured. Add locks to toilets and cabinets or doors that conceal electronics, toiletries, cleaners, or glassware, and secure large furniture to the wall to prevent them from tipping over. Pro tip: To get a better sense of what could harm your baby, sit down and lie down on the floor to see your home from a baby’s level. You’ll discover sharp edges, dangling cords, and other potential hazards more easily.
2. Toilet Paper Tube Trick
Crawling babies have more access to items they can put in their mouths, whether that’s dog food or an older sibling’s LEGOs. Not sure what’s a choking hazard? Use the toilet paper tube trick. If the item fits through the tube, keep it out of baby’s reach.
3. Skin Saver
Hard surfaces can damage a crawling baby’s delicate skin. Rough floors, concrete playgrounds or even carpets can cause scraped, bruised or raw knees from frequent contact. Save your baby’s knees—and pants—by slipping leg warmers or baby knee pads, like the cute ones above from Simply Kids, over baby’s legs. Pro tip: Baby knee pads are also good protection for wobbly toddlers who take frequent tumbles.
4. Staying Alert
Any time you venture out and about with a mobile baby, you’ll have to stay on kid watch like your baby’s life depends on it (because it does). Even new crawlers are shockingly quick. If you have any doubts about whether you can stay fully focused on your little explorer, play it safe and strap baby into a stroller or carrier.
5. Timing Is Everything
If you find yourself having trouble accomplishing tasks with a baby on the loose, adjust your schedule where you can. For example, cut down on time in the kitchen by relying on meal planning or quick prep and slow cooker recipes. Consider showering at night after baby’s bedtime and saving certain tasks for naptime or moments when you have someone else to watch your little mover.
iStock
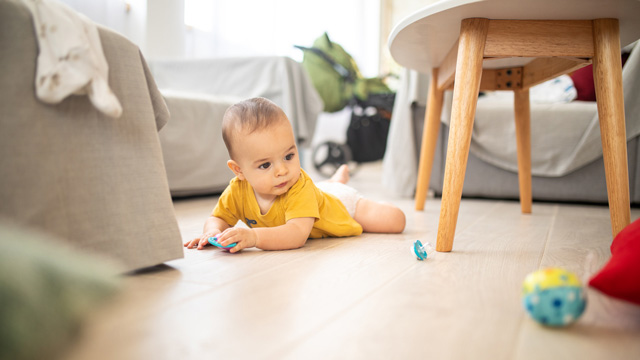
6. Try Redirection
A crawling or toddling baby can leave quite a trail as they explore everything in reach. Keep a small basket of baby-safe toys and books in each room to capture their attention when necessary and keep them away from cereal boxes, markers, and other major messes.
7. Get Germ-Aware Keeping a crawling baby clean when you’re away from home can be a challenge. Keep a stash of wipes and sanitizer in your diaper bag for outings, and a change of clothes in case of bigger messes.
8. Keep a Surprise Toy Stash
How can you entertain your little cruiser when you need to shower, take a phone call or respond to emails? Hide a stash of “surprise” toys that stay out of your regular toy rotation. Pulling out the basket of “new” trinkets can keep your mobile mini-me entertained for a few minutes while you take care of business or relax for some much-needed me time.
9. Plan a Pool Party!
Turn your blow-up pool into a ball pit by adding colorful plastic balls. Your child will have room to move freely while exploring, and you’ll rest easy knowing baby is contained and entertained.
10. Cook Up Some Quiet
If trying to prep pasta primavera with baby running amok (or attached to your leg) sounds like a recipe for disaster, put your babe in the high chair to watch you. Sing songs, tell stories, or offer an assortment of finger foods to keep them entertained. If you want to pretend you have your own cooking show, we won’t tell anybody.
11. Relocate Your Belongings
If you find yourself frequently cleaning up a certain area—whether baby is obsessed with pulling books off of your shelves or shoes out of your closet—save yourself the constant cleanup and move those belongings upward on higher shelves. Consider this the flooding stage of parenting. As your baby zooms through the house like a force of nature, you move items upwards to keep them out of baby’s wake.
12. Repeat After Us
If snagging your baby inches from the curb for the millionth time or babyproofing have you ready to pull out your (now graying) hair, remember: It’s just a phase. Trust us, “It’s just a phase” will become your new favorite parenting mantra. Bonus: This useful phrase is surprisingly versatile! You’ll likely be using it for one thing or another for, oh, the next 18 years or so.
Check out these spooky Halloween minute to win it games that all the kiddos will love!
Halloween is right around the corner, and if you’re looking for fun Halloween games to make the holiday extra spooky, these minute-to-win-it ideas are exactly what you’re after. Whether you’re staying in this year or going out for trick-or-treating, these party games will keep your kids entertained for hours. While you’re at it, make the night extra special with some fun Halloween jokes, kid-friendly ghost stories, easy Halloween treats, and awesome Halloween crafts.
What’s a minute to win it game?
Simply put, it’s a 60-second game using items typically found around the house. Participants attempt to see who can finish a challenge first or who can complete a task the most times in under a minute. You can try these holiday minute to win it games when Halloween is over or attempt some year-round minute to win it favorites!
Take their favorite piece of Halloween candy (that isn’t too messy, of course) and place it on your child’s forehead. They’ll need to use their facial muscles to move it down their face into their mouth without using their hands.
2. Pumpkin Balance
This involves two players balancing mini pumpkins on their heads and racing to a certain point without dropping the pumpkin. You can make it tougher by making it a running race!
3. Donut Race
Slide a donut on a string and see who can eat it off the string the fastest. What a delicious game to play!
4. Candy Balancing
Put the end of a craft stick in your mouth and stack a candy of your choice on top. Whoever stacks the most pieces wins! You can make the game more challenging by choosing a non-flat candy.
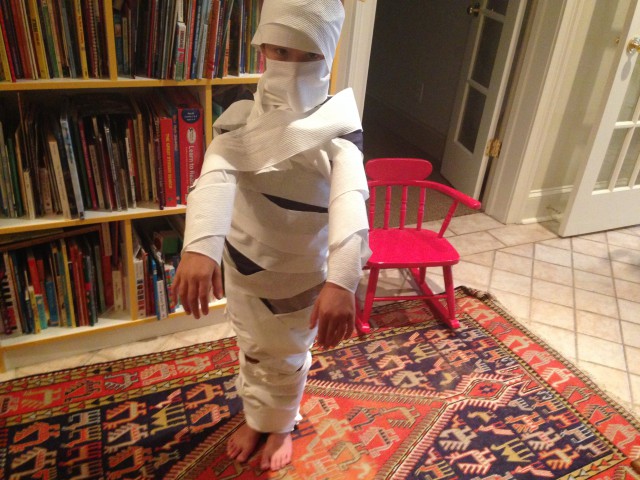
A two-player game that involves wrapping the other player in toilet paper to look like a mummy.
6. Stack 'Em
Using apples, gourds, or mini pumpkins with the stems cut off, little ones have one minute to stack five apples or pumpkins (or three for younger kids) on top of each other and get them to stay for three seconds.
7. Candy Toss
Have two players take turns tossing their favorite candy (wrapped or unwrapped) into a bowl or cauldron. Whoever gets the most pieces into the cauldron in a minute wins.
8. M&M Switch
Each player will need two plates; one filled with M&Ms and one empty. Players use a straw to suck up each M&M and drop it onto the other plate. Whoever gets the most M&Ms onto the other plate wins!
Make ghost or mummy Halloween pins out of toilet paper rolls or white/clear plastic cups. Use a mini pumpkin or a regular-sized pumpkin (real or fake) as your bowling ball and get rolling.
10. Witch's Hat Ring Toss
Connect glow sticks or fuzzy craft sticks into rings. Each player takes turns tossing their rings onto the witch's hat, and whoever gets the most rings onto the hat wins (You can also use a pumpkin stem to catch the rings.)!
11. Candy Unwrapping
Have your contestants take a wrapped piece of candy (choose a difficult one for a challenge) and have them unwrap it one-handed.
12. Dig for Creepy Crawlies
Crumble up your favorite cookie (that resembles dirt) and fill a bowl or bucket. Hide plastic creepy crawlies inside the dirt and have the players dig for them with a spoon. Whoever finds the most creepy crawlies wins.
Need some craft ideas that aren’t your usual? Raid the recycle bin, bust out any toilet paper rolls lying around, and get crafting! From Star Wars characters to bird feeders and even flying fish, the possibilities are endless when you’ve got a stash of toilet paper rolls on hand!
If you had one of those flip puzzle books that allowed you to create animals with different tops, middles, and bottoms, then you’ll appreciate this adorable idea.
Swipe through the images in this post to see the spray-painted final products of this toilet paper roll craft! This is one you could make as detailed or as simple as you’d like. You could also hand-paint it for some extra fun.
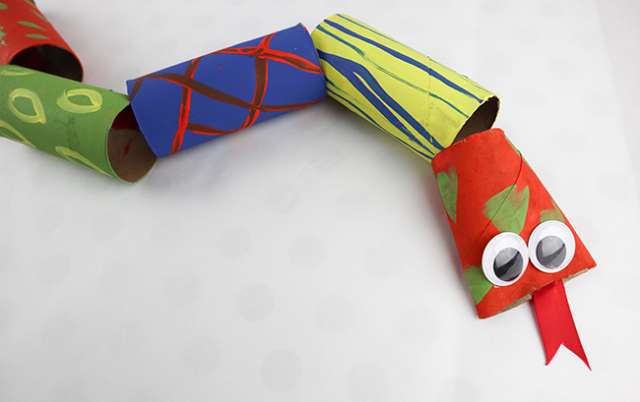
This adorable toilet paper roll craft will have kids creating their own snake out of multiple toilet paper rolls. After your kiddo is done and the paint is dry, it's playtime! Get the tutorial from The Clumsy Crafter.
What a cute idea for a birthday party favor! Kids can make their own crowns and wear them throughout the whole event. Get the tutorial over at Creative Jewish Mom.
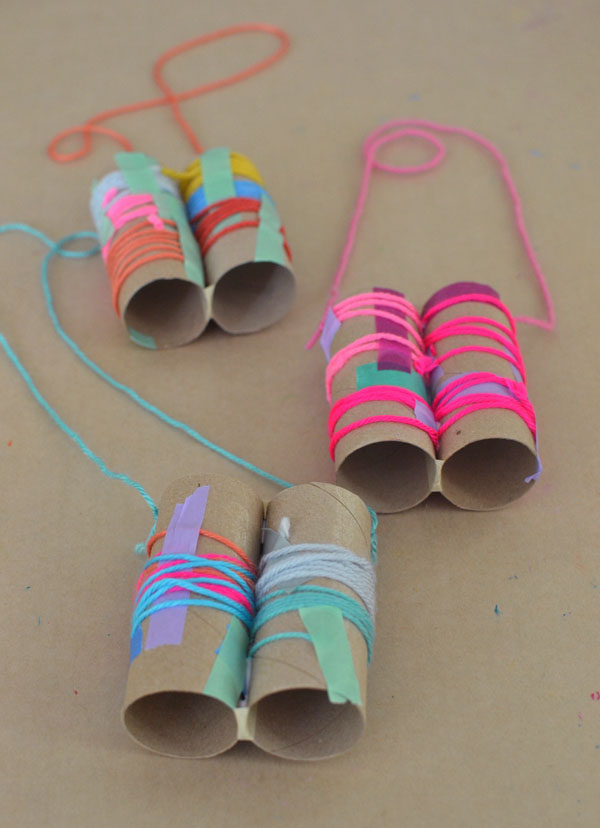
Whether you're on an outdoor adventure or peeking at birdies from your window, these adorable Bird Finder Binoculars from Art Bar are perfect for exploring. All you need are some empty toilet paper rolls, string, and colorful masking tape to make your own.
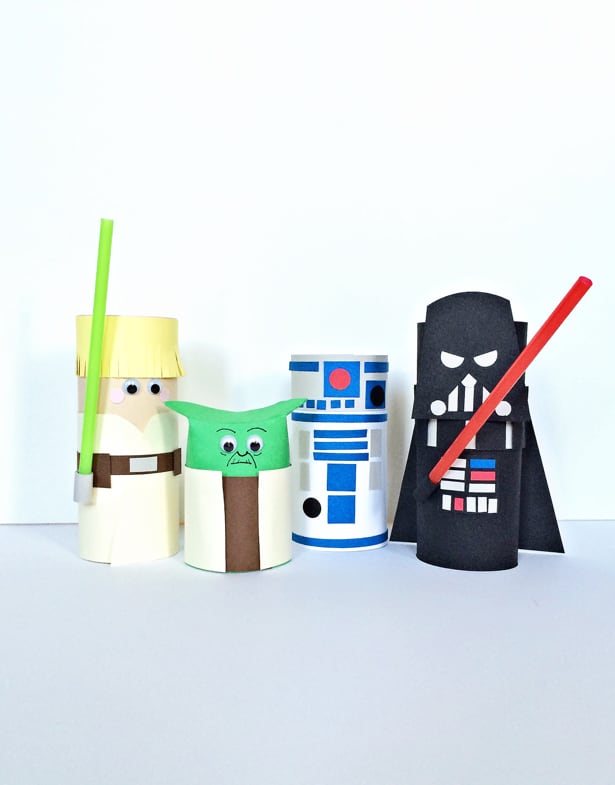
The gang's all here! This cast of Star Wars characters from Hello, Wonderful is perfect for your young Jedis. Great for an entire afternoon, these mini crafts use up that collection of TP rolls you've been collecting.
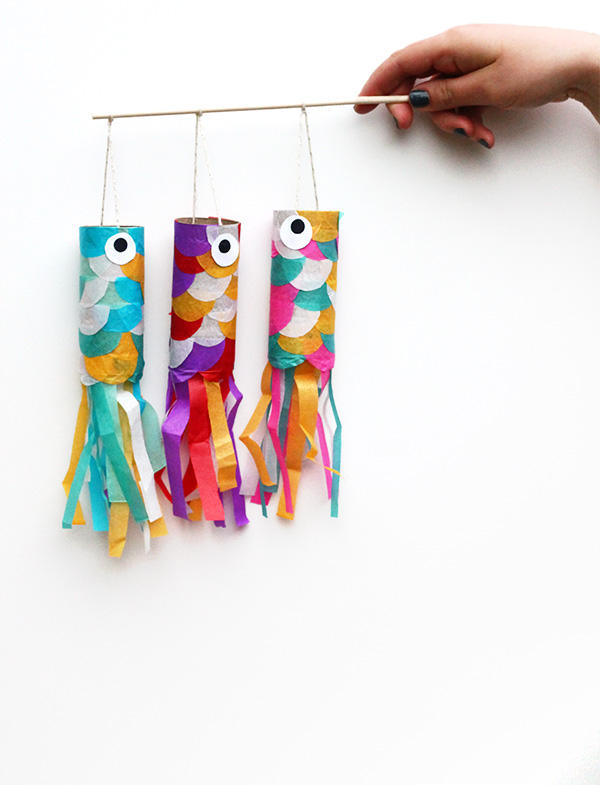
Everyone's day can use a little more color, especially in the form of whimsical and cheery flying carp from Squirrelly Minds! With basic supplies like tissue paper and double-sided tape, your littles will be running around with a few flying fish in no time.
If you have a stack of old TP rolls lying around, why not turn them into a useful sign like this one? Color the tubes, do some specific cutting and you have a truly unique way to say "Happy birthday!" Get all the details over Super Make It.
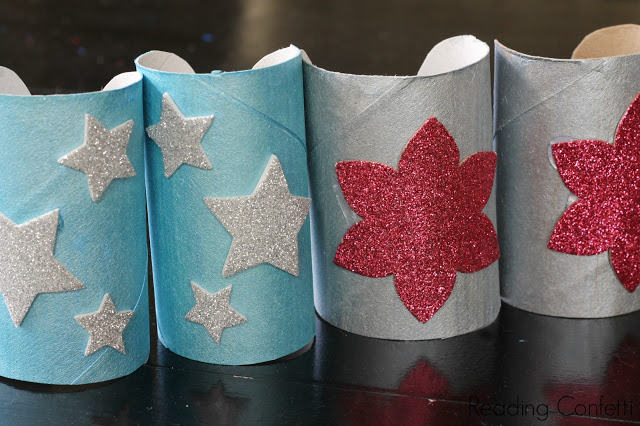
You don't need special powers to make these awesome wristlets with your little hero. After painting the tubes, let your kids decorate them with stars, flowers, lightning bolts, or anything that they think gives them special powers. Find out how to make the slits for little arms just right over at Reading Confetti.
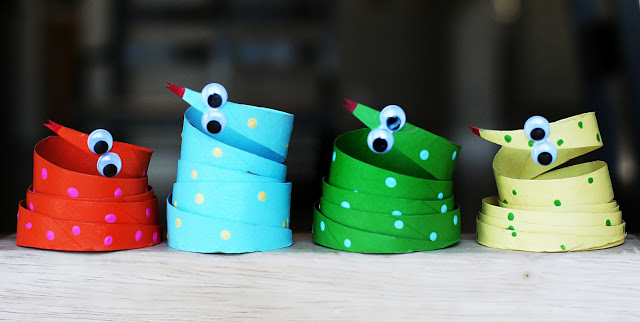
Practice dexterity and scissor cutting by whipping up one of these googly-eyed reptiles. Start by painting a toilet paper roll and letting it dry. Next, have your little one use safety scissors to snip a spiral shape into the roll. Decorate the bouncy creature with stripes or dots and a pair of inquisitive eyes. The gals over at Eighteen 25 have the low-down on how to get this toilet paper roll craft just right.
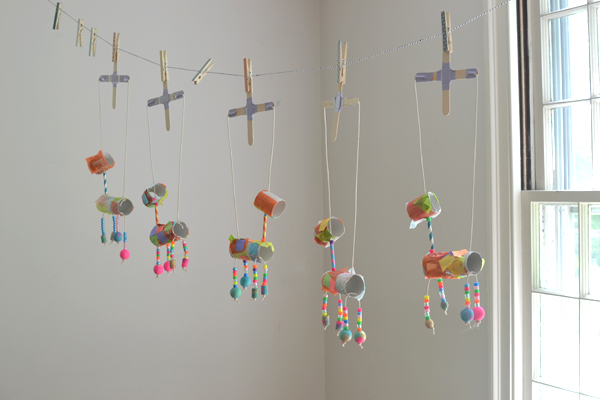
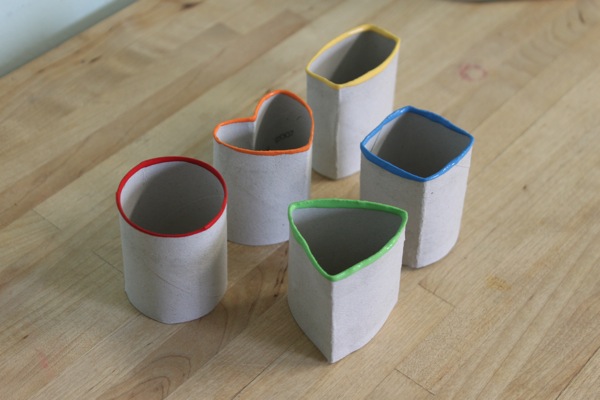
Mama Jen of Mama Papa Bubba wows again! This toilet paper roll craft is the ultimate win-win. While the bambino brushes up on shapes and colors, you get to upcycle all of those saved rolls. On a rainy day, use the shapes to make cards or just let your kiddo go stamp crazy on the poster board.
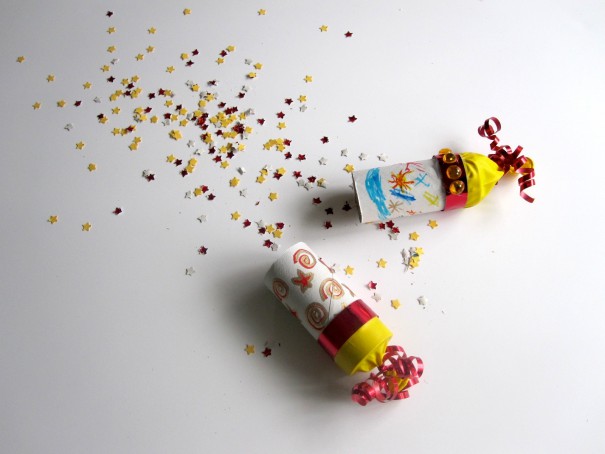
Confetti Poppers
Gabby Cullen
Speaking of parties... turn your kid's next one into the shindig of the year with these confetti poppers crafted out of a tied balloon wrapped and taped over a toilet tissue roll. Pour confetti into the open end, gently pull the end of the balloon... and POP! Check out our tutorial here.
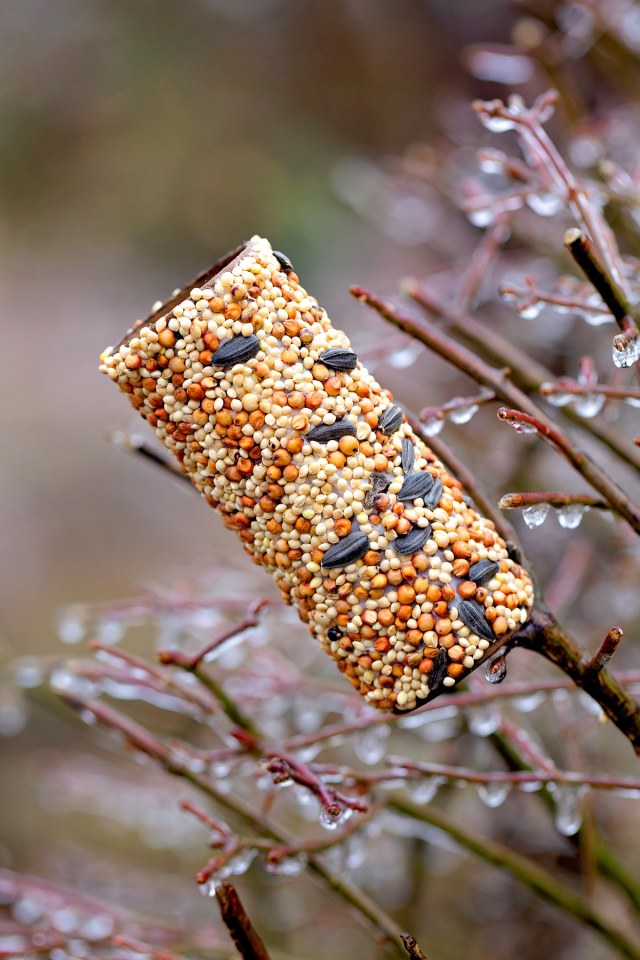
Keep an eye on your feathered friends by whipping up this easy feeder. All you have to do is spread the shortening onto a toilet paper roll and then roll the tube into bird seeds. The seeds will stick to the roll, and you can hang it up porch-side or stick it on a branch. Fireflies and Mud Pies has the details for this awesome toilet paper roll craft.
When you need to keep it simple, a mini village made from toilet paper rolls will do the trick. Pull out the markers, ribbon, paper, and whatever else the kids want to use, and get crafting!
Here’s what all those bubbles and foam really mean
As schools start to let out for the summer, parents everywhere are starting to mentally prepare themselves for occupying their kids at home. Get started early with this fun demo video for the beaker volcano science project from The Dad’s Book of Awesome Science Experiments.
The science behind, “But, why?”
Don’t get caught off guard by your kids’ science questions! You and your family can learn about chemistry with this amazing beaker volcano science project! Best of all, this experiment can be tossed together with just vinegar, baking soda, red dye, a baker, toilet paper, and string. This is a science experiment that also expertly mimics what happens under the earth’s crust to create volcanic eruptions.
Volcano Time!
If you grew up watching endless Brady Bunch reruns you’re probably familiar with Peter Brady’s volcano—a mud-spewing, steep-sided science project that sent showers of muck and sludge all over Peter’s sister, Marsha, and her snooty friends. It was the coolest thing ever.
There’s a good chance that this one episode alone launched our love affair with kitchen-sink volcano projects—an experiment so simple that you and your lab partner can most likely do it right now with stuff you already have in the kitchen. All you really need is vinegar, baking soda, and a bottle to mix them in, but it is much cooler to use good ol’ fashioned backyard dirt to construct a volcano model around the bottle first and then conduct the experiment. Either way you do it, this is a science experiment with serious thrills. But it also expertly mimics what happens under the earth’s crust to create volcanic eruptions.
Here’s Why the Volcano Science Project Works
When the solid baking soda (sodium bicarbonate—a base) mixes with the liquid vinegar (acetic acid—a weak acid), a chemical reaction occurs and forms a gas (carbon dioxide). All those bubbles and foam? They’re evidence of gas, and as the gas expands, it looks for an escape route for all that built-up pressure. So the foam and bubbles rise until they flood out of your bottle’s opening. Pretty much the same exact thing is happening under the earth right now. The earth’s crust is made up of many sections of super thick shell—65-plus miles thick!—called tectonic plates that are always moving, very slowly, over the much, much hotter inner earth. Most of the world’s volcanoes are found where two or more of these tectonic plates meet one another. Sometimes those plates shift and sometimes they collide, forming escape routes in the earth’s crust for molten rocks and gas, called magma. Much like the carbon dioxide in your baking soda–vinegar experiment seeks the quickest escape route to relieve pressure, the gases in the underground magma do the same thing before erupting out of a volcano.
Not all eruptions are alike, however. Sometimes the gases in the magma are easily released from the earth’s crust and the result is a slow, oozing spread of superhot lava. But sometimes the gases stay trapped beneath cooled magma and rock building up pressure until they erupt in violent explosions that can send ash and boulders flying up to 20 miles high. In fact, airplane pilots keep track of volcano activity around the earth, just to be sure they don’t fly into clouds of dangerous ash.
Here’s What You Need for a Volcano Science Experiment
Baking soda
Vinegar
A bottle (a good vase with a wide bottom and slender top also works well, but use whatever you can find)
Red food dye String Toilet paper
Here’s What You Do
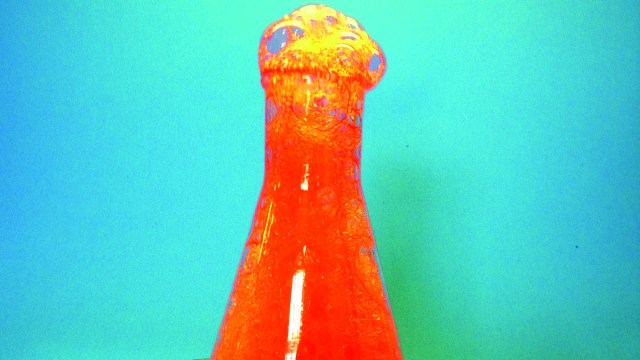
1. First add the vinegar to your bottle and dye it red with food coloring. Then, rip out a few sheets of toilet paper and make a pouch for the baking soda. Use your string to tie the pouch and then insert the pouch into your bottle, using the bottle cap to hold the other end of the string so that the pouch dangles above your “lava.” (See Fig. 1.)
2. If you’re feeling super science-y/crafty, let your lab partner shape a volcano model out of backyard mud and dirt around the bottle. Note: you don’t have to do this, but go big or go home, right?
3. When your volcano model is ready, lift the cap and watch the pouch drop into the lava. It will foam up slowly, mimicking the slow buildup of earth’s gases, until the vinegar fully soaks the tissue paper. Then, the fun really begins, as the foam begins to climb the bottle, looking for an escape route. Just stand back, and watch the foam erupt. It’s really that easy!
Want More?
There are many, many ways to perform this experiment, so don’t be afraid to get creative. Try mixing the vinegar and baking soda in a bottle, and then quickly place a balloon over the bottle opening. While this doesn’t create a lava explosion, the gases will inflate the balloon. Pretty cool, right? Or, put baking soda in a small snack-size zip bag and seal it tightly with a bit of air in the bag. Place the baking soda bag in a larger zip bag that is filled with vinegar and seal that bag tightly, with as little air as possible in the big bag. Now use your fist to smash the tiny baking soda bag and stand back. You just made a sandwich bag bomb, using the same chemical reactions as your volcano.
Although it seems like it was just yesterday you were bringing your sweet baby home for the first time, the months have flown by. You’ve joyfully witnessed baby’s first smile, first time rolling over (both ways), and don’t even get us started on how amazing it was the first time baby sat—without padding or leaning on anything. Sounds like crawling is just around the corner—yet another in the line of baby’s firsts. That means it’s time to start babyproofing the place.
Our handy babyproofing checklist includes clever DIY tricks that make your home safer for your child and can save you some money too. Whether you need to babyproof your cabinets, your fireplace, or drawers, these ideas are a great place for any parent to start.
When to Start Babyproofing
As your little one gets close to crawling, it’s time to babyproof your home and other places they visit frequently, like grandparents’ homes. To start, get on the floor and look at the surroundings from a baby’s perspective. See what’s tempting to grab and pull on, what’s at eye level, and what could injure them. Then, put away fragile items, move cords, secure furniture that could fall over, and put padding on sharp edges. Every few months, and when your child reaches a new milestone, like walking, evaluate your home for additional babyproofing needs. As kids grow taller, the danger zones will change and likely increase.
The railings on staircases or landings on upper floors may look narrow, but they’re big enough for kids’ limbs (or heads) to get stuck in. Secure clear plastic or fabric to railings to deter kids from playing on them.
2. Hide cleaning products
Plastic bins with lids and latches that baby can’t open are a safer place for cleaning products than under your kitchen sink. If you can store them on a high shelf or out of sight in a tall cabinet, that’s even better.
3. Corral cords
Cut a slit down an empty paper towel roll or piece of pipe insulation and thread multiple wires through it to keep them from becoming tangled in your tot’s curious hands. You can also use zip ties to pull together cords and then tuck them far away from baby’s reach. Don’t forget your USB cords that still hold a charge when they’re plugged in.
4. Cover outlets
Plastic covers are the easiest way to cover outlets around the house (and safest too). But in a pinch, or when you’re visiting relatives or traveling, you can put adhesive bandages or duct tape over electrical outlets. Avoid cartoon varieties of bandages that will attract little ones’ attention.
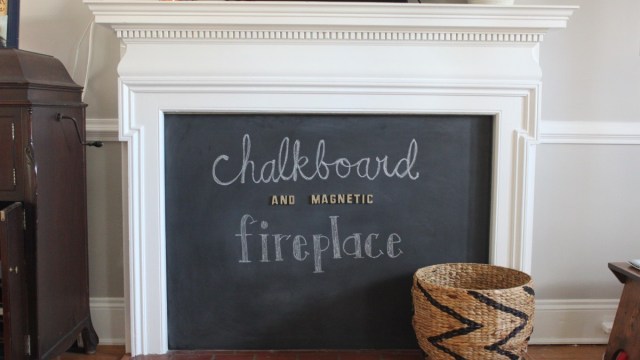
Babyproof a fireplace without sacrificing aesthetics too much by covering the opening with a piece of magnetic chalkboard (we love the one above from Sassy Wife/Classy Life). The chalkboard blocks off the fireplace and give little ones a surface on which to draw with chalk and play with magnets (choose large magnets that don’t pose a choking hazard).
6. Place dishtowels out of reach
Nix the dishtowel hanging off your oven door handle. Kids can pull down on it and open a hot oven or bonk themselves with the heavy door. Move towels to a higher shelf or put them on command hooks out of baby’s reach.
7. Test choking hazards with a toilet paper tube
There’s no need to purchase a choke tester. Anything that can fit into an empty toilet paper tube is small enough for your baby to choke on. Keep all those wee things out of reach.
Babies love to unroll toilet paper as much as pets do. Keep your TP intact and out of baby’s hands and mouth with a two-liter soda bottle! Cut off the top and bottom of the bottle and cut a slit down the remaining center piece. Use tape to cover sharp, raw edges and slide the container over your toilet roll to cover it. See the tutorial at My Frugal Baby Tips.
9. Protect with pool noodles
These summertime staples can be used for everything from door stoppers to crib-rail covers that prevent tots from rolling out of bed. They’re also good for wrapping around sharp edges, like around the fireplace, to minimize bumps and scrapes.
10. Pad corners with tennis balls
Tennis balls can soften sharp corners where a pool noodle doesn’t fit. Cut a few small slices into the ball’s core so you can wedge it over items like table corners. It may not look pretty, but this hack is pretty temporary. Before you know it, your toddler will be steady enough on their feet that you no longer feel the need to protect every corner in your home.
11. Shorten pull cords
Use clothespins or twist ties to shorten and hold up pull cords on curtains and blinds to remove this strangulation risk from your home. Command hooks are also handy for keeping cords out of reach.
12. Sock it to knobs
To keep little hands from turning door knobs, cover them with a spare sock and wrap a hair tie or rubber band around the base to hold the sock in place. An adult can still squeeze and turn the handle, but a child won’t be able to.
13. Band together on horizontal cabinets
Attach hair ties or rubber bands to keep paired cabinet doors closed. Just loop the tie around the handles and your baby will only be able to open the doors a little bit, not wide enough to slip a hand through.
14. Get a handle on vertical drawers
Slide a yardstick or tension rod (or another long, thin object) through the handles of horizontally stacked drawers, rather than spending time and money on individual locks.
Make sure to capture photos of your baby crawling around their newly babyproofed pad—and share them with your family and friends near and far—with the Tinybeans app. The secure platform puts parents in total control of who sees and interacts with photos and videos of their kids.
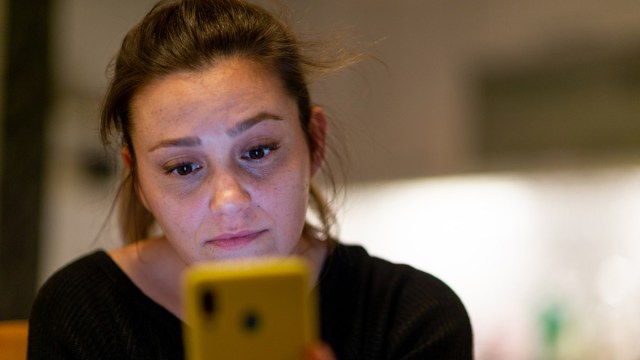
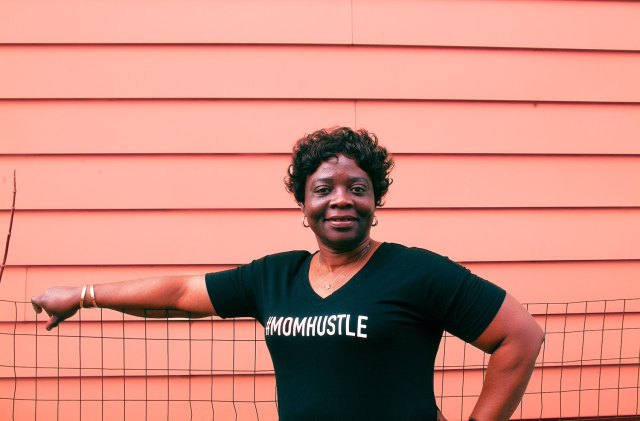
“Anybody have a really good babysitter you can recommend? Available at the last minute?” This group text popped up on a Friday afternoon and was quickly drowned in a sea of “nopes!” and “good lucks!” and teary emojis from unrecognized numbers. No one lets go of that number lightly. None of these people, other than the sender, were in my contacts. None of these people, including the sender, will get a response from me.
I could say it’s because this person wasn’t a close friend or that I didn’t have the time while hauling my kids around in the sub-freezing darkness that January evening. But the truth is, I just cannot give it up. Because I only have one number.
Other than family, I have one number, one person, I can call to babysit my children. I’m not being picky; I am being deadly serious. I have a five-year-old with cerebral palsy whose 40 pounds might as well be 100 when you’re carrying him up the stairs or lifting him out of the van and into his wheelchair or changing a diaper on the floor. He also has limited speech, so you must be part psychic, part lip reader, to intuit his needs. His babysitter is an employee at his preschool and has known him since he was two. I can’t afford to give away the one person I trust.
I know it’s tough to find someone older than 14 and responsible and available and consistent and friendly and cheap-ish to watch your kids. But for us, it is so much more than that. It takes a background in working with children with disabilities, a secret handshake, a personality test, and some serious magic for me to feel comfortable leaving my children in the hands of someone I’m unrelated to.
That number on my phone with “babysitter” in parentheses is sacrosanct. The days of protecting it began in infancy. When we first brought our son home from the hospital, he came with a tracheotomy, suction machine, oxygen monitor, and g-tube. I barely left the room, much less the house. Date nights were not a priority.
And just before I went back to work, we said goodbye to the daycare we had lined up a year in advance. How could we ask them to hook him up to a feeding pump or suction out the snotty gunk from his trach hole? Not to mention pitting him against the invariable sicknesses that pass from kid to kid. A registered nurse or my mother watched him instead.
Thankfully, the trach and the g-tube and all the most precarious of his medical issues faded away with age. We no longer need a nurse. But we do need someone physically strong enough and trained enough to meet his needs.
And did I mention I also have twins? They are insane, in all the natural ways threenagers are, and require just as much eyes-on time—if not so much hands-on time—as their older brother. They will empty the entire roll of toilet paper into the toilet and lock themselves in the bathroom in under 30 seconds. Date nights are happening again, but they are still rare enough to make me feel giddy just backing out of the driveway.
This is why I let the text go unanswered. This is why I let someone else fill in that blank. Our family situation calls for a very particular set of skills. We need the Navy SEALs version of babysitters. And I don’t know another mother with a child with special needs who doesn’t feel the same. We already get less free time, much less time away without worry over our children’s safety. We can’t afford to hand out freebies.
It’s nothing personal. It’s business, the business of running our family. We need the people we trust. And so we keep them close.
This post was originally published in January 2018.
Jamie Sumner is the author of the book, Unbound: Finding Freedom from Unrealistic Expectations of Motherhood. She is a writer for The Washington Post, Parenting Special Needs Magazine and Scary Mommy, and an editor for Literary Mama. She is mother to twins and a son with cerebral palsy.
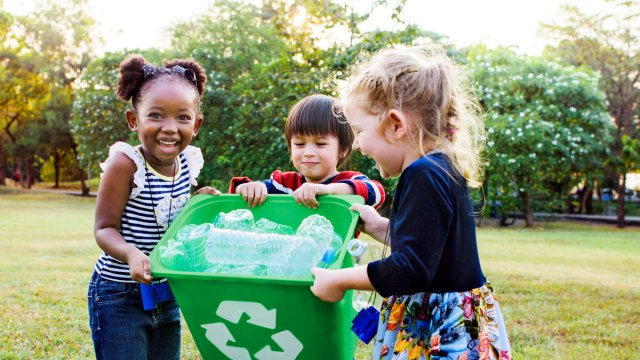
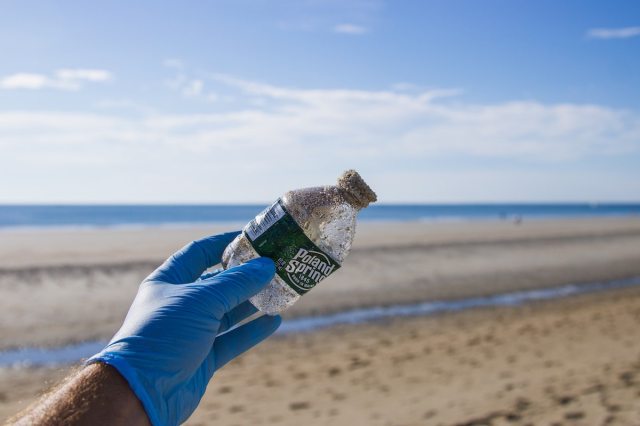
Your kid may not be ready to give up his LEGO collection, but that doesn’t mean you can’t start eliminating plastic from your everyday life. Wondering how to make it happen? It’s easier than you think! From buying in bulk to swapping out your plastic straws, these 29 ideas on how to reduce plastic waste will start you on a better path today.
2. Bring your own bags to the grocery store (this includes your own smaller reusable bags for fruits and veggies).
3. Buy in bulk when you can, and bring your own containers. Remember to weigh the containers before checking out so the cashier can accurately ring you up.
10. Stop using bath and body products with synthetic microbead exfoliants and opt for either natural exfoliating ingredients like scrubs with nut/seed exfoliants like St. Ive’s, or sugar scrubs.
11. Know your plastic recycling codes and what your town does and doesn’t recycle. Upcycle what your town can’t recycle: plastic containers and bottles are great for craft/paint projects, puzzle/game piece storage or bath toys.
12. Compost at home to cut down on the amount of trash bags you use.
13. Switch to compostable, eco-friendly trash bags like these.
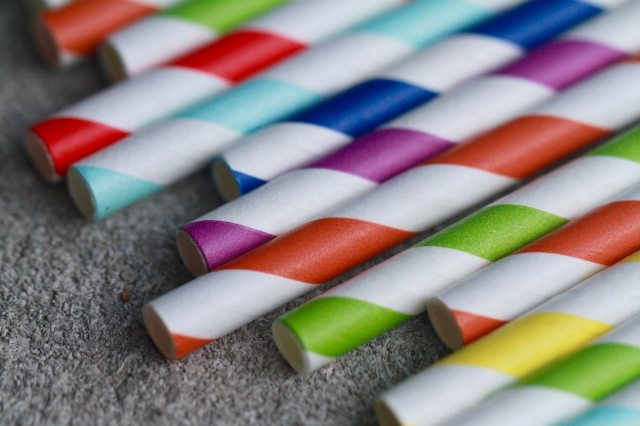
14. Keep a set (or two) of utensils/reusable straws at work, in your purse, in your diaper bag or in your car, so you don’t have to use disposable utensils when you’re out and about. PS: Chopsticks take up a lot less drawer/bag real estate, and you’d be surprised how many things you can eat with them!
15. Join your local Buy Nothing Group (or start your own) to pay it forward and snag gently-used goods. We love these groups especially for the baby and toddler phase when it's easy to get inundated by plastic toys and gear.
17. If babe loves the food pouches, but you hate the waste, research where you can recycle them via Terracycle. You can even start a collection site of your own.
18. Buy toilet paper and paper towels that are wrapped in paper instead of plastic.
19. Better yet, ditch the paper towels altogether. Use old rags or towels.
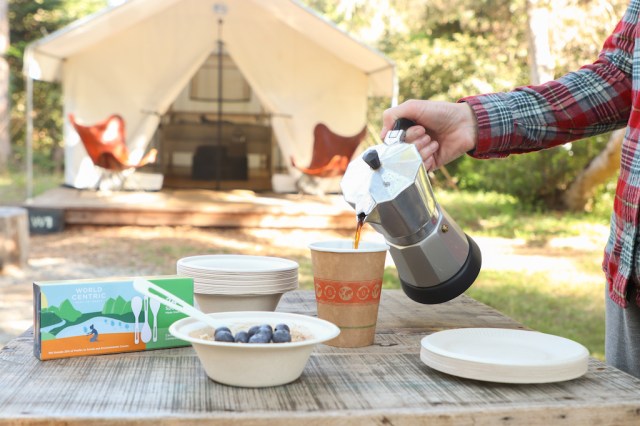
There’s no better time than now to head into nature, pitch a tent and sleep under the stars. Camping is one of the best ways to disconnect from your screens, and reconnect with the outside world. In doing so, it’s important to protect and preserve wild spaces for future generations to enjoy. Camping sustainable means minimizing your impact on the environment around you and leaving no trace.
Here are some recommendations for making your next camping adventure as sustainable as possible:
1. Gear: Buy Used Gear, Borrow & Donate
If you don’t camp more than a few times a year, try borrowing or renting gear rather than buying your own. If you have your own gear and it’s older or damaged, reach out to the manufacturers to inquire about repair programs. When I look for “new to me” equipment, I check used online marketplaces, it’s amazing how many people camp or hike only a few times and then decide to sell their equipment.
2. E-waste & Fuel: Bring Rechargeable & Solar Products
When you are in the market for a new lantern, look for one that is rechargeable or solar powered—or best yet, both! In this way you can avoid the use of non-rechargeable batteries. You can find rechargeable headlamps, speakers, and charging blocks to help you avoid battery waste. One pound propane tanks are popular for small camp stoves and grills, but the resulting single-use canisters are hazardous waste. Refillable small propane tanks are more difficult to find, but if you live in an area serviced like Little Kamper or another similar company, take advantage of the ability to avoid waste.
3. Food: Minimize Packaging
Pack your food in reusable containers rather than relying on small packaged goods. Try chopping your fruits and vegetables in advance if you can, so you can compost the food scraps at home. If you’re eating meals on reusable dishes and have to wash them in the wild, be mindful of the soap you’re using. Standard dish detergent is hard on the environment. Bring biodegradable soap, and keep it at least 200 feet away from natural water sources.
Opt for compostable tableware like from World Centric, including plant-based plates, cups, bowls, cutlery and more can make campsite eating a little easier. Just be sure to properly bag and pack out all of your compostables and food scraps, and leave no trace.
4. Stay Local
You don’t have to travel far to get offline, and you may be surprised at the beautiful open spaces that are right in your own backyard. Camping locally reduces the distance you have to travel, thus reducing your emissions. It can also help you better explore your own surroundings and community. During the height of the pandemic when travel was more restricted, I found the best remote campsite just a couple hours from my home. My county parks’ campgrounds offered a great easy car camping experience within minutes from my house.
5. Build Responsible Campfires
If you see a fire ban in place where you’re camping, it exists for a reason. This year has been one of the hottest and driest years on record in many parts of the world. With dry seasons comes the risk of wildfires, so please respect these bans. Keep campfires where permitted and contained to fire pits, and never burn toxic materials like trash, paperboard or anything plastic.
6. Respect the Wildlife
When hiking, going off-trail can be harmful to plants and animals. Be sure to stay on the trail and leave rocks and other artifacts where they are. If you encounter wildlife while hiking or camping, keep your distance for your own safety and theirs. Never leave food out around your campsite overnight, as it can attract animals.
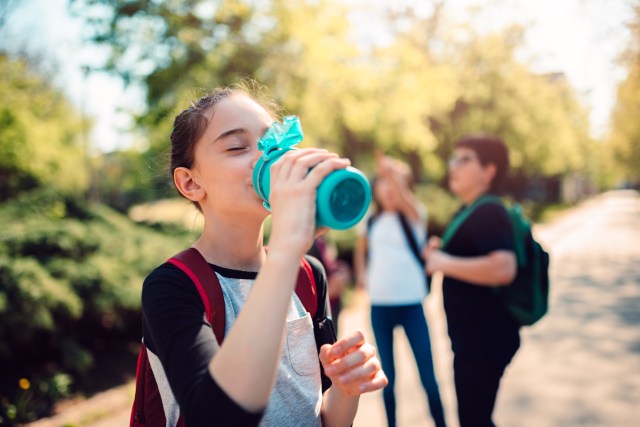
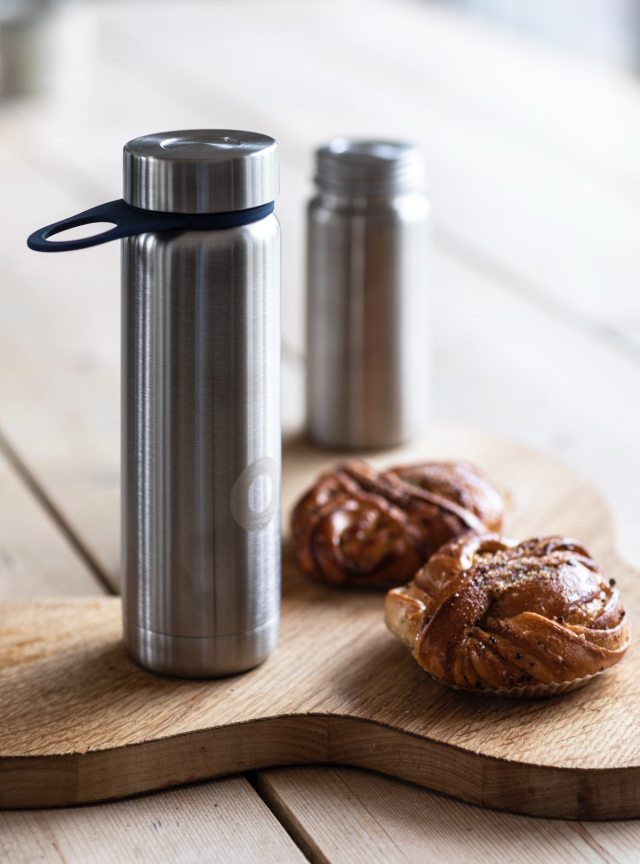
7. Use Refillable Water Jugs & Bottles
Skip buying prefilled single-use water bottles or gallon jugs of water. Bring reusables and refill your own. You can pack enough filled bottles with what you anticipate needing, or invest in a water purifier.
8. Reduce Gross Waste
It’s not fun to talk about, but toilet paper is a source of litter at parks and recreation areas. Avoid using toilet paper in the wild by investing in a small refillable bidet, and for women, buying a reusable antibacterial cloth. Always bury your waste and compostable toilet paper (if using) according to local guidelines, which usually include burying it at least six inches deep and 200 feet from water.
Lauren K. Olson is the Zero Waste Manager at World Centric. Lauren holds a Master's degree in Community Sustainability specializing in decision-making about waste, and a Bachelor of Science's degree in Environmental Economics-- both degrees from Michigan State University
›Whether you’re threatening to turn the car around or telling the kids not to kick the ball in the house for the hundredth time, motherhood means saying things you never thought you would. When we’re not dreading sounding like our own moms, some of the things we end up saying on a daily basis are actually pretty funny. We asked our readers and editors to share their daily mantras, and here’s what they had to say.
We Sound Like Our Moms
"Because I'm the mom, that's why!" –Tami R.
"Because I said so." –Kari S.
"I'll give you something to cry about." –Debbie H.
"Wait 'til your father gets home." –Tracey L.
"Watch your mouth young lady (man) or I’ll get the soap." –Linda M.
"When you pay the bills then you can....(insert whatever they want)..." –Julie J.
Clothing Not Optional
iStock
"You need to wear underwear when people come over to the house!" –Kristen H.
"What happened to your pants?” or “where did your pants go?” –Keiko Z.
"Please put some pants on!" –Sara S.
"Why are you always naked!?!" –Laura L.
Because Kids Are Gross
iStock
"How do those boogers taste?" –Gabby C.
"Do not lick mommie!" –Teri P.
"Who peed on the seat?!" –Kristi F.
"No, I don't want to wipe your butt for you." –Amber G.
"Use toilet paper! It's not optional!" –Bonnie C.
“Where are you planning to put that booger?” –Chinae G.