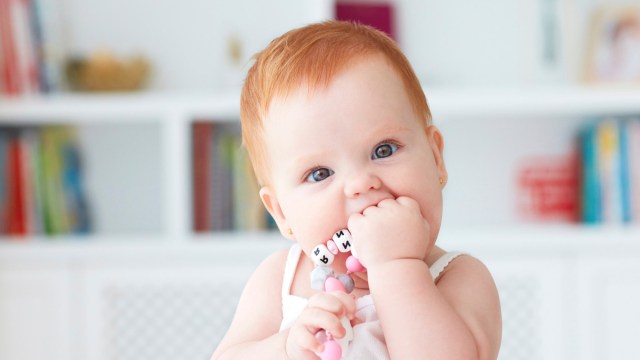
Teething has turned your sweet baby into a drooling, clingy, cranky mess, and none of your go-to remedies seem to be working. You’re giving them all the extra cuddles (the best treatment for most baby drama), extra boob or bottles, you panic-ordered the iconic banana teether toothbrush, and you’re now best friends with Sophie La Girafe, but your little one is still a disaster. Luckily, there are so many other ways to help soothe a teething baby. Try these teething tips to ease your babe’s discomfort fast—and don’t forget to keep wiping that waterfall of drool pouring out of their mouths! (The last thing you need is irritated skin on top of teething pain.)

iStock

1. Rub baby’s gums. After washing your hands, give your baby a gentle gum massage. The pressure from your fingers will counter the pressure of the teeth breaking through. It will feel good and offer your little one some relief from sore, swollen gums.

2. Refrigerate a pacifier. Chilling a pacifier makes it even more soothing by lightly numbing gums to dull the pain.

3. Wear baby-safe teething necklaces. Teething necklaces (jewelry for mom with chewable silicone pieces) give your child an easy-to-grab item to gnaw on when you're holding them. Just don't put any jewelry (e.g. amber necklaces) on your baby—these are choking and strangulation hazards

iStock

4. Try a mesh feeder. Freezing some fruits in a mesh feeder can be a lifesaver for cranky kids and their equally cranky parents. Not only does it chill and soothe sore gums, but your baby or toddler will be occupied for a solid chunk of time before they get through all that frozen goodness.

5. Make milk/formula popsicles. Some babies and toddlers refuse to eat while teething, mostly out of discomfort. Popsicles keep your little one fed and hydrated while soothing those gums. Use silicone popsicle forms to make them, and fill with breastmilk or formula. When eating, slip a bib on your babe or place them on a washable towel or blanket since popsicles can get messy.

6. Wear your baby as much as possible. Strap your clingy child into a structured carrier or wrap, facing inward. They'll feel comfort from being close to you, and you can still get things done. Win-win.

iStock

7. Freeze a wet, textured washcloth. Moisten a textured washcloth, wring it dry, and place in the freezer before giving it to your baby. Terrycloth or a ribbed texture will offer added relief by creating friction as baby gnaws on it.

8. Refrigerate a small spoon. A spoon is something your child can hold on their own, chew on, push against their gums, and even play with to distract themselves from teething pain. Keep a few spoons in the fridge so you always have one at the ready. Those new teeth can really sneak up on you.

9. Serve chilled purees. Chill pureed foods prior to feeding your baby so the food is cool on their gums. It will feel nice and may encourage your child to eat more.

iStock

10. Become a chew toy. Wash your hands in cold water and then offer a chilled pinky for your child to gum on. You can also show your child how to gum on their own fingers, to help them self-soothe.

11. Give your child a foot massage. Studies in reflexology have identified connections between toes and the head and teeth. Gently massage your child’s toes for comfort and a distraction from their pain.

Make sure to capture all the pics of those adorable new teeth—and share them with your family and friends near and far—with the Tinybeans app. The secure platform puts parents in total control of who sees and interacts with photos and videos of their kids.

We love finger painting ideas for kids like this one that’s non-toxic and safe for babies

Make your own non-toxic paint and you’ll be less worried about your kids putting it in their mouth. This easy recipe comes together with three ingredients you probably already have at home. Follow these simple step-by-step instructions for making edible finger paint for babies and older kids, and you’ll be making art in no time.

stock

Warning: While this recipe isn't made with toxic ingredients, it does contain raw flour, which the U.S. Food & Drug Administration warns against eating. Keep a watchful eye on your child and a wet washcloth handy to clean off hands as you paint.

Save this recipe for edible baby finger paints.

Supplies You'll Need

1. Mix the flour and water together.

stock

Use warm water to help the mixture come together more easily. We used a whisk to get all of the lumps out. If you have older kids, this is a good step for them to help with.

2. Divide the flour and water mixture.

stock

Pour the mixture into four bowls, cups or containers of your choice.

3. Add food coloring to each container.

We stuck with the basics, making our paints red, blue, green and yellow. That way we could talk about color mixing as we played, showing how red + yellow = orange and blue + red = purple.

stock

Pro tip: We used only three drops of food coloring for each small bowl and still ended up with bright colors. If you go overboard with the food coloring, you may end up staining your fingers. But we promise it will wash off eventually!

4. Let your baby get creative!

stock

Our little tester isn't sitting up on his own yet, so we made this a tummy-time activity. You can use any type of paper, but we like finger-painting paper (like this one from Melissa & Doug). It's glossy and non-absorbent, which helps the paint spread easily across it.

stock

Pro tip: Let your baby paint in the high chair (as long as it's easy to clean), lay down a waterproof splat mat, or make this an outdoor activity to keep mess and cleanup to a minimum.

stock

Post-painting clean-up: Set out your artwork to dry, and be prepared to give your baby a bath after your art session. The flour-water mixture should wash out of clothes and off of floors, splat mats, etc., but it's easiest to clean up with warm water right away. Happy finger painting!

Julie Seguss

featured image: iStock

RELATED STORIES:

16 Baby Games for Every Age from Newborn to Their First Birthday

Let’s Play! Sensory Activities for All Five Senses

The Best Age for Baby’s First Music Class, Flight & More

Newborn Tips from a Delivery Nurse

As an expecting parent, there are soon to be a lot of new experiences you will encounter. As your baby grows, you will grow with them, taking one step at a time. Carole Kramer Arsenault RN, IBCLC, and founder of Boston Baby Nurse & Nanny, shares her top newborn tips as you enter into the world of parenthood.

The First 48 Hours in the Hospital

Skin-to-Skin: Both you and your baby will most likely be wide-awake immediately after birth so enjoy cuddling skin-to-skin. This will help baby transition to life outside of the womb, regulating their temperature and blood sugar levels. If you plan on breastfeeding, this is a good time to try it out and promote a successful latch. Don’t stress if skin-to-skin or breastfeeding don’t happen immediately after birth; you’ll have plenty of time for both of you to enjoy it in the postpartum room. Partners can offer skin-to-skin time too; it’s helpful while Mom delivers the placenta and gets stitches if required.

Breast Feeding: If you are breastfeeding, remember that although it is natural and has been around forever, it does not come naturally for every mom and baby. Some newborns need a little time to learn how to breastfeed effectively. Stay positive if your baby is not latching immediately; there are many ways to remedy this. Ask your nurse for assistance and be sure to request a lactation consultant stop by as well. The best advice I can give you is that if it hurts for more than 30 seconds after latching then gently edge your clean, pinky finger in between the corner of baby’s mouth and your nipple to break the suction. Take them off and try again. You want your baby to learn a good, deep latch so that they’re getting enough milk and you are both enjoying the experience.

Heading Home as a Family of Three

Bathing Your Newborn: Newborns only need to be bathed every two to three days, in between wipe your baby’s neck and bottom with a warm washcloth, daily. To give a bath, fill the baby bathtub with lukewarm water before placing your baby in. Their head and ears should be well above the water line. Place a warm washcloth on a large exposed area of skin, such as baby’s belly, so they are less likely to become chilled and cry.

Start by washing their face with just water on a washcloth. Then use baby soap on their body and hair. Make sure to get those little crevices and between the toes. Rinse your baby well and try to avoid pouring water down the front of your baby’s face. When you are done, place your hands firmly under your baby’s armpits and use the tips of your fingers to support their neck. Slowly raise your baby up and gently place them onto a prepared towel.

Feeding Baby: Your most important job is to make sure that your baby is getting enough to eat. The goal is to have your baby back at his birth weight at the two-week checkup. If you need to supplement with a bottle as mom’s milk comes in, offer the smallest and slowest paced nipple size. This should help the baby get back on the breast without getting frustrated because it will be a similar paced feed from breast to bottle.

Burp your baby in between breasts if you are breastfeeding. Bottle fed babies will need to get burped more due to more air seeping in through the artificial nipple. During the first two weeks, burp a bottle fed baby every one to two ounces; as time goes on you can burp halfway through the bottle. If your baby fusses or spits out the nipple, try to burp him before finishing the feeding. Burp for about a minute and if nothing comes out, then you’re done. You can burp your baby with him resting up right on your chest or by sitting your baby upright on your lap, using one hand to support his chin and neck and the other to pat his back.

Safe & Comfortable Sleep: Your baby’s crib or bassinet should not contain any wedges, sleep positioners, blankets, pillows, bumpers or stuffed animals. If you follow the list of SIDS-prevention methods, the risks decrease dramatically. Avoid overheating by dressing your baby in cotton to allow air to circulate around baby’s body. As a rule of thumb, dress your baby in one more layer than yourself because they cannot yet regulate their body temperature.

Put your newborn in a bassinet next to your bed and, “sleep when your baby sleeps.” This is especially important in the first couple of months. If he spits up, he will turn his head, or cough and cry. Don’t worry, you will wake up. The bottom line here is that in order to take the absolute best care of your baby, you need to be well-rested.

Set up Baby Stations around Your House: This is especially helpful if your house is more than one level or if you gave birth to multiples. In a basket, put together some of the following supplies: wipes, diapers, cream, burp cloths, swaddling blankets, an extra outfit, a water bottle and a snack for yourself. Remember it’s important to take care of yourself too so you can be the best parent possible for your new baby.

Every new parent runs into one hiccup or another when it comes to how they envisioned their first few days with their baby. Do your best to try and go with the flow—you’ll be much happier if you give yourself some slack right from the beginning! Learn more tips about pregnancy, delivery and the first three months of life from Carole Kramer Arsenault’s parenting book, Newborn 101.

Carole Kramer Arsenault
Tinybeans Voices Contributor

Carole worked as a labor and delivery nurse in Boston. She interacted with many families and saw the need for top-notch newborn care. Carole founded Boston Baby Nurse & Nanny 15 years ago to support new and expecting parents. She has published two award winning books: The Baby Nurse Bible and Newborn 101. 

Think it’s too early to brush baby’s teeth? Think again. Even before the first tooth breaks through, it’s a good idea to establish oral hygiene habits. If your little one is used to teeth-brushing as a part of the daily routine, you may have fewer battles later on. If you’re not sure when or how to get started, here are helpful tips on brushing your baby’s adorable little pearly whites.

photo: grabease; the Double Sided Toothbrush

1. Start before baby’s teeth come in.
Keeping your baby’s mouth clean even before the first little tooth pops through is an important beginning step. Wiping gums after feedings will help to remove surface bacteria. To do this, wrap a clean, wet washcloth or a piece of clean gauze around your finger and wipe those toothless gums.

You can also try brushes designed for gums, like The RaZ-Berry Baby Toothbrush or the adorable finger-puppet brushes The Brushies.

photo: RADIUS

2. Choose the right toothbrush.
Once babies have teeth, it’s time to introduce a toothbrush. You’ll want to look for one with soft bristles, a small head and a large handle that little hands can holdand you’ll want to replace it every three months or so.

The Double Sided Toothbrush from grabease (pictured at top; for kids 6+ months) has a tapered brush head, a wide handle for little hands to grip, and bristles on two sides to make it easier and faster to get those teeth brushed. The handle sports a choke protection barrier for safety, so your little one can safely practice brushing.

The Pure Brush from RADIUS (pictured above; for kids 6-18 months) has a small, cornerless oval brush head that’s designed for babies’ mouths, with soft bristles. The handle is tapered to fit in baby’s hand, and the entire brush is free of BPAs, synthetic dyes and harmful chemicals.

3. Help them out.
Since baby’s fine motor skills aren’t fully developed yet, it’s best if you brush the teeth. Since that doesn’t always go as smoothly as we’d like, take a “Mommy’s (or Daddy’s) turn, and then your turn” approach. Continue to supervise the process until your child can rinse and spit without help.

photo: jennyfriedrichs via Pixabay

4. Talk to your dentist about toothpaste.
It’s a question many parents wonder about: Should I use a flouride or flouride-free toothpaste? The answer depends on many factors, including whether your water is flouridated, so your best bet is to ask your pediatric dentist. Whichever you choose, experts recommend brushing with toothpaste the size of a grain of rice.

5. Take your baby to the dentist.
The American Dental Association recommends that you take your baby to the dentist for their initial visit no later than their first birthday. However, you may want to ask your pediatrician’s opinion.

You can choose a pediatric dentist or kid-friendly family dentist to make the experience more comfortable for your little one. Some are equipped with TVs or colorful art and give kids treats. Since baby teeth are important because they hold the spot for permanent teeth, be sure to take care of them by scheduling regular visits.

Heather Dixon & Eva Ingvarson Cerise


RELATED STORIES:

10 Bathtime Essentials for Baby

Top Teethers for Babies & Toddlers

15 Tips to Ease Teething Pain

Do you remember when you were young and you used to cry to your Mom when you were sick? In all of the ways that make a Mom so special, this is one that is way high up on the list. She has the ability to comfort us in times of need. This whining, I mean crying, to Mom when you were sick probably continued through adolescence and possibly even college.

Personally, I remember having to call my mom at least a couple of times when I was in college. Mom was 90 minutes away or just a phone call away to provide comfort and advice. There’s something about a Mom that makes everything better. She takes your temperature, calls the doctor, gives you meds and a cold bath. She keeps your medication schedule, makes you a bed on the couch and feeds you soup, crackers, and Gatorade. Moms make it all better. 

So, Mommy friends, tell me, what is it like when you are sick? Do you get to lay on the couch, take yourself to the doctor, give yourself a bath, relax and eat soup? Do you even get to put your feet up, read under a warm blanket, feel sorry for your self or even sleep in? While I think self-care is super important, likely you are sick because everyone else in your house is sick, and you (at this time) are the low man on the totem pole. Likely, those carrier monkeys that you call your sons or daughters brought it home from their cesspool and while it caused a cough or fever for them, it extrapolated to the full-on flu for you. Sweet. 

But a sick day for Mom? Likely it looks like trips to the pediatrician followed with $140 spent at CVS. Or your sick day looks like your 1, 2 or 3 kids on their “couch beds” and endless demands of water and Gatorade, “No, I said water MIXED with Gatorade, Mom. Where’s my straw? Do you have more popsicles? I want purple. Now can you put it on the table? I need a tissue. Where’s my blankey? Tuck me in up to my shoulders. No, not like that. I have to poop now.”

Your shirt is definitely a snot rag and everyone hates you for putting a cool washcloth on their head. Do they even notice that you are just as sick too? Of course, not. And you don’t bother telling them because what does it really matter anyway? 

If you are lucky, you are home on your sick day. You take medicine for body aches, forget to take your own temperature, and take a dose of DayQuil, have your coffee and press on. 

You, Mama, are stronger than you know and it is times like this where you prove it loud and clear. Funny though, when you are young, immature and sick, you never once think about how Mom feels. Mom is so selfless taking care of you, it doesn’t even cross your mind how she is doing or if she has caught it from you yet. Or all of the things she isn’t getting done in her life because she is picking up your prescription, getting you a popsicle and washing your sheets and disinfecting all of the toilets in the house.

I admit it, when I was 8 or even 12-years-old, and home sick from school I am sure I was never thinking about how my Mom was feeling. I was too busy, probably feeling bad for myself. Most times really, it is a thankless job. (Thank you for always taking such good care of me, Mom.) But as a Mom, and a wiser person, I now understand that there is nothing else we would rather be doing than sucking it up and just taking care of our sick little children and babies the very best that we possibly can.  While it would be a luxury to lay in bed and have a sick day, we put our boys and girls first.

You go ahead, change your own snotty shirt, spend $80 on their in-haler and keep going. You are a great parent and you are their comfort in life and you are doing an amazing job even if they are forgetting to tell you that right now. 

This post originally appeared on Life, Love & Little Boys.

Located in Bloomington, Indiana I am a wife, full-time working Mom to 3 boys, a part-time graduate student & a writer. I am also an optimist, problem solver, peacemaker, gardener, runner and a crazy-busy mom just trying to enjoy each moment. I truly value my friends, family and my mommy tribe.

The Academy of Pediatric Dentistry states that children should visit a pediatric dentist after their first tooth erupts or no later than his or her first birthday. This initial dental visit is valuable because you will learn how to care for those erupting baby teeth and your child will become familiar with the dentist, the sounds and smells of the dental office and what it’s like to have someone looking in his or her mouth.

By exposing your little one to these experiences early, you may prevent the onset of dentophobia—otherwise known as fear of the dentist. That said, the first visit may be challenging for you and your child. Use the tips below to make the visit a bit more enjoyable for everyone.

Read books about dental care.

Read books to your child about visiting the dentist. For example, “Going to the Dentist” by Anne Civardi and Scholastic’s “Brush, Brush, Brush!” book are both good choices. Since role-playing is a great way to familiarize your child with what occurs during a dental exam, consider taking turns mimicking what is happening. Even if your child is an infant, ask to look inside his or her mouth. Then, let your child look into yours.

Stay positive when talking about the dentist.

When you are speaking to your child about going to the dentist for the first time, avoid using any words that may cause anxiety. For example, it is best to avoid words such as needles, drill, hurt, scared and pain.

Help your child practice proper oral care.

If your child is too small to brush and floss, you can purchase an oral care kit that is designed specifically for little ones. The kit should contain a variety of mouth-cleaning tools to keep your baby’s teeth sparkling and gums healthy.

If you would rather not purchase a kit, a wet washcloth or piece of gauze wrapped around your finger and rubbed along the gums works well. However, once the first tooth erupts, a toddler-safe, soft-bristled toothbrush needs to be used twice daily. Until your dentist approves toothpaste, have your child brush with plain water.

Brush and floss with enthusiasm!

You can show your little one that oral care isn’t frightening by brushing and flossing enthusiastically. Be somewhat animated about it—make faces and squint your eyes—besides getting a laugh, you will be showing your child that taking care of your teeth can be fun.

Counter your child’s fears by remaining calm.

Children can easily read their parents’ emotions. Therefore, it is necessary that your child believes you are calm and relaxed, even if you are not. If you have dentophobia, you may want to ask your child’s other parent to bring him or her to the appointment. When this isn’t possible, speak with the pediatric dentist before the appointment. This information may be helpful as the dentist prepares for your child’s first visit.

Recognize the teeth and tongue during games.

Children love learning about parts of their bodies. For years, we have been teaching them to point to their noses, eyes, ears, belly buttons, etc. While these are all important parts of the body, the teeth and tongue are also essential. Add these to your list. Then, when the dentist asks to look at your child’s tongue, he or she can boldly stick it out.

Lead by example.

Primary teeth have a thinner layer of enamel than permanent teeth, which is why baby teeth are more susceptible to decay. As such, regular dental visits are crucial to maintaining the health of your child’s teeth and gums.

You can set a good example by consistently visiting your dentist. This consistency helps your child view going to the dentist for biannual checkups and cleanings in a more positive light.

While many believe the primary teeth are not as important as the secondary teeth, this is not the case. Even though these teeth are only in the mouth for a short time, their presence has a lasting effect on your child’s future dental needs.

The premature loss of a primary tooth leads to reduced space for the adult teeth, which ultimately results in crowding. Follow the above tips and your child’s first dentist visit can set him or her up for a lifetime of good oral health.

Dr. Sheila Harris is owner of Natomas Crossing Dental Care in Sacramento, California. Dr. Harris has been a licensed dentist since 2000, after graduating from Northwestern University School of Dentistry.

Summer screams curbside lemonade stand. But, if you’re out of the sweetly sour stuff and still want to widen your young entrepreneurs’ selling scope with fun summer jobs, we scoped out eight great alternatives that will get your little people selling out fast. Keep reading to see them all.

photo: Miroslav Vajdic via Flickr

1. Watermelon Stand
Ice cold watermelon is a hot weather staple. And, not only does it give you a boost of energy, this is a pretty affordable product to sell. Simply slice it up, store in an ice chest and watch your kids sell a slice of summer.

2. Otter Pop Stand
On a hot day, anything cold is sure to be a hit. So let your kids break open the freezer and get out the Otter Pops (also called Freezer Pops or Fun Pops) to sell to those who need something cold to quench their thirst. Hint: You can also pair the pops with water or juice to make for double-hydration.

photo: Personal Expressions via Flickr

3. Popcorn Stand
You can make a ton of this movie-night favorite right on your stove in a large pot. Or, if you have one of those classic movie theater poppers, it’ll add major curbside appeal. Order a few packages of nostalgic popcorn containers and you’re all set.

photo: Melissa Heckscher

4. Advice Stand
It worked for Charlie Brown and Lucy! Let your kids put on their doctor hats (and costumes, if they have them!) and dispense psychological help to anyone willing to pay a few pennies for a little kid-branded honesty. Kids say the darndest things, after all; your little doctors may just do some good.

photo: Pretty Prudent

5. Bake Sale
Bake sales are par for the course at school fundraisers; why not bake some yummy treats for a private streetside sale? This project gives your littles two activities to do: One, in helping you bake the goods; two, for bringing in the bucks when they sell them. Any leftovers can be frozen and stashed for a special occasion. Like tomorrow.

photo: Duncan Rawlinson via Flickr

6. Tattoo Stand
Order a few dozen of your kids’ favorite temporary tattoos, add water and a washcloth, and you’ve got yourself the makings of a very fun roadside pit stop.

photo: Melissa Heckscher

7. Greeting Card Sale
Let your kids pen good wishes and illustrations onto their own homemade greeting cards. Since these creations take a bit of work on behalf of your aspiring Hallmarkers, your kids can charge a little more for each product ($1 a card isn’t unreasonable). They’ll be aspiring greeting card writers by day’s end.

photo: Patrick via Flickr

8. A Hose-Down Stand 
With temps rocketing well over 100 in much of the U.S., a nice misting of cool water might be worth a few pennies. Have your little water hosers hunker down by the street, ready to spray anyone who wants to pay a nickel or two for the instant cool-down. Don’t be surprised if your tots are soaking wet by the end of this little business venture.


RELATED STORIES:
This 9-Year-Old’s Lemonade Stand Made Over $5,000 for the Best Reason Ever
10 Modern Twists on the Traditional Lemonade
5 Valuable Life Skills Kids Learn from Working Parents