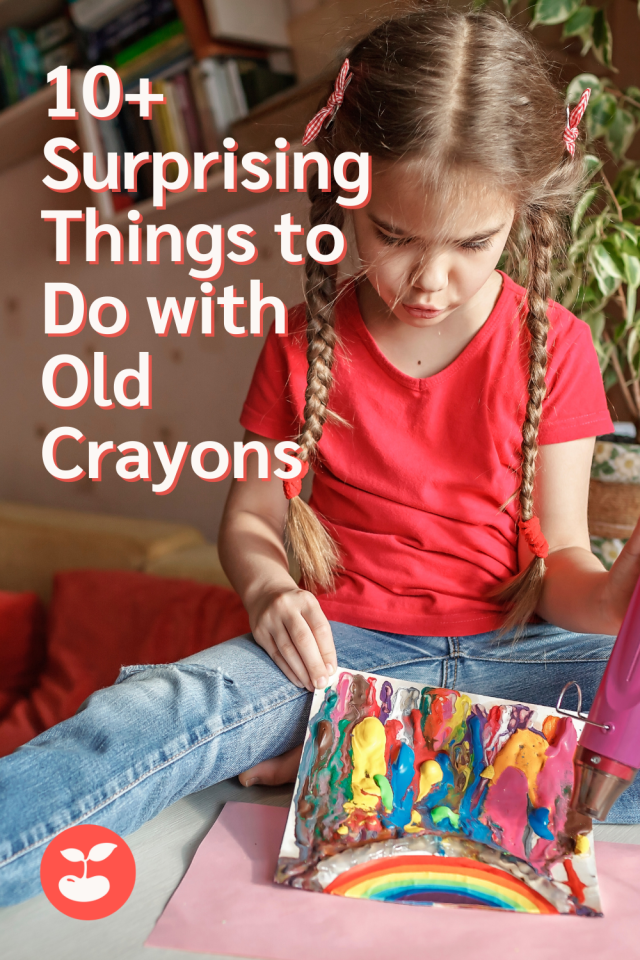
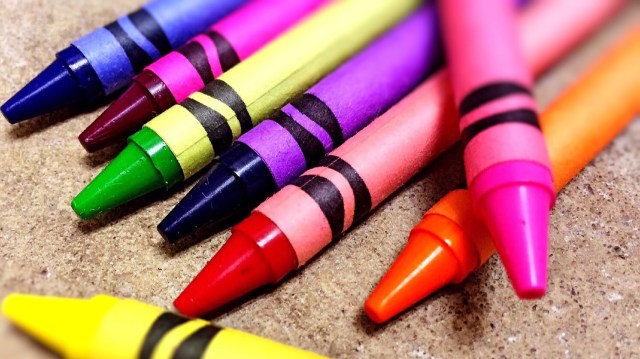
There’s nothing like a fresh box of new crayons, but sooner or later you’re left with tons of broken pieces––because kids. Before you toss those busted bits into the trash, keep reading to see how your kids can created gorgeous melted crayon art, candles and plenty of other unique ways to upcycle your old crayons.
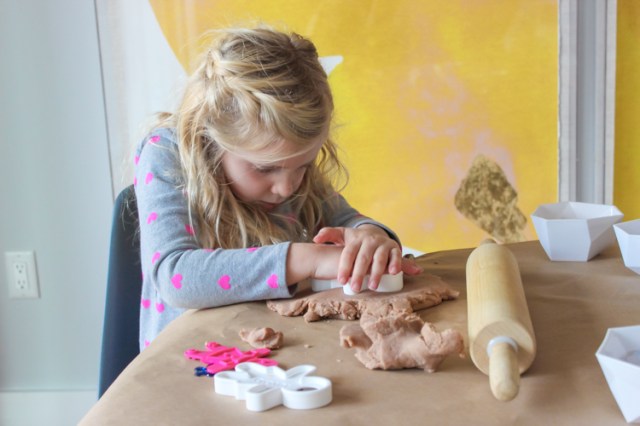
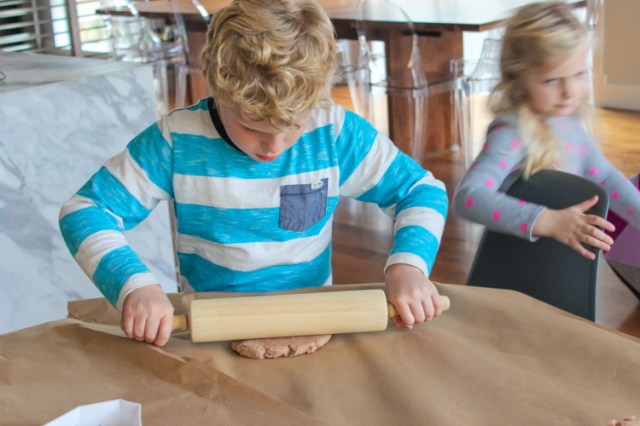
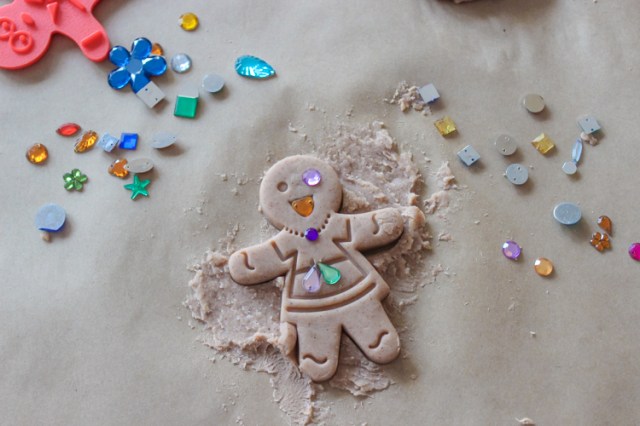
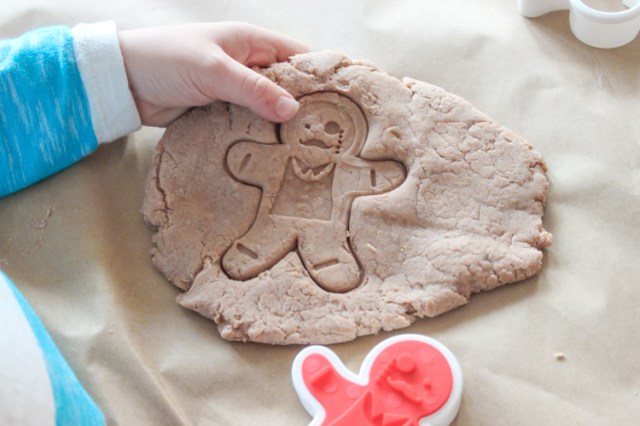
Crayon Play Dough

iStock

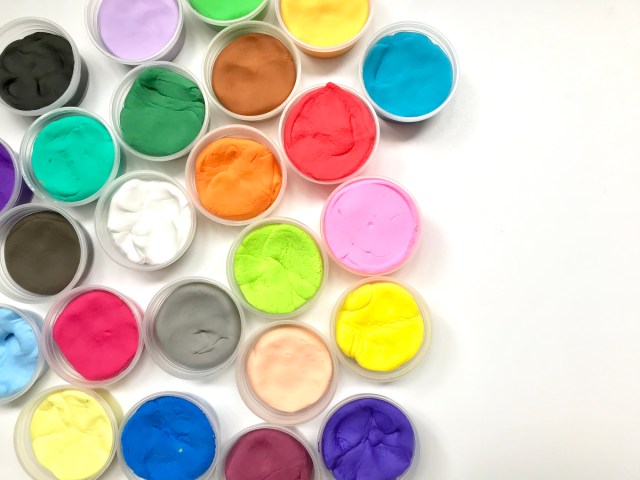
Sure, you can make play dough using Kool Aid, but did you know your old, broken crayons make great ingredients, too? Instead of tossing those small pieces, melt them down with your flour, salt and cream of tartar to make vibrant play dough, using this recipe from Sugar Aunts.

Hot Rock Crayon Art

Kids Activities Blog

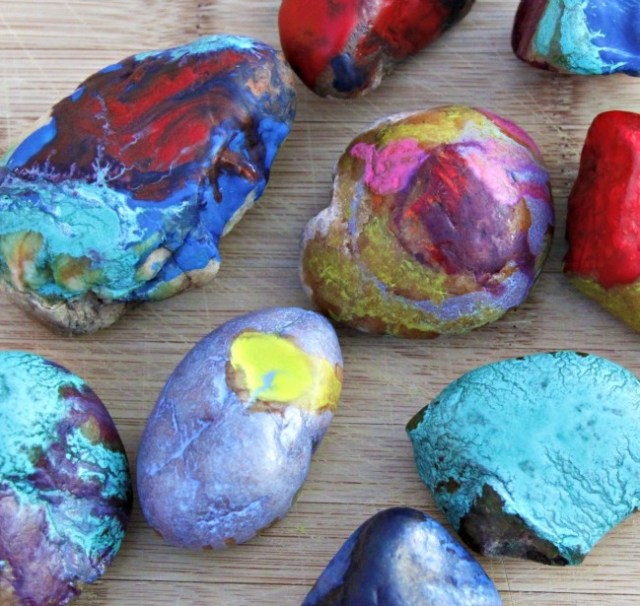
Perfect for hot summer days or those when you just need a craft, these hot rocks covered in melted crayons from Kids Activities Blog are so creative! Rocks baked in the oven (adult supervision, please!) are set on newspaper and then topped with broken pieces of crayon. Watch the colors melt and make one of a kind beauty!

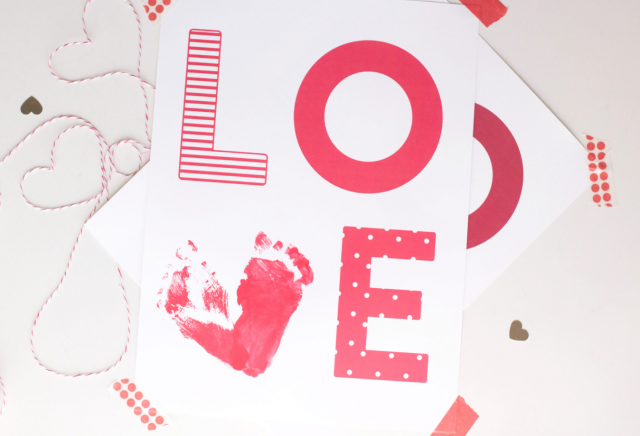
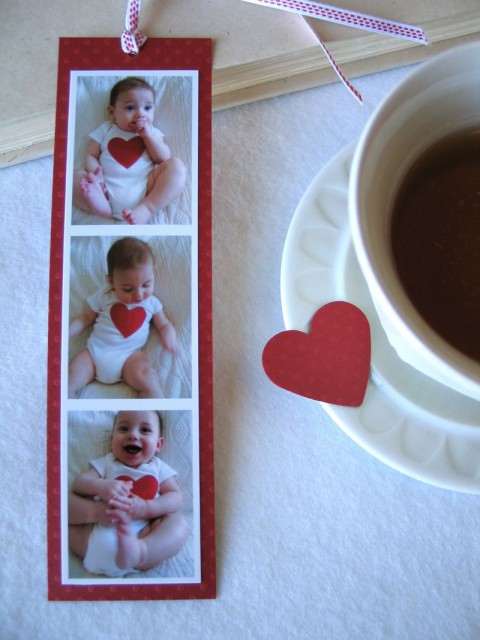
One of a Kind Valentines

The Nerds Wife

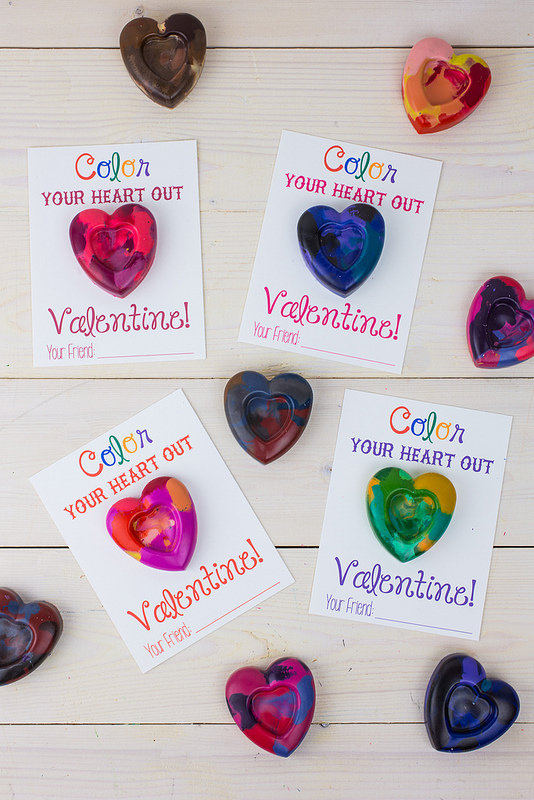
All you need is love, and broken crayons for this fun craft. This easy DIY Valentine from The Nerd's Wife is perfect for using those old broken crayons and sharing the love. Crayons are melted into a silicone heart-shaped baking pan and then attached to a sweet printable, perfect for your valentine.

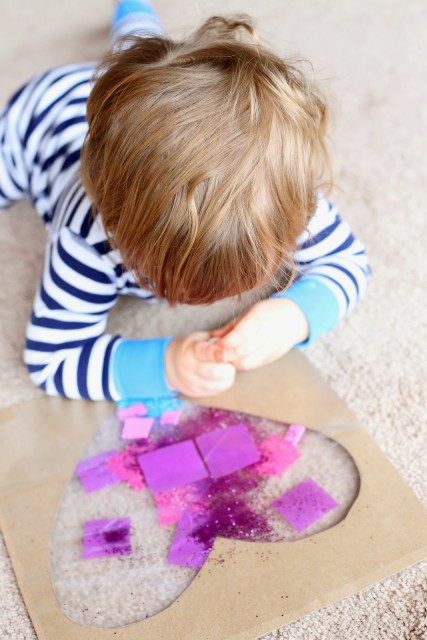
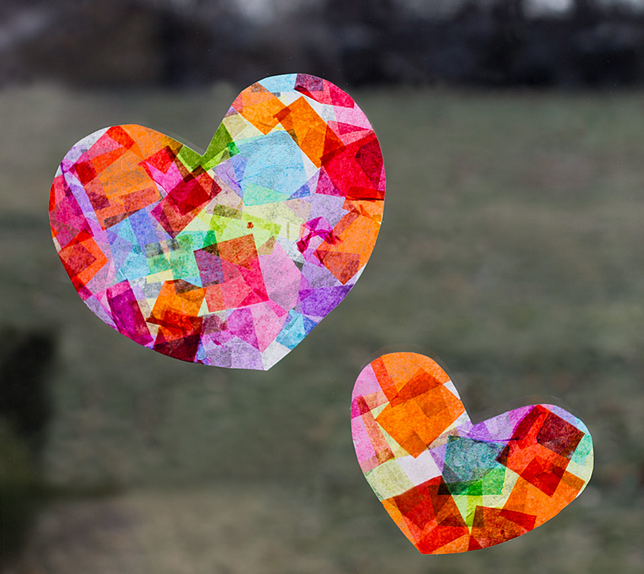
Shaved Crayon Hearts

Skip to My Lou

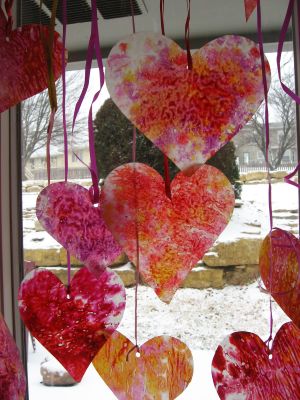
The next time you have teeny, tiny broken crayons, make them smaller! Shave the crayon remnants onto heart-shaped paper, then cover with wax paper and iron on low. The result? Beautiful Valentine-worthy hearts like these from Skip to my Lou!

Upcycle Your Crayons for the Greater Good!

Pexels via Pixabay

Did you know there are at least three different national organizations that take old crayons and turn them into something amazing, all for the good of the Earth and kids in need? Well, there are. Click here to learn more about these amazing programs.
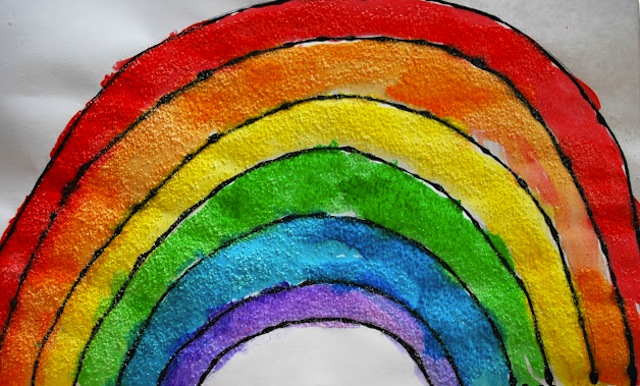
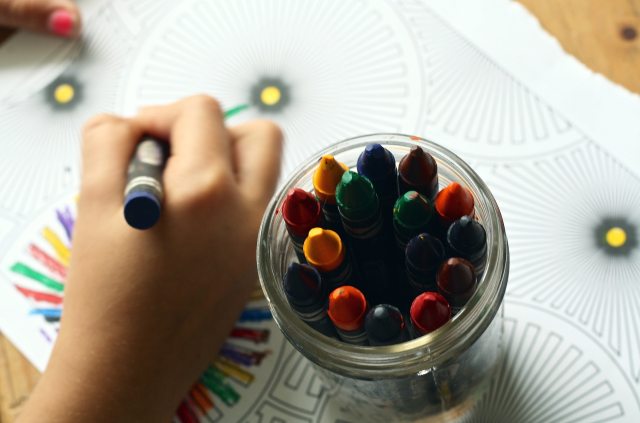
Red, Yellow & Blue

Melissa Hecksher

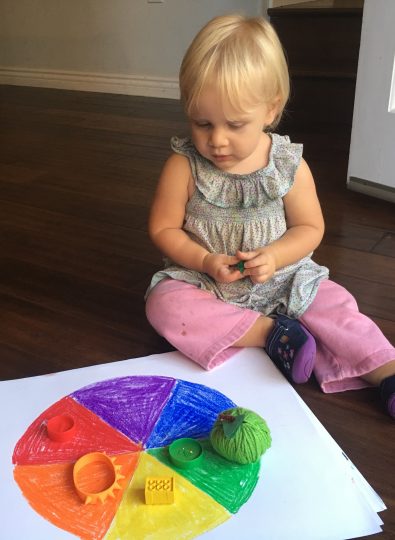
Teach the kiddos about the primary colors and how they rleate to by making an easy color wheel.

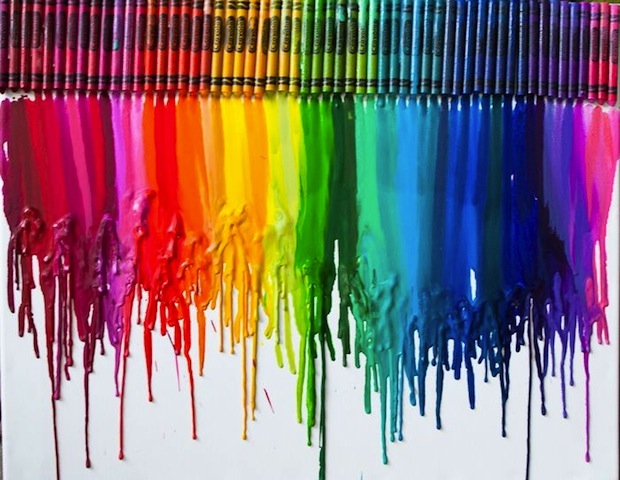
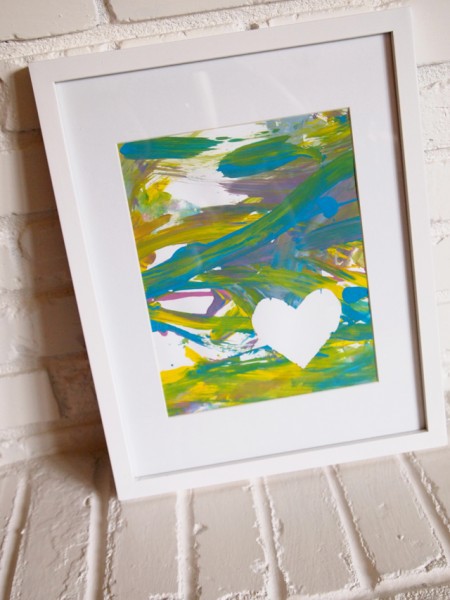
Melted Crayon Canvas

Shelly Massey

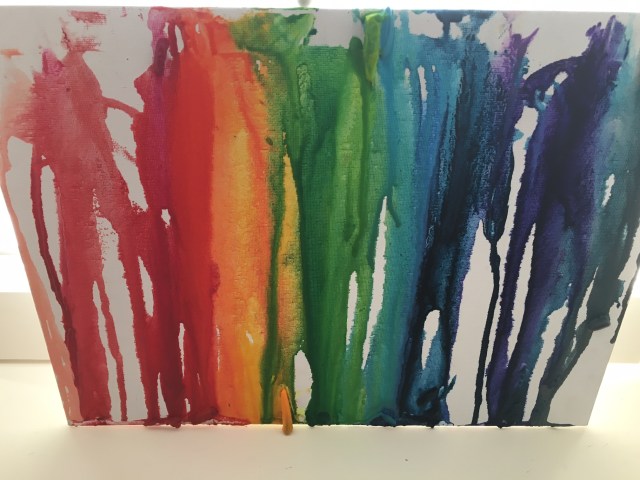
We’re so charmed by these melted crayon creations that our Atlanta editor whipped up with her kids. It’s easier than you think, plus you get to use all those broken crayons you know you have. All you need is a blow dryer, the crayons and something to let the wax drip on. While a canvas or paper is great, you can even try melting onto a large rock, bottle or even a tree branch.

Make Something New

19melissa68 via Flickr

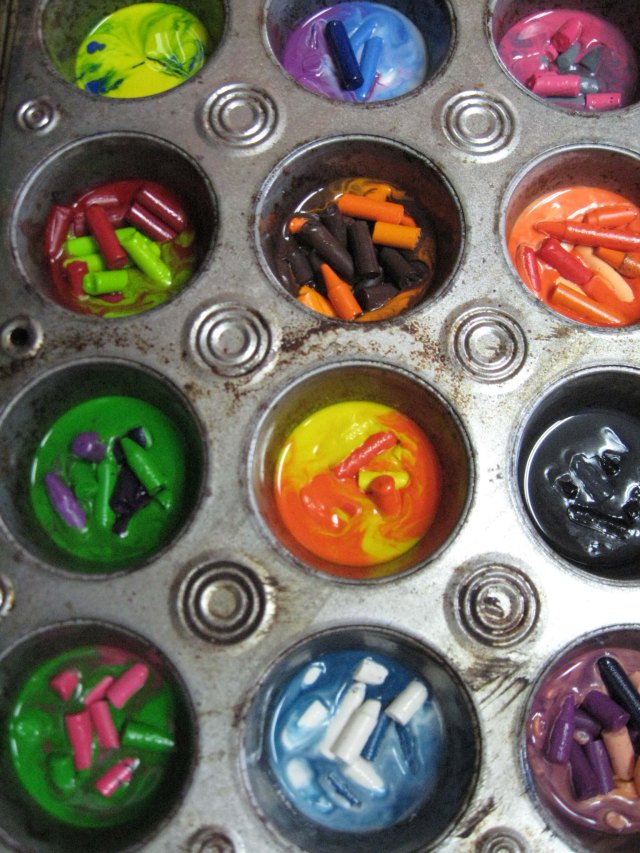
Gather up all those bits of broken crayon, peel away the paper and organize by color family. Then add the crayon parts to an old muffin tin and place in the oven at about 250 degrees until melted. Remove, let cool and you've got some creatively re-used crayons. You can also try microwaving crayons and pouring the wax into silicone molds to make heart shapes, LEGO bricks or whatever you have around!

Egg-cellent Wax Decorations

The Nerd's Wife

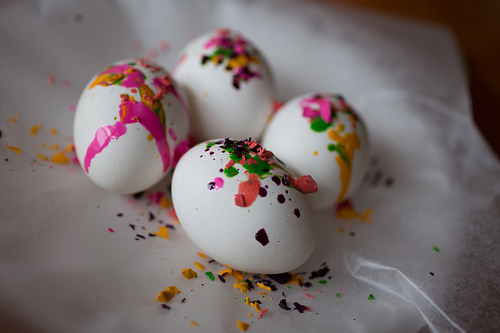
It doesn't have to be Easter to decorate eggs: try this cute trick the next time you want to pack hard-boiled eggs for a picnic. The wax stays on the shell, so the inside remains edible. Try the wax melting method with your old stubby bits of crayon by making these genius eggs from The Nerd's Wife. The heat from freshly boiled eggs melts the crayons into awesome abstract designs. Get the full instructions on how to make these fuss-free beauties by jumping over toThe Nerd's Wife.

Colorful Shells

Fun at Home with Kids

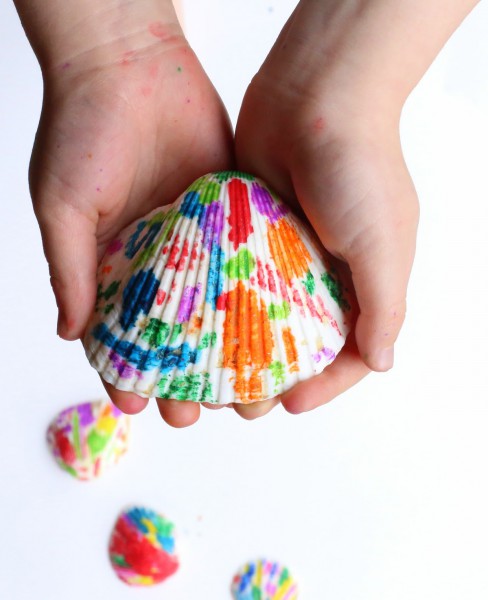
A set of crayons and assortment of shells is all you need to create your very own Crayola Experience at home. Recommended for older artists (oven use required), head over to Fun at Home with Kids for the full how-to.

Comic Strip Creation

a boy draws and writes to create his own comic strip
Melissa Hecksher

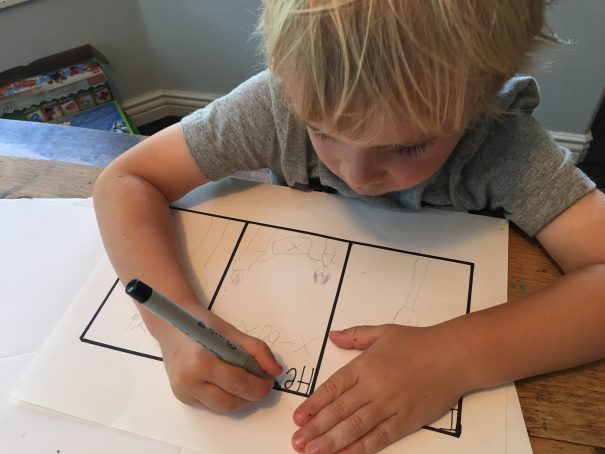
Put your coloring skills to the test and help the kiddos create their very own comic book.

Coloring Books (but Not the Kind You Think)

Amber Guetebier

Crayons are a staple in your craft box, but what about on your bookshelf? For example, read: Red, A Crayon’s Story then do: an unexpected coloring experiment. Click here for more ideas on books that go with crayons!


Coloring for Grown-Ups

Ponce Photography via pixabay

Adults coloring is taking the world by storm, and we’re not just talking about sitting next to the kiddos while they do it. Read how coloring can actually help moms de-stress.

A Box of Crayons

Berry Sweet Baby

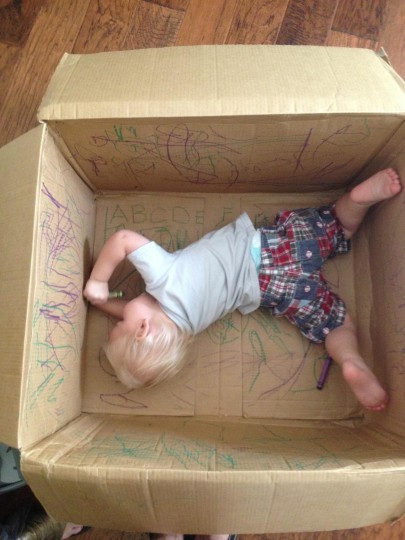
Got a little guy or a big box? Pop them into the cardboard walls and let them go crazy, no cutting required. Now you have just enough time to go to the bathroom in peace.


—Amber Guetebier & Karly Wood

Feature photo: WorkAndaPix via Pixabay


RELATED STORIES

3 Ways to Recycle Crayons for a Good Cause

Coloring Book & Activity Pairings

Before You Toss Your Kids’ Old Markers in the Trash, Read This


Photo: Rebecca Green

Right about now I start diving in deep on holiday planning. I love to cook all day and while the kids love to help too, I always try to plan ahead and set out a few fun activities for them to do while they’re waiting for the holiday meal. Our gingerbread playdough recipe will make your entire house smell delicious! The kids loved decorating the “cookies” and they got to get in on the holiday cooking without leaving me with an entire plate of cookies to eat. An all around win.

Ingredients:

4 cups flour
4 cups water
1 cup salt
2 tablespoons cooking oil
4 teaspoons cream of tartar
3 teaspoons ground cinnamon
3 teaspoons ground ginger
2 teaspoons ground nutmeg
2 teaspoons ground cloves – a drop of brown food coloring

Optional accessories:

gingerbread people cookie cutters
rolling pin
decorative bits such as buttons, googley eyes, sequins, gems, etc.

Directions:

Combine ingredients through food coloring and cook over medium heat, stirring constantly until most of the moisture is absorbed (it should take about 5-7 minutes). Let it cool on some wax paper. Have the kids roll the dough and cut out gingerbread people to decorate!

Rebecca Green is an author, freelance writer, blogger, and recovering lawyer. Her first book, "Banish Boredom: Activities to Do with Kids That You'll Actually Enjoy," was published in July 2016. Rebecca writes freelance and blogs creative family activities, healthy lifest‌yle topics, and on the general tomfoolery of raising children. 

Your phone is the only camera they’ve ever known and the closest they’ve seen to print is Instagram, but that doesn’t mean you can’t have some fun and learn about the art of image projection with a DIY pinhole camera. This simple no-film required project teaches kids about the basics of camera projection and takes just a few minutes to create. Read on for the step-by-step.

You will need:
A cardboard tube (like an oatmeal container or Pringles can) or even a cardboard cereal box (it doesn’t have to be round but round works best).

Scissors, tape, one pushpin or needle, tape or a rubber band (to hold the wax paper in place)

Wax paper

Decorations (optional):  Washi tape, stickers, pens, paint, paper

A blanket

Step One:
Take off the lid. You can of course skip the decoration part, but why would you? Strip the label off your container or cover it with paper, paint it, sticker it up. Let the kiddos take the reigns and customize to their heart’s content.

Step Two: Cut out a circle of waxed paper big enough to cover the open end (be sure and leave enough space for it to fold over the edge). Tape it or rubber band it in place.

Step Three: Poke a hole with push pin in the opposite end (not the end that has the waxed paper).

Step Four: Dim the lights or go into a room that is relatively dark, with a bright light source, or take your camera outside. Put the blanket over your head and hold the camera at arm’s length, wax paper side toward you. (Everything but the very end of the camera should be under the blanket.) Point the pinhole end toward something bright, like a tree with the sun behind it. You should see the light or object projected onto the surface of the wax paper. It may be tricky to tell at first, but the image you see should be upside-down. If you can’t see, get to a darker room and grab a flashlight to shine against a bright wall on the other side of the room.

Why It Works:
The pinhole in the camera acts as the lens, making all outside light focus on one small point. If you had film, the image would be projected onto that and you would be able to develop it into a picture that would not look inverted.
Want to go the next step? Check out this awesome tutorial for making a functioning 35mm pinhole camera out of jello box!

How was your science experiment? Did it work? 

Photo & copy by Amber Guetebier

There’s just something about rainbows—Kermit the Frog knew it and we do too. With a certain lucky day fast approaching, it’s time to celebrate! Instead of going green this year, it’s all about the most clever (and colorful) hiding spot of all (never could find that pot of gold!). From melting crayon art to watercolors and windcatchers, scroll down to discover cool ideas for helping those little leprechauns of yours discover a real rainbow connection.


meltingrainbows_megdeurksen_rainbowcrafts_stpatricks_national_redtricycle

photo: Meg Duerksen via Meg Duerksen

Melting Rainbows
It’s a science experiment and art class all rolled into one. Meg Duerksen and her crew tried their hand at the colorful creation and the results were awesome. With just a little hot glue (to keep the crayons on the canvas) a hair dryer and a steady hand, watch the oozing and goozing turn into amazing. Don’t want to buy a whole new box of Crayola? Downsize and use broken crayon bits instead. Find out why it’s best to leave out brown by paying a visit to Meg Duerksen.


saltrainbow_vickymessforless_rainbowcrafts_stpatricks_national_redtricycle

Photo: Mess for Less

Rainbow Watercolors
We think this black-glue-salt-rainbow from Mess for Less is so cool looking. The key is of course, the glue—once it’s dried, set your watercoloring kids free to fill in the blanks. Find out what happens next (and how to make black glue) over at Mess for Less.

3Drainbowcraft_arenablake_rainbowcraft_stpatricksday_national_redtricycle

photo: Arena Blake via The Nerd’s Wife

3D Rainbow
A 3D rainbow, so neat-o and so simple to boot! Creative mama Arena of The Nerd’s Wife provides an easy tutorial even a preschooler can master. We love how with just a swipe of the glue stick, your kids can create a colorful crescent. Got a kid who likes to mix it up? Tell them to arrange the strips of paper in their own rainbow form. Get the low-down from The Nerd’s Wife.

corkrainbow_allisonmcdonald_rainbowcrafts_stpatricksday_national_redtricycle

photo: Allison McDonald via No Time for Flashcards

Cork Painted Rainbows
This is your chance to pop the top on that Pinot Noir you’ve been saving. After all, how else will you collect enough corks for this super creative and very easy art project? We love the easy handling corks offer little artists! Simply drop paint on a tray, add a cork (or six) and let the littles have at it.  Get the low-down on this adorable project over at No Time for Flashcards.

stainedglassrainbow_trishmomontimeout_rainbowcrafts_stpatricksday_national_redtricycle

photo: via Mom on Time Out

Rainbow Stained Glass
You know you keep every piece of tissue paper hoping to reuse it one day. Well your day and your art project has come! Pull out the whole supply, add wax paper, glue and let your kiddos get crazy. Your super littles can help by ripping up the paper, and older kids will enjoy creating a colorful window design. For tips and tricks from smoothing paper to hanging it right, skip on over to Mom on Time Out.

fruitlooprainbow_crystalunderwood_rainbowcrafts_stpatricks_national_redtricycle

photo: Krystal Underwood via Growing a Jeweled Rose

Fruit Loops Rainbow
Talk about an awesome project for keeping kids entertained, not to mention a fab way to clear out the remains of that sugar cereal you bought to keep the kids quiet in the grocery store. Add paper, glue, and cotton puffs. See why art master-mama Krystal suggests tracing the rainbow before adoring with sugary circles over at Growing a Jeweled Rose.

rainbowcrowns_krissybeinspired_rainbowcrafts_stpatricks_national_redtricycle

photo: via B-Inspired Mama

St. Patrick’s Day Crown
She’ll be queen of St. Patrick’s day with a pipe cleaner crown. If you’ve got straws, pipe cleaners, foam shamrocks (may we suggest the Dollar Store?) a hole punch, it won’t take much arm-twisting to get your kids to create their own headpieces. Krissy of B-Inspired Mama shares with us why it’s not just art, it’s a fine motor skill workout too!

windcatcherrainbow_michellecraftymorning_rainbowcrafts_stpatricksday_national_redtricycle
photo: via Crafty Morning

Rainbow Wind Catcher
A project requiring very little in the way of supplies but providing a lot of creativity time, these paper towel wind catchers designed by Michelle of Crafty Morning are almost as clever as little leprechauns. If you’ve got paint, floss, and green ribbon (Christmas leftovers!) you’ll be good to go. Check out the entire project over at Crafty Morning.

— Gabby Cullen


Just because your little one may not be crawling or walking yet, doesn’t mean he can’t get in on some Valentine-making action. Let your sweeties show their loves some love with one of these super-simple craft projects.

baby-valentine-1
Photo: Brigette Turner

Stamp of Approval
Using the free printable from mama/graphic designer Brigette Turner and your baby’s footprint you can make this adorable piece of art to give or keep for yourself. Just swipe some paint on your littles feet and press them down in a ‘V’ shape on the print-out. Plop the work of art into a cute frame and voila!

baby-valentine-2
 Photo: Life is Sweet

Right on the Kisser
Your baby may not have the motor skills to master blowing kisses just yet, but you can help him along by making this blowing kisses card from Life is Sweet. Cover your baby’s hand in paint to make a handprint, then use a picture of your sweetie to create a card where the hand becomes a flap with a Happy Valentine’s Day message inside.

baby-valentine-1
Photo: Bliss and Misc

Blank Space
Using tape, mom or dad can create a shape like a heart, or spell out a word like “love” then let baby go at it finger painting until she’s good and messy and ready for the tub. When it’s completely dry, pull up the tape to let the design shine through. Get the full how-to at Bliss and Misc.

baby-valentine-4
Photo: Fun at Home with Kids

Stuck On You
Sensory play and art collide to create this easy Valentines’s Day masterpiece from Fun at Home with Kids. Parents will need to get this project started by cutting the cardboard and the sticky contact paper, but then your baby can use whatever materials you have laying around to decorate his creation—from glitter to tissue paper and foam board.


baby-valentine-5
Photo: Sugar and Spice Mommy 

First Impressions
For this heart cookie cutter painting from Sugar and Spice Mommy, all you need is some paint, poster board, cookie cutters, and glitter (which is totally optional, considering you’ll be brushing it out of your babe’s strands weeks later). Great for the 12-18 month-set, they’ll simply dip the cookie cutter into paint and glitter, and then press it all over the board, stamp-style. Things may—er, will—get a little messy, but all is fair in love.

baby-valentine-7
Photo: Fireflies and Mudpies

Sun Day Best
If your mini likes to touch and tinker while you craft, this Valentine from Fireflies and Mudpies is for them. Cut up tissue paper in red, purple, and pink and brush some kid-safe glue onto wax paper. Then let your babe go to town placing the pieces in whatever pattern she wants. When she’s done, cut out the wax paper in the shape of a heart and—like magic—you have a sun catcher to hang in your window or give away as a gift.

baby-valentine-6
Photo: Urban Comfort

Say, “Cheese”
Baby has an easy job with this Valentine’s Day gift idea from Urban Comfort—just look cute. But your job is just as simple. Slip your little one into a white onesie and tape or fabric glue a big red heart to the front of it. Snap a slew of photos, then lay them out on your computer. Print the images and glue them to bookmark-shaped poster board.

Do you have an awesome baby-craft idea for Valentine’s Day? Tell us about it in the Comments section below.  

—Jenn Andrlik

When did Valentine’s Day become synonymous with candy and sweets? While your kids love that this holiday is the second best to Halloween, the idea of your kiddos hopped on sugar with chocolate-stained teeth is enough to make any parent moan and grown (except dentists, of course!). So this year instead of feeding your kids need for sweets, get crafty with these oh-so-sweet Valentine’s Day crafts. Each DIY project is designed for both the younger and older sets in mind, take just a handful of objects, and produce some really awesome creations. Spread the love and let us know in the comment section below how your crafts turn out.

 Valentine’s Day Felt Mice:
This is probably the only time you’ll welcome mice into your home with open arms. These little critters are super cute (ok go ahead, say, awwww). The felt mice are made with colorful felt and kids will have fun affixing the eyes, nose, and tail, which can consist of any extra pencils lying around the house or if you want to imbue a bit of sweetness into the craft, you can also use a lollipop.

Wax Paper Stained Glass Hearts:
Raise your hand if your fam has those annoying extra crayons around the house. Yep, we know there are a lot of you scrap crayon-adverse parents out there, which is why we’re passing along some secret info: those extra crayons can be used to make this wax paper stained glass craft. Make it extra special by cutting your final creation into a heart and hang it up in your window for all to see.

Clay Heart Pendants: 
We challenge you to find us any kid who doesn’t like to play with model magic. Stumped you, didn’t we? We love this Valentine’s Day craft because kids can get hands-on with model magic, making heart shapes and using rubber stamps or really any small objects around your house to personalize the pendants to their liking. Got a heart-adverse kid? Use any shaped cookie cutter for to make this sweet craft.

Candy Heart Pops:
Sometimes (ok ok, most of the time) the best part about DIY arts and crafts is the end result. With that in mind, we couldn’t help but love this Valentine’s Day project for candy heart pops. While it sounds complicated, believe it or not, it’s quite simple and appropriate for kids of all ages. Candy heart pops requires only a few ingredients and you and the kiddos are left with a sweet treat when all is done.

Cupcake Headband: 
Make your very own cupcake headband for your little princess with this fun craft. If you want to make it Valentine’s Day themed, use red or pink ribbon and festive felt fabric. Your kiddo will be showing off her creation at school in no time.

And, if you’re looking for more ideas, check out this post from our friend and craft goddess Kelley Moore, who has some great insider tips on how to get the kids involved this Valentine’s Day.

— Erin Lem

For more fun Valentine’s Day craft projects and activities for kids, click HERE.

Looking for a super quick dinner or something fun and different for the lunchbox that doesn’t take too much time to prepare? Here is one of our favorite kid approved “chicken on the bone” recipes around.

Ingredients:

12 salteen or butter crackers
1/2 tsp. paprika
1/2 tsp. seasoned salt
1 lb. (6) organic chicken drumsticks
2 eggs, whipped

Method:

Begin by making the coating by crushing crackers into fine or chunky pieces. (A great job for the kids!) Mix crumbs, paprika, seasoned salt together and place in a shallow pan or baking dish.. Rinse drumsticks then dip into eggs then roll in cracker crumbs, coating all sides well.

Place drumsticks on microwave safe dish with meaty sides up. and cover with wax paper. Cook on high for 8-10 minutes until chicken is no longer pink. If neccessary, rotate dish 1/2 way through cooking. Let stand covered for 2 minutes before serving.

Yields 2-3 yummy servings.

PS – Want to score some extra points with the kiddos?  Substitute potato chips for crackers. Barbeque and cheddar cheese flavors add an extra kick!

These Valentine’s Day candy pops are quick and easy to make and require just a few ingredients, but they leave plenty of room for creativity. Younger kids may only make blobs and scribbles for their pops, whereas older kids can pipe hearts and more complicated designs. Either version is cute and delicious. Your children will have a blast making these, almost all by themselves!

You’ll need:*

candy melts (red, white and/or pink)
Valentine’s Day sprinkles or small candies
disposable decorating bags
rubber bands
scissors
baking tray
wax paper
lollipop sticks

*Find the candy melts, sprinkles, decorating bags and lollipop sticks in the baking aisle of any major craft store.

Directions:

1. Prepare the trays: Line baking tray(s) with sheets of wax paper. Pour some sprinkles or candies in bowls to have ready.

2. Melt the candy melts: Fill a disposable decorating bag with about ½ cup of candy melts. Microwave the bag at 50 percent power for 90 seconds. Massage the bag and continue to microwave in 30 second, then 15 second, intervals until completely melted, massaging at each interval. Do not overheat! Remove from the microwave, and close the opening tightly with a rubber band so the melts don’t ooze out the top when piping.

3. Make the candy pops: Snip ½-inch from the tip of the bag. Pipe a small dot the size of a dime on the wax paper. Lay the lollipop stick on top. This will help secure the lollipop stick to the back of the heart. Then, pipe and fill a heart on top of the lollipop stick with the melted candy melts. Immediately add sprinkles or candies. Candy melts harden quickly, so work with one heart pop at a time. Fill the tray and let set at room temperature very well, about one hour.

Insider Tips:

— Create a template to help older kids pipe hearts. Draw a heart with black marker on a piece of paper, and slide under the wax paper.

— Candy melts cool quickly, but they may be hot when first taken out of the microwave. Use caution when handling and let cool slightly before giving to children.

— You may melt two to three bags of candy melts at the same time in the microwave to prevent squabbles over who gets to go first.

Meaghan Mountford has been a professional cookie decorator for over a decade. She crafts cookies, marshmallows and other creative treats for her blog, The Decorated Cookie, and she is the Edible Crafts editor at the popular website, CraftGossip.com. Author of the new book Sugarlicious and also Cookie Sensations, she lives in Washington, D.C. with her husband and daughter.

A special thanks to Red Tricycle writer Nicki Richesin for submitting this awesome Valentine’s Day kids craft.

This easy kids craft project is for those moms and dads with oodles of broken bits of crayons laying around the house (sound familiar?). Instead of letting the broken crayons decay and mark up your drawers, we suggest using them to your creative advantage by making this super fun stained glass craft, which only requires four items. Your kids will beam with pride at their handmade craft and the activity is likely to keep them focused and not jumping off the walls on these long winter days.

What you’ll need:

broken bits, pieces or shavings from crayons

wax paper

a dish towel

an iron

Directions:

1. Cut out two large pieces of wax paper each about 12″ long (or however big you prefer). Take all of your leftover crayons and make a pile of colorful shaving.

2. Lay one piece of wax paper down and place the colorful pieces of shaved crayon onto the wax paper shaped to your kid’s liking. Suggestions: a heart, a butterfly, a bird or anything you or your little one can imagine.

2. Cover the pile with the second piece of wax paper.

3. Plug in the iron to low and let it get toasty (careful for little ones pulling iron cords or touching the iron at all for that matter). Cover the wax paper with a dish towel (if you put the iron directly onto the wax paper itself it will burn). Iron over the shape until it feels melted.

5. Let cool and then take off the protective dish towel and ta-da, your wax paper stained glass creation is made!

6. You can cut your stained glass creation into various shapes (hearts for Valentines Day or shamrocks for St. Patty’s Day) and punch a hole in the top, string some twine through, and hang your stained glass creation from any windowsill.

Photo credit “Year in Blue” Blog